WebClient is a non-blocking, reactive web client in Spring WebFlux, enabling asynchronous communication with HTTP services. It simplifies making HTTP requests by providing a fluent API and handles asynchronous responses. WebClient supports various HTTP methods, request customization, and reactive programming, making it ideal for building scalable and responsive web applications. Let us explore the Spring WebClient POST example.
1. Introduction
WebClient is a powerful and versatile tool in the Spring WebFlux framework, allowing developers to make HTTP requests to remote servers in a non-blocking and reactive manner. Let’s delve into its key features and benefits:
1.1 Key Features
- Non-Blocking: WebClient operates asynchronously, allowing applications to perform other tasks while waiting for responses from HTTP services.
- Reactive Programming: Built on the principles of reactive programming, WebClient handles responses as reactive streams, enabling efficient processing of large datasets.
- Fluent API: It offers an articulate and expressive API for building requests, making it easy to customize headers, query parameters, and request bodies.
- Request and Response Transformation: WebClient supports mapping request and response bodies to Java objects, simplifying serialization and deserialization.
- Error Handling: Provides robust error handling mechanisms, allowing developers to handle various HTTP status codes and exceptions gracefully.
1.2 Benefits
- Performance: Asynchronous and non-blocking nature ensures optimal utilization of system resources, enhancing overall application performance.
- Scalability: Reactive programming and efficient handling of concurrent requests make WebClient ideal for building highly scalable applications capable of handling a large number of users.
- Flexibility: Supports multiple HTTP methods (GET, POST, PUT, DELETE, etc.) and enables integration with various authentication mechanisms and third-party APIs.
- Readability: The fluent API enhances code readability, making it easier to understand and maintain, especially in complex projects.
- Integration: Seamlessly integrates with other Spring components, enabling developers to build end-to-end reactive applications with ease.
2. What is Spring Webflux?
Spring WebFlux is a reactive programming framework within the broader Spring ecosystem for building asynchronous, non-blocking, and event-driven web applications. It was introduced in Spring Framework 5 to provide an alternative to the traditional Spring MVC framework for building web applications. Spring WebFlux is particularly well-suited for building highly scalable and responsive applications that can handle a large number of concurrent connections.
- Reactive Programming Model: Spring WebFlux is built on the principles of reactive programming, which allows developers to handle asynchronous and event-driven operations using reactive streams. It uses Project Reactor, a reactive programming library, to provide the necessary building blocks for reactive applications.
- Non-Blocking: Spring WebFlux is non-blocking, meaning it can handle a large number of concurrent requests without blocking threads. This is particularly useful for applications that require high concurrency and low-latency responses.
- Annotation-Based Controllers: Spring WebFlux supports annotation-based controllers for defining endpoints and handling HTTP requests.
- Functional Endpoints: In addition to annotation-based controllers, Spring WebFlux also allows you to define endpoints using a more practical and programmatic approach. This can be useful for building reactive APIs.
- Router Functions: Router functions are a fundamental concept in Spring WebFlux for defining how incoming requests are routed to handlers. They provide a way to create custom routing logic, allowing for more flexibility in defining endpoints.
- Support for Multiple Reactive Data Sources: Spring WebFlux is not limited to HTTP requests. It can also handle other types of data sources, such as WebSockets, server-sent events (SSE), and more. This makes it suitable for building real-time applications.
- Reactive WebClient: Spring WebFlux includes a reactive WebClient that allows you to make asynchronous HTTP requests to external services. It integrates seamlessly with the reactive programming model.
- Adaptive Threading: Spring WebFlux uses an adaptive threading model that automatically adjusts the number of threads based on the workload, making efficient use of system resources.
- Backpressure Support: Reactive streams, used in Spring WebFlux, support backpressure, which allows consumers to signal producers about their ability to handle data. This helps prevent overwhelming the system with too much data.
- Integration with Spring Ecosystem: Spring WebFlux can be integrated with other Spring projects and libraries, such as Spring Security, Spring Data, and Spring Cloud, making it suitable for building comprehensive microservices architectures.
- Annotated Controllers for MVC: While Spring WebFlux is primarily designed for reactive applications, it also includes the option to use annotated controllers in a traditional Spring MVC style, allowing you to mix both programming models in a single application.
- Functional Error Handling: Spring WebFlux provides functional error handling mechanisms that allow you to define how errors are handled at different levels of the application, including global error handling.
- Reactive Security: Spring Security can be integrated with Spring WebFlux to provide security features for reactive applications, including authentication and authorization.
3. Spring WebClient POST Example
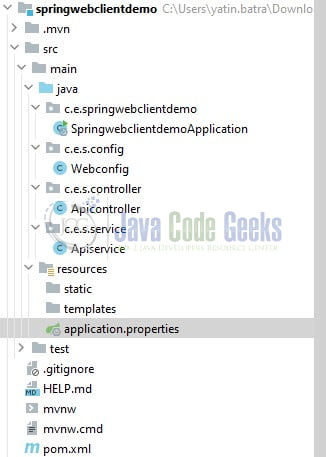
Let us dive into some practice stuff. If anyone is interested in looking at the project structure refer to the below image.
3.1 Updating the Maven dependencies in pom.xml file
Set up a new Spring Boot project or use an existing one. Include the necessary dependencies in your project’s pom.xml file.
pom.xml
<dependencies>
	<dependency>
		<groupId>org.springframework.boot</groupId>
		<artifactId>spring-boot-starter-web</artifactId>
	</dependency>
	<dependency>
		<groupId>org.springframework.boot</groupId>
		<artifactId>spring-boot-starter-webflux</artifactId>
	</dependency>

	<dependency>
		<groupId>org.springframework.boot</groupId>
		<artifactId>spring-boot-starter-test</artifactId>
		<scope>test</scope>
	</dependency>
	<dependency>
		<groupId>io.projectreactor</groupId>
		<artifactId>reactor-test</artifactId>
		<scope>test</scope>
	</dependency>
</dependencies>
3.2 Configure WebClient Configuration Class
In Spring applications, configuring WebClient is a common practice to enable seamless communication with external APIs or services.
The Webconfig class is annotated with @Configuration, indicating that it configures the Spring application context. Inside this class, a WebClient.Builder bean is defined using the @Bean annotation. This bean provides a builder pattern to create instances of WebClient, allowing the application to make HTTP requests.
The Configuration annotation marks the class as a configuration class, indicating that it contains methods to create and configure beans. In this case, it provides the WebClient builder bean.
Webconfig.java
package com.example.springwebclientdemo.config;

import org.springframework.context.annotation.Bean;
import org.springframework.context.annotation.Configuration;
import org.springframework.web.reactive.function.client.WebClient;

@Configuration
public class Webconfig {

    @Bean
    public WebClient.Builder webBuilder() {
        return WebClient.builder();
    }
}
3.3 Create a Service Class
The Apiservice class is annotated with @Service, indicating that it’s a Spring service component. Let’s break down how this class utilizes WebClient for making POST requests:
- The
Apiserviceclass takes in aWebClient.Builderobject through its constructor. This is a classic example of dependency injection, where theWebClient.Builderinstance is injected into the service. - The
postDataToApimethod sends a POST request to the specified API URL with the providedrequestdata. It utilizesWebClientto perform the request and retrieve the response body as aString. Theblock()method is used to block the execution and wait for the response. - The
uploadFile(String apiUrl, byte[] fileBytes, String fileName)method uploads a file as a multipart request to the specified API URL. It constructs the multipart body usingMultipartBodyBuilderand sets the appropriate headers for the file. The request is made asynchronously, and the response body is processed as aMono<String>. - The
postDataWithParameters(String apiUrl, String param1, String param2)method sends a POST request to the specified API URL with the provided query parameters. The request is made asynchronously, and the response body is processed as aMono<String>.
Apiservice.java
package com.example.springwebclientdemo.service;

import org.springframework.beans.factory.annotation.Autowired;
import org.springframework.http.client.MultipartBodyBuilder;
import org.springframework.stereotype.Service;
import org.springframework.web.reactive.function.BodyInserters;
import org.springframework.web.reactive.function.client.WebClient;
import reactor.core.publisher.Mono;

@Service
public class Apiservice {

    private final WebClient.Builder webBuilder;

    @Autowired
    public Apiservice(WebClient.Builder builder) {
        this.webBuilder = builder;
    }

    public String postDataToApi(String apiUrl, String request) {
        return webBuilder.build()	        // Creates a WebClient instance
                .post()		                // Specifies the HTTP method as POST
                .uri(apiUrl)	            // Specifies the URI where the request should be sent
                .body(BodyInserters.fromValue(request))
                .retrieve()	                // Initiates the request and receives the response
                .bodyToMono(String.class)	// Converts the response body to a Mono
                .block();
    }

    public Mono<String> uploadFile(String apiUrl, byte[] fileBytes, String fileName) {
        // Build the multipart request body
        MultipartBodyBuilder bodyBuilder = new MultipartBodyBuilder();
        bodyBuilder.part("file", fileBytes)
                .header("Content-Disposition", "form-data; name=file; filename=" + fileName);

        // Make the multipart file upload request using WebClient
        return webBuilder.build()                                           // Creates a WebClient instance
                .post()                                                     // Specifies the HTTP method as POST
                .uri(apiUrl)                                                // Specifies the URI where the request should be sent
                .body(BodyInserters.fromMultipartData(bodyBuilder.build())) // Sets the request body as multipart data
                .retrieve()                                                 // Initiates the request and receives the response
                .bodyToMono(String.class);                                  // Converts the response body to a Mono
    }

    public Mono<String> postDataWithParameters(String apiUrl, String param1, String param2) {
        return webBuilder
                .baseUrl(apiUrl)
                .build()
                .post()
                .uri(uriBuilder -> uriBuilder
                        .path("/endpoint") // Specify the endpoint path
                        .queryParam("param1", param1) // Add query parameters
                        .queryParam("param2", param2)
                        .build())
                .retrieve()
                .bodyToMono(String.class);
    }
}
3.4 Create a Controller Class
The Apicontroller class is annotated with @RestController, indicating that it’s a Spring MVC controller. It handles POST requests at the endpoint /api/send-data. Let’s break down how this controller integrates WebClient for processing incoming requests:
- Sending Data Endpoint: This endpoint accepts POST requests at
/api/send-datawith a JSON body. It processes the data using theApiserviceand sends it to the sample API endpointhttps://jsonplaceholder.typicode.com/postsfor demonstration purposes. - File Upload Endpoint: This endpoint handles file uploads using
multipart/form-data. It accepts POST requests at/api/uploadwith file content and name as parameters. The file is uploaded asynchronously using theApiserviceto the sample API endpointhttp://example.com/upload. - Sending Data Endpoint Having Query Parameters: This endpoint accepts POST requests at the
/api/datawithparam1andparam2as query parameters. The data is processed based on the query parameters for demonstration purposes.
Apicontroller.java
package com.example.springwebclientdemo.controller;
import com.example.springwebclientdemo.service.Apiservice;
import org.springframework.beans.factory.annotation.Autowired;
import org.springframework.web.bind.annotation.*;
import reactor.core.publisher.Mono;
@RestController
@RequestMapping(value = "/api")
public class Apicontroller {
private final Apiservice apiservice;
@Autowired
public Apicontroller(Apiservice service) {
this.apiservice = service;
}
// curl -X POST -H "Content-Type: application/json" -d '{"name":"hello-world"}' http://localhost:8500/api/send-data
@PostMapping(value = "/send-data")
public String postData(@RequestBody String request) {
String apiUrl = "https://jsonplaceholder.typicode.com/posts"; // Sample API endpoint. You're free to change it as per your wish.
return apiservice.postDataToApi(apiUrl, request);
}
// curl -X POST -H "Content-Type: multipart/form-data" -F "file=@/path/to/your/file.txt" -F "fileName=file.txt" http://localhost:8500/api/files/upload
@PostMapping("/upload")
public Mono<String> uploadFile(@RequestParam("file") byte[] fileBytes,
@RequestParam("fileName") String fileName) {
String apiUrl = "http://example.com/upload"; // Sample API endpoint. You're free to change it as per your wish.
return apiservice.uploadFile(apiUrl, fileBytes, fileName);
}
// curl -X POST "http://localhost:8500/api/data?param1=value1¶m2=value2"
@PostMapping("/api/data")
public Mono<String> getDataWithParameters(@RequestParam("param1") String param1,
@RequestParam("param2") String param2) {
String apiUrl = "https://example.com"; // Sample API endpoint. You're free to change it as per your wish.
return apiservice.postDataWithParameters(apiUrl, param1, param2);
}
}
3.5 Create Main Class
In this main class, the @SpringBootApplication annotation is used to indicate that this is the main entry point for a Spring Boot application. It enables auto-configuration and component scanning.
The main() method starts the Spring Boot application by calling SpringApplication.run() and passing the main class SpringwebclientdemoApplication.class along with any command-line arguments args.
SpringwebclientdemoApplication.java
package com.example.springwebclientdemo;

import org.springframework.boot.SpringApplication;
import org.springframework.boot.autoconfigure.SpringBootApplication;

@SpringBootApplication
public class SpringwebclientdemoApplication {

    public static void main(String[] args) {
        SpringApplication.run(SpringwebclientdemoApplication.class, args);
    }

}
4. Output
Start the Spring boot application by running the SpringwebclientdemoApplication.java class from the IDE and open the Postman tool to import the cURL requests. When a cURL request like this is sent to a Spring Boot application endpoint, the Spring controller mapped to the specified URL will handle the incoming POST request.
cURL requests
-- To send data to the server and receive a response
curl -X POST -H "Content-Type: application/json" -d '{"name":"hello-world"}' http://localhost:8500/api/send-data
-- To upload a file and receive a response
curl -X POST -H "Content-Type: multipart/form-data" -F "file=@/path/to/your/file.txt" -F "fileName=file.txt" http://localhost:8500/api/files/upload
-- To send data to the server using query parameters and receive a response
curl -X POST "http://localhost:8080/api/data?param1=value1¶m2=value2"
Note – The application will operate on port 8500. Feel free to modify the port number by adjusting the server.port property in the application.properties file.
server.port=8500
spring.application.name=spring-webclient-demo-app
5. Conclusion
In conclusion, this exploration of the Spring Boot WebClient POST example highlights the seamless integration and efficiency of WebClient in making asynchronous POST requests within Spring applications. By leveraging WebClient’s non-blocking, reactive approach, developers can enhance the responsiveness and scalability of their applications. The flexibility and ease of use provided by WebClient’s fluent API empower developers to interact with external APIs effortlessly. Through this example, we’ve demonstrated how WebClient simplifies the process of sending data to remote services, allowing for the creation of dynamic and interactive web applications. As technology continues to evolve, understanding and mastering tools like WebClient are essential for building robust, high-performance, and user-friendly Spring Boot applications.
6. Download the Project
This was a tutorial to understand the WebClient in a spring boot application and send a sample HTTP POST request.
You can download the full source code of this example here: Spring Boot WebClient POST Example
