In this example, we will demonstrate what is Spring Web-Flow, what are its benefits, and how to configure it in a web application. In the previous article, we have demonstrated how Spring MVC can be configured.
1. Introduction
Spring MVC is a powerful framework that allows the user to configure and manage the flow of web-application in any possible way. However, sometimes the scenario may require be to have a more tight control over the flow of the application or to manage the possible ways to navigate through the application.
Spring Web-Flow helps in this kind of scenario by clearly defining the views and the transition between them. Web-Flow is itself based on top of Spring MVC and hence provides all the goodies of Spring MVC plus the added control over the transitions. Let’s look at how we can configure the Web-Flow for our applications:
2. Project Set-Up
Let’s start by first setting up the project in Eclipse or any other you have in mind. We shall use Maven to setup our project. Open Eclipse and create a simple Maven project and check the skip archetype selection checkbox on the dialogue box that appears. Replace the content of the existing pom.xml with the one provided below:
pom.xml
<project xmlns="http://maven.apache.org/POM/4.0.0" xmlns:xsi="http://www.w3.org/2001/XMLSchema-instance"
  xsi:schemaLocation="http://maven.apache.org/POM/4.0.0 http://maven.apache.org/maven-v4_0_0.xsd">
  <modelVersion>4.0.0</modelVersion>
  <groupId>com.jcg.examples.springWebFlowExample</groupId>
  <artifactId>SpringWebFlowExample</artifactId>
  <packaging>war</packaging>
  <version>0.0.1-SNAPSHOT</version>
  <name>SpringWebFlowExample</name>
  <url>http://maven.apache.org</url>
  <dependencies>
    <dependency>
      <groupId>junit</groupId>
      <artifactId>junit</artifactId>
      <version>3.8.1</version>
      <scope>test</scope>
    </dependency>
     <dependency>
        <groupId>org.springframework.webflow</groupId>
        <artifactId>spring-webflow</artifactId>
        <version>2.4.2.RELEASE</version>
    </dependency>
  </dependencies>
  <build>
    <finalName>SpringWebFlowExample</finalName>
  </build>
</project>
This will import the required JAR dependencies in the project. We can now start with the actual implementation of the Spring Web-Flow in our project.
Our application will be a simple login based application. Upon hitting the URL for the first time, the user will directed to a login page.
The user enters his credentials and clicks on the login button.
If the password is correct the view transitions to success view or else the user is directed back to the login screen.
While this is a very basic scenario for the beginner users to understand, Spring Web-Flow is capable of handling many more complex scenarios.
3. Implementation
The implementation starts with the basic PoJo for login purposes which will hold the username and password.
LoginBean.java
package com.jcg.examples.bean;

import java.io.Serializable;

public class LoginBean implements Serializable
{
		/**
		 *
		 */
		private static final long serialVersionUID = 1L;

		private String userName;

		private String password;

		public String getUserName()
		{
				return userName;
		}

		public void setUserName(String userName)
		{
				this.userName = userName;
		}

		public String getPassword()
		{
				return password;
		}

		public void setPassword(String password)
		{
				this.password = password;
		}

		@Override
		public String toString()
		{
				return "LoginBean [userName=" + userName + ", password=" + password + "]";
		}

}
Next is the Service file which will authenticate the user. Based on the output of its validateUser method, web-flow will decide the view to be rendered. The Service class is marked with annotation to be picked up at run time by the Spring Bean Factory. For the sake of brevity, I have hard-coded the credentials in the source file itself.
LoginService.java
package com.jcg.examples.service;

import org.springframework.stereotype.Service;

import com.jcg.examples.bean.LoginBean;

@Service
public class LoginService
{
		public String validateUser(LoginBean loginBean)
		{
				String userName = loginBean.getUserName();
				String password = loginBean.getPassword();
				if(userName.equals("Chandan") && password.equals("TestPassword"))
				{
						return "true";
				}
				else
				{
						return "false";
				}
		}

}
Now, we need to implement the define the flow. Flow is basically a cycle of events that will lead to completion of a single task in the context of the application. This cycle or flow will include multiple events and the user maybe made to navigate to and fro between various views, depending upon the choice he makes. Let’s have a look at the xml that we have to use for our application for flow navigation:
book-search-flow.xml
<?xml version="1.0" encoding="UTF-8"?>
<flow xmlns="http://www.springframework.org/schema/webflow"
	xmlns:xsi="http://www.w3.org/2001/XMLSchema-instance"
	xsi:schemaLocation="http://www.springframework.org/schema/webflow
http://www.springframework.org/schema/webflow/spring-webflow-2.4.xsd">

	<var name="loginBean" class="com.jcg.examples.bean.LoginBean" />

	<view-state id="displayLoginView" view="jsp/login.jsp" model="loginBean">
		<transition on="performLogin" to="performLoginAction" />
	</view-state>

	<action-state id="performLoginAction">
		<evaluate expression="loginService.validateUser(loginBean)" />

		<transition on="true" to="displaySuccess" />
		<transition on="false" to="displayError" />

	</action-state>

	<view-state id="displaySuccess" view="jsp/success.jsp" model="loginBean"/>

	<view-state id="displayError" view="jsp/failure.jsp" />
</flow>
The first view in the flow becomes the default view and hence, is shown when the URL for that particular Flow is hit for the first time. Once the user submits the flow moves to action tag to determine dynamically which view should be rendered. The action directive in turn uses the backing Service Bean we created earlier.
Also the view may have a backing Bean as we have in Spring MVC, which is defined by the model attribute. The view contain two important variables which tell the container, the event that has occurred and the current state of the application. These variables are _eventId and _flowExecutionKey. When coding for the view, the developer should not forget to include these variables in the view code.
Now that the flow is ready we need to hook it up somewhere in the system, so that it can be picked up by the Spring Container.
flow-definition.xml file defines a Flow-Executor and a Flow-Registry. As the name indicates, the Flow-Executor, actually orchestrates the flow while it refers to Flow-Registry to determine the next action to be taken for the flow.
FlowHandlerMapping is responsible for creating the appropriate URLs for all the flows defined in the application.FlowHandlerAdapter encapsulates the actual flow and delegates the specific flows to be handled by the Spring Flow Controllers. We will include this file in the main spring configuration sheet so that our web-flow gets hooked into the main Spring Container and the requests are directed to the Flow Controllers.
flow-definition.xml
<?xml version="1.0" encoding="UTF-8"?>
<beans xmlns="http://www.springframework.org/schema/beans"
	xmlns:xsi="http://www.w3.org/2001/XMLSchema-instance" xmlns:flow="http://www.springframework.org/schema/webflow-config"
	xsi:schemaLocation="http://www.springframework.org/schema/webflow-config
http://www.springframework.org/schema/webflow-config/spring-webflow-config-2.4.xsd
http://www.springframework.org/schema/beans
http://www.springframework.org/schema/beans/spring-beans-3.0.xsd">

	<bean class="org.springframework.webflow.mvc.servlet.FlowHandlerMapping">
		<property name="flowRegistry" ref="bookSearchFlowRegistry" />
	</bean>

	<bean class="org.springframework.webflow.mvc.servlet.FlowHandlerAdapter">
		<property name="flowExecutor" ref="bookSearchFlowExecutor" />
	</bean>

	<flow:flow-executor id="bookSearchFlowExecutor" flow-registry="bookSearchFlowRegistry" />

	<flow:flow-registry id="bookSearchFlowRegistry">
		<flow:flow-location id="bookSearchFlow" path="/flows/book-search-flow.xml" />
	</flow:flow-registry>

</beans>
spring-config.xml contains the basic information for the spring container for tasks like rendering the views, bean declarations, annotation scanning etc. It also includes the flow-definition.xml file for the container to load its contents.

spring-config.xml
<?xml version="1.0" encoding="UTF-8"?>
<beans xmlns="http://www.springframework.org/schema/beans"
	xmlns:context="http://www.springframework.org/schema/context"
	xmlns:xsi="http://www.w3.org/2001/XMLSchema-instance" xmlns:flow="http://www.springframework.org/schema/webflow-config"
	xsi:schemaLocation="
	http://www.springframework.org/schema/webflow-config
	http://www.springframework.org/schema/webflow-config/spring-webflow-config-2.4.xsd
   http://www.springframework.org/schema/beans
   http://www.springframework.org/schema/beans/spring-beans-3.0.xsd
   http://www.springframework.org/schema/context
   http://www.springframework.org/schema/context/spring-context-3.0.xsd">

	<context:component-scan base-package="com.jcg.examples" />

	<bean
		class="org.springframework.web.servlet.view.InternalResourceViewResolver">
		<property name="prefix" value="/jsp/" />
		<property name="suffix" value=".jsp" />
	</bean>

	<import resource="flow-definition.xml"/>

</beans>
The web.xml is similar to any spring mvc application. It starts the Spring container with the above xml and directs all the reuqests to the DispatcherServlet.
web.xml
<!DOCTYPE web-app PUBLIC
 "-//Sun Microsystems, Inc.//DTD Web Application 2.3//EN"
 "http://java.sun.com/dtd/web-app_2_3.dtd" >

<web-app>
  <display-name>Spring-Flow Web-Application Example</display-name>

  <servlet>
		<servlet-name>springFlowApplication</servlet-name>
		<servlet-class>org.springframework.web.servlet.DispatcherServlet</servlet-class>
		<init-param>
			<param-name>contextConfigLocation</param-name>
			<param-value>classpath://spring-config.xml</param-value>
		</init-param>
		<load-on-startup>1</load-on-startup>
	</servlet>

	 <servlet-mapping>
      <servlet-name>springFlowApplication</servlet-name>
      <url-pattern>/</url-pattern>
   </servlet-mapping>
</web-app>
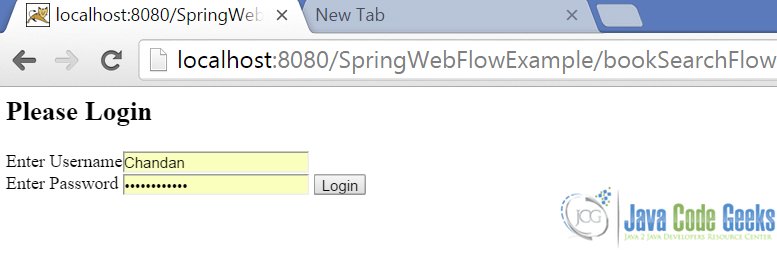
Here’s the default view of our Flow which is backed by a Spring bean. The name of the input boxes are same as the property names in the backing PoJo. In case the developer wants to name them separately, he may use the Spring tag library and the path attribute.
login.jsp
<%@ page isELIgnored="false"%>
<html>
<body>
	<h2>Please Login</h2>

	<form method="post" action="${flowExecutionUrl}">

		<input type="hidden" name="_eventId" value="performLogin">
		<input type="hidden" name="_flowExecutionKey" value="${flowExecutionKey}" />

		<input type="text" name="userName" maxlength="40"><br>
		<input type="password" name="password" maxlength="40">
		<input type="submit" value="Login" />

	</form>

</body>
</html>
This is the view rendered upon successful authentication.
success.jsp
<%@ page language="java" contentType="text/html; charset=ISO-8859-1"
    pageEncoding="ISO-8859-1"%>
    <%@ page isELIgnored ="false" %>
<!DOCTYPE html PUBLIC "-//W3C//DTD HTML 4.01 Transitional//EN" "http://www.w3.org/TR/html4/loose.dtd">
<html>
<head>
<meta http-equiv="Content-Type" content="text/html; charset=ISO-8859-1">
<title>Login Successful</title>
</head>
<body>
Welcome ${loginBean.userName}!!
</body>
</html>
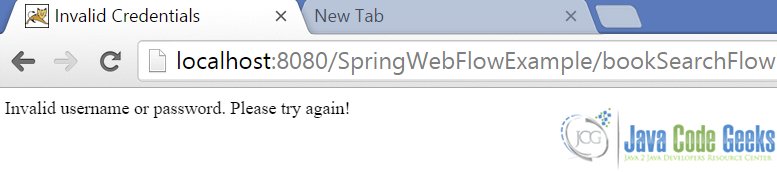
When entering the wrong credentials, the user is notified via this view:
failure.jsp
<%@ page language="java" contentType="text/html; charset=ISO-8859-1"
    pageEncoding="ISO-8859-1"%>
    <%@ page isELIgnored ="false" %>
<!DOCTYPE html PUBLIC "-//W3C//DTD HTML 4.01 Transitional//EN" "http://www.w3.org/TR/html4/loose.dtd">
<html>
<head>
<meta http-equiv="Content-Type" content="text/html; charset=ISO-8859-1">
<title>Login Successful</title>
</head>
<body>
Invalid username or password. Please try again!
</body>
</html>
Now, let’s deploy and run the code. I have used Apache Tomcat 7 for this example. Here’s the output for the first page:
Upon successful authentication :

Upon entering Invalid Credentials:
4. Download The Source Code
In this example, we demonstrated how our view flows could be defined clearly and hence, managed easily and minutely using Spring Web-Flow.
You can download the source code of this example here: Spring Web Flow Tutorial
Last updated on Jun. 29th, 2021

Hi. Not able to start application properly. On deploying application on tomcat and hitting locolhost:8080/ , it says ‘origin server did not found a current representation’
Hi. Great article. Looking for info to adapt to Springboot and thymeleaf. Any update??. Thanks
Hi Chandan, I am beginner for web flow, kindly tell me what the “${flowExecutionUrl}” contain and how I get to know?
In my project I also see action=”${flowExecuter.defination.id}” kindly make me understand what is the value and how it fetch the url value?
flowExecutionUrl to access the context-relative URI for the current flow execution
Thanks to reply karunan
Hi,
Able to import the project. But not able to run the project.
Run on Server is asking “Selection cannot run on server”
Using jdk1.8 with Apache 9.0