Welcome, in this tutorial, we will see how to use Spring Initializr.
1. Introduction
- Spring Initializr is a web UI provided by the spring framework to easily create the spring project structure
- The initializer helps to speed up the groundwork required for the project structure such as identifying the spring boot version, maven libraries, plugins, creating a folder structure, programming language, etc
1.1 Spring Initializr modules
The spring initializr consists of the following modules –
- initializr-actuator: Optional module that provides additional information and statistics on project generation
- initializr-bom: BOM stands for Bill of Materials. Provides easy dependency management for the project
- initializr-docs: Module to provide the documentation
- initializr-generator: Core project generation library
- initializr-generator-spring: Optional module defining the typical spring boot project conventions. Can be reused or replaced by own conventions
- initializr-generator-test: Provides a test infrastructure for the project generation
- initializr-metadata: Provides metadata infrastructure for various aspects of the project
- initializr-version-resolver: Optional module to extract version number for an arbitrary POM
- initializr-web: Provides web endpoints for the third party clients
1.2 Supported interface
Once you have downloaded the project from the spring initializer interface you can use the IDE of your choice such as IntelliJ, Eclipse, etc. I am using IntelliJ as my preferred IDE.
2. Generating a project
To generate a spring project via the spring initializr. Go to Spring Initializr interface and it will open an interface as shown in Fig. 1.
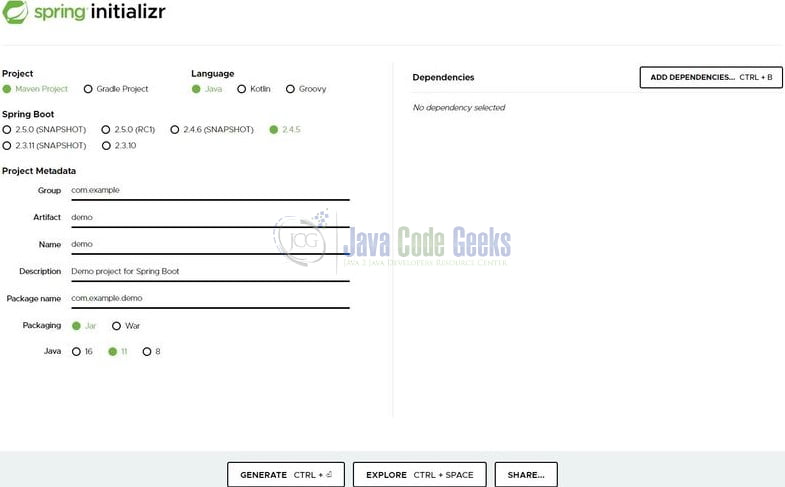
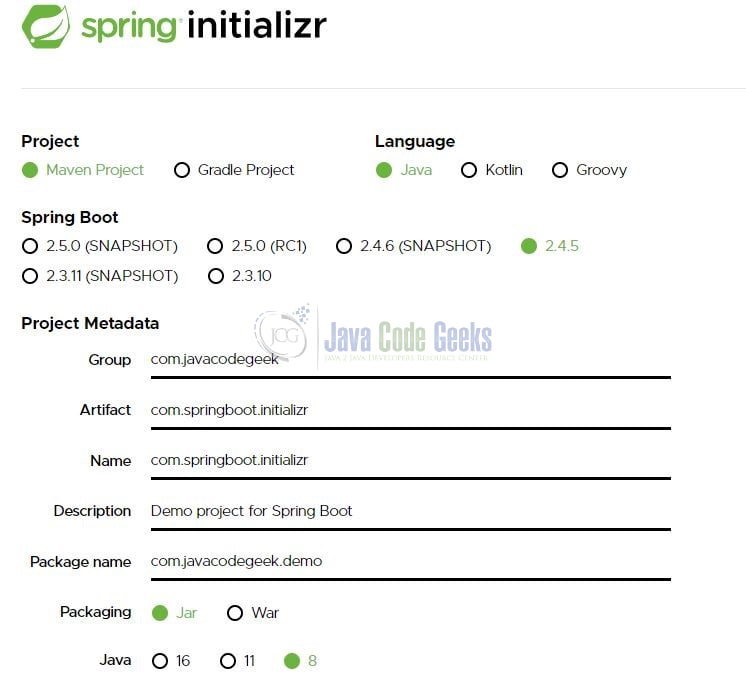
Select the project type, programming language (Java is selected by default), and the Spring boot version you want to use (the latest version is selected by default). In addition, we will also specify the project metadata such as artifact, group, project name, package name, project packaging (such as jar or war), and a specific Java version we want to use.
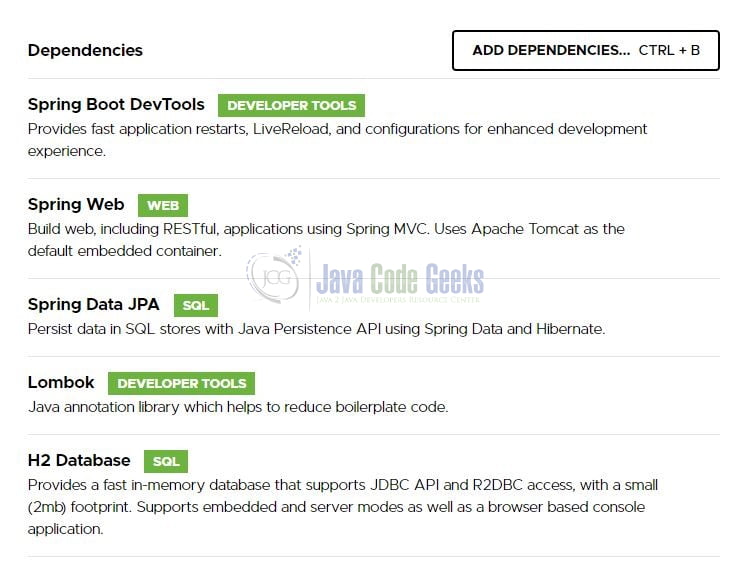
In the next step add the required dependencies. Click the Add dependencies button and a pop-up list of dependencies will appear. You are free to search for dependencies and select the required ones. Remember to press the Ctrl button if you would like to add more than one dependency in a single go. Once all dependencies are selected they will under the Dependencies section as shown in Fig. 3.
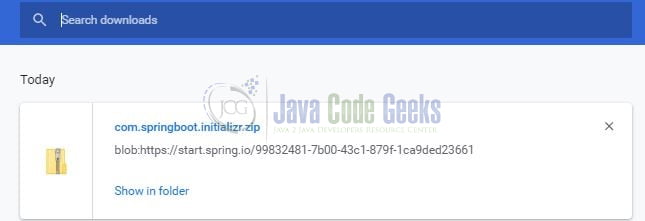
Once everything is done click on the Generate button to download the zip file based on the selections made in the Spring Intializr interface.
3. Run Spring Initializr generated project
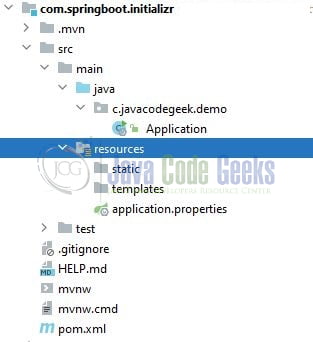
You can import the generated project to any IDE of your choice. I will use the IntelliJ IDE to import this project into the IDE. Once the project is successfully imported it will be shown as in Fig. 5.
4. Creating a Spring boot application
Once the project is successfully imported into the IDE you can refer to the below steps to add some sample code to the application.
4.1 Maven Dependencies
Let us validate the dependencies added via the Spring Initializr web interface. The dependencies added via the web interface will be present in the pom.xml file.
pom.xml
<?xml version="1.0" encoding="UTF-8"?>
<project xmlns:xsi="http://www.w3.org/2001/XMLSchema-instance" xmlns="http://maven.apache.org/POM/4.0.0"
         xsi:schemaLocation="http://maven.apache.org/POM/4.0.0 https://maven.apache.org/xsd/maven-4.0.0.xsd">
    <modelVersion>4.0.0</modelVersion>
    <parent>
        <groupId>org.springframework.boot</groupId>
        <artifactId>spring-boot-starter-parent</artifactId>
        <version>2.4.5</version>
        <relativePath/> <!-- lookup parent from repository -->
    </parent>
    <groupId>com.javacodegeek</groupId>
    <artifactId>com.springboot.initializr</artifactId>
    <version>0.0.1-SNAPSHOT</version>
    <name>com.springboot.initializr</name>
    <description>Demo project for Spring Boot</description>
    <properties>
        <java.version>1.8</java.version>
    </properties>
    <dependencies>
        <dependency>
            <groupId>org.springframework.boot</groupId>
            <artifactId>spring-boot-starter-data-jpa</artifactId>
        </dependency>
        <dependency>
            <groupId>org.springframework.boot</groupId>
            <artifactId>spring-boot-starter-web</artifactId>
        </dependency>

        <dependency>
            <groupId>org.springframework.boot</groupId>
            <artifactId>spring-boot-devtools</artifactId>
            <scope>runtime</scope>
            <optional>true</optional>
        </dependency>
        <dependency>
            <groupId>com.h2database</groupId>
            <artifactId>h2</artifactId>
            <scope>runtime</scope>
        </dependency>
        <dependency>
            <groupId>org.projectlombok</groupId>
            <artifactId>lombok</artifactId>
            <optional>true</optional>
        </dependency>
        <dependency>
            <groupId>org.springframework.boot</groupId>
            <artifactId>spring-boot-starter-test</artifactId>
            <scope>test</scope>
        </dependency>
    </dependencies>

    <build>
        <plugins>
            <plugin>
                <groupId>org.springframework.boot</groupId>
                <artifactId>spring-boot-maven-plugin</artifactId>
                <configuration>
                    <excludes>
                        <exclude>
                            <groupId>org.projectlombok</groupId>
                            <artifactId>lombok</artifactId>
                        </exclude>
                    </excludes>
                </configuration>
            </plugin>
        </plugins>
    </build>

</project>
4.2 Application properties file
Creating a properties file in the resources folder and add the following code to it. You are free to change the details as per your wish.
application.properties
server.port=9090
spring.application.name=spring-initializr-application
#h2 configuration
spring.datasource.driver-class-name=org.h2.Driver
spring.datasource.url=jdbc:h2:mem:testdb
spring.datasource.username=sa
spring.datasource.password=
#h2 console settings
#browser url = http://localhost:9090/h2-console
spring.h2.console.path=/h2-console
spring.h2.console.enabled=true
#spring jpa settings
spring.jpa.database-platform=org.hibernate.dialect.H2Dialect
spring.jpa.hibernate.ddl-auto=create-drop
spring.jpa.show-sql=true
4.3 Java Classes
Let us write the classes involved in this application.
4.3.1 Implementation/Main class
Add the following code to the main class to bootstrap the application from the main method. Always remember, the entry point of the spring boot application is the class containing @SpringBootApplication annotation and the static main method.
Application.java
package com.javacodegeek.demo;

import lombok.extern.slf4j.Slf4j;
import org.springframework.boot.SpringApplication;
import org.springframework.boot.autoconfigure.SpringBootApplication;

//lombok annotation
@Slf4j
//spring annotation
@SpringBootApplication
public class Application {

    public static void main(String[] args) {
        SpringApplication.run(Application.class, args);
        log.info("Application started successfully.");
    }
}
4.3.2 Controller class
Add the following code to the controller class which consists of an HTTP GET endpoint to fetch the employees from the database and show it to the user. You can the endpoint in the browser or via the postman tool.
EmployeeController.java
package com.javacodegeek.demo.controller;

import com.javacodegeek.demo.model.Employee;
import com.javacodegeek.demo.service.EmployeeService;
import org.springframework.beans.factory.annotation.Autowired;
import org.springframework.http.HttpStatus;
import org.springframework.web.bind.annotation.GetMapping;
import org.springframework.web.bind.annotation.RequestMapping;
import org.springframework.web.bind.annotation.ResponseStatus;
import org.springframework.web.bind.annotation.RestController;

import java.util.List;

//spring annotations
@RestController
@RequestMapping("/api")
public class EmployeeController {

    @Autowired
    EmployeeService service;

    //http://localhost:9090/api/getall
    @GetMapping("/getall")
    @ResponseStatus(HttpStatus.OK)
    public List<Employee> getEmployees() {
        return service.getEmployees();
    }
}
For brevity, we will skip the other classes’ like model, service, and repository as these classes contain a simple code to either persist the employee data into the database or get the data from the database.
Employee.java– Entity class that will be persisted in the databaseEmployeeRepository.java– Repository interface that extends theJpaRepositoryinterface to perform the SQL operationsEmployeeService.java– Service class that interact with the DAO layer methodsDefaultEmployeesLoader.java– Bootstrap class to populate dummy data to the h2 database once the application is started successfully
5. Run the application
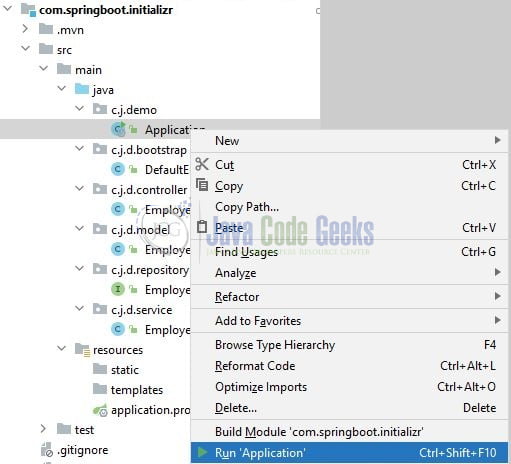
To run this application locally you can right-click on the Application.java class, Run As -> Java Application.
Once the application is started successfully it would expose the following endpoint on the port number – 9090 and you can hit them in the browser for the testing purpose.
Application endpoints
-- HTTP GET : Get all employees endpoint --
http://localhost:9090/api/getall
That is all for this tutorial and I hope the article served you whatever you were looking for. Happy Learning and do not forget to share!
6. Summary
In this section, you learned,
- Introduction to Spring Initializr
- Steps to create a simple spring boot application structure using Spring Initializr web interface
- Steps to add simple programming code in the spring boot application
You can download the sample application as an Eclipse project in the Downloads section.
7. Download the Project
This was an example to show how to use the Spring Initializr web interface.
You can download the full source code of this example here: Spring Initializr Tutorial
Last updated on Feb. 24th, 2022
