In today’s technology-driven world, chatbots have gained significant popularity due to their ability to automate conversations, provide instant customer support, and enhance user experiences on websites and applications. Chatbots powered by artificial intelligence and natural language processing have become increasingly sophisticated, enabling businesses and developers to create interactive and engaging user interfaces. In this introduction, we will explore the concept of building a simple chatbot using the Spring Boot framework, Thymeleaf templating engine, and the ChatGPT API.
1. Introduction
ChatGPT is an advanced artificial intelligence (AI) language model developed by OpenAI. It belongs to the GPT (Generative Pre-trained Transformer) family of models and represents state-of-the-art technology in the field of natural language processing (NLP). ChatGPT is designed to understand and generate human-like text, making it an incredibly versatile tool for a wide range of applications.
This AI model has been trained on vast amounts of text data from the internet, which enables it to perform various language-related tasks, such as answering questions, providing explanations, generating creative content, and engaging in natural-sounding conversations. ChatGPT can be used to automate customer support, assist with writing and editing tasks, facilitate learning and education, and even serve as a virtual assistant.
What sets ChatGPT apart is its ability to comprehend context, follow conversational nuances, and generate coherent and contextually relevant responses. It’s a testament to the rapid advancements in AI, offering a glimpse into the potential of machines to interact with humans in more meaningful and useful ways.
It’s important to note that while ChatGPT demonstrates remarkable language understanding and generation capabilities, it may not always provide perfectly accurate or unbiased information, and its responses are generated based on patterns in the data it was trained on. OpenAI continues to refine and improve models like ChatGPT to enhance their performance and safety for a wide range of practical applications.
1.1 Benefits and Usecases of ChatGPT
- Efficient Customer Support: ChatGPT can automate responses to common customer queries, reducing response times and improving customer satisfaction.
- Content Generation: It aids in generating high-quality written content for blogs, articles, or reports, saving time and maintaining consistency.
- Language Translation: ChatGPT can assist in translating text between languages, facilitating global communication.
- Education and Tutoring: It can serve as a virtual tutor, answering questions and explaining complex topics to learners.
- Code Assistance: Developers can use it to get code suggestions, debug errors, or explain programming concepts.
- Personal Assistants: ChatGPT can be the foundation for creating virtual personal assistants that help with scheduling, reminders, and information retrieval.
- Content Summarization: It can summarize lengthy documents or articles, providing concise overviews.
- Enhanced Search: ChatGPT can improve search engine results by understanding user queries more accurately.
- Medical Diagnosis Support: It can assist healthcare professionals in analyzing medical records and offering initial diagnostic insights.
- Language Learning: ChatGPT can engage users in conversation and provide language practice exercises.
2. Significance of Thymeleaf
Thymeleaf is a popular server-side templating engine for web applications in the Java ecosystem. Thymeleaf is significant because it provides an efficient and developer-friendly way to create server-side rendered web applications in Java and it holds importance for several reasons:
- Server-Side Rendering (SSR): Thymeleaf is primarily used for server-side rendering, which means that HTML templates are processed on the server before being sent to the client’s browser. This approach is valuable for search engine optimization (SEO) and initial page load performance because it ensures that the HTML content is readily available to search engines and doesn’t rely on client-side JavaScript for rendering.
- Integration with Spring Framework: Thymeleaf integrates seamlessly with the Spring Framework, making it a preferred choice for building web applications with Spring. It supports both Spring MVC (Model-View-Controller) and Spring WebFlux, allowing developers to choose the appropriate programming model for their application’s needs.
- Natural and Human-Readable Templates: Thymeleaf templates are designed to be easy to read and write. They resemble standard HTML, and the Thymeleaf-specific attributes and syntax are intuitive. This makes it accessible to developers, including those who are new to Thymeleaf.
- Rich Templating Features: Thymeleaf provides a wide range of features for templating, including expressions, conditional rendering, iteration, attribute manipulation, and more. These features allow developers to create dynamic and data-driven web pages with ease.
- Internationalization and Localization: Thymeleaf includes built-in support for internationalization (i18n) and localization (l10n). It allows you to create templates that can be easily adapted to different languages and regions, making it suitable for building global applications.
- Wide Adoption and Active Community: Thymeleaf has gained widespread adoption in the Java community and has an active and supportive user base. This means that you can find ample documentation, tutorials, and community-contributed extensions and libraries to enhance your Thymeleaf projects.
- Extensibility: Thymeleaf is extensible, allowing developers to create custom dialects or processors to meet specific project requirements. This extensibility ensures that you can adapt Thymeleaf to your application’s unique needs.
- Cross-Platform Compatibility: Thymeleaf can be used in various Java-based web frameworks and environments, including Spring Boot, Java EE, and standalone applications. This flexibility makes it a versatile choice for web development in Java.
- No Dependency on JavaScript: Unlike client-side rendering frameworks, Thymeleaf doesn’t rely on JavaScript to render content. This can simplify development and ensure that your application remains functional even when JavaScript is disabled in the user’s browser.
3. Developing an application
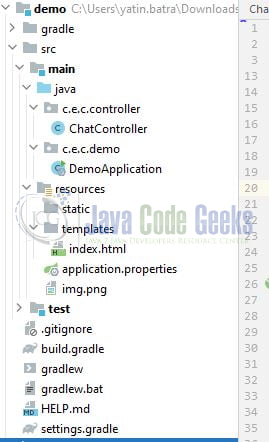
Let’s delve into some practical exercises to understand the application. In case anyone is interested in understanding the project structure:
Remember to get the open api access key from the platform.openai.com portal as this key will be responsible for communicating to the open api portal via the spring boot application. We will use this key in the spring controller class for making calls to the open api platform.
3.1 Incorporating Dependencies into pom.xml
Establish a fresh Spring Boot project using Spring Initialzr or leverage an existing one. Include the necessary dependencies in your project’s pom.xml file.
pom.xml
<dependencies>
	  <dependency>
		<groupId>org.springframework.boot</groupId>
		<artifactId>spring-boot-starter-thymeleaf</artifactId>
	 </dependency>
	<dependency>
		<groupId>org.springframework.boot</groupId>
		<artifactId>spring-boot-starter-web</artifactId>
	</dependency>
	<dependency>
		<groupId>org.springframework.boot</groupId>
		<artifactId>spring-boot-starter-test</artifactId>
		<scope>test</scope>
	</dependency>
</dependencies>
3.2 Configure Application Properties
Let us understand the application.properties.
server.port=9030– Specifies the port on which the server should listen for incoming requests.spring.application.name– Specifies the application namespring.thymeleaf.reactive.max-chunk-size=8192– Configures the maximum chunk size for reactive Thymeleaf processing. This property can affect how Thymeleaf processes templates in a reactive way.
application.properties
#spring property
server.port=4433
spring.application.name=springboot-chatgpt-thymeleaf

# thymeleaf property
spring.thymeleaf.reactive.max-chunk-size=8192
3.3 Create a Controller Class
The ChatController class is responsible for managing user interactions with the chatbot interface and integrating with the ChatGPT API to generate responses. It is annotated with @Controller to mark it as a Spring MVC controller, allowing it to handle HTTP requests.
The class contains the following class-level and method-level fields:
chatMessages: A list that stores chat messages, including both user messages and responses from the chatbot. This list is used to display the conversation in the chat interface.chatGptApiKey: A field to store your ChatGPT API key. You should replace"YOUR_CHATGPT_API_KEY"with your actual API key. This key is used for authentication when making requests to the ChatGPT API.chatGptApiUrl: The URL of the ChatGPT API endpoint. It is set to"https://api.openai.com/v1/engines/davinci-codex/completions", but you can replace it with the correct API URL for your ChatGPT setup.
The ChatController class includes the following annotations and methods:
@GetMapping("/"): This method handles HTTP GET requests to the root (“/”) URL. It populates aModelwith chat messages and returns the “chat” template. This template is responsible for displaying the chat interface.@PostMapping("/sendMessage"): This method handles HTTP POST requests to the “/sendMessage” endpoint. It receives user messages as a request parameter, adds them to thechatMessageslist, and then calls thegenerateChatGptResponsemethod to obtain a response from the ChatGPT API. If a response is received, it is added to thechatMessageslist as well.generateChatGptResponse(String userMessage): This private method is responsible for requesting the ChatGPT system to generate a response based on the user’s input message. It constructs an HTTP request with the appropriate headers and payload, sends the request usingRestTemplate, and processes the response. If the response is successful (HTTP status code 200), it returns the generated response; otherwise, it handles API call errors.
ChatController.java
package com.example.chatgptapi.controller;

import org.springframework.http.*;
import org.springframework.stereotype.Controller;
import org.springframework.ui.Model;
import org.springframework.web.bind.annotation.GetMapping;
import org.springframework.web.bind.annotation.PostMapping;
import org.springframework.web.bind.annotation.RequestParam;
import org.springframework.web.client.RestTemplate;

import java.util.ArrayList;
import java.util.List;

@Controller
public class ChatController {

    private final List<String> chatMessages = new ArrayList<>();

    @GetMapping("/")
    public String chat(Model model) {
        model.addAttribute("messages", chatMessages);
        return "chat";
    }

    @PostMapping("/sendMessage")
    public String sendMessage(@RequestParam String userMessage) {
        chatMessages.add("User: " + userMessage);

        // Call ChatGPT API to generate a response
        String chatGptResponse = generateChatGptResponse(userMessage);

        if (chatGptResponse != null) {
            chatMessages.add("ChatGPT: " + chatGptResponse);
        }

        return "redirect:/";
    }

    private String generateChatGptResponse(String userMessage) {
        HttpHeaders headers = new HttpHeaders();
        String chatGptApiKey = "YOUR_CHATGPT_API_KEY ";
        headers.setBearerAuth(chatGptApiKey);
        headers.setContentType(MediaType.APPLICATION_JSON);

        String requestBody = "{\"prompt\": \"" + userMessage + "\", \"max_tokens\": 50}";

        HttpEntity<String> requestEntity = new HttpEntity<>(requestBody, headers);

        RestTemplate restTemplate = new RestTemplate();
        // Replace with your ChatGPT API URL
        String chatGptApiUrl = "https://api.openai.com/v1/engines/davinci-codex/completions";
        ResponseEntity<String> responseEntity = restTemplate.exchange(
                chatGptApiUrl,
                HttpMethod.POST,
                requestEntity,
                String.class
        );

        if (responseEntity.getStatusCode() == HttpStatus.OK) {
            return responseEntity.getBody();
        } else {
            // Handle API call error here
            return "Error communicating with ChatGPT API.";
        }
    }
}
3.4 Create a Main Class
Create a main class. It is the entry point for the application and is responsible for bootstrapping and launching the Spring Boot application.
DemoApplication.java
package com.example.chatgptapi.demo;

import org.springframework.boot.SpringApplication;
import org.springframework.boot.autoconfigure.SpringBootApplication;

@SpringBootApplication
public class DemoApplication {

    public static void main(String[] args) {
        SpringApplication.run(DemoApplication.class, args);
    }

}
3.5 Thymeleaf Template
Create Thymeleaf templates in the src/main/resources/templates directory. The template will retrieve the messages attribute to display the data returned by the controller class.
index.html
<!DOCTYPE html>
<html xmlns:th="http://www.thymeleaf.org" lang="en">
<head>
    <title<Chatbot>/title>
</head>
<body>
<div id="chat">
    <div id="chat-box">
        <div th:each="message : ${messages}" th:text="${message}"></div>
    </div>
    <label for="user-input"></label>
    <input type="text" id="user-input" placeholder="Type a message..." />
    <button id="send-button">Send</button>
</div>
</body>
</html>
You’re free to add CSS changes as per your requirements.
4. Run the Application
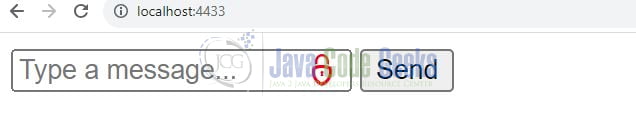
You can now run your Spring Boot application by running the DemoApplication.java class. When you access http://localhost:4433/ in the browser, the index.html template will be rendered and the chat application will be available for testing.
5. Conclusion
Building a simple chatbot using Spring Boot, Thymeleaf, and the ChatGPT API can enhance user engagement and provide automated support on web applications. This technology combination allows developers to create intelligent chatbots capable of understanding and responding to user queries effectively.
6. Download the Project
This was a tutorial to play with the Chat GPT platform and integrate it with Spring Boot and Thymeleaf.
You can download the full source code of this example here: Spring Chatbot with ChatGPT
