1. Introduction
In this is tutorial, we will see how to combine a web-based Spring application and a React front-end to work with together. We will build a full stack web application to understand this process.
2. What is React-Spring?
Spring is an MVC framework used to develop web applications, and it is one of the most popular development frameworks for enterprise Java. The Spring framework makes web development more accessible, and we use Spring for web-based CRUD applications. We see one such example shortly.
To develop the frontend, one of the most popular frameworks is React.js. It is an open-source Javascript library used for creating user interfaces and components.
We can integrate or use React.js and Spring together very quickly to produce a web app with a strong backend and robust frontend.
3. Installation
For building a project using Spring and React, we need the following softwares
- Java version 8 or more. To download Java, please visit the <a href=”http://Java Downloads Page.
- Node.js version 8 or more. To download, visit the Node.js downloads page.
- Your Favorite IDE like Eclipse or Visual Studio Code. We are using Visual Studio Code in this example. Visual Studio Code download link is available here.
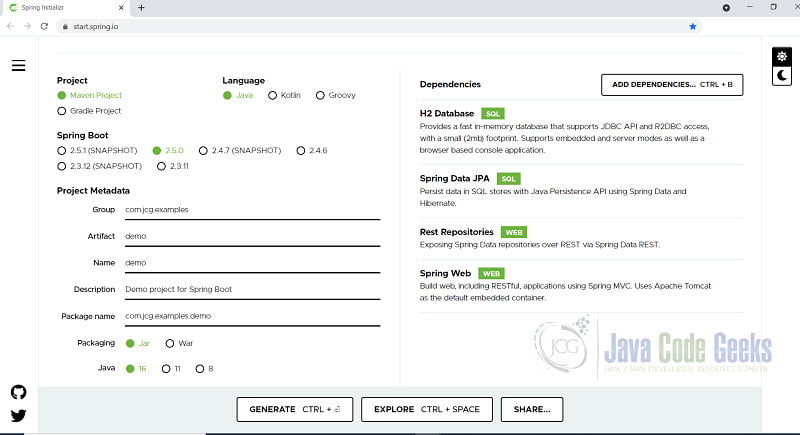
We also use the Spring initializer to generate a Spring project. We add the following dependencies to the project:
- H2 database, which is an in-memory database.
- Spring Data JPA
- Web
4. Example Code
To understand how to use Spring and React to work with each other, we shall build a simple application for a Book Management System. We shall only build the Read part of the Book Management System.
Open the project in the Visual Studio Code.
- Create a simple class for a Book which had the 2 variables id and name and generate getter-setters.
- Create a Controller file called BookController.java. The Book Controller is as follows:
BookController.java
package com.jcg.examples.demo.books;

import java.util.Collection;
import java.util.stream.Collectors;

import org.springframework.web.bind.annotation.GetMapping;
import org.springframework.web.bind.annotation.RestController;


@RestController

public class BookController {
    private BookRepository repository;

    public BookController(BookRepository repository) {
        this.repository = repository;
    }

    @GetMapping("/good-books")

    public Collection goodBooks() {
        return repository.findAll().stream()
                .filter(this::isAvailable)
                .collect(Collectors.toList());
    }

    private boolean isAvailable(Book Book) {
        return !Book.getName().equals("Les Miserables") &&
                !Book.getName().equals("The History of the World");
    }
}
- Create a Repository class and add the
@RepositoryRestResourceannotation to the class to expose the CRUD operations as Rest endpoints. - We also add a Command-line runner to get output to the screen.
- Building the project and running shows the following output on the screen:

- To create a new React project inside the Spring project repository, we trigger the command:
create-react-app client --scripts-version=react-scripts-ts
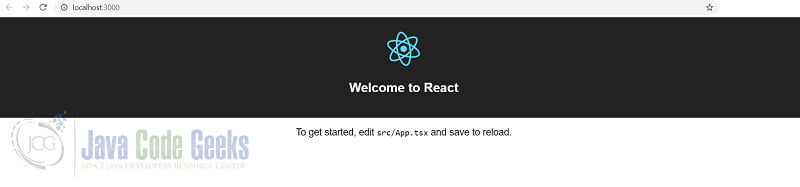
This step creates a client folder under the root of the Spring project. If we change into the client folder and run the command:
npm start
it will show the main react page as follows:
To connect the React application with the Spring application, we add the componentDidMount() and change the render in the App.tsx file. In the App.tsx file, we also add the interfaces and constructors.
App.tsx
import * as React from 'react';
import './App.css';

import logo from './logo.svg';

interface Book {
  id: number;
  name: string;
}

interface AppProps {
}

interface AppState {
  books: Array;
  isLoading: boolean;
}

class App extends React.Component {

  constructor(props: AppProps) {
    super(props);

    this.state = {
      books: [],
      isLoading: false
    };
  }

  componentDidMount() {
    this.setState({ isLoading: true });

    fetch('http://localhost:4000/good-books')
      .then(response => response.json())
      .then(data => this.setState({ books: data, isLoading: false }));
  }

  render() {
    const { books, isLoading } = this.state;

    if (isLoading) {
      return <p>Loading...</p>;
    }

    return (
      <div className="App">
        <header className="App-header">
          <img src={logo} className="App-logo" alt="logo" />
          <h1 className="App-title">Welcome to React</h1>
        </header>
        <div>
          <h2>Book List</h2>
          {books.map((book: Book) =>
            <div key={book.id}>{book.name}</div>
          )}
        </div>
      </div>
    );
  }
}


export default App;
Since we are essentially joining the output from the localhost for the Spring application to the output of the React application, we get a CORS exception. To overcome the CORS exception, we do the following :
In our Spring Controller, we need to add the @CrossOrigin annotation. The Controller now looks as follows:
BookController.java
package com.jcg.examples.demo.books;

import java.util.Collection;
import java.util.stream.Collectors;

import org.springframework.web.bind.annotation.GetMapping;
import org.springframework.web.bind.annotation.RestController;
import org.springframework.web.bind.annotation.CrossOrigin;

@RestController

public class BookController {
    private BookRepository repository;

    public BookController(BookRepository repository) {
        this.repository = repository;
    }

    @GetMapping("/good-books")
    @CrossOrigin(origins = "http://localhost:3000")
    public Collection goodBooks() {
        return repository.findAll().stream()
                .filter(this::isAvailable)
                .collect(Collectors.toList());
    }

    private boolean isAvailable(Book Book) {
        return !Book.getName().equals("Les Miserables") &&
                !Book.getName().equals("The History of the World");
    }
}
After this step, rebuild the code, clear the browser cache and restart the server. Now, we should see the output as follows:
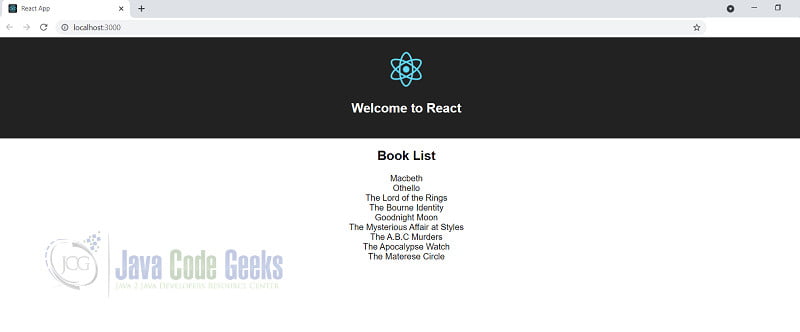
We have just created a Spring and React application. We can add functionality for inserting records, updating records etc.
5. Summary
In this article, we saw how to combine React and Spring and build a full-stack web app. We can also do the same using Springboot as well. React and Spring for Java is an excellent choice for building full-stack web-based applications.
6. Download the Source Code
The attached code is for the Simple Spring application with react.js as the frontend. The attached code contains only the source folders and the pom.xml file.
You can download the full source code of this example here: React Spring Tutorial
