Hello in this tutorial, we will understand how to create a RESTful API in a Node.js environment running on an Express.js server and using a PostgreSQL database. The tutorial will cover the CRUD operations on the API which will execute the corresponding database commands.
1. Introduction
RESTful API stands for the standard web service interface used by the applications to communicate with each other. This API conforms to the REST architectural style and constraints. It is scalable, stateless, cacheable, and has a uniform interface. It utilizes HTTP requests and the four most common HTTP methods are POST, PUT, GET, and DELETE. Express.js on the other hand is the most popular Node.js web framework that provides a robust set of features to develop web and mobile applications. It offers features like –
- Set up middleware to respond to HTTP requests
- Defines the routing table to perform different actions based on HTTP methods
- Allows to render HTML pages dynamically
1.1 Setting up Node.js
To set up Node.js on windows you will need to download the installer from this link. Click on the installer (also include the NPM package manager) for your platform and run the installer to start with the Node.js setup wizard. Follow the wizard steps and click on Finish when it is done. If everything goes well you can navigate to the command prompt to verify if the installation was successful as shown in Fig. 1.

1.2 Setting up PostgreSQL server
To start with the tutorial, I am hoping that you have the PostgreSQL up and running in your localhost environment. For easy setup, I have the server up and running on the docker environment. You can execute the below command to get the container running on docker in minutes. Make note –
- PostgreSQL server docker command will contain the
postgresuser password
Docker commands
-- run the postgresql container --
docker run -d -p 5433:5432 -e POSTGRES_PASSWORD=password --name postgres postgres
If everything goes well the container would be started successfully as shown in Fig. 2. You can use the docker ps -a command to confirm the status. For further information on docker basics, you can navigate to this tutorial.

1.3 Setting up a table in PostgreSQL
To work with the CRUD operation we will need to create a table so that we can persist the data and can also retrieve it. For this, we will use the pgAdmin interface. Open the interface and enter the Hostname, Port, and Postgres user credentials to connect to the server. After successful authentication, use the below SQL script to create the mock data in a new database.
Users.sql
-- create database --
create database test;

-- create table --
create table users (
	id SERIAL PRIMARY KEY,
	first_name VARCHAR(100),
	last_name VARCHAR(100),
	email VARCHAR(100),
	gender VARCHAR(100),
	phone VARCHAR(100)
);

-- insert data into table --
insert into users (first_name, last_name, email, gender, phone) values ('Melita', 'Coleborn', 'mcoleborn0@yahoo.com', 'F', '932-150-0885');
insert into users (first_name, last_name, email, gender, phone) values ('Errol', 'Konzelmann', 'ekonzelmann1@goo.gl', 'M', '693-288-6973');
insert into users (first_name, last_name, email, gender, phone) values ('Giraud', 'Jost', 'gjost2@abc.net.au', 'M', '613-303-3178');
insert into users (first_name, last_name, email, gender, phone) values ('Nadine', 'Wolfenden', 'nwolfenden3@photobucket.com', 'F', '167-176-7986');
insert into users (first_name, last_name, email, gender, phone) values ('Rossy', 'Holt', 'rholt4@economist.com', 'M', '474-789-2730');

-- view data --
select * from users;
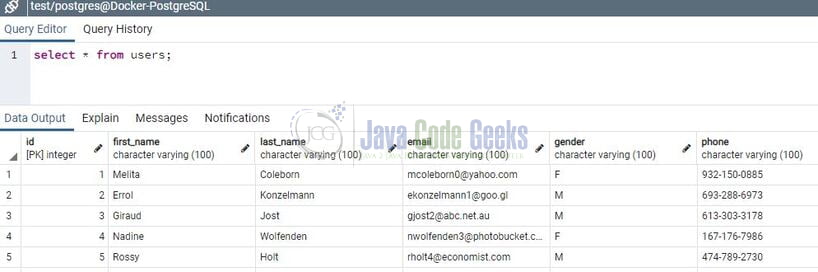
If everything goes well the mock data will be created as shown in Fig. 3.
2. PostgreSQL with Node.js and Express.js tutorial
At this point, we have successfully created the initial data required for our application. Now to set up the Node.js app and Express.js server we will need to navigate to a path where our project will reside in. For programming stuff, I am using Visual Studio Code as my preferred IDE. You’re free to choose the IDE of your choice.
2.1 Setting up dependencies
Navigate to the project directory and run npm init -y to create a package.json file. This file holds the metadata relevant to the project and is used for managing the project dependencies, script, version, etc. Add the following code to the file wherein we will specify the Express.js, Node-Postgres (pg) client, and Nodemon (Tool to speed up the Node.js applications development by automatically restarting the node application when file changes are detected in the directory) dependencies.
package.json
{
  "name": "node-postgres",
  "version": "1.0.0",
  "description": "",
  "main": "index.js",
  "scripts": {
    "test": "echo \"Error: no test specified\" && exit 1",
    "start": "node index.js"
  },
  "keywords": [],
  "author": "",
  "license": "ISC",
  "dependencies": {
    "express": "^4.17.1",
    "pg": "^8.6.0",
    "nodemon": "^2.0.7"
  }
}
To download the dependencies navigate to the directory path containing the file and use the npm install command. If everything goes well the dependencies will be loaded inside the node_modules folder and you are good to go with the further steps.
2.2 Creating a db seed file
Create a db seed file in the src/controller folder that will be used to perform the CRUD operations in the database. The file will require the pg module to create a pool of connections and will consist of different functions corresponding to each application endpoint i.e.
| HTTP method | Application endpoint | Db seed method |
|---|---|---|
| GET | / | index |
| GET | /health | health |
| GET | /users | getUsers |
| GET | /users/:id | getUserById |
| POST | /users | save |
| DELETE | /users/:id | deleteUser |
| PUT | /users/:id | updateUser |
Add the following code to the db seed file and you are free to change these details as per your application or database configuration setup.
apis.js
// importing module
const { Pool } = require('pg');
// db configuration
const pool = new Pool({
    host: 'localhost',
    user: 'postgres',
    password: 'password',
    database: 'test',
    port: 5433
});

// basic endpoint

const index = (request, response) => {
    response.status(200).json({ info: 'Application started successfully' });
};

// health check endpoint

const health = (request, response) => {
    pool.query('SELECT NOW()', (err, results) => {
        error(err, response);
        response.status(200).json({ info: 'Database is up and running' });
    });
};

// application endpoints

// get all users
const getUsers = (request, response) => {
    console.log('Getting all users');
    pool.query('SELECT * FROM users', (err, results) => {
        error(err, response);
        response.status(200).json({ info: results.rows });
    });
};

// get user by id
const getUserById = (request, response) => {
    const id = parseInt(request.params.id)
    console.log('Get user id = ' + id);
    pool.query('SELECT * FROM users WHERE id = $1', [id], (err, results) => {
        error(err, response);
        response.status(200).json({ info: results.rows });
    });
};

// save new user
const save = (request, response) => {
    console.log('Saving new user');
    const { firstName, lastName, email, gender, phone } = request.body
    pool.query('INSERT INTO users (first_name, last_name, email, gender, phone) VALUES ($1, $2, $3, $4, $5) RETURNING *',
        [firstName, lastName, email, gender, phone], (err, results) => {
            error(err, response);
            response.setHeader('created_id', `${results.rows[0].id}`);
            response.status(201).json({ info: 'Resource created successfully' });
        });
};

// delete user by id
const deleteUser = (request, response) => {
    const id = parseInt(request.params.id);
    console.log('Delete user id = ' + id);
    pool.query('DELETE FROM users WHERE id = $1', [id], (err, results) => {
        error(err, response);
        if (results.rowCount == 0)
            response.status(400).json({ info: 'Resource not found' });
        else
            response.status(200).json({ info: `Resource deleted with id: ${id}` });
    });
};

// update user by id
// db part skipped for brevity. you are free to play around
const updateUser = (request, response) => {
    const id = parseInt(request.params.id);
    console.log('Update user id = ' + id);
    response.status(204).json({ info: `Resource updated with id: ${id}` });
};

// helper method
function error(err, response) {
    if (err) {
        // console.log(err);
        response.status(503).json({ info: 'Some internal server error occurred' });
    }
}

module.exports = {
    index,
    health,
    getUsers,
    getUserById,
    save,
    deleteUser,
    updateUser
};
2.3 Creating an index file
Create an index file that will act as an entry point for our server. The file will require the express module and exported functions from apis.js file. In this file, we will set the HTTP request method for each endpoint and map it to a relevant function.
index.js
const express = require('express');
const api = require("./src/controller/apis");
const app = express();
const port = 10091;

app.use(express.json());

// url - http://localhost:10091/
app.get('/', api.index);

// url - http://localhost:10091/health
app.get('/health', api.health);

// url - http://localhost:10091/users
app.get('/users', api.getUsers);

// url - http://localhost:10091/users/2
app.get('/users/:id', api.getUserById);

// url - http://localhost:10091/users
// sample request body
/*
{
    "firstName": "John",
    "lastName": "Doe",
    "email": "john.doe@gupshup.com",
    "gender": "F",
    "phone": "860-861-4604"
}
*/
app.post('/users', api.save);

// url - http://localhost:10091/users/10
app.delete('/users/:id', api.deleteUser)

// url - http://localhost:10091/users/10
// sample request body
/*
{
    "firstName": "Radhe Shyam",
    "lastName": "Tiwari",
    "email": "radhe-shyam.tiwari@gupshup.com",
    "gender": "M",
    "phone": "727-213-8139"
}
*/
app.put('/users/:id', api.updateUser);

app.listen(port, () => {
    console.log(`Application listening on port ${port}`)
});
3. Run the Application
To run the application navigate to the project directory and enter the following command as shown in Fig. 4. If everything goes well the application will be started successfully on port number 10091.

4. Project Demo
When the application is started, open the Postman tool to hit the application endpoints. You are free to choose any tool of your choice.
Application endpoints
-- HTTP GET endpoints --
// url - http://localhost:10091/
// url - http://localhost:10091/health
// url - http://localhost:10091/users
// url - http://localhost:10091/users/2

-- HTTP POST endpoint --
// url - http://localhost:10091/users
// sample request body
/*
{
    "firstName": "John",
    "lastName": "Doe",
    "email": "john.doe@gupshup.com",
    "gender": "F",
    "phone": "860-861-4604"
}
*/

-- HTTP DELETE endpoint --
// url - http://localhost:10091/users/5

-- HTTP PUT endpoint --
// url - http://localhost:10091/users/4
// sample request body
/*
{
    "firstName": "Radhe Shyam",
    "lastName": "Tiwari",
    "email": "radhe-shyam.tiwari@gupshup.com",
    "gender": "M",
    "phone": "727-213-8139"
}
*/
Similarly, you can create other endpoints like /deleteall to delete all records from the table and many others. That is all for this tutorial and I hope the article served you with whatever you were looking for. Happy Learning and do not forget to share!
5. Summary
In this tutorial, we learned:
- Introduction to RESTful API and Express.js
- Steps to setup Node.js and start PostgreSQL server using Docker
- Steps to create mock data using a simple SQL file
- Sample programming stuff to perform CRUD operations using RESTful endpoints via Express.js
You can download the source code of this tutorial from the Downloads section.
6. Download the Project
This was a programming tutorial on PostgreSQL with Node.js and Express.js.
You can download the full source code of this example here: PostgreSQL with Node.js and Express.js

Thanks.