In this article, we will demonstrate how to migrate an application from Java SE 8 to Java SE 13.
1. Introduction
Oracle began a six-month release cadence for Java Standard Edition starting with Java 10. Instead of being major version releases, they are instead “feature releases”. This release cycle is in the spirit of Continuous Integration / Continuous Deployment and will benefit many projects, as they can be upgraded to the next release with less risk and fewer code changes. Although many projects have been developed with the newer versions, Java 8 SE is still the most used version.
Since Oracle stopped supporting Java 8 in January of 2019 (except for businesses that have a commercial license) now may be a good time to migrate your applications to Java 11 (the latest release that provides Long Term Support) or to a later Java release. (Or you may just want to take advantage of the new language features available in later releases.) Java is a very backward compatible language and in general, requires little or no effort to upgrade your application. If your application uses Java technologies that have been removed from Java SE (e.g. Java EE modules) or older third-party libraries, additional steps may be required.
In this article, we will demonstrate how to migrate an application from Java 8 to Java 13.
1.1 Tools Used in this Example
- Eclipse IDE for Enterprise Java Developers Version: 2019-12 (4.14.0)
- Maven Integration for Eclipse: Version 1.15.0.20200120-1354
- IBM WebSphere Application Server Migration Toolkit: Version 3.24.0.v20200305_1150
2. Migrating from Java 8 to Java 13
2.1 Setup the Environment
Start by downloading the Java JDK 13 from the Oracle website. https://www.oracle.com/java/technologies/javase-jdk13-downloads.html
Next, follow the instructions in the Installation Guide from the Oracle website. https://docs.oracle.com/en/java/javase/13/install/overview-jdk-installation.html#GUID-8677A77F-231A-40F7-98B9-1FD0B48C346A
To configure Java 13 in Eclipse, select Preferences from the menu and type “jre” in the search box. Select Installed JREs from the result list.
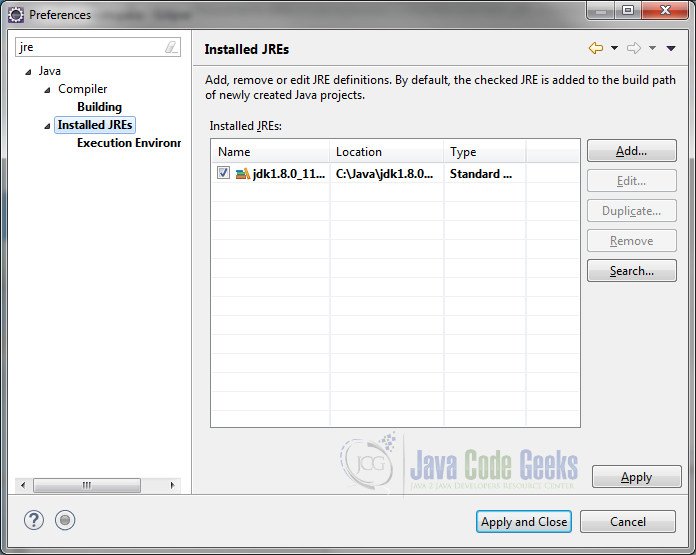
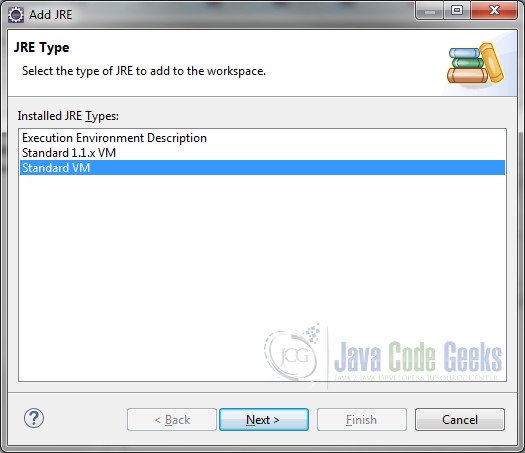
Click on the Add… button. In the JRE Type dialog window, select Standard VM and click Next.
Click on the Directory… button and browse to the directory where you installed the Java 13 JDK.

Click Finish and Apply and Close.
In this example, we will use a trivial SOAP-based web service to demonstrate the issues you may encounter when migrating a Java 8 application to Java 13 and how to address them. Note that this application was developed using the latest version of Java 8 SE available here: https://www.oracle.com/java/technologies/javase-jdk8-downloads.html
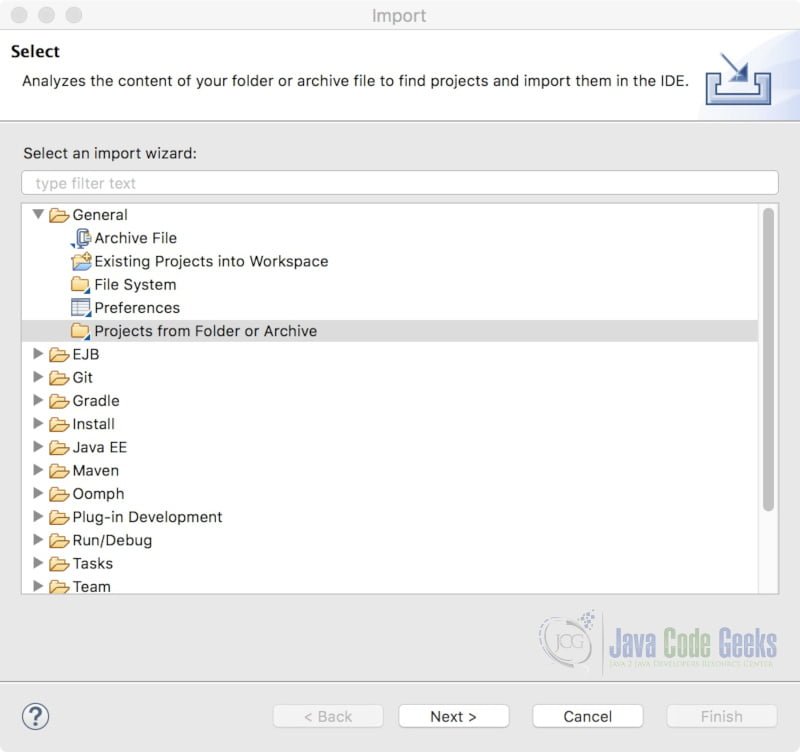
Begin by downloading the Migrating from Java 8 to Java 13 zip from the download section and extracting it to a folder of your choice. To import the sample project, click File -> Import… and select Projects from Folder or Archive under General. Click Next.
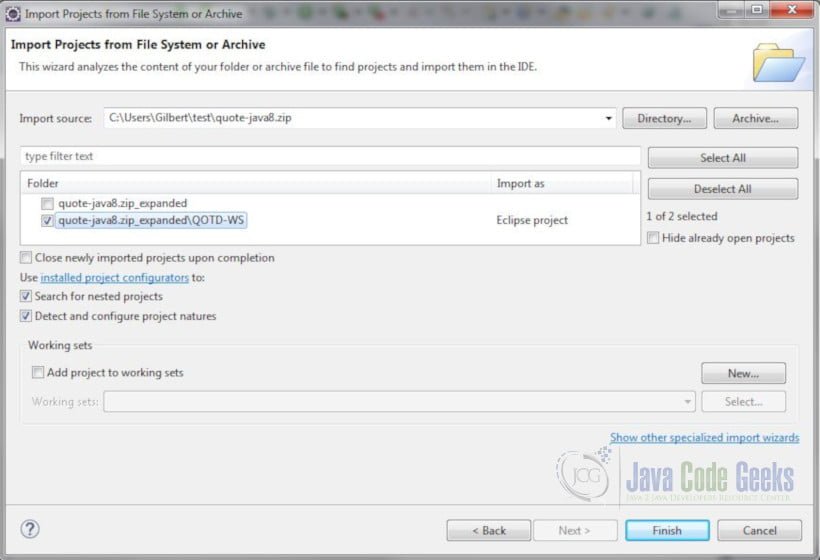
Click on the Archive… button and select the quote-java8.zip file from the folder where the archive was extracted. Select the Eclipse project from the list and click Finish.
2.2 Compile the Application Using JDK 13
Open pom.xml. You will notice that the project is using the Maven compiler plugin at version 3.8.1 for building the project and that it is configured to use Java 8. Let’s change it to use Java 13. Modify the source and target elements as follows:
pom.xml
<project xmlns="http://maven.apache.org/POM/4.0.0"
	xmlns:xsi="http://www.w3.org/2001/XMLSchema-instance"
	xsi:schemaLocation="http://maven.apache.org/POM/4.0.0 https://maven.apache.org/xsd/maven-4.0.0.xsd">
	<modelVersion>4.0.0</modelVersion>
	<groupId>com.javacodegeeks.examples</groupId>
	<artifactId>QOTD-WS</artifactId>
	<version>0.0.1-SNAPSHOT</version>
	<name>QOTD-WS</name>
	<build>
		<pluginManagement>
			<plugins>
				<plugin>
					<groupId>org.apache.maven.plugins</groupId>
					<artifactId>maven-compiler-plugin</artifactId>
					<version>3.8.1</version>
					<configuration>
						<source>13</source>
						<target>13</target>
					</configuration>
				</plugin>
			</plugins>
		</pluginManagement>
		<finalName>${project.artifactId}</finalName>
	</build>
</project>
Save the changes and select Maven->Update Project from the project context menu. Select your project from “Available Maven Codebases”. Leave the other defaults and click OK.
At this point, you will see many errors in the Markers view stating that several variables, types, imports and annotations cannot be resolved. This is because the following technologies and packages were removed in Java SE 11:
- JAXB –
javax.xml.bind.* - JAX-WS –
javax.jws, javax.jws.soap, javax.xml.soap, and javax.xml.ws.* - Commons Annotation –
javax.annotation
Other technologies and packages were removed as well:
- Java Transaction API (JTA) –
javax.transaction - JavaBeans Activation Framework (JAF) –
javax.activation - CORBA –
javax.activity, javax.rmi, javax.rmi.CORBA, and org.omg.*
There may be options available to resolve missing JEE module
issues, depending on how your application is packaged. For instance:
- You can package the missing libraries in your application
- You can let the application server provide the missing libraries if available
- You can change your code to use alternative APIs
We will use the first option in our example.
2.3 Add Dependencies
Open the pom.xml file and the source following dependencies, just below the ending </build> tag:
pom.xml
<dependencies>
	<dependency>
		<groupId>javax.xml.bind</groupId>
		<artifactId>jaxb-api</artifactId>
		<version>2.3.1</version>
	</dependency>
	<dependency>
		<groupId>javax.xml.ws</groupId>
		<artifactId>jaxws-api</artifactId>
		<version>2.3.1</version>
	</dependency>
	<dependency>
		<groupId>com.sun.xml.ws</groupId>
		<artifactId>jaxws-rt</artifactId>
		<version>2.3.2</version>
	</dependency>
</dependencies>
This will add JAXB and
JAX-WS APIs as external libraries in the project. We also added the JAX-WS
runtime library to the project.
jaxws-rt contains the JAXB runtime. If you wanted to use JAXB only you can use the following dependencies:
<dependencies>
	<dependency>
		<groupId>javax.xml.bind</groupId>
		<artifactId>jaxb-api</artifactId>
		<version>2.3.1</version>
	</dependency>
	<dependency>
	    <groupId>org.glassfish.jaxb</groupId>
	    <artifactId>jaxb-runtime</artifactId>
	    <version>2.3.1</version>
	</dependency>
</dependencies>
2.4 Update Third-Party Libraries
If your application uses third-party libraries, you may have to use an updated version of the library that supports JDK 13. Our sample application does not use any third-party libraries.
2.5 Compile Updated Application
Save the file. Maven will download the required libraries and the project will be recompiled. Consequently, the compile errors will get resolved.
2.6 Run the Application
Expand com.javacodegeeks.examples.endpoint under src/main/java. Right-click RandomQuotePublisher and select Run As -> Java Application. Once the application starts, you will see the following warnings:
WARNING: An illegal reflective access operation has occurred
WARNING: Illegal reflective access by org.glassfish.pfl.basic.reflection.Bridge$1 (file:/C:/Users/Gilbert/.m2/repository/org/glassfish/pfl/pfl-basic/4.0.1/pfl-basic-4.0.1.jar) to method java.io.ObjectInputStream.latestUserDefinedLoader()
WARNING: Please consider reporting this to the maintainers of org.glassfish.pfl.basic.reflection.Bridge$1
WARNING: Use --illegal-access=warn to enable warnings of further illegal reflective access operations
WARNING: All illegal access operations will be denied in a future release
...
- The first line indicates that one library (JAR file) in your classpath made an illegal reflective access operation. (Some libraries use reflection to access elements of the JDK that are meant for internal use only.) It is partly for this reason (encapsulation of internal APIs) that the platform decided to modularize Java 9.
- The second line displayes the JAR file whose code used reflection to access an internal element of the JDK and the name of the element itself.
- The third line suggests that you inform the maintainer of the library so that they can make the required changes. Of course, there is no guarantee that they will go through the effort.
- The fourth line shows the option to use to view all illegal reflective access violations. (By default, only the first violation is shown.)
- The last warning informs you that all illegal access operations will be denied in a future release.
Let’s see a list of all illegal reflection access violations. Right-click RandomQuotePublisher and select Run as > Run configurations… and select the (x)= Arguments tab. In the VM arguments text box, enter –illegal-access=warn and click the Apply button.
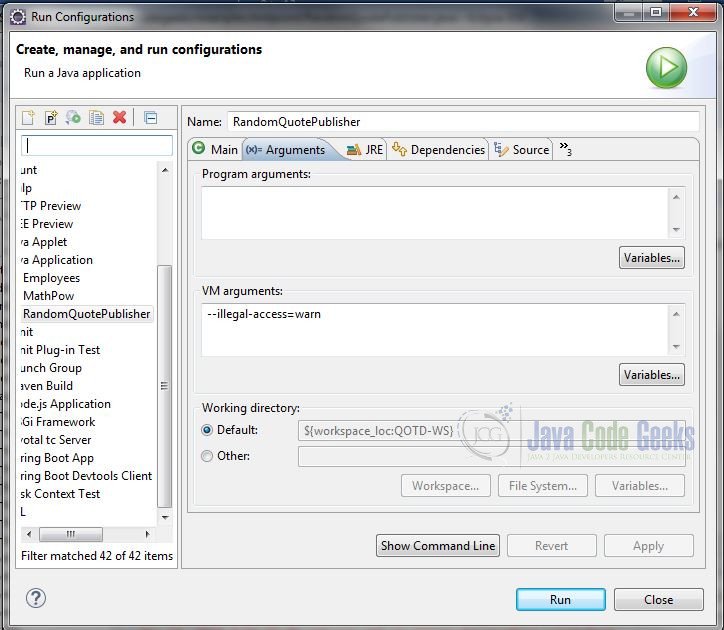
Click the Run button. When the application starts, you will see the list of all illegal reflective access operations:
WARNING: Illegal reflective access by org.glassfish.pfl.basic.reflection.Bridge$1 (file:/C:/Users/Gilbert/.m2/repository/org/glassfish/pfl/pfl-basic/4.0.1/pfl-basic-4.0.1.jar) to method java.io.ObjectInputStream.latestUserDefinedLoader()
WARNING: Illegal reflective access by org.glassfish.pfl.basic.reflection.Bridge$2 (file:/C:/Users/Gilbert/.m2/repository/org/glassfish/pfl/pfl-basic/4.0.1/pfl-basic-4.0.1.jar) to constructor java.io.OptionalDataException(boolean)
WARNING: Illegal reflective access by org.glassfish.pfl.basic.reflection.BridgeBase (file:/C:/Users/Gilbert/.m2/repository/org/glassfish/pfl/pfl-basic/4.0.1/pfl-basic-4.0.1.jar) to field javax.management.openmbean.SimpleType.myHashCode
WARNING: Illegal reflective access by org.glassfish.pfl.basic.reflection.BridgeBase (file:/C:/Users/Gilbert/.m2/repository/org/glassfish/pfl/pfl-basic/4.0.1/pfl-basic-4.0.1.jar) to field javax.management.openmbean.SimpleType.myToString
WARNING: Illegal reflective access by org.glassfish.pfl.basic.reflection.BridgeBase (file:/C:/Users/Gilbert/.m2/repository/org/glassfish/pfl/pfl-basic/4.0.1/pfl-basic-4.0.1.jar) to field javax.management.openmbean.OpenType.className
WARNING: Illegal reflective access by org.glassfish.pfl.basic.reflection.BridgeBase (file:/C:/Users/Gilbert/.m2/repository/org/glassfish/pfl/pfl-basic/4.0.1/pfl-basic-4.0.1.jar) to field javax.management.openmbean.OpenType.description
WARNING: Illegal reflective access by org.glassfish.pfl.basic.reflection.BridgeBase (file:/C:/Users/Gilbert/.m2/repository/org/glassfish/pfl/pfl-basic/4.0.1/pfl-basic-4.0.1.jar) to field javax.management.openmbean.OpenType.typeName
WARNING: Illegal reflective access by org.glassfish.pfl.basic.reflection.BridgeBase (file:/C:/Users/Gilbert/.m2/repository/org/glassfish/pfl/pfl-basic/4.0.1/pfl-basic-4.0.1.jar) to field javax.management.openmbean.OpenType.isArray
WARNING: Illegal reflective access by org.glassfish.pfl.basic.reflection.BridgeBase (file:/C:/Users/Gilbert/.m2/repository/org/glassfish/pfl/pfl-basic/4.0.1/pfl-basic-4.0.1.jar) to field javax.management.openmbean.OpenType.descriptor
WARNING: Illegal reflective access by org.glassfish.pfl.basic.reflection.BridgeBase (file:/C:/Users/Gilbert/.m2/repository/org/glassfish/pfl/pfl-basic/4.0.1/pfl-basic-4.0.1.jar) to field java.lang.reflect.Executable.hasRealParameterData
WARNING: Illegal reflective access by org.glassfish.pfl.basic.reflection.BridgeBase (file:/C:/Users/Gilbert/.m2/repository/org/glassfish/pfl/pfl-basic/4.0.1/pfl-basic-4.0.1.jar) to field java.lang.reflect.Executable.parameters
WARNING: Illegal reflective access by org.glassfish.pfl.basic.reflection.BridgeBase (file:/C:/Users/Gilbert/.m2/repository/org/glassfish/pfl/pfl-basic/4.0.1/pfl-basic-4.0.1.jar) to field java.lang.reflect.Executable.declaredAnnotations
M
To suppress warning messages, use the --add-opens option of the java command. Here is the syntax:
java --add-opens <module>/<package>=$readingmodule
For example:
java --add-opens java.base/java.io=ALL-UNNAMED
Here we are specifying that the package java.io from module java.base will be accessible to all code in the classpath. You can specify that only a specific module can access the package for finer-grained control by replacing ALL-UNNAMED with a specific module name. (Since this is a small application, there is no real need to modularize it.)
Let’s suppress all the warnings for our application. Right-click RandomQuotePublisher and select Run as > Run configurations… and select the (x)= Arguments tab. In the VM arguments text box, replace the current contents with --add-opens java.base/java.io=ALL-UNNAMED --add-opens java.base/java.lang.reflect=ALL-UNNAMED --add-opens java.management/javax.management.openmbean=ALL-UNNAMED and click the Apply button.
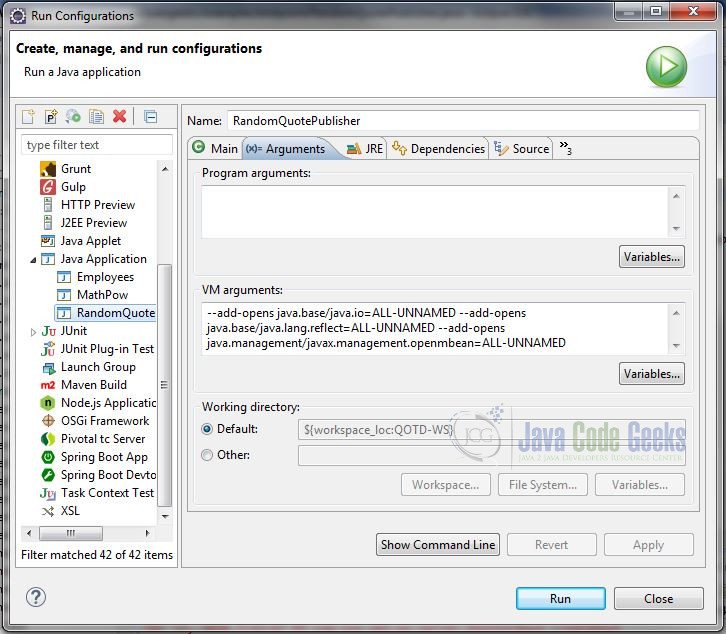
Click the Run button. The application will start and all warning messages will be suppressed.
2.7 WebSphere Application Server Migration Toolkit
There is an Eclipse plugin tool named “IBM WebSphere Application Server Migration Toolkit” that can help identify migration issues. (Note that this tool does not depend on any application server for our specific purpose.) Let’s see how we can use it to analyze our project.
Start by installing the toolkit. Select Eclipse Marketplace… from the Help menu and search for “IBM WebSphere Application Server Migration Toolkit”.
Once installed, right-click the project and select Software Analyzer -> Software Analyzer Configurations… (If you followed the previous steps, you will need to delete the project and re-import it as we need to start with the Java 8 version of the application.)
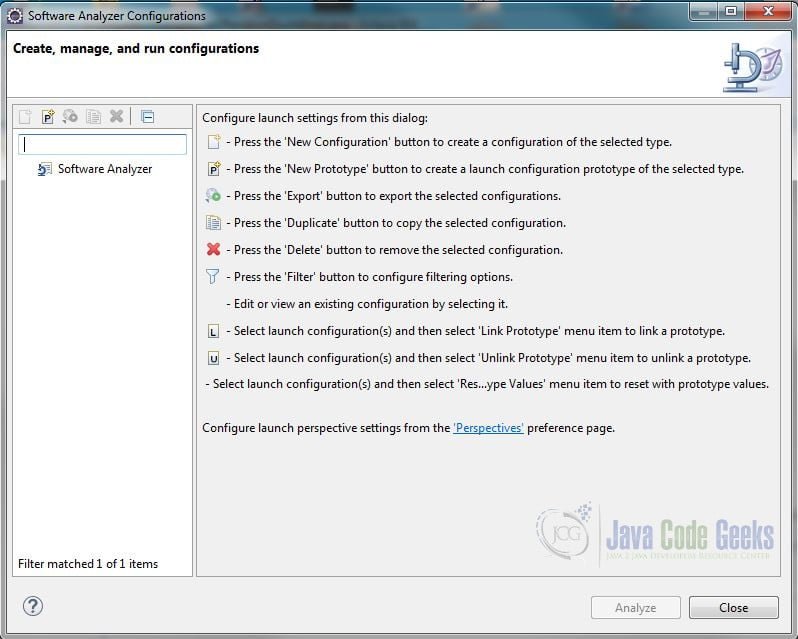
Select Software Analyzer from the list and press the ‘New Configuration’ button. Enter a name for the configuration. In the Scope tab, select the Analyze selected projects radio button and select the QOTD-WS project.

Select the Rules tab. Select WebSphere Application Server Version Migration from the Rule Sets drop-down menu and click the Set… button next to it. Select Liberty for both the source and target application server. Select Oracle Java 8 for the Source Java version and Java 13 (non-LTS) for the Target Java version.
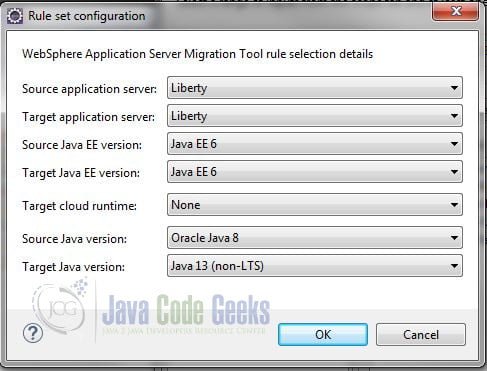
Click OK. This will automatically select the relevant rules in the Analysis Domains.
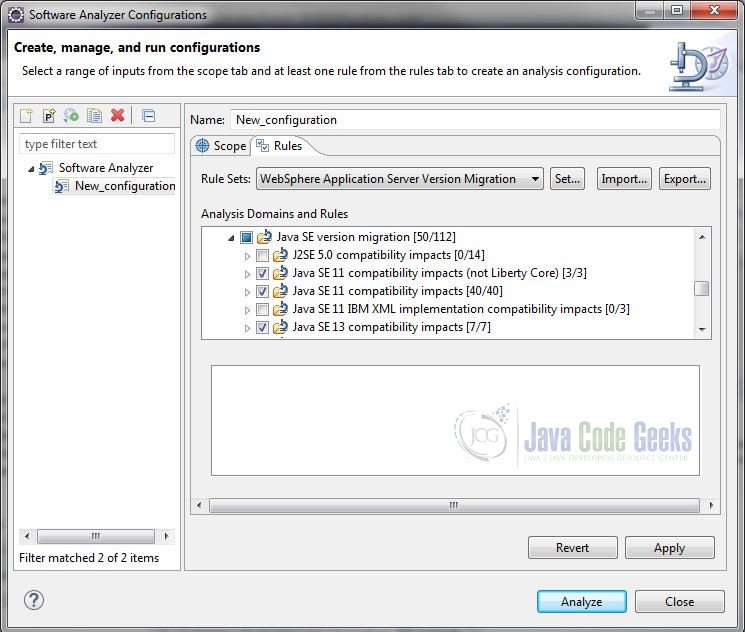
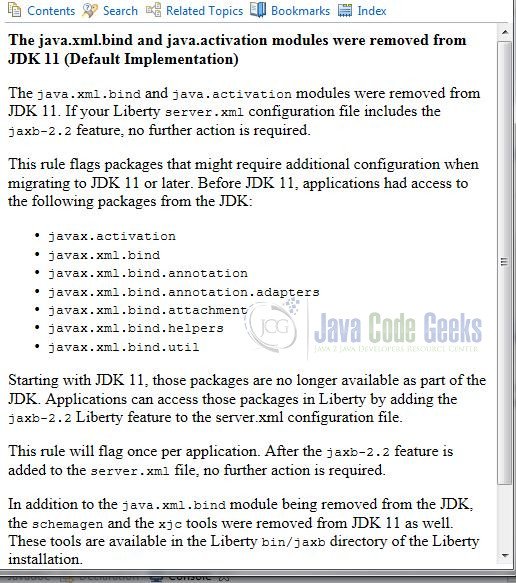
If you want to learn more about a specific rule, select it from the list and click the help button (the question mark in the lower-left corner of the window). In the Help section, click on Detailed Help.
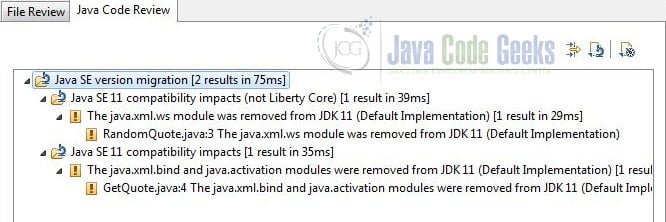
Click the Apply button and click the Analyze button. You can view the results in the Software Analyzer Results view.
3. Summary
In this article, we will described the steps to migrate an application from Java SE 8 to Java SE 13. We also provided a short tutorial on how to use the migration tool to provide insights on migration issues.
4. Download the Source Code
This was a “Migrating from Java 8 to Java 13” example.
You can download the full source code of this example here:
Migrating from Java 8 to Java 13
