This is a tutorial about Java Spring Boot which makes it easy to create stand-alone, production-grade Spring-based Applications that you can “just run”. It takes an opinionated view of the platform and third-party libraries so you can get started with minimum fuss.
You can also check this tutorial in the following video:
1. Introduction
Spring boot is used to create stand-alone Spring applications. It has an embedded Tomcat/Jetty server so we don’t need to deploy the application explicitly. It provides opinionated ‘starter’ dependencies to simplify build configuration. It also provides production-ready features such as metrics, health checks, and externalized configuration.
Spring Boot offers a fast way to build applications. It looks at your classpath and at the beans you have configured, makes reasonable assumptions about what you are missing, and adds those items. With Spring Boot, you can focus more on business features and less on infrastructure. Furthermore it does not generate code or make edits to your files. Instead, when you start your application, dynamically wires up beans and settings and applies them to your application context.
2. Advantages
Some of the main advantages are listed below:
- It reduces the time spent on development and increases the overall efficiency of the development team.
- The integration of Spring Boot with the Spring ecosystem which includes Spring Data, Spring Security, Spring ORM, and Spring JDBC is easy.
- Comes with embedded HTTP servers like Jetty and Tomcat to test web applications.
- Helps to avoid all the manual work of writing boilerplate code, annotations, and complex XML configurations.
- We can quickly set up and run standalone, web applications, and microservices at very less time.
3. Disadvantages
- Lack of control. Lots of things are done behind the scene.
- May unnecessarily increase the deployment binary size with unused dependencies.
- Turning legacy spring applications into Spring boot requires a lot of effort and a time-consuming process.
4. Microservice
Microservices architecture refers to a technique that gives modern developers a way to design highly scalable, flexible applications by decomposing the application into discrete services that implement specific business functions. These services, often referred to as “loosely coupled,” can then be built, deployed, and scaled independently.
Each service communicates with other services, through standardised application programming interfaces (APIs), enabling the services to be written in different languages or on different technologies. This differs completely from systems built as monolithic structures where services were inextricably interlinked and could only be scaled together.
5. Java Spring Boot Starter
Spring Boot provides a number of starters that allow us to add jars in the classpath. Built-in starters make development easier and rapid. A Spring Boot Starter is a Maven or Gradle module with the sole purpose of providing all dependencies necessary to get started with a certain feature. This usually means that it’s a solitary pom.xml or build.gradle file that contains dependencies to one or more auto-configure modules and any other dependencies that might be needed.
First define the parent in your pom.xml as below:
<parent>
    <groupId>org.springframework.boot</groupId>
    <artifactId>spring-boot-starter-parent</artifactId>
    <version>2.3.5.RELEASE</version>
</parent>
Now we can define the starter dependencies like below:
<dependency>
    <groupId>org.springframework.boot</groupId>
    <artifactId>spring-boot-starter-web</artifactId>
</dependency>
6. Code
In this section we will see a working example of a spring boot application. We will build a very simple web controller.
6.1 Controller
HelloController.java
package org.javacodegeeks.example;

import org.springframework.web.bind.annotation.RestController;
import org.springframework.web.bind.annotation.RequestMapping;

@RestController
public class HelloController {

    @RequestMapping("/")
    public String hello() {
        return "Greetings from Java Code Geeks";
    }
}
The class is flagged as a @RestController, meaning it is ready for use by Spring MVC to handle web requests. @RequestMapping maps / to the hello() method. When invoked from a browser or by using curl on the command line, the method returns pure text. That is because @RestController combines @Controller and @ResponseBody, two annotations that result in web requests returning data rather than a view.
6.2 Application
Let’s build the Application class.
Application.java
package org.javacodegeeks.example;

import org.springframework.boot.SpringApplication;
import org.springframework.boot.autoconfigure.SpringBootApplication;

@SpringBootApplication
public class Application {

    public static void main(String[] args) {
        SpringApplication.run(Application.class, args);
    }
}
@SpringBootApplication is a convenience annotation that adds all of the following:
@Configuration: Tags the class as a source of bean definitions for the application context.@EnableAutoConfiguration: Tells Spring Boot to start adding beans based on classpath settings, other beans, and various property settings. For example, ifspring-webmvcis on the classpath, this annotation flags the application as a web application and activates key behaviors, such as setting up aDispatcherServlet.@ComponentScan: Tells Spring to look for other components, configurations, and services in theorg.javacodegeeks.examplepackage, letting it find the controllers.
The main() method uses Spring Boot’s SpringApplication.run() method to launch an application. Did you notice that there was not a single line of XML? There is no web.xml file, either. This web application is 100% pure Java and you did not have to deal with configuring any plumbing or infrastructure.
Run the following command on the terminal to run the application:
mvn spring-boot:run
You should see the output similar to the following:
[INFO] Scanning for projects...
[INFO]
[INFO] ------------------------------------------------------------------------
[INFO] Building spring-boot-example 1.0-SNAPSHOT
[INFO] ------------------------------------------------------------------------
[INFO]
[INFO] >>> spring-boot-maven-plugin:2.3.5.RELEASE:run (default-cli) > test-compile @ spring-boot-example >>>
[INFO]
[INFO] --- maven-resources-plugin:3.1.0:resources (default-resources) @ spring-boot-example ---
[INFO] Using 'UTF-8' encoding to copy filtered resources.
[INFO] Copying 0 resource
[INFO] Copying 0 resource
[INFO]
[INFO] --- maven-compiler-plugin:3.8.1:compile (default-compile) @ spring-boot-example ---
[INFO] Changes detected - recompiling the module!
[INFO] Compiling 2 source files to /Users/ziameraj16/study/JCG/spring-boot-example/target/classes
[INFO]
[INFO] --- maven-resources-plugin:3.1.0:testResources (default-testResources) @ spring-boot-example ---
[INFO] Using 'UTF-8' encoding to copy filtered resources.
[INFO] skip non existing resourceDirectory /Users/ziameraj16/study/JCG/spring-boot-example/src/test/resources
[INFO]
[INFO] --- maven-compiler-plugin:3.8.1:testCompile (default-testCompile) @ spring-boot-example ---
[INFO] Changes detected - recompiling the module!
[INFO]
[INFO] <<< spring-boot-maven-plugin:2.3.5.RELEASE:run (default-cli) < test-compile @ spring-boot-example <<<
[INFO]
[INFO]
[INFO] --- spring-boot-maven-plugin:2.3.5.RELEASE:run (default-cli) @ spring-boot-example ---
[INFO] Attaching agents: []

  .   ____          _            __ _ _
 /\\ / ___'_ __ _ _(_)_ __  __ _ \ \ \ \
( ( )\___ | '_ | '_| | '_ \/ _` | \ \ \ \
 \\/  ___)| |_)| | | | | || (_| |  ) ) ) )
  '  |____| .__|_| |_|_| |_\__, | / / / /
 =========|_|==============|___/=/_/_/_/
 :: Spring Boot ::        (v2.3.5.RELEASE)

2020-11-01 21:52:12.754  WARN 4462 --- [           main] o.s.boot.StartupInfoLogger               : InetAddress.getLocalHost().getHostName() took 5004 milliseconds to respond. Please verify your network configuration (macOS machines may need to add entries to /etc/hosts).
2020-11-01 21:52:17.767  INFO 4462 --- [           main] org.javacodegeeks.example.Application    : Starting Application on Mohammads-MacBook.local with PID 4462 (/Users/ziameraj16/study/JCG/spring-boot-example/target/classes started by ziameraj16 in /Users/ziameraj16/study/JCG/spring-boot-example)
2020-11-01 21:52:17.768  INFO 4462 --- [           main] org.javacodegeeks.example.Application    : No active profile set, falling back to default profiles: default
2020-11-01 21:52:18.934  INFO 4462 --- [           main] o.s.b.w.embedded.tomcat.TomcatWebServer  : Tomcat initialized with port(s): 8080 (http)
2020-11-01 21:52:18.953  INFO 4462 --- [           main] o.apache.catalina.core.StandardService   : Starting service [Tomcat]
2020-11-01 21:52:18.954  INFO 4462 --- [           main] org.apache.catalina.core.StandardEngine  : Starting Servlet engine: [Apache Tomcat/9.0.39]
2020-11-01 21:52:19.085  INFO 4462 --- [           main] o.a.c.c.C.[Tomcat].[localhost].[/]       : Initializing Spring embedded WebApplicationContext
2020-11-01 21:52:19.085  INFO 4462 --- [           main] w.s.c.ServletWebServerApplicationContext : Root WebApplicationContext: initialization completed in 1243 ms
2020-11-01 21:52:19.322  INFO 4462 --- [           main] o.s.s.concurrent.ThreadPoolTaskExecutor  : Initializing ExecutorService 'applicationTaskExecutor'
2020-11-01 21:52:19.550  INFO 4462 --- [           main] o.s.b.w.embedded.tomcat.TomcatWebServer  : Tomcat started on port(s): 8080 (http) with context path ''
2020-11-01 21:52:19.567  INFO 4462 --- [           main] org.javacodegeeks.example.Application    : Started Application in 17.456 seconds (JVM running for 18.102)
2020-11-01 21:52:32.873  INFO 4462 --- [nio-8080-exec-1] o.a.c.c.C.[Tomcat].[localhost].[/]       : Initializing Spring DispatcherServlet 'dispatcherServlet'
2020-11-01 21:52:32.874  INFO 4462 --- [nio-8080-exec-1] o.s.web.servlet.DispatcherServlet        : Initializing Servlet 'dispatcherServlet'
2020-11-01 21:52:32.894  INFO 4462 --- [nio-8080-exec-1] o.s.web.servlet.DispatcherServlet        : Completed initialization in 20 ms
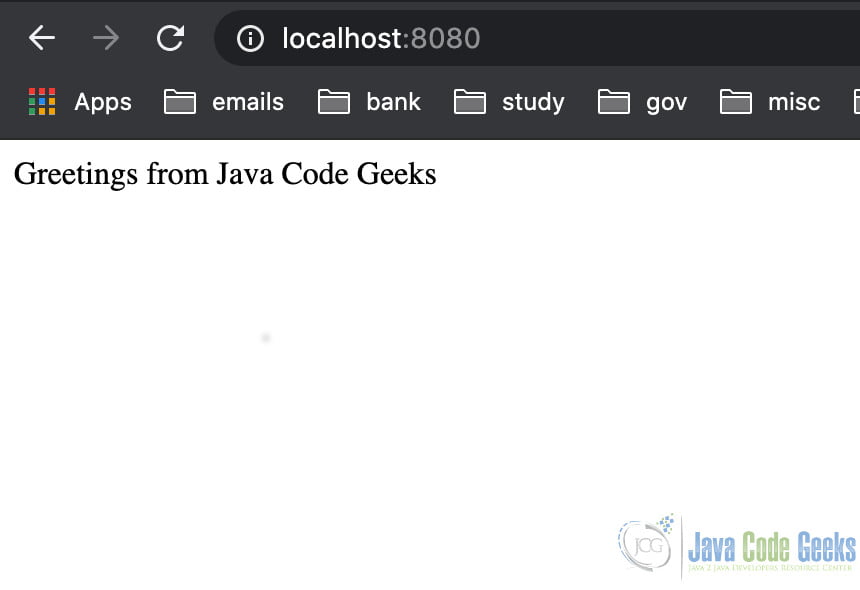
Now open the browser and go to URL: http://localhost:8080/. You will see the text as below
7. Testing
Now let’s add a test to verify our implementation. We will add the spring-boot-starter-test dependency in our pom as below:
<dependency>
    <groupId>org.springframework.boot</groupId>
    <artifactId>spring-boot-starter-test</artifactId>
    <scope>test</scope>
    <exclusions>
        <exclusion>
            <groupId>org.junit.vintage</groupId>
            <artifactId>junit-vintage-engine</artifactId>
        </exclusion>
    </exclusions>
</dependency>
Now let us write the spring test for our controller.
HelloConrollerTest.java
package org.javacodegeeks.example;

import org.junit.jupiter.api.Test;
import org.springframework.beans.factory.annotation.Autowired;
import org.springframework.boot.test.autoconfigure.web.servlet.AutoConfigureMockMvc;
import org.springframework.boot.test.context.SpringBootTest;
import org.springframework.test.web.servlet.MockMvc;
import org.springframework.test.web.servlet.request.MockMvcRequestBuilders;

import static org.hamcrest.Matchers.equalTo;
import static org.springframework.test.web.servlet.result.MockMvcResultMatchers.content;
import static org.springframework.test.web.servlet.result.MockMvcResultMatchers.status;

@SpringBootTest
@AutoConfigureMockMvc
public class HelloControllerTest {

    @Autowired
    private MockMvc mvc;

    @Test
    void hello() throws Exception {
        mvc.perform(MockMvcRequestBuilders.get("/"))
                .andExpect(status().isOk())
                .andExpect(content().string(equalTo("Greetings from Java Code Geeks")));
    }
}
The @SpringBootTest annotation tells Spring Boot to look for the main configuration class (one with @SpringBootApplication, for instance) and use that to start a Spring application context. You can run this test in your IDE or on the command line (by running ./mvn test), and it should pass.
The @SpringBootTest annotation provides the following features over and above the regular Spring TestContext Framework:
- Uses
SpringBootContextLoaderas the defaultContextLoaderwhen no specific@ContextConfiguration(loader=…)is defined. - Automatically searches for a
@SpringBootConfigurationwhen nested@Configurationis not used, and no explicit classes are specified. - Allows custom
Environmentproperties to be defined using the properties attribute. - Allows application arguments to be defined using the args attribute.
- Provides support for different web environment modes, including the ability to start a fully running web server listening on a defined or random port.
- Registers a
TestRestTemplateand/orWebTestClientbean for use in web tests that are using a fully running web server.
8. Spring Boot Annotation
@SpringBootApplication annotation can be used to enable the below three features:
@EnableAutoConfiguration: enable Spring Boot’s auto-configuration mechanism@ComponentScan: enable@Componentscan on the package where the application is located@Configuration: allow to register extra beans in the context or import additional configuration classes
@SpringBootApplication also provides aliases to customize the attributes of @EnableAutoConfiguration and @ComponentScan.
8.1 Component Scan Annotation
When working with Spring, we can annotate our classes in order to make them into Spring beans. But, besides that, we can tell Spring where to search for these annotated classes. With Spring, we use the @ComponentScan annotation along with @Configuration annotation to specify the packages that we want to be scanned.
@ComponenentScan annotation configures component scanning directives for use with @Configuration classes.It provides support parallel with Spring XML’s <context:component-scan> element. Either basePackageClasses() or basePackages() (or its alias value()) may be specified to define specific packages to scan. If specific packages are not defined, scanning will occur from the package of the class that declares this annotation.
Note that the <context:component-scan> element has an annotation-config attribute; however, this annotation does not. This is because in almost all cases when using @ComponentScan, default annotation config processing (e.g. processing @Autowired and friends) is assumed. Furthermore, when using AnnotationConfigApplicationContext, annotation config processors are always registered, meaning that any attempt to disable them at the @ComponentScan level would be ignored.
9. Summary
In this article, we discussed the Spring Boot application. We saw how easy it is to build an application from scratch. We discussed the advantages and disadvantages of Spring Boot and also looked at some of the most commonly used annotations. We also discussed how easy it is to write unit tests for a Spring Boot application.
10. Download Source Code
That was a tutorial about Java Spring Boot.
You can download the full source code of this example here: Java Spring Boot Tutorial
