1. Introduction
In this post, we feature a comprehensive article on Spring Netbeans. Java Spring has been a popular Java development framework in use for over 10 years now. Getting started with Java Spring development has got quite easier over the years. However, it sometimes is challenging to get started with Java Spring using IDEs.
Netbeans is one such popular IDE that is being used in industries around the world. In this article, I take you through the process of using Netbeans IDE for developing a Spring application. We start with a normal Spring Core application and move towards developing a Spring Web MVC based application using the IDE. This tutorial takes you through detailed steps that you need to do for the same.
2. Prerequisities
Before we begin, there are certain pre-requisites that you need to setup before we progress on the example. We are going to use the below tools and technologies for the example:
- Netbeans 8.2 IDE
- Java JDK 7/8
- Glassfish Server
Once you have the above items installed, proceed to the next step.
3. Creating the project
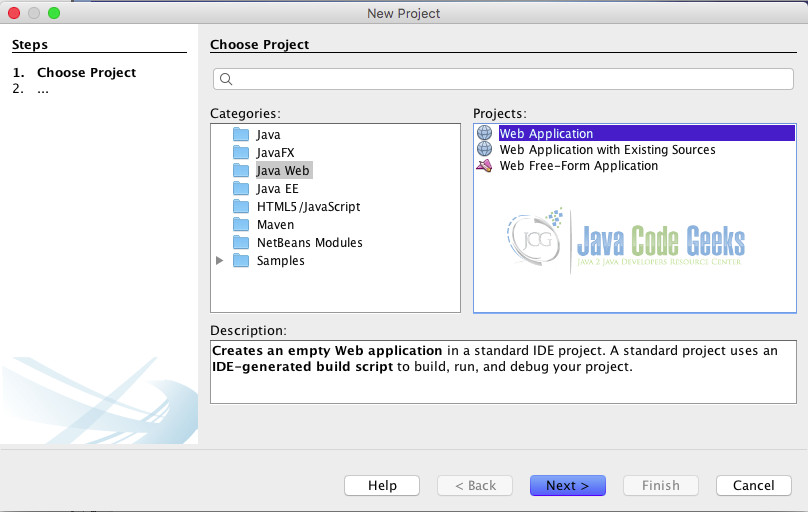
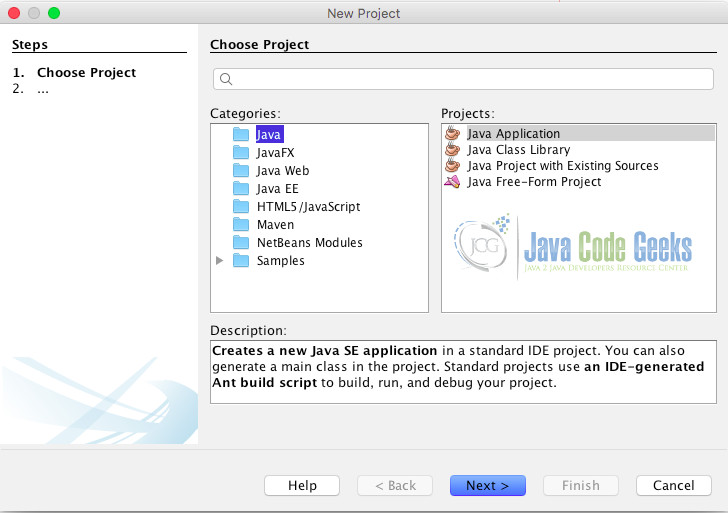
To create the project, go to the File menu and select New Project. It opens up a New Project panel as shown below. Select the project category – Java Web and Project type as Web application to begin with.
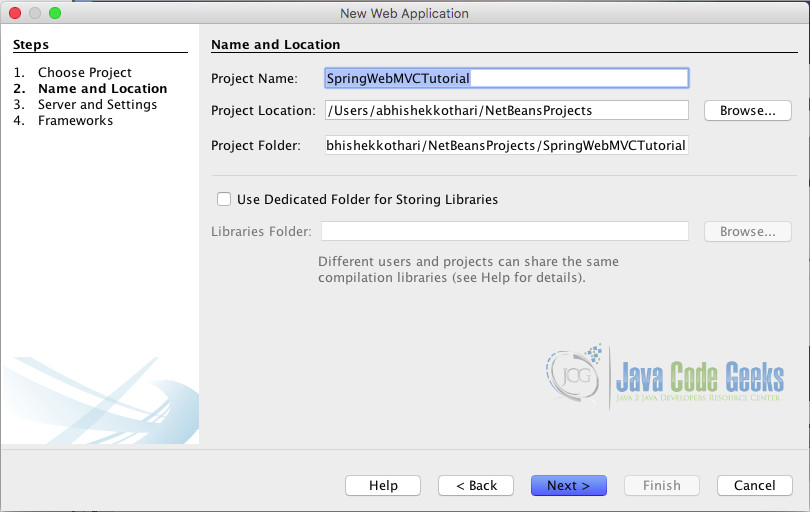
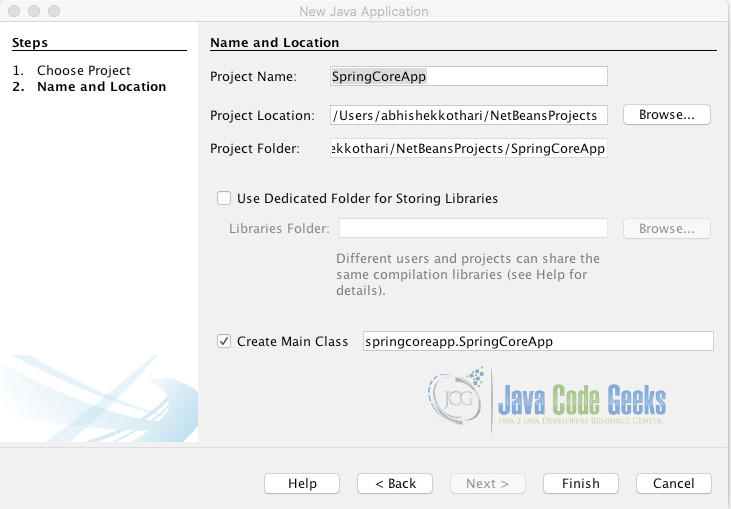
Enter the project name and select the path to store your project as shown in the below image and click Next
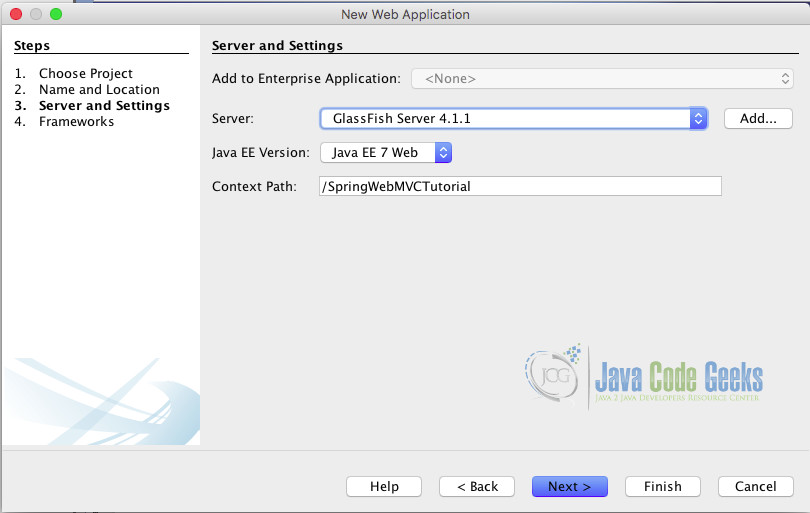
In the next screen, select your server to be Glassfish server and Java version to be Java EE 7 or Java EE 8. The Context path can be kept as it is. The context path decides your local URL path.
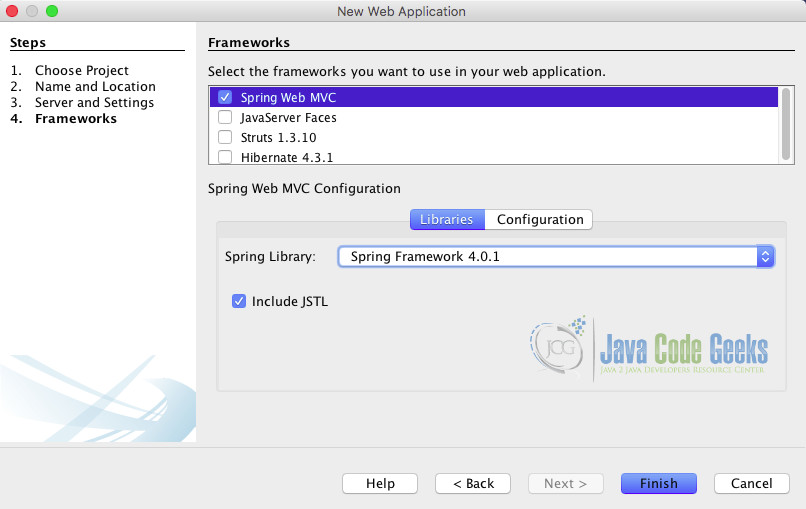
In the final screen, you should see the selection of framework. Netbeans support various frameworks starter projects out of the box. Spring Framework is one of them. In the frameworks selection screen, select Java Spring Framework. You can choose the latest version here. As of present day, we have Spring 4.0.1 version available out of the box in Netbeans. Choose the version and click finish to create the initial project. It might take some time if the framework was not downloaded before.
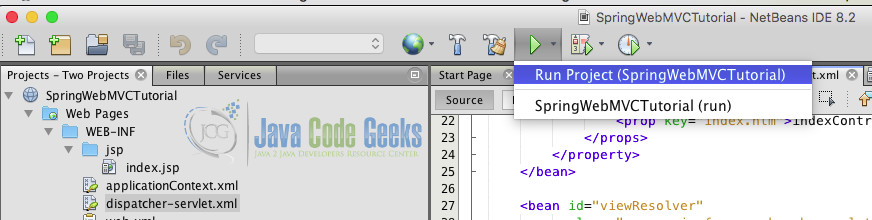
4. Run your project first time
Now that you have created the first Spring Web MVC project, let us run it. To run the project, run project option in the image shown below. The option will perform two operations.
- It will build the Spring Web MVC project and validate it for any sort of errors
- It will deploy and start your web MVC application on Glassfish server.
The Glassfish server will automatically open the home page. The default page will contain simple text mentioning that it is a default page and guide you through how to make changes.
5. Understanding the project structure
The project created by Netbeans shows four main folders in the projects window. The folders are:
- Web Pages
- Source Packages
- Libraries
- Configuration Files
This organized folder structure of Netbeans is a great benefit. It is self explanatory as to which files are contained in the folders. A brief description of each of the folders is discussed below.
The web pages folder contain the WEB-INF directory which holds the web related configuration files and the jsp files which are to be served to the user. The Source packages is the place where all your Spring Controllers, Beans and related java files will be placed. The Libraries folder is the collection of all the dependencies. It contains the jar files of the relevant libraries that are required for the Spring Web MVC application. Any additional library that you use can be added to libraries folder. The last is Configuration Files contain the configuration files for the Spring Web MVC application. This includes web.xml again as it is also a configuration file for the Web servlet configuration.
6. Creating a project from scratch
You might not always require a Web MVC project and might be looking to create a project from scratch with only the required dependencies. In order to do so, we need to manually create either a Dynamic Web project or a Java project depending on the type of project we need. Later, we need to add the Spring dependencies to it. Let us go through the process of creating the same.
We will go through the process of creating a Spring Core project. To create one, navigate to New Project. Select Java Application as the type of project and click next. Name the project as SpringCoreApp.
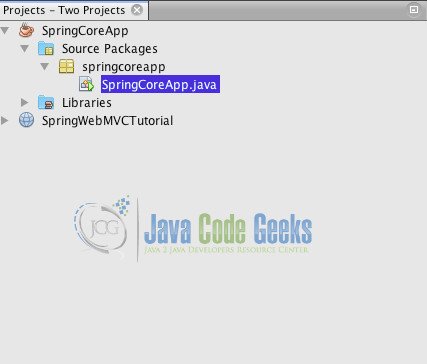
You will see a simple project created with just two folders – Source packages and Libraries.
The first step towards configuring a Spring Core project is to add its libraries. You can download the Spring Core and Spring Context jar files from the links and save them. To add the jars to the libraries, right click the project and select project properties.
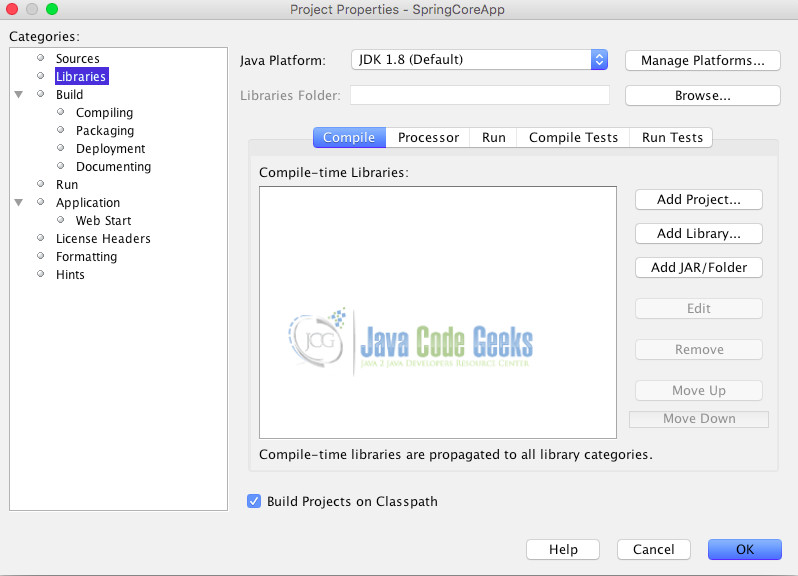
In the project properties select Libraries as shown in the image above. Click Add jar and select the jars that you have downloaded and click OK. You should see the files in libraries section now. You now have the base dependencies for the Spring project. Let us begin creating the configuration file and a basic bean to start our project.
6.1. Configuring Spring Application
In this tutorial, we will be using the Java based Spring framework configuration to create our Spring Core Application. To start with the same, we first need to create a Spring Bean. The Spring bean with Java configuration can be created by just annotating it with @Bean annotation in the configuration file
Let us create our first bean.
HelloJava.java
package springcoreapp;

/**
 *
 * @author abhishekkothari
 */
public class HelloJava {
   private String tutorName;

    public String getTutorName() {
        return tutorName;
    }

    public void setTutorName(String tutorName) {
        this.tutorName = tutorName;
    }

}
The above file provides a class which has an attribute in it. Now let us configure Spring to provide this as a bean. To create the Spring configuration file, use the below code.
HelloSpringConfig.java
package springcoreapp;

import org.springframework.context.annotation.Bean;
import org.springframework.context.annotation.Configuration;

/**
 *
 * @author abhishekkothari
 */
@Configuration
public class HelloSpringConfig {
    @Bean
    public HelloJava helloJava(){
        return new HelloJava();
    }
}
Notice two annotations in the above code. These annotations are the primary annotations for the Java configuration in Spring Core application. The annotation @Configuration signifies that the class needs to be treated as a Spring configuration class. The @Bean annotation signifies that the function provides a bean. This configuration is quite manual in that we need to define the functions for each bean. In the present release of Spring, it also allows you to mark the beans as autowired to get eliminate the need for these functions. Now that we have one bean and the configuration file in place, let us run the project and see the bean in action
To start the project, we need to update the main function in the class <code>SpringCoreApp</code> that was created by default. In case you gave a different name to the project, the class might differ. Update the class to contain the below code.
SpringCoreApp.java
package springcoreapp;

import org.springframework.context.annotation.AnnotationConfigApplicationContext;

/**
 *
 * @author abhishekkothari
 */
public class SpringCoreApp {

    /**
     * @param args the command line arguments
     */
    public static void main(String[] args) {
        AnnotationConfigApplicationContext ctx = new AnnotationConfigApplicationContext(HelloSpringConfig.class);

        HelloJava hellojava = ctx.getBean(HelloJava.class);
        hellojava.setTutorName("Abhishek Kothari!");
        hellojava.getTutorName();
    }
}
The above code does the job of starting the Spring application and load its configuration files. Let us understand the main function code line by line. The first line in the function loads the application configuration using the annotation based configuration feature. The class specifies a single configuration file that we had created and uses that to pass the configuration to the Spring Framework. There might be a need to have multiple configuration files which we will cover later in the tutorial. The next line of code tries to get the bean using the annotation context object that was created before. This method tries to lookup the function with the @Bean annotation returning the class object that is passed as the argument in the function. This means that if we have passed HelloJava.class, it will look up for a function with return type HelloJava. You must have noticed this function in the configuration file that we created above. The further code in the function is simple object operations. To get an actual output in the code, let us add a print statement as well. The code will look like the one shown below.

SpringCoreApp.java
package springcoreapp;

import org.springframework.context.annotation.AnnotationConfigApplicationContext;

/**
 *
 * @author abhishekkothari
 */
public class SpringCoreApp {

    /**
     * @param args the command line arguments
     */
    public static void main(String[] args) {
        AnnotationConfigApplicationContext ctx = new AnnotationConfigApplicationContext(HelloSpringConfig.class);

        HelloJava hellojava = ctx.getBean(HelloJava.class);
        hellojava.setTutorName("Abhishek Kothari!");
        System.out.println(hellojava.getTutorName());
    }
}
6.2 Running the Spring Core App
Now that we have all the things in place, let us actually execute the code and see the output. As soon as you run the code, you will hit a roadblock with the below error.
run:
Exception in thread "main" java.lang.NoClassDefFoundError: org/springframework/beans/factory/support/BeanDefinitionRegistry
	at java.lang.ClassLoader.defineClass1(Native Method)
	at java.lang.ClassLoader.defineClass(ClassLoader.java:763)
	at java.security.SecureClassLoader.defineClass(SecureClassLoader.java:142)
	at java.net.URLClassLoader.defineClass(URLClassLoader.java:467)
	at java.net.URLClassLoader.access$100(URLClassLoader.java:73)
	at java.net.URLClassLoader$1.run(URLClassLoader.java:368)
	at java.net.URLClassLoader$1.run(URLClassLoader.java:362)
	at java.security.AccessController.doPrivileged(Native Method)
	at java.net.URLClassLoader.findClass(URLClassLoader.java:361)
	at java.lang.ClassLoader.loadClass(ClassLoader.java:424)
	at sun.misc.Launcher$AppClassLoader.loadClass(Launcher.java:335)
	at java.lang.ClassLoader.loadClass(ClassLoader.java:357)
	at springcoreapp.SpringCoreApp.main(SpringCoreApp.java:20)
Caused by: java.lang.ClassNotFoundException: org.springframework.beans.factory.support.BeanDefinitionRegistry
	at java.net.URLClassLoader.findClass(URLClassLoader.java:381)
	at java.lang.ClassLoader.loadClass(ClassLoader.java:424)
	at sun.misc.Launcher$AppClassLoader.loadClass(Launcher.java:335)
	at java.lang.ClassLoader.loadClass(ClassLoader.java:357)
	... 25 more
/Users/abhishekkothari/Library/Caches/NetBeans/8.2/executor-snippets/run.xml:53: Java returned: 1
BUILD FAILED (total time: 1 second)
Although there was no failures in compilation, it gave this error. The reason behind the error is that in the background spring is dependent on other jars too which need to be added. Spring is a modularised framework and we need to put together all the dependent modules to get it to work. Download the Apache Commons Loggging jar and all the Spring framework dependencies from this link. Download the dist archive. From the dist archive, add all the release jars into the dependencies for the project. Once that is done, run the project. You should not see any error. The output of the project should be similar to the one shown below.
run:
Abhishek Kothari!
BUILD SUCCESSFUL (total time: 1 second)
The application runs perfectly alright and is able to get the bean and use it. There are chances where you might need to use multiple configuration files. Let us discuss the same in the next section.
7. Using multiple configuration files
Before understanding how to use multiple configuration files, let us create another bean and another configuration file. The code for the files is given below.
HelloSecondTime.java
package springcoreapp;

/**
 *
 * @author abhishekkothari
 */
public class HelloSecondTime {
   private String studentName;

    public String getStudentName() {
        return studentName;
    }

    public void setStudentName(String studentName) {
        this.studentName = studentName;
    }

}
HelloSecondConfig.java
package springcoreapp;

import org.springframework.context.annotation.Bean;
import org.springframework.context.annotation.Configuration;

/**
 *
 * @author abhishekkothari
 */
@Configuration
public class HelloSecondConfig {
    @Bean
    public HelloSecondTime helloSecondTime(){
        return new HelloSecondTime();
    }
}
Now that we have two configuration files configuring different beans, we can modify our code in the main function to utilise these two configuration files. To do so, update the code inside the function as shown below.
SpringCoreApp.java
package springcoreapp;

import org.springframework.context.annotation.AnnotationConfigApplicationContext;

/**
 *
 * @author abhishekkothari
 */
public class SpringCoreApp {

    /**
     * @param args the command line arguments
     */
    public static void main(String[] args) {
        AnnotationConfigApplicationContext ctx = new AnnotationConfigApplicationContext();
        ctx.register(HelloSpringConfig.class);
        ctx.register(HelloSecondConfig.class);
        ctx.refresh();
        HelloJava hellojava = ctx.getBean(HelloJava.class);
        hellojava.setTutorName("Abhishek Kothari!");
        System.out.println(hellojava.getTutorName());

        HelloSecondTime helloSecondTime = ctx.getBean(HelloSecondTime.class);
        helloSecondTime.setStudentName("You!");
        System.out.println(helloSecondTime.getStudentName());
    }

}
Execute the code with the two configuration files registered in the main function. The code should now be able to read the two configuration files and progress on the same. On executing the code, you should be seeing an output similar to the one shown below.
run:
Abhishek Kothari!
You!
BUILD SUCCESSFUL (total time: 2 seconds)
Thus, we built a spring core application using multiple configuration file and having multiple beans.
8. Spring Netbeans – Conclusion
Building a Spring App using Netbeans is quite easy as long as you understand the basic about the Spring framework. In this tutorial, we captured the process of building a Spring Web MVC app as well as Spring Core application from scratch. Further coding can easily be done on top of these just like any other Spring application. The code or imports might change with the future versions of Spring framework. Hence, you need to ensure that you are using the right version of Spring framework at any point of time.
9. Download
The code files of the project created above are packaged in an archive and provided at the below link.
You can download the full source code of this example here: Spring Netbeans Example
