In this tutorial, we will walk through the steps of creating a Hello World Spring application using the Eclipse IDE. Developers will learn the fundamental concepts of Spring framework while building a sample application. So let us proceed to write a simple Spring Application which will print a message based on the configuration done in Spring Bean Configuration file.
Table Of Contents
1. Introduction
1.1 Spring Framework
- Spring is an open-source framework created to address the complexity of an enterprise application development
- One of the chief advantages of the Spring framework is its layered architecture, which allows developer to be selective about which of its components they can use while providing a cohesive framework for
J2EEapplication development - Spring framework provides support and integration to various technologies for e.g.:
- Support for Transaction Management
- Support for interaction with the different databases
- Integration with the Object Relationship frameworks for e.g. Hibernate, iBatis etc
- Support for Dependency Injection which means all the required dependencies will be resolved with the help of containers
- Support for
RESTstyle web-services
1.2 Spring Architecture
Spring has a layered architecture which consists of various modules. All the modules are built on top of the core container and are mostly independent. This way, the developer is free to use only the modules that are needed for the particular requirement. The modules in Spring framework are grouped into Core Container, Data Access/Integration, Web, AOP (Aspect Oriented Programming), Instrumentation and, Test.
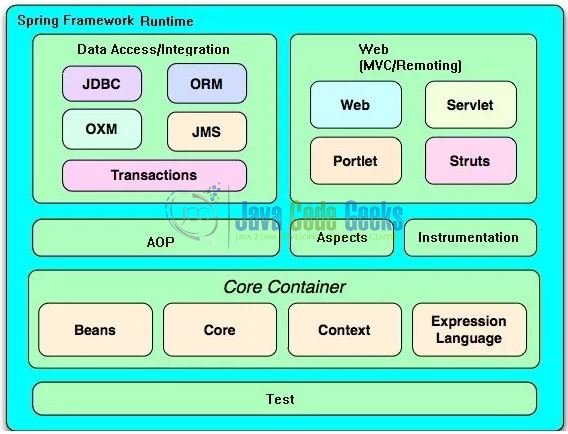
1.2.1 Spring Data Access and Integration
Spring Data Access and Integration consists of the below five modules:
- Transaction: The Transaction module provides supports to the programmatic and declarative transaction management that provides benefits like:
- Consistent programming model across different transaction APIs such as Java Transaction API (
JTA),JDBC,Hibernate, Java Persistence API (JPA), and Java Data Objects (JDO) - Simpler API for programmatic transaction management than complex transaction APIs such as
JTA
- Consistent programming model across different transaction APIs such as Java Transaction API (
- OXM (Object/XML Mapping): This module provides an abstraction layer that supports the Object/
XMLmapping implementations such asJAXB, andXMLBeans - ORM (Object Relationship Mapping): This module supports the integration of application with other ORM frameworks such as
JPA,JDO, andHibernate - JDBC (Java Database Connectivity): We all have used
JDBCsomewhere to connect to the database and repetitive code needs to be written every time. The module is kind of wrapper onJDBCwhich eliminates the need to the repetitive and unnecessary exception handling overhead - JMS (Java Messaging Service): The
JMSmodule (Java Messaging Service) includes features for sending and receiving the messages between multiple clients
1.2.2 Spring Web
Spring Web Layer consists of the below three modules:
- Web: The web module provides support for features like File Upload, Web Application Context implementation etc
- Servlet: This module is known as the Spring Web MVC module which provides Model View Controller implementation for the web applications
- Portlet: This module is known as Spring Web MVC Portlet module which provides the support for Spring based Portlets
1.2.3 Spring Core Container
Spring Core Container consists of the below four modules:
- Spring Core: As its name suggests, this module is the core of Spring framework and provides implementation to several features including – Inversion of Control (IoC). IOC is also known as Dependency Injection and it allows objects to define their dependencies and container and then inject those dependencies when it creates the Bean. This process is fundamentally inverse, hence the name Inversion of Control (IoC)
- Spring Beans: This module provides the implementation of
BeanFactoryobject - Spring Context: Spring Core and Spring Beans modules are the foundation of the Context (i.e. Spring Context) module. This module provides the implementation of Application Context which is a way to access objects in a framework-style manner that is similar to a
JNDIregistry. Context module inherits its features from the Beans module and adds support for other features like Internationalization events propagation etc - Spring Expression Language: This module is an extension to the expression language supported by the Java Server pages and is represented as
SpEL. This module helps in achieving a dynamic behavior
1.2.4 Spring Test
This module provides support for unit testing and integration testing with other testing frameworks for e.g. Junit or TestNG.
1.2.5 AOP (Aspect Oriented Programming)
It is used as a replacement for EJB container and is much simpler than EJBs. This module provides an AOP Alliance implementation to provide a way of modularizing the application logic so that each module addresses a distinct concern.
1.3 Spring Benefits
In the following list there are some of the great benefits that Spring framework provides:
- Spring enables developers to develop enterprise-class applications using
POJO. The benefit of using onlyPOJOis that developers do not need anEJBcontainer product such as an application server but they have the option of using only a robust servlet container such as Tomcat - Spring is organized in a modular fashion. Even though the number of packages and classes are substantial, developers have to worry only about the ones they need and ignore the rest
- Spring does not reinvent the wheel instead, it truly makes use of some of the existing technologies like
ORMframeworks, Logging frameworks,JEEQuartz andJDKTimers - Testing an application written with Spring is simple because the environment-dependent code is moved into this framework. Furthermore, by using JavaBean style, it becomes easier to use Dependency Injection for injecting the test data
- Spring’s web framework is a well-designed web MVC framework, which provides a great alternative to web frameworks such as
Strutsor other over engineered or less popular web frameworks - Spring provides a convenient API to translate technology-specific exceptions (thrown by the
JDBC,Hibernate, orJDO) into consistent and unchecked exceptions - Lightweight IoC containers tend to be lightweight, especially when compared to
EJBcontainers. This is beneficial for developing and deploying applications on computers with limited memory and CPU resources - Spring provides a consistent transaction management interface that can scale down to a local transaction (using a single database) and scale up to global transactions (using
JTA)
Now, open up the Eclipse IDE and let’s see how to implement the sample application in Spring!
2. Spring Tutorial for Beginners
2.1 Tools Used
We are using Eclipse Kepler SR2, JDK 8 and Maven. Having said that, we have tested the code against JDK 1.7 and it works well.
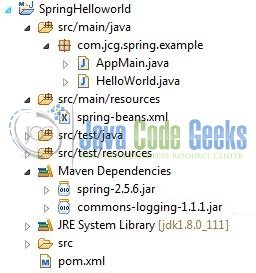
2.2 Project Structure
Firstly, let’s review the final project structure, in case you are confused about where you should create the corresponding files or folder later!
2.3 Project Creation
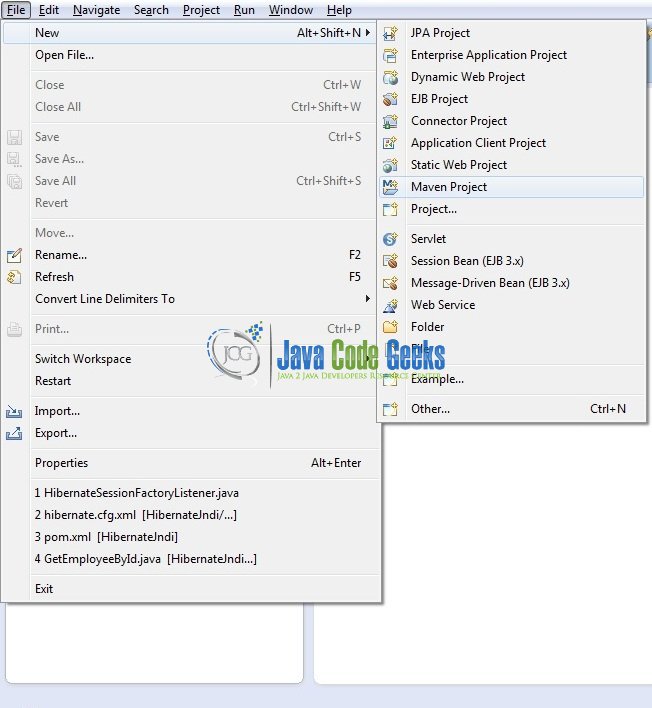
This section will demonstrate on how to create a Java based Maven project with Eclipse. In Eclipse IDE, go to File -> New -> Maven Project.
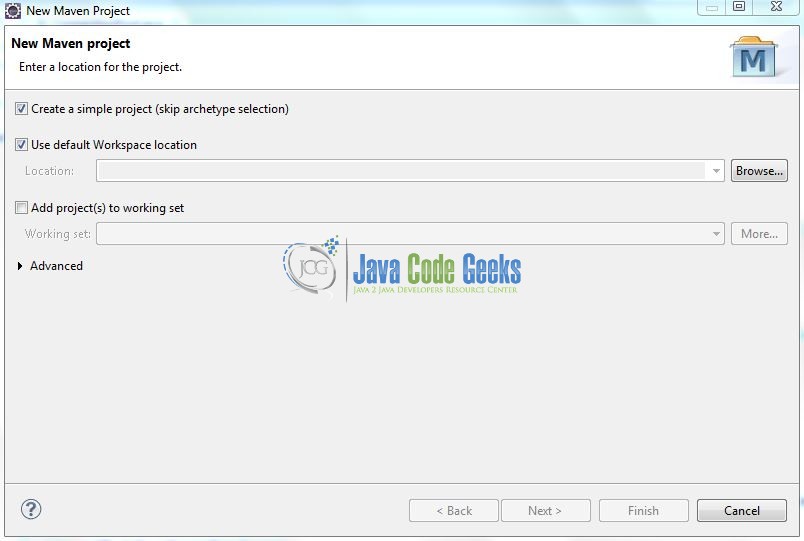
In the New Maven Project window, it will ask you to select project location. By default, Use default workspace location will be selected. Select the Create a simple project (skip archetype selection) checkbox and just click on next button to proceed.
It will ask you to ‘Enter the group and the artifact id for the project’. We will input the details as shown in the below image. The version number will be by default 0.0.1-SNAPSHOT.
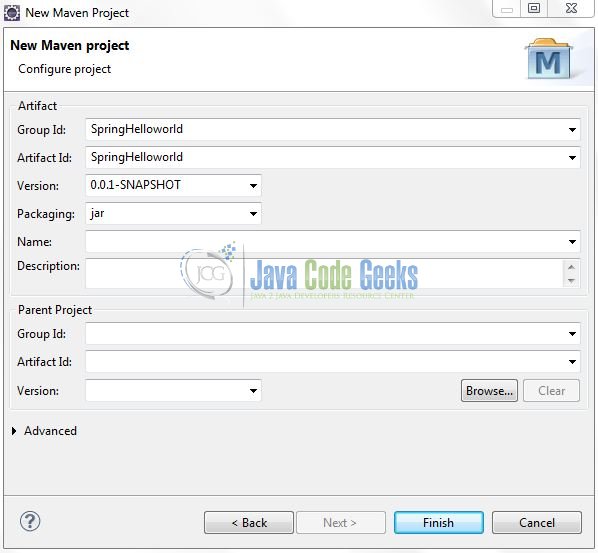
Click on Finish and the creation of a maven project is completed. If you observe, it has downloaded the maven dependencies and a pom.xml file will be created. It will have the following code:
pom.xml
<project xmlns="http://maven.apache.org/POM/4.0.0" xmlns:xsi="http://www.w3.org/2001/XMLSchema-instance" xsi:schemaLocation="http://maven.apache.org/POM/4.0.0 http://maven.apache.org/xsd/maven-4.0.0.xsd">
	<modelVersion>4.0.0</modelVersion>
	<groupId>SpringHelloworld</groupId>
	<artifactId>SpringHelloworld</artifactId>
	<version>0.0.1-SNAPSHOT</version>
</project>
We can start adding the dependencies that developers want like Spring etc. Let’s start building the application!
3. Application Building
Below are the steps involved in developing this application.
3.1 Maven Dependencies
Here, we specify the dependency for the Spring framework. The rest dependencies will be automatically resolved by Maven, such as AOP, Spring Core, Spring Beans etc. The updated file will have the following code:
pom.xml
<project xmlns="http://maven.apache.org/POM/4.0.0" xmlns:xsi="http://www.w3.org/2001/XMLSchema-instance" xsi:schemaLocation="http://maven.apache.org/POM/4.0.0 http://maven.apache.org/xsd/maven-4.0.0.xsd">
	<modelVersion>4.0.0</modelVersion>
	<groupId>SpringHelloworld</groupId>
	<artifactId>SpringHelloworld</artifactId>
	<version>0.0.1-SNAPSHOT</version>
	<packaging>jar</packaging>
	<dependencies>
		<!-- Spring framework -->
		<dependency>
			<groupId>org.springframework</groupId>
			<artifactId>spring</artifactId>
			<version>2.5.6</version>
		</dependency>
	</dependencies>
	<build>
		<finalName>${project.artifactId}</finalName>
	</build>
</project>
3.2 Java Class Creation
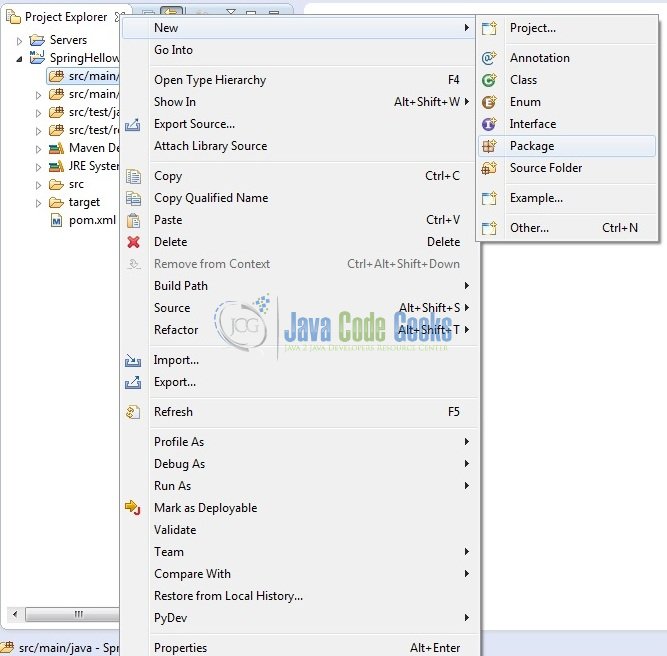
Let’s create the required Java files. Right-click on src/main/java folder, New -> Package.

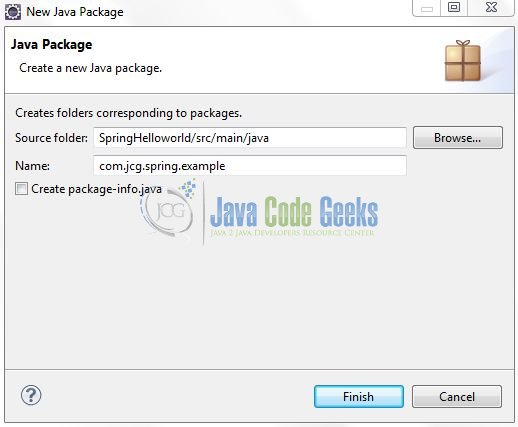
A new pop window will open where we will enter the package name as: com.jcg.spring.example.
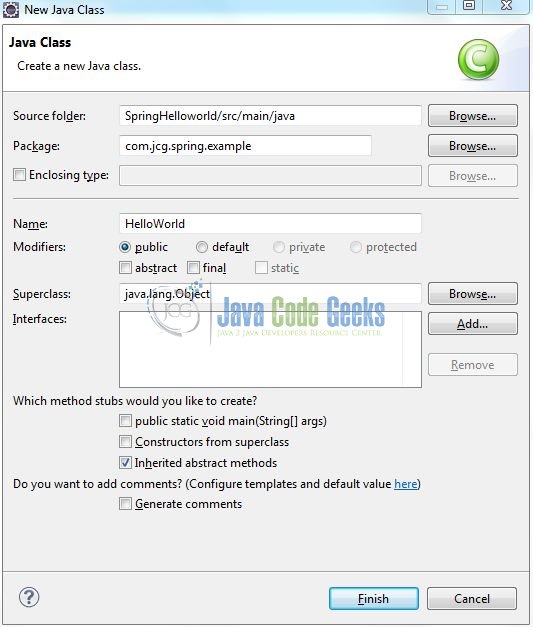
Once the package is created in the application, we will need to create the POJO and the main classes. Right-click on the newly created package: New -> Class.

A new pop window will open and enter the file name as HelloWorld. The POJO class will be created inside the package: com.jcg.spring.example.
Repeat the step (i.e. Fig. 8) and enter the filename as AppMain. The implementation class will be created inside the package: com.jcg.spring.example.

3.2.1 Implementation of POJO Class
It is a simple Java class with a single attribute plus the corresponding getter and setter method for the same. Add the following code to it:
HelloWorld.java
package com.jcg.spring.example;

public class HelloWorld {

	private String username;

	public String getUsername() {
		return username;
	}

	public void setUsername(String username) {
		this.username = username;
	}
}
3.2.2 Implementation of Main Class
This class helps in loading the beans configuration using the BeanFactory object and calls the getBean() method to get the instance of a bean during the Spring runtime environment. Add the following code to it:
AppMain.java
package com.jcg.spring.example;

import org.springframework.beans.factory.BeanFactory;
import org.springframework.beans.factory.xml.XmlBeanFactory;
import org.springframework.core.io.ClassPathResource;

public class AppMain {

	private static BeanFactory beanFactoryObj;

	// This Method Is Used To Load The Spring Bean Configuration File And Return The 'BeanFactory' Object
	public static BeanFactory getBeanFactory() {
		beanFactoryObj = new XmlBeanFactory(new ClassPathResource("spring-beans.xml"));
		return beanFactoryObj;
	}

	// This Is The Main Method And In Here We Are Retrieving The Spring Bean via 'getBean()' Method
	public static void main(String[] args) {
		HelloWorld helloObj = (HelloWorld) getBeanFactory().getBean("helloBean");
		System.out.println(helloObj.getUsername());
	}
}
3.3 Spring Configuration File
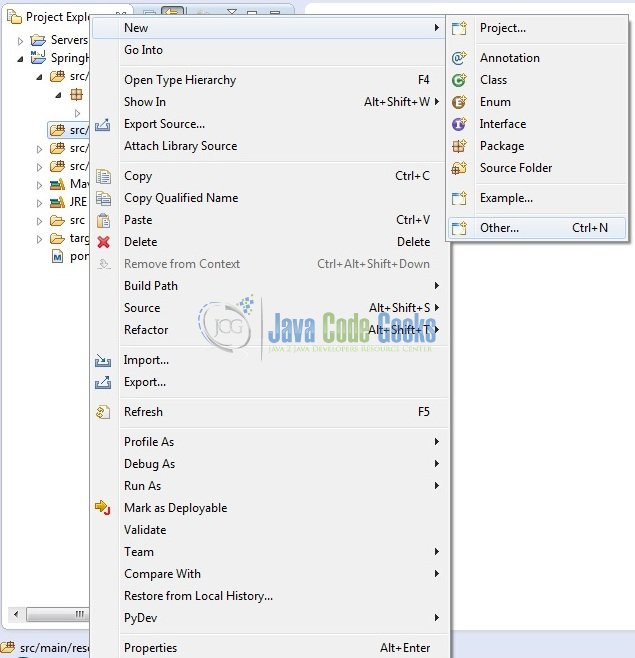
To configure the Spring framework, we need to implement a bean configuration file i.e. spring-beans.xml to provide an interface between the basic Java class (i.e. POJO) and the outside world. Right-click on src/main/resources folder, New -> Other.
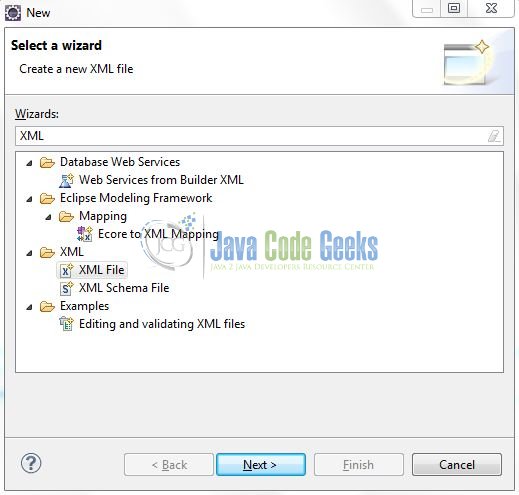
A new pop window will open and select the wizard as an XML file.
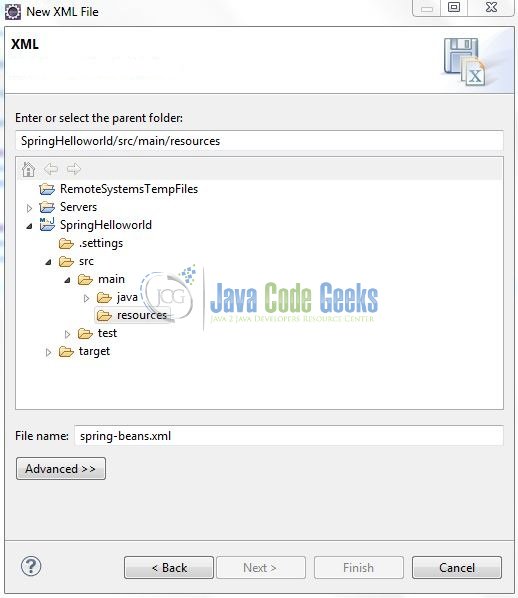
Again, a pop-up window will open. Verify the parent folder location as SpringHelloworld/src/main/resources and enter the file name as: spring-beans.xml. Click Finish.
Once the XML file is created, we will add the following code to it:
spring-beans.xml
<?xml version="1.0" encoding="UTF-8"?>
<beans xmlns="http://www.springframework.org/schema/beans"
	xmlns:xsi="http://www.w3.org/2001/XMLSchema-instance"
	xsi:schemaLocation="http://www.springframework.org/schema/beans
    http://www.springframework.org/schema/beans/spring-beans-3.0.xsd">

	<!-- Mapping With Model Class -->
	<bean id="helloBean" class="com.jcg.spring.example.HelloWorld">
		<property name="username" value="Java Code Geek"></property>
	</bean>
</beans>
Notes:
- Bean Id: A unique id defined for a particular class object or an aspect. Once this is defined, it can be used to access the corresponding class
- Class: Path of the class that is mapped to a particular bean
- Property: This is used to inject values to the attribute using the setter injection
- Scope: Defines the bean scope, as in singleton, prototype etc
4. Run the Application
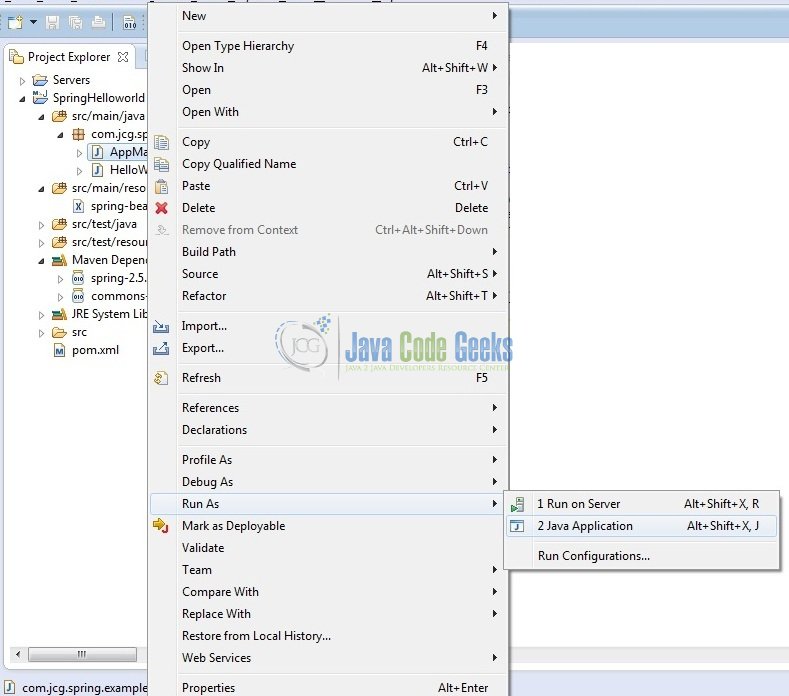
To run the Spring application, Right-click on the AppMain class -> Run As -> Java Application.
5. Project Demo
Executing the AppMain class, developers will see that the value injected as property in the XML file for the HelloWorld class gets displayed on the screen. Developers can debug the example and see what happens after every step. Enjoy!

That’s all for this post. Happy Learning!!
6. Conclusion
In this section, developers learned how to download, create a new project in Eclipse IDE, and add Spring 3.0 library files to write a simple program. That’s all for the Spring tutorial and I hope this article served you whatever you were looking for.
7. Download the Eclipse Project
This was an example of Spring for beginners.
You can download the full source code of this example here: Spring Helloworld
