Spring @DependsOn Annotation Example
In the Spring framework, programmers can force the IoC container to initialize one or more beans. In this tutorial, we will explore the @DependsOn annotation.
1. Introduction
- Spring is an open-source framework created to address the complexity of an enterprise application development
- One of the chief advantages of the Spring framework is its layered architecture, which allows the developer to be selective about which of its components they can use while providing a cohesive framework for
J2EEapplication development - Spring framework provides support and integration to various technologies for e.g.:
- Support for Transaction Management
- Support for interaction with the different databases
- Integration with the Object Relationship frameworks for e.g. Hibernate, iBatis etc
- Support for Dependency Injection which means all the required dependencies will be resolved with the help of containers
- Support for
RESTstyle web-services
1.1 @DependsOn annotation in Spring
The @DependsOn annotation in spring forces the IoC container to initialize one or more beans. This annotation is directly used on any class or indirectly annotated with @Component or on methods annotated with @Bean.
Now, open the Eclipse IDE and let us see how to implement this annotation in the spring framework!
2. Spring @DependsOn Annotation Example
Here is a systematic guide for implementing this tutorial in the spring framework.
2.1 Tools Used
We are using Eclipse Kepler SR2, JDK 8 and Maven. Having said that, we have tested the code against JDK 1.7 and it works well.
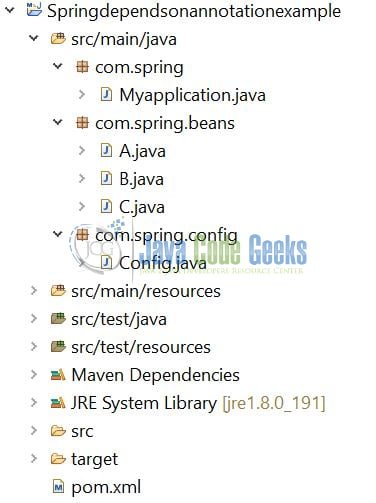
2.2 Project Structure
Firstly, let us review the final project structure, in case you are confused about where you should create the corresponding files or folder later!
2.3 Project Creation
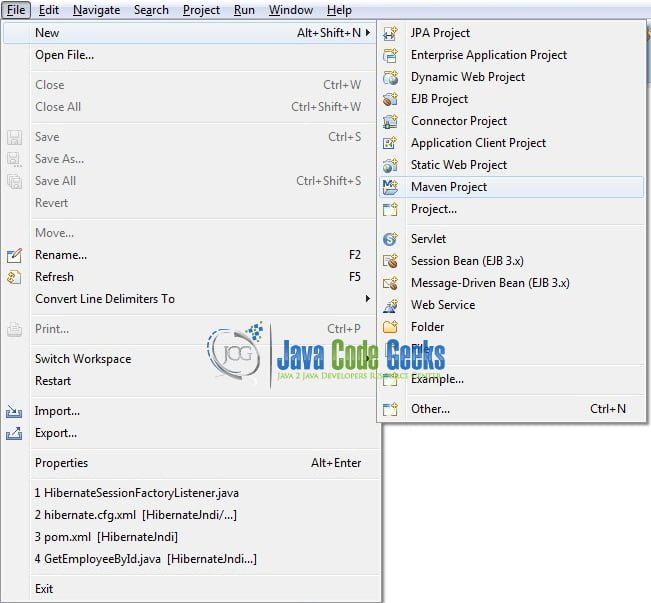
This section will demonstrate how to create a Java-based Maven project with Eclipse. In Eclipse IDE, go to File -> New -> Maven Project.
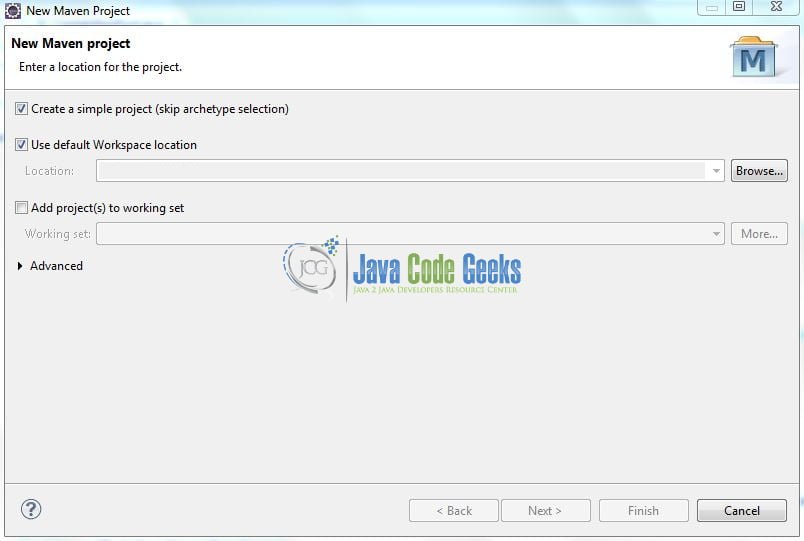
In the New Maven Project window, it will ask you to select a project location. By default, ‘Use default workspace location’ will be selected. Select the ‘Create a simple project (skip archetype selection)’ checkbox and just click on the next button to proceed.
It will ask you to ‘Enter the group and the artifact id for the project’. We will input the details as shown in the below image. The version number will be by default: 0.0.1-SNAPSHOT.
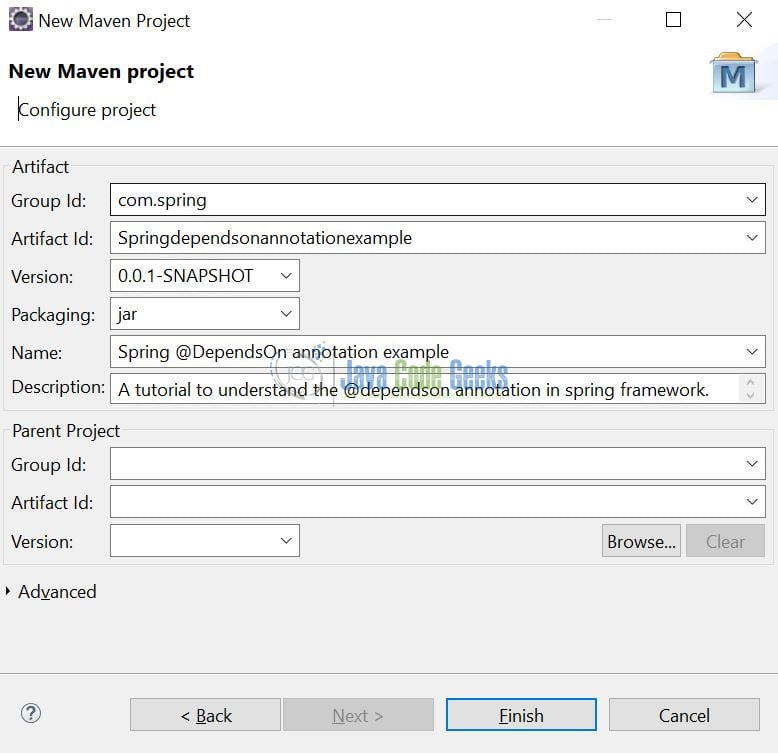
Click on Finish and the creation of a maven project is completed. If you observe, it has downloaded the maven dependencies and a pom.xml file will be created. It will have the following code:
pom.xml
<project xmlns="http://maven.apache.org/POM/4.0.0" xmlns:xsi="http://www.w3.org/2001/XMLSchema-instance" xsi:schemaLocation="http://maven.apache.org/POM/4.0.0 http://maven.apache.org/xsd/maven-4.0.0.xsd">
	<modelVersion>4.0.0</modelVersion>
	<groupId>com.spring</groupId>
	<artifactId>Springdependsonannotationexample</artifactId>
	<version>0.0.1-SNAPSHOT</version>
</project>
We can start adding the dependencies that developers want like Spring Boot etc. Let us start building the application!
3. Application Building
Below are the steps involved in developing this application.
3.1 Maven Dependencies
Here, we specify the dependency for the spring boot. Maven will automatically resolve the rest dependencies such as Spring Beans, Spring Core etc. The updated file will have the following code:
pom.xml
<project xmlns="http://maven.apache.org/POM/4.0.0"
	xmlns:xsi="http://www.w3.org/2001/XMLSchema-instance"
	xsi:schemaLocation="http://maven.apache.org/POM/4.0.0 http://maven.apache.org/xsd/maven-4.0.0.xsd">
	<modelVersion>4.0.0</modelVersion>
	<groupId>com.spring</groupId>
	<artifactId>Springdependsonannotationexample</artifactId>
	<version>0.0.1-SNAPSHOT</version>
	<name>Spring @DependsOn annotation example</name>
	<description>A tutorial to understand the @dependson annotation in spring framework.</description>

	<!-- spring boot parent dependency jar -->
	<parent>
		<groupId>org.springframework.boot</groupId>
		<artifactId>spring-boot-starter-parent</artifactId>
		<version>2.1.1.RELEASE</version>
	</parent>
	<dependencies>
		<!-- spring boot jar -->
		<dependency>
			<groupId>org.springframework.boot</groupId>
			<artifactId>spring-boot-starter</artifactId>
		</dependency>
	</dependencies>
	<build>
		<finalName>Springdependsonannotationexample</finalName>
	</build>
</project>
3.2 Java Class Creation
Let us write the Java classes involved in this application.
3.2.1 Implementation of A bean
Add the following code to the bean definition.
A.java
package com.spring.beans;

import org.springframework.beans.factory.annotation.Autowired;

public class A {

	@Autowired
	private B b;

	@Autowired
	private C c;

	public A() {
		System.out.println("====== Bean A is initialized. ======");
	}

	public void doSomething() {
		System.out.println("Inside doSomething() method of 'A' bean.");
		b.doSomething();
		c.doSomething();
	}
}
3.2.2 Implementation of B bean
Add the following code to the bean definition.
B.java
package com.spring.beans;

public class B {

	public B() {
		System.out.println("====== Bean B is initialized. ======");
	}

	public void doSomething() {
		System.out.println("Inside doSomething() method of 'B' bean.");
	}
}
3.2.3 Implementation of C bean
Add the following code to the bean definition.
C.java
package com.spring.beans;

public class C {

	public C() {
		System.out.println("====== Bean C is initialized. ======");
	}

	public void doSomething() {
		System.out.println("Inside doSomething() method of 'C' bean.");
	}
}
3.2.4 Implementation of Configuration class
Add the following code to the Java-based configuration class.
Config.java
package com.spring.config;

import org.springframework.context.annotation.Bean;
import org.springframework.context.annotation.Configuration;
import org.springframework.context.annotation.DependsOn;

import com.spring.beans.A;
import com.spring.beans.B;
import com.spring.beans.C;

@Configuration
public class Config {

	@Bean(name= "beanone")
	@DependsOn(value= { "beantwo", "beanthree" })
	public A getA() {
		return new A();
	}

	@Bean(name= "beantwo")
	public B getB() {
		return new B();
	}

	@Bean(name= "beanthree")
	public C getC() {
		return new C();
	}
}
3.2.5 Implementation of Main class
Add the following code to the main class.
Myapplication.java
package com.spring;

import org.springframework.boot.SpringApplication;
import org.springframework.boot.autoconfigure.SpringBootApplication;
import org.springframework.context.ConfigurableApplicationContext;

import com.spring.beans.A;

@SpringBootApplication
public class Myapplication {

	public static void main(String[] args) {

		ConfigurableApplicationContext context = SpringApplication.run(Myapplication.class, args);

		A a = context.getBean(A.class);
		a.doSomething();

		// Closing the context object.
		context.close();
	}
}
4. Run the Application
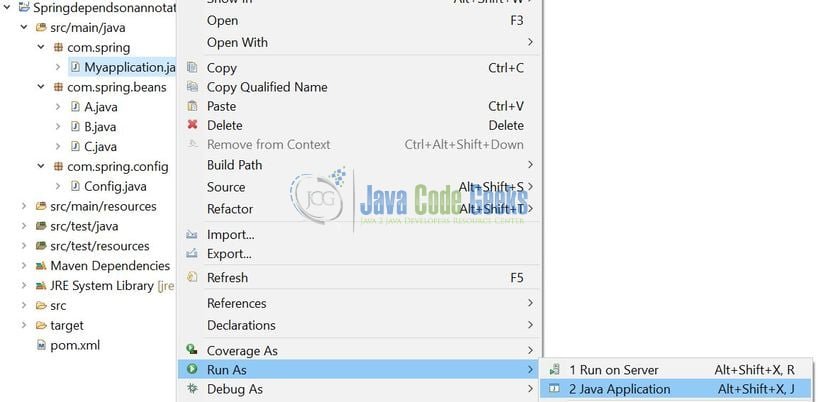
To execute the application, right click on the Myapplication.java class, Run As -> Java Application. Developers can debug the example and see what happens after every step. Enjoy!
5. Project Demo
The code shows the following logs as the output of this tutorial.
====== Bean B is initialized. ======
====== Bean C is initialized. ======
====== Bean A is initialized. ======

2019-01-22 12:43:02.028  INFO 13688 --- [           main] com.spring.Myapplication                 : Started Myapplication in 0.856 seconds (JVM running for 1.283)

Inside doSomething() method of 'A' bean.
Inside doSomething() method of 'B' bean.
Inside doSomething() method of 'C' bean.
That is all for this tutorial and I hope the article served you whatever you were looking for. Happy Learning and do not forget to share!
6. Conclusion
This post defines the implementation of the @DependsOn annotation in the spring framework and helps developers understand the basic configuration required to achieve this. Developers can download the sample application as an Eclipse project in the Downloads section.
7. Download the Eclipse Project
This was an example of Spring @DependsOn annotation for beginners.
You can download the full source code of this example here: Spring @DependsOn Annotation Example


