Welcome readers, in this tutorial, we will explore an interesting Spring Cloud component known as Netflix Ribbon for client-side load balancing.
1. Introduction
- Spring Boot is a module that provides rapid application development feature to the spring framework including auto-configuration, standalone-code, and production-ready code
- It creates applications that are packaged as jar and are directly started using embedded servlet container (such as Tomcat, Jetty or Undertow). Thus, no need to deploy the war files
- It simplifies the maven configuration by providing the starter template and helps to resolve the dependency conflicts. It automatically identifies the required dependencies and imports them in the application
- It helps in removing the boilerplate code, extra annotations, and xml configurations
- It provides a powerful batch processing and manages the rest endpoints
- It provides an efficient jpa-starter library to effectively connect the application with the relational databases
- It offers a Microservice architecture and cloud configuration that manages all the application related configuration properties in a centralized manner.
1.1 Load Balancing
- Load Balancing is a concept of distributing the workloads across multiple resources such as servers, clusters, or disk drives
- Load Balancing aims to improve the application’s response time, avoiding overloading a single resource, optimizing resource usage, and maximizing throughput
Now, open the eclipse ide and let’s see how to implement this tutorial in spring boot. Do note, we’ll use the existing Eureka server and client applications to work on this tutorial. Users can refer to this link for reading.
2. Spring Cloud Ribbon with Eureka Example
Here is a systematic guide for implementing this tutorial.
2.1 Tools Used
We are using Eclipse Kepler SR2, JDK 8 and Maven.
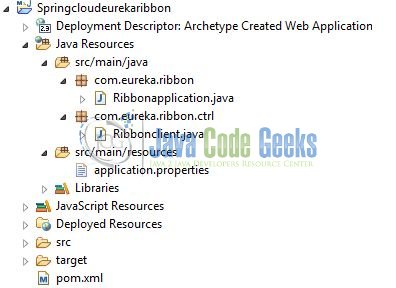
2.2 Project Structure
In case you are confused about where you should create the corresponding files or folder, let us review the Eureka server and Eureka client project structure of the spring boot application.
2.3 Project Creation
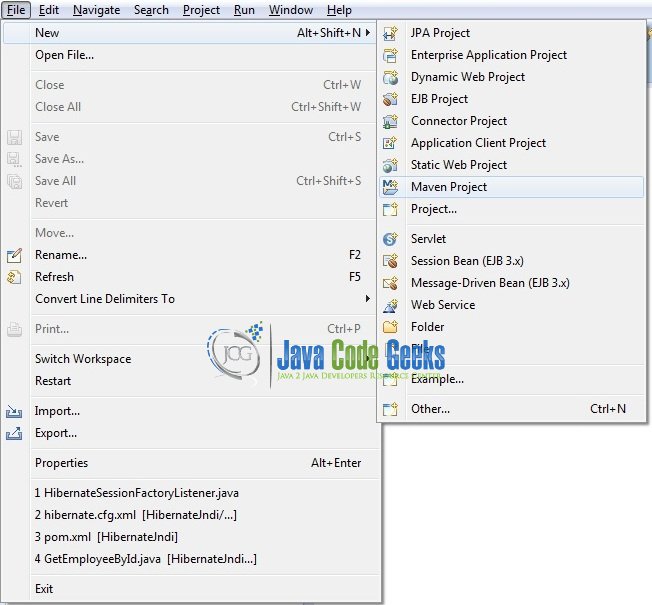
This section will demonstrate how to create a Java-based Maven project with Eclipse. In Eclipse IDE, go to File -> New -> Maven Project.
In the New Maven Project window, it will ask you to select a project location. By default, ‘Use default workspace location’ will be selected. Just click on the next button to proceed.

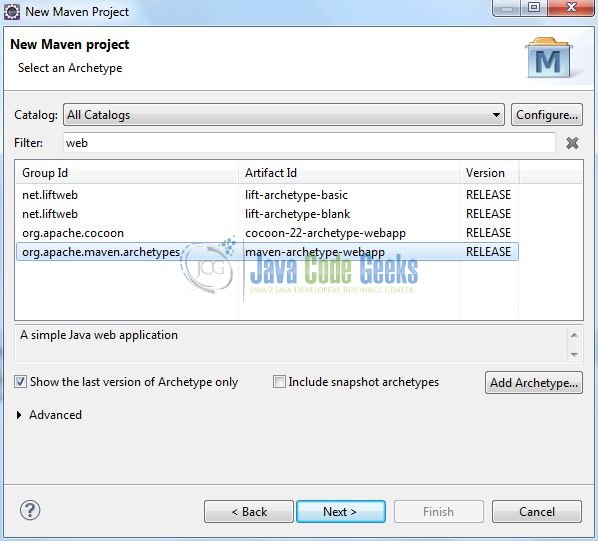
Select the Maven Web App archetype from the list of options and click next.
It will ask you to ‘Enter the group and the artifact id for the project’. We will input the details as shown in Fig. 5. The version number will be by default: 0.0.1-SNAPSHOT.
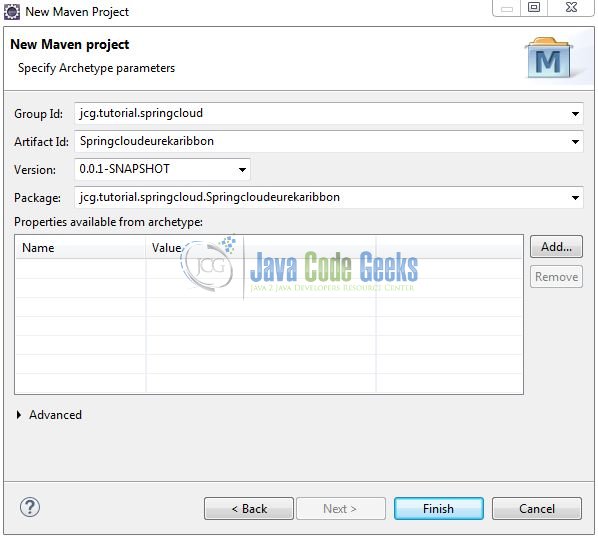
Click on Finish and the creation of the maven project will be completed. If you observe, it has downloaded the maven dependencies and a pom.xml file will be created for the project. Let’s start building the application!
3. Code changes in Eureka Client
Add the instance id to the application.properties of Springcloudeurekaclient application.
application.properties
1 | eureka.instance.instance-id= ${spring.application.name}:${spring.application.instance_id:${random.value}} |
Do remember to start the client application twice by changing the server.port property in the properties file. This is required for the load balancer implementation.
4. Creating a Ribbon Client
Below are the steps involved in developing the application.
4.1 Ribbon Client: Maven Dependencies
Here, we specify the dependencies for Spring Cloud, Discovery server, and Ribbon. Maven will automatically resolve the other dependencies. The updated file will have the following code.
pom.xml
01 02 03 04 05 06 07 08 09 10 11 12 13 14 15 16 17 18 19 20 21 22 23 24 25 26 27 28 29 30 31 32 33 34 35 36 37 38 39 40 41 42 43 44 45 46 47 48 49 50 51 52 53 | <modelVersion>4.0.0</modelVersion> <groupId>jcg.tutorial.springcloud</groupId> <artifactId>Springcloudeurekaribbon</artifactId> <packaging>war</packaging> <version>0.0.1-SNAPSHOT</version> <name>Spring cloud eureka ribbon tutorial</name> <parent> <groupId>org.springframework.boot</groupId> <artifactId>spring-boot-starter-parent</artifactId> <version>2.1.3.RELEASE</version> </parent> <!-- To import the spring cloud parent pom as well. --> <dependencyManagement> <dependencies> <dependency> <groupId>org.springframework.cloud</groupId> <artifactId>spring-cloud-starter-parent</artifactId> <version>Greenwich.RELEASE</version> <type>pom</type> <scope>import</scope> </dependency> </dependencies> </dependencyManagement> <dependencies> <dependency> <groupId>org.springframework.boot</groupId> <artifactId>spring-boot-starter-web</artifactId> </dependency> <dependency> <groupId>org.springframework.cloud</groupId> <artifactId>spring-cloud-starter-eureka</artifactId> <version>1.4.6.RELEASE</version> </dependency> <dependency> <groupId>org.springframework.cloud</groupId> <artifactId>spring-cloud-starter-ribbon</artifactId> <version>1.4.6.RELEASE</version> </dependency> </dependencies> <build> <finalName>Springcloudeurekaribbon</finalName> </build></project> |
4.2 Ribbon Client: Configuration File
Create a new properties file at the Springcloudeurekaribbon/src/main/resources/ location and add the following code to it.
application.properties
1 2 3 | server.port=9090spring.application.name=ribbonclienteureka.client.serviceUrl.defaultZone=http://localhost:7171/eureka/ |
4.3 Ribbon Client: Implementation Class
Add the following code the main class to bootstrap the application from the main method. Always remember, the entry point of the spring boot application is the class containing @SpringBootApplication annotation and the static main method.
Ribbonapplication.java
01 02 03 04 05 06 07 08 09 10 11 12 13 14 15 | package com.eureka.ribbon;import org.springframework.boot.SpringApplication;import org.springframework.boot.autoconfigure.SpringBootApplication;import org.springframework.cloud.client.discovery.EnableDiscoveryClient;@SpringBootApplication//Below annotation is used to list down the application on the eureka server (i.e. the registry server).@EnableDiscoveryClientpublic class Ribbonapplication { public static void main(String[] args) { SpringApplication.run(Ribbonapplication.class, args); }} |
4.4 Ribbon Client: Controller Class
Add the following code to the controller class. Please note, this controller class for testing purpose only and developers can access it via the following link – http://localhost:9090/fetch.

Ribbonclient.java
01 02 03 04 05 06 07 08 09 10 11 12 13 14 15 16 17 18 19 20 21 22 23 24 25 26 27 28 29 30 31 32 33 34 35 36 37 38 39 40 41 42 43 44 45 46 47 | package com.eureka.ribbon.ctrl;import java.io.IOException;import org.springframework.beans.factory.annotation.Autowired;import org.springframework.cloud.client.ServiceInstance;import org.springframework.cloud.client.loadbalancer.LoadBalancerClient;import org.springframework.http.HttpEntity;import org.springframework.http.HttpHeaders;import org.springframework.http.HttpMethod;import org.springframework.http.MediaType;import org.springframework.http.ResponseEntity;import org.springframework.web.bind.annotation.GetMapping;import org.springframework.web.bind.annotation.RestController;import org.springframework.web.client.RestClientException;import org.springframework.web.client.RestTemplate;@RestControllerpublic class Ribbonclient { @Autowired private LoadBalancerClient lba; @GetMapping(value= "/fetch") public void getGreetings() throws RestClientException, IOException { ServiceInstance servInstance= lba.choose("greetings"); System.out.println(servInstance.getUri()); String baseUrl= servInstance.getUri().toString(); baseUrl= baseUrl + "/greet/welcome/en"; RestTemplate restTemplate= new RestTemplate(); ResponseEntity<String> response= null; try { response= restTemplate.exchange(baseUrl, HttpMethod.GET, getHeaders(), String.class); } catch (Exception ex) { System.out.println(ex); } System.out.println("Output= " + response.getBody()); } private static HttpEntity<?> getHeaders() throws IOException { HttpHeaders headers = new HttpHeaders(); headers.set("Accept", MediaType.APPLICATION_JSON_VALUE); return new HttpEntity<>(headers); }} |
5. Run the Applications
As we are ready with all the changes, let us compile the projects and run the applications as a java project.
- Run the existing Eureka server and client applications
- Right click on the
Ribbonapplication.javaclass,Run As -> Java Application. The application will be started on the9090port
Developers can debug the example and see what happens after every step. Enjoy!
6. Project Demo
Now hit the following url on your favorite browser and developers will see the Eureka Server page.
Developers can see that the Ribbon Client Load Balancer depending on its algorithm will now call either of the “greetings” instances.
1 2 3 4 5 6 7 | 2019-06-02 15:44:03.648 INFO 6984 --- [nio-9090-exec-2] c.n.l.DynamicServerListLoadBalancer : Using serverListUpdater PollingServerListUpdater2019-06-02 15:44:03.695 INFO 6984 --- [nio-9090-exec-2] c.netflix.config.ChainedDynamicProperty : Flipping property: greetings.ribbon.ActiveConnectionsLimit to use NEXT property: niws.loadbalancer.availabilityFilteringRule.activeConnectionsLimit = 21474836472019-06-02 15:44:03.698 INFO 6984 --- [nio-9090-exec-2] c.n.l.DynamicServerListLoadBalancer : DynamicServerListLoadBalancer for client greetings initialized: DynamicServerListLoadBalancer:{NFLoadBalancer:name=greetings,current list of Servers=[hp-PC:8181],Load balancer stats=Zone stats: {defaultzone=[Zone:defaultzone; Instance count:1; Active connections count: 0; Circuit breaker tripped count: 0; Active connections per server: 0.0;]},Server stats: [[Server:hp-PC:8181; Zone:defaultZone; Total Requests:0; Successive connection failure:0; Total blackout seconds:0; Last connection made:Thu Jan 01 05:30:00 IST 1970; First connection made: Thu Jan 01 05:30:00 IST 1970; Active Connections:0; total failure count in last (1000) msecs:0; average resp time:0.0; 90 percentile resp time:0.0; 95 percentile resp time:0.0; min resp time:0.0; max resp time:0.0; stddev resp time:0.0]]}ServerList:org.springframework.cloud.netflix.ribbon.eureka.DomainExtractingServerList@6149c43bOutput= GOOD MORNING |
That is all for this tutorial and I hope the article served you whatever you were looking for. Happy Learning and do not forget to share!
7. Conclusion
In this section, developers learned how to create a Ribbon client application and register it on the Eureka server. Developers can download the sample application as an Eclipse project in the Downloads section.
8. Download the Eclipse Project
This was an example of implementing the Ribbon Client with Spring Cloud.
You can download the full source code of this example here: Spring Cloud Ribbon with Eureka Example
