In this article we will talk about the concept of Listeners as provided by the Spring Batch framework. Listeners are the entities that help to intercept the execution of a Job or a Step and allow the user to perform some functionality. The article will be driven by an XML based Spring Batch example. Following are the tools that would be used in it.
- Eclipse Helios
- Maven 2.2.1
- Spring 4.0.5.RELEASE
- Spring Batch 3.0.4.RELEASE
- Spring JDBC 4.0.5.RELEASE
- HSQL Database 1.8.0.7
- Commons 1.4
- Spring OXM (for un/marshaling) 4.0.5.RELEASE
The article has been organized into sections as shown below. The entire example code is available for download at the end of the article.
1. Introduction
A Job in Spring Batch encapsulates the entire batch processing entity. However, the actual execution or the action in a Job happens in the Steps that constitute a Job. Listeners are an effective and simple way of intercepting the executions at both the Job level and at the Step levels and performing some intervening functionality. Say, maintaining a database table that keeps a tab on the status of the overall job execution like the number of records that were read, updated, skipped etc. In this article we will look at the different types of Listeners that are available and how these could be used. In the example code written here we will demonstrate with an example of an ItemReadListener that is triggered when an item is read and an ItemWriteListener that is invoked when an item is written out. But before jumping into the example code, a quick brush up on the basic concepts involved have been provided in the following section. Those already familiar with these may move on to the example code directly.
2. Spring Batch Basics
Before working out the example code, it will be good to have a quick peek at the core concepts at play namely, Job, Step and Listeners.
2.1 Job
As aptly described in the official documentation a Job encapsulates the whole concept of batch processing. It consists of one or more Steps where the actual processing occurs. Job is basically an interface with SimpleJob being its simplest implementation floated by the framework. Most often working with SimpleJob suffices one’s requirements. Following is an example snippet of an XML based Job configuration.
XML Based Job Configuration
<job id="dbToXml" xmlns="http://www.springframework.org/schema/batch">
   <step id="step12">
   	<tasklet>
            <chunk reader="itemReader" processor="itemProcessor" writer="itemWriter" commit-interval="1"/>
   	</tasklet>
   </step>
</job>
2.2 Step
A Step is where the actual action happens. Step is an interface. Processing inside a Step happens in either a Chunk-Oriented manner or through Tasklets. The former is used when a Step involves reading, processing and writing data to some output. Say, we want a number of records from a database table to be read, some business logic applied to those records and then the records should be written to a CSV file. This is when Chunk-oriented processing is to be used. It has a property called ‘commit-interval’ which specifies how many records should be read, processed and aggregated into a chunk to be written out. Tasklet Step Processing is used when a single operation say, invoking a Stored Procedure needs to be done. So since so many things are at work during Step execution, Listeners play an important role in tracking the execution flow and performing some intervening operations in it. In our example code, we will employ a Chunk-Oriented Processing. The following snippet shows the XML configuration for a Step.
XML Based Step Configuration
<job id="sampleJob" job-repository="jobRepository">
    <step id="step1">
        <tasklet transaction-manager="transactionManager">
            <chunk reader="itemReader" writer="itemWriter" commit-interval="10"/>
        </tasklet>
    </step>
</job>
2.3 Listeners
As stated above, listeners help to listen into the Job or Step execution and intercept it. Following are the different types of Listeners floated by the framework. There is a JobListener which is meant for the Job.StepListener is meant for Steps, it is basically a marker interface. It has several extensions. There are six main types of listeners that can be plugged into Step execution, all of which implement the StepListener interface. Listeners are specified via a ‘listeners’ element that is valid at the level of a Step, Tasklet or Chunk; it is recommended to apply the listener at the most granular level that it is applicable. The following code-snippet shows a simple XML based configuration of a Step Listener.
Configuring Step Listener
<step id="step1">
    <tasklet>
        <chunk reader="reader" writer="writer" commit-interval="10"/>
        <listeners>
            <listener ref="stepListener"/>
        </listeners>
    </tasklet>
</step>
2.3.1 StepExecutionListener
StepExecutionListener is the most generic listener. It has just two methods which are to be invoked right before a Step execution starts and right after it ends. The ‘ExitStatus’ of the ‘afterStep()’ method indicates whether the Step execution ended successfully or not.
StepExecutionListener Interface
public interface StepExecutionListener extends StepListener {

    void beforeStep(StepExecution stepExecution);

    ExitStatus afterStep(StepExecution stepExecution);

}
2.3.2 ChunkListener
ChunkListener listens into the life-cycle of a chunk. As stated above, a Chunk-Oriented Processing is used when we are dealing with a collection of items that are to be aggregated to be committed together as output within the scope of a transaction. beforeChunk() is called after the transaction starts but before read is called on the ItemReader. afterChunk() is called only after the chunk has been committed. It is not called in the case of a rollback. Since it is the TaskletStep that calls the ChunkListener hence it can be used in non-item-oriented tasklet as well.
ChunkListener Interface
public interface ChunkListener extends StepListener {

    void beforeChunk();
    void afterChunk();

}
2.3.3 ItemReadListener
ItemReadListener can be used around the reading of an item. It has three methods which are appropriately named according to the tasks they do which are pretty self-explanatory.
ItemReadListener Interface
public interface ItemReadListener extends StepListener {

    void beforeRead();
    void afterRead(T item);
    void onReadError(Exception ex);

}
2.3.4 ItemProcessListener
ItemProcessListener is used to listen into an item processor. Its method names are pretty intuitive.
ItemProcessListener Interface
public interface ItemProcessListener extends StepListener {

    void beforeProcess(T item);
    void afterProcess(T item, S result);
    void onProcessError(T item, Exception e);

}
2.3.5 ItemWriteListener
ItemWriteListener is invoked when an item is written into. This interface holds just three methods.
ItemWriteListener Interface
public interface ItemWriteListener<S> extends StepListener {

    void beforeWrite(List items);
    void afterWrite(List items);
    void onWriteError(Exception exception, List items);

}
2.3.6 SkipListener
SkipListener is the listener for listening into items which have been skipped, that is, those items that did not qualify through all the three stages of step execution namely, read, process and write. The following is how the interface looks.
SkipListener Interface
public interface SkipListener extends StepListener {

    void onSkipInRead(Throwable t);
    void onSkipInProcess(T item, Throwable t);
    void onSkipInWrite(S item, Throwable t);

}
There are a few points to note about the behavior of this interface.
- Rollbacks may cause the same item to be registered as skipped multiple times
- Most often it is used to log items that were skipped and could not complete the whole step processing cycle to either get them processed in the next cycle or for human processing
- The appropriate skip method is ensured to be called by the framework only once per item depending on when the error occurred
- It is always called just before the transaction is committed
3. Spring Batch Listener Example
Now we should be good to write our example code. We will configure a simple Batch Job that reads data from an HSQL (an in-memory) database table and writes it out to an XML file. We will set-up two listeners- an ItemReadListener and an ItemWriteListener. The former would just print out out some statements. In the ItemWriteListener once an item is written out we will make some entries into a stats table in the same HSQL database. Kindly note that the other types of listeners listed above could also be configured in just the same manner and made to either print out some statements just to see how they are triggered or could be made to do something more meaningful. Since the idea here is just to demonstrate how listeners work we are confining ourselves to use just these two listeners. This example code will use XML based configuration. It will be a standard Maven project created using Eclipse Helios IDE. So, here we go.
3.1 Project Set-Up
- Fire-up your IDE, Eclipse in our case from a suitable location
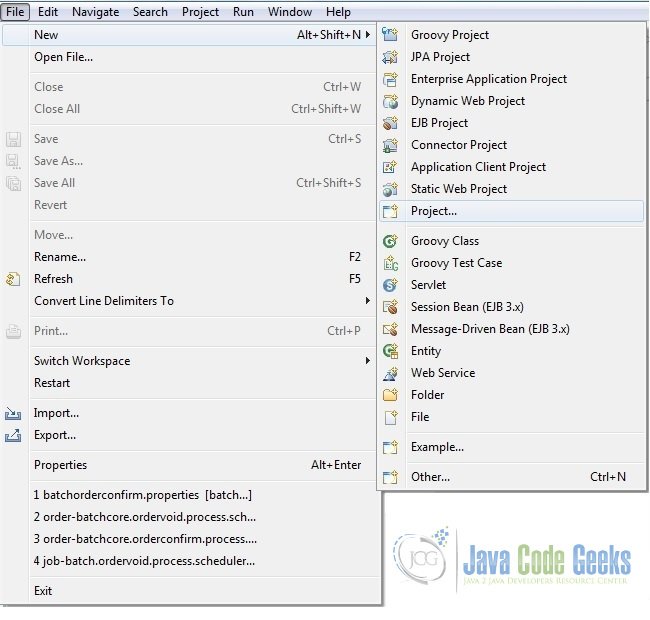
- Create a standard Maven project
- Name the project appropriately
- Follow the below screenshots for reference

Fig.1 Create Project 
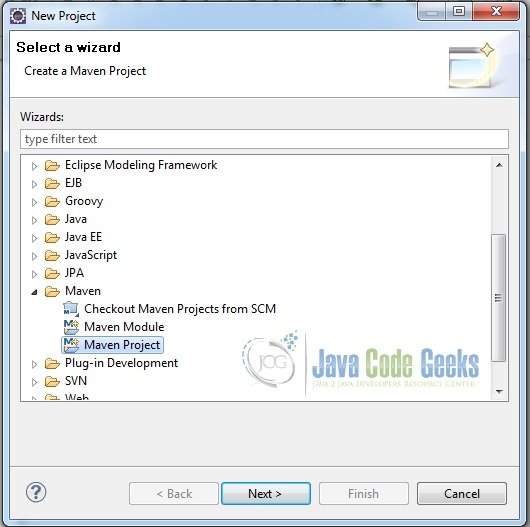
Fig.2 Choose the Creation of a Maven Project 
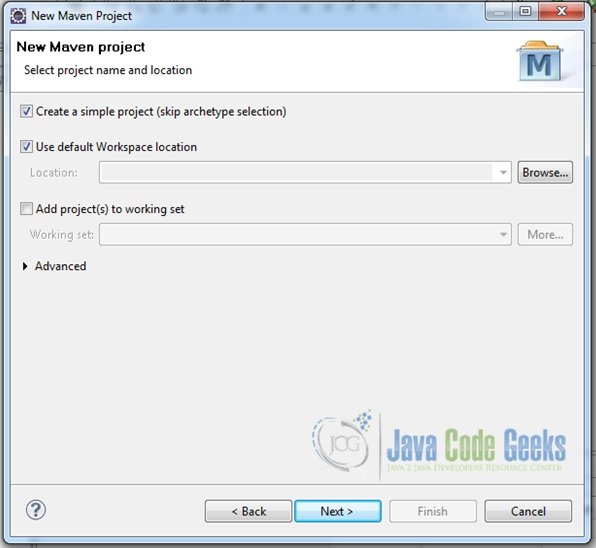
Fig.3 Choose Standard Maven Project (ignore archetype selection) 
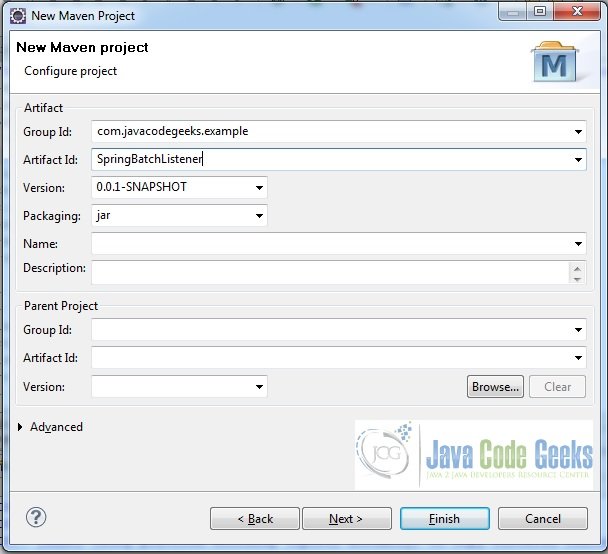
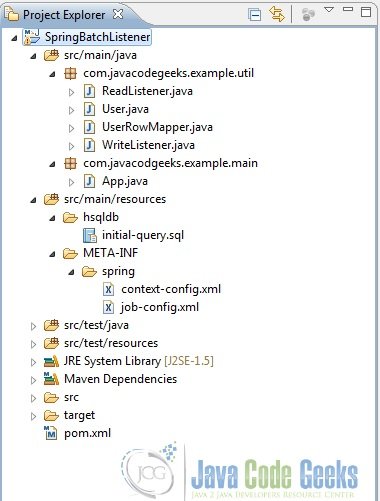
Fig.4 Provide Project Name - Once the project is created add some files and folders to it so that it has the final structure as shown in the screenshot below.

Fig. 5 Final Project Structure
3.2 Maven Dependencies
Open the pom.xml file and add the following Maven dependencies in it.
pom.xml
<project xmlns="http://maven.apache.org/POM/4.0.0" xmlns:xsi="http://www.w3.org/2001/XMLSchema-instance" xsi:schemaLocation="http://maven.apache.org/POM/4.0.0 http://maven.apache.org/xsd/maven-4.0.0.xsd">
  <modelVersion>4.0.0</modelVersion>
  <groupId>com.javacodegeeks.example</groupId>
  <artifactId>SpringBatchListener</artifactId>
  <version>0.0.1-SNAPSHOT</version>
  <properties>
  	<spring.version>4.0.5.RELEASE</spring.version>
  	<spring.batch.version>3.0.4.RELEASE</spring.batch.version>
  	<spring.jdbc.version>4.0.5.RELEASE</spring.jdbc.version>
  	<hsql.version>1.8.0.7</hsql.version>
  	<commons.version>1.4</commons.version>
  	<spring.oxm.version>4.0.5.RELEASE</spring.oxm.version>
  </properties>
  <dependencies>
  	<dependency>
		<groupId>org.springframework</groupId>
		<artifactId>spring-context-support</artifactId>
		<version>${spring.version}</version>
    </dependency>
  	<dependency>
		<groupId>org.springframework.batch</groupId>
		<artifactId>spring-batch-core</artifactId>
		<version>${spring.batch.version}</version>
    </dependency>
    <dependency>
		<groupId>hsqldb</groupId>
		<artifactId>hsqldb</artifactId>
		<version>${hsql.version}</version>
	</dependency>
	<dependency>
		<groupId>org.springframework</groupId>
		<artifactId>spring-jdbc</artifactId>
		<version>${spring.jdbc.version}</version>
   </dependency>
     <dependency>
		<groupId>commons-dbcp</groupId>
		<artifactId>commons-dbcp</artifactId>
		<version>${commons.version}</version>
	</dependency>
	<dependency>
		<groupId>org.springframework</groupId>
		<artifactId>spring-oxm</artifactId>
		<version>${spring.oxm.version}</version>
	</dependency>
  </dependencies>
</project>
3.3 HSQL Database Table Creation
Now, open up the initial-query.sql file and add the following SQL queries to it. This script would be invoked on the configured datasource from the context-config.xml file. These queries are meant to create a USER table and insert some records into it which would be read from and written out into a CSV file in our Job. The other table called USER_STATS would be populated from our StepListener once the records are written to output.
initial-query.sql
DROP TABLE USER IF EXISTS;

DROP TABLE USER_STATS IF EXISTS;

CREATE TABLE USER(
firstName varchar(30),
middleName varchar(35),
lastName varchar(30),
city varchar(20),
id integer
);

CREATE TABLE USER_STATS(
firstName varchar(30),
lastName varchar(30),
city varchar(20),
id integer,
createTime timestamp default 'now'
);

INSERT INTO USER VALUES('Ram','Gopal', 'Verma', 'Mumbai', 44);
INSERT INTO USER VALUES('Harivansh','Rai', 'Bachhan', 'Patna', 84);
INSERT INTO USER VALUES('Mary','Anna', 'McBeth', 'Delhi', 92);
3.4 POJO Classes
Next, we will create a POJO class and its corresponding rowmapper that maps to the USER table we created above in the HSQL database table.

User.java
package com.javacodegeeks.example.util;

public class User {
   String firstName, middleName, lastName;
   String city;
   int id;

	public String getFirstName() {
		return firstName;
	}
	public void setFirstName(String firstName) {
		this.firstName = firstName;
	}
	public String getMiddleName() {
		return middleName;
	}
	public void setMiddleName(String middleName) {
		this.middleName = middleName;
	}
	public String getLastName() {
		return lastName;
	}
	public void setLastName(String lastName) {
		this.lastName = lastName;
	}
	public String getCity() {
		return city;
	}
	public void setCity(String city) {
		this.city = city;
	}
	public int getId() {
		return id;
	}
	public void setId(int id) {
		this.id = id;
	}
	@Override
	public String toString(){
		return firstName+" "+middleName+" "+lastName+" resides in "+ city;
	}

}
UserRowMapper.java
package com.javacodegeeks.example.util;

import java.sql.ResultSet;
import java.sql.SQLException;

import org.springframework.jdbc.core.RowMapper;

public class UserRowMapper implements RowMapper{

	public User mapRow(ResultSet rs, int rowNum) throws SQLException {
		User user = new User();
		user.setFirstName(rs.getString("firstName"));
		user.setMiddleName(rs.getString("middleName"));
		user.setLastName(rs.getString("lastName"));
		user.setCity(rs.getString("city"));
		user.setId(rs.getInt("id"));
		return user;
	}

}
3.5 Configure Listeners
So far so good. Now we will roll out our two Step Listeners. As stated in the introductory part, the ReadListener implements the ItemReadListener interface and it would simply hold some print statements. WriteListener implements the ItemWriteListener in which we will try to insert some records into the USER_STATS.
ItemReadListener.java
package com.javacodegeeks.example.util;

import org.springframework.batch.core.ItemReadListener;


public class ReadListener implements ItemReadListener{

	public void beforeRead() {
		System.out.println("Before reading an item");
	}

	public void afterRead(User item) {
		System.out.println("After reading an item: "+ item.toString());
	}

	public void onReadError(Exception ex) {
		System.out.println("Error occurred while reading an item!");
	}

}
WriteListener.java
package com.javacodegeeks.example.util;

import java.util.List;

import javax.sql.DataSource;

import org.springframework.batch.core.ItemWriteListener;
import org.springframework.jdbc.core.JdbcTemplate;

public class WriteListener implements ItemWriteListener{

	private String INSERT_QUERY = "insert into user_stats(firstName,lastName,city,id) values (?,?,?,?)";
	private DataSource dataSource;


	public DataSource getDataSource() {
		return dataSource;
	}

	public void setDataSource(DataSource dataSource) {
		this.dataSource = dataSource;
	}


	public void beforeWrite(List items) {
		System.out.println("Going to write following items: "+ items.toString());
	}

	public void onWriteError(Exception exception, List items) {
		System.out.println("Error occurred when writing items!");

	}
	public void afterWrite(List items) {
		System.out.println("Feeding the stats table");
		int result = 0;
		JdbcTemplate jdbcTemplate = new JdbcTemplate(getDataSource());

		for(User user: items){
			Object[] params = {user.getFirstName(),user.getLastName(),user.getCity(),user.getId()};
			result += jdbcTemplate.update(INSERT_QUERY, params);

		}
		System.out.println("Number of rows inserted: "+ result);
	}

}
3.6 Configure Basic Beans
Next, in the context-config.xml file we will configure the basic beans to be used in our application like JobRepository, TransactionManager etc. Also, the initial-query.sql would be invoked here.
context-config.xml
<beans xmlns="http://www.springframework.org/schema/beans"
	xmlns:xsi="http://www.w3.org/2001/XMLSchema-instance"
	xmlns:jdbc="http://www.springframework.org/schema/jdbc"
	xsi:schemaLocation="
		http://www.springframework.org/schema/beans
		http://www.springframework.org/schema/beans/spring-beans-3.2.xsd
		http://www.springframework.org/schema/jdbc
	    http://www.springframework.org/schema/jdbc/spring-jdbc.xsd">

	<!-- using in-memory store for batch meta-data -->
	<bean id="jobRepository"
		class="org.springframework.batch.core.repository.support.MapJobRepositoryFactoryBean">
		<property name="transactionManager" ref="transactionManager" />
	</bean>

	<bean id="transactionManager"
		class="org.springframework.batch.support.transaction.ResourcelessTransactionManager" />

	<bean id="jobLauncher"
		class="org.springframework.batch.core.launch.support.SimpleJobLauncher">
		<property name="jobRepository" ref="jobRepository" />
	</bean>

	<bean id="dataSource" class="org.apache.commons.dbcp.BasicDataSource"
		lazy-init="true" destroy-method="close">
		<property name="driverClassName" value="org.hsqldb.jdbcDriver" />
		<property name="url"
			value="jdbc:hsqldb:file:src/main/resources/hsqldb/batchcore.db;shutdown=true;" />
		<property name="username" value="sa" />
		<property name="password" value="" />

	</bean>

	<!-- Create meta-tables. Here we are also invoking the initial-query.sql script -->
	<jdbc:initialize-database data-source="dataSource">
	    <jdbc:script location="classpath:hsqldb/initial-query.sql" />
		<jdbc:script location="org/springframework/batch/core/schema-drop-hsqldb.sql" />
		<jdbc:script location="org/springframework/batch/core/schema-hsqldb.sql" />
    </jdbc:initialize-database>

</beans>
3.7 Configure Job
Open the job-config.xml file and add the following lines of code to it. We have just one Job with a Step in it.
job-config.xml
<?xml version="1.0" encoding="UTF-8"?>
<beans xmlns="http://www.springframework.org/schema/beans"
	xmlns:batch="http://www.springframework.org/schema/batch"
	xmlns:util="http://www.springframework.org/schema/util"
	xmlns:task="http://www.springframework.org/schema/task"
	xmlns:xsi="http://www.w3.org/2001/XMLSchema-instance"
	xsi:schemaLocation="http://www.springframework.org/schema/batch
	http://www.springframework.org/schema/batch/spring-batch-3.0.xsd
	http://www.springframework.org/schema/beans
	http://www.springframework.org/schema/beans/spring-beans-4.0.xsd
	http://www.springframework.org/schema/util
	http://www.springframework.org/schema/util/spring-util-4.0.xsd">

   <job id="dbToXml" xmlns="http://www.springframework.org/schema/batch" restartable="true">
   	<step id="myStep" allow-start-if-complete="true">
   		<tasklet>
   			<chunk reader="itemReader" writer="itemWriter" commit-interval="2"/>
   			<listeners>
   				<listener ref="readListener" />
   				<listener ref="writeListener" />
   			</listeners>
   		</tasklet>
   	</step>
   </job>

   <bean id="itemReader" class="org.springframework.batch.item.database.JdbcCursorItemReader" scope="step">
   	<property name="dataSource" ref="dataSource"></property>
   	<property name="sql" value="select * from user"></property>
   	<property name="rowMapper">
   		<bean class="com.javacodegeeks.example.util.UserRowMapper"/>
   	</property>
   </bean>


   <bean id="itemWriter" class="org.springframework.batch.item.xml.StaxEventItemWriter">
   	<property name="resource" value="file:xml/user_data3.xml"></property>
   	<property name="marshaller" ref="unmarshaller"></property>
   	<property name="rootTagName" value="users"></property>
   </bean>

   <bean id="unmarshaller" class="org.springframework.oxm.xstream.XStreamMarshaller">
   	<property name="aliases">
   		<util:map id="aliases">
   			<entry key="user" value="com.javacodegeeks.example.util.User"></entry>
   		</util:map>
   	</property>
   </bean>

   <bean id="readListener" class="com.javacodegeeks.example.util.ReadListener" />

   <bean id="writeListener" class="com.javacodegeeks.example.util.WriteListener">
   		<property name="dataSource" ref="dataSource"></property>
   </bean>
</beans>
3.8 Set-Up Application
Okay, almost there. Now to be able to fire this job easily we will set up our Main() as follows. Notice that we are just picking up the Job and the JobLauncher as two beans from the application-context and just triggering the job in it.
App.java
package com.javacodgeeks.example.main;

import org.springframework.batch.core.Job;
import org.springframework.batch.core.JobExecution;
import org.springframework.batch.core.JobParameters;
import org.springframework.batch.core.launch.JobLauncher;
import org.springframework.context.ApplicationContext;
import org.springframework.context.support.ClassPathXmlApplicationContext;

public class App {
   public static void main(String[] args) {
	String[] str = {"META-INF/spring/context-config.xml", "META-INF/spring/job-config.xml"};
	ApplicationContext ctx = new ClassPathXmlApplicationContext(str);
	Job job = (Job) ctx.getBean("dbToXml");
	JobLauncher jobLauncher = (JobLauncher) ctx.getBean("jobLauncher");
	try{
		JobExecution execution = jobLauncher.run(job, new JobParameters());
		System.out.println("Job Execution Status: "+ execution.getStatus());
	}catch(Exception e){
	  e.printStackTrace();
	}
  }
}
3.9 Output
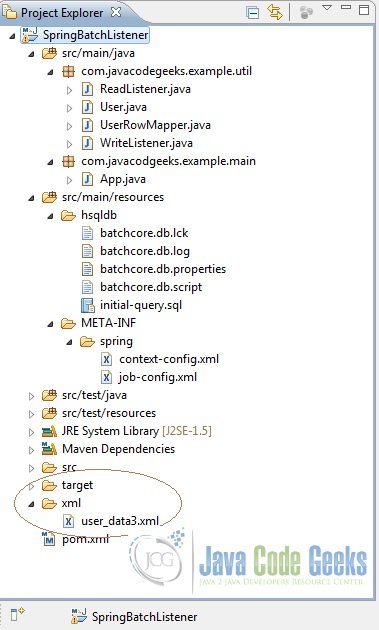
Now, just run the App.java as a Java Application. If everything described above has been followed so far, it should print out the following output on the Eclipse console. Also, the CSV file should have been written out so that the final project structure becomes what is shown in the screenshot below.
Output
INFO: Job: [FlowJob: [name=dbToXml]] launched with the following parameters: [{}]
Aug 26, 2015 7:56:21 AM org.springframework.batch.core.job.SimpleStepHandler handleStep
INFO: Executing step: [myStep]
Before reading an item
After reading an item: Ram Gopal Verma resides in Mumbai
Before reading an item
After reading an item: Harivansh Rai Bachhan resides in Patna
Going to write following items: [Ram Gopal Verma resides in Mumbai, Harivansh Rai Bachhan resides in Patna]
Feeding the stats table
Number of rows inserted: 2
Before reading an item
After reading an item: Mary Anna McBeth resides in Delhi
Before reading an item
Going to write following items: [Mary Anna McBeth resides in Delhi]
Feeding the stats table
Number of rows inserted: 1
Aug 26, 2015 7:56:22 AM org.springframework.batch.core.launch.support.SimpleJobLauncher run
INFO: Job: [FlowJob: [name=dbToXml]] completed with the following parameters: [{}] and the following status: [COMPLETED]
Job Execution Status: COMPLETED
Final Project Structure after running the Job
4. Conclusion
This brings us to the end of the example. Hope it was worth reading. The entire sample code is available for download below.
You can download the full source code of this example here: SpringBatchListener

Sprring Batch On Read Error is not working
If I give the incorrect query or incorrect password in the given example, OnReadError is not working.. Am I missing anything.