Spring Autowiring Tutorial
One of the main tenets of the Spring framework is Dependency Injection (DI). The framework implements DI by using @Autowired annotations. These annotations were introduced starting with Spring 2.5. By using this annotation, one can leave a lot of configuration overheads and leave the handling of injection of beans to Spring.
Table Of Contents
1. Introduction
Dependency injection (DI) in Spring “is a process whereby objects define their dependencies, that is, the other objects they work with, only through constructor arguments, arguments to a factory method, or properties that are set on the object instance after it is constructed or returned from a factory method.”
@Autowired annotation accomplishes the DI feature. Through the use of XML based or Java based configurations (explained later in this article), when the Spring application context is being spun up, Spring automatically locates beans which have been marked as auto-wire candidates. The @Autowired annotation tells Spring where an injection needs to occur. These beans are then instantiated and then are available in the Spring application context to be used by other classes or components.
2. Setup Maven Project
Create a New Maven Project
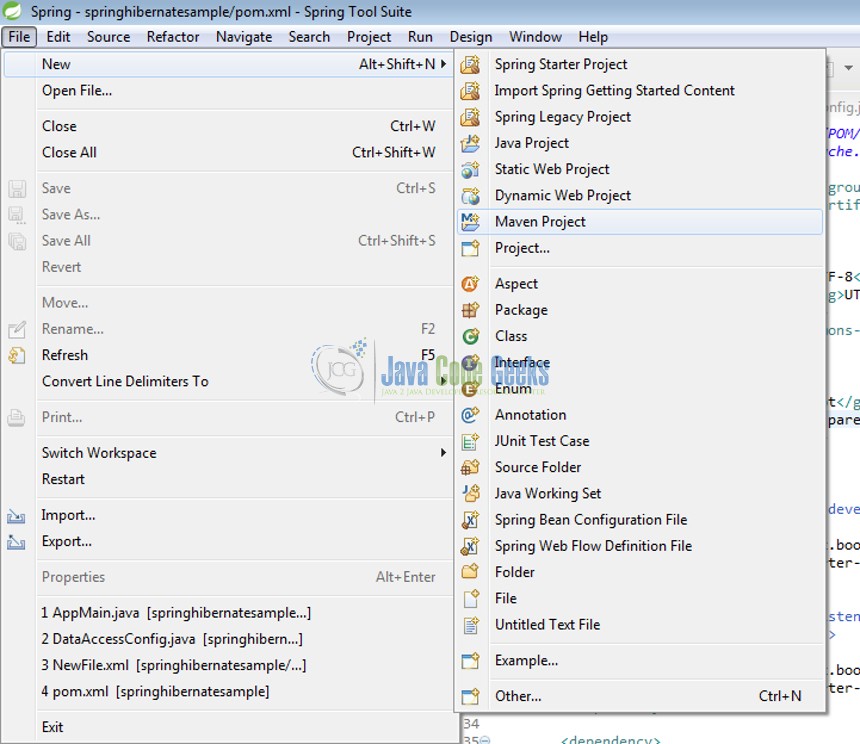
- Navigate to File menu in Eclipse or Spring Tool Suite IDE.
- Click ‘File’ -> ‘New’ -> ‘Maven Project’.
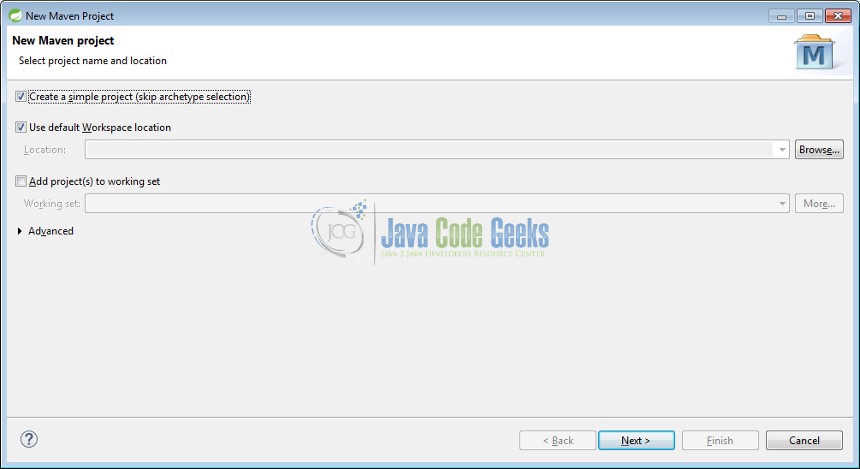
Under the “New Maven Project” window:
- Select ‘Create a simple project….’ check box.
- The remaining options can be kept as it is and simply click on ‘Next’.
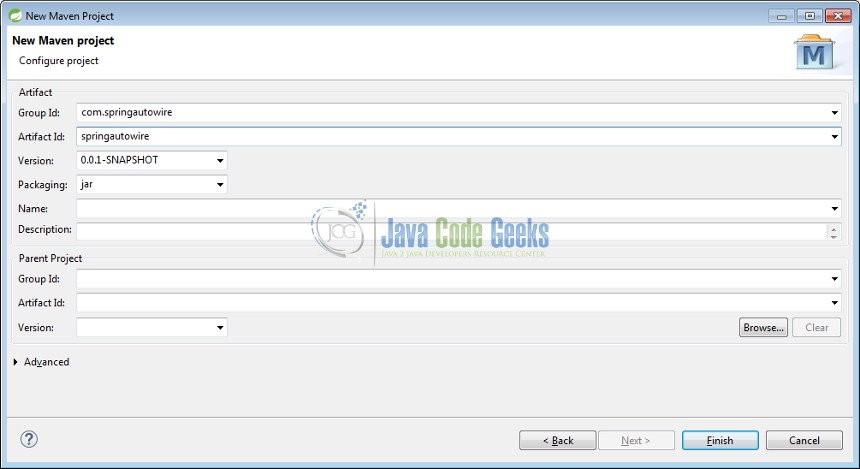
In the next window enter the following options:
- For
Group IDenter com.springautowire. - For
Artifact IDenter springautowire. - The remaining options can be kept as it is (We will be working with a jar file here).
- Click on ‘Finish’.
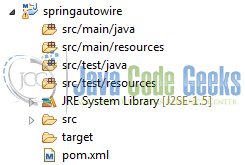
A new maven project is created and is visible under Package Explorer in Eclipse

3. Project Demo
3.1 How to configure
To enable annotation-driven injection in a spring application, java based or XML based configurations can be used. For a java based configuration, injection by using AnnotationConfigApplicationContextloads the spring configuration.
AppConfig.java
@Configuration
@ComponentScan({"com.springautowire.domain"})
public class AppConfig {
//.....further code....
}
Here @ComponentScan annotation lets the spring context know which package to search for beans and instantiate for injection. If you wish to XML based configurations, it can be enabled by declaring it in Spring XML files like: context:annotation-config
3.2 Types of Autowiring
DI by Autowiring can be set in Spring by three major types:
- By Setter Injection
- By Constructor Injection
- By Autowiring properties
3.2.1 Setter Injection
The @Autowired annotation can also be used on setter methods. In the below example, the annotation is used on the setter method for Person entity. So now the setter method is invoked with the instance of Person when Customer is created:
Customer.java
public class Customer {

	private Person person;

	@Autowired
	public void setPerson(Person person) {
		this.person = person;
	}

	private String type;
	private boolean isActive;

	@Override
	public String toString() {
		StringBuilder s = new StringBuilder();
		s.append(person.getFirstName()).append(" ").append(person.getLastName()).append("\n")
				.append(person.getPhoneNum()).append("\n").append(type).append("\n").append(isActive);
		return s.toString();
	}

	public Person getPerson() {
		return person;
	}

	public String getType() {
		return type;
	}

	public void setType(String type) {
		this.type = type;
	}

	public boolean isActive() {
		return isActive;
	}

	public void setActive(boolean isActive) {
		this.isActive = isActive;
	}
3.2.2 Constructor Injection
The @Autowired annotation can also be used on constructors. In the below example, the annotation is used on a constructor for the Customer class. So an instance of Person is injected as an argument to the constructor when Customeris created:
Customer.java
public class Customer {

	private Person person;

	@Autowired
	public Customer(Person person) {
		this.person = person;
	}

	private String type;
	private boolean isActive;

	@Override
	public String toString() {
		StringBuilder s = new StringBuilder();
		s.append(person.getFirstName()).append(" ").append(person.getLastName()).append("\n")
				.append(person.getPhoneNum()).append("\n").append(type).append("\n").append(isActive);
		return s.toString();
	}

	public Person getPerson() {
		return person;
	}

	public String getType() {
		return type;
	}

	public void setType(String type) {
		this.type = type;
	}

	public boolean isActive() {
		return isActive;
	}

	public void setActive(boolean isActive) {
		this.isActive = isActive;
	}
3.2.3 Autowiring properties
This annotation can be directly on class member and/or properties. Thus this eliminates the need of setter or constructor injection.
Customer.java
public class Customer {

	@Autowired
	private Person person;

	private String type;
	private boolean isActive;

	@Override
	public String toString() {
		StringBuilder s = new StringBuilder();
		s.append(person.getFirstName()).append(" ").append(person.getLastName()).append("\n")
				.append(person.getPhoneNum()).append("\n").append(type).append("\n").append(isActive);
		return s.toString();
	}

	public Person getPerson() {
		return person;
	}

	public void setPerson(Person person) {
		this.person = person;
	}

	public String getType() {
		return type;
	}

	public void setType(String type) {
		this.type = type;
	}

	public boolean isActive() {
		return isActive;
	}

	public void setActive(boolean isActive) {
		this.isActive = isActive;
	}
}
To check if the bean has been correctly instantiated and included in the spring application context, we can test by using the below java class.
Application.java
public class Application {

	public static void main(String[] args) {
		ApplicationContext ctx = new AnnotationConfigApplicationContext(AppConfig.class);

		Customer c = ctx.getBean(Customer.class);
		System.out.println(c.toString());

		((ConfigurableApplicationContext)(ctx)).close();
	}
}
This prints out the sample Customer to the system console. The spring application context ctx gets a hold of the bean via the getBean method. The class name in String format or .class can be passed as paramaters.
John Doe
773-876-8978
EComm
true
3.3 Handling Exceptions
Spring framework auto-wires spring beans by default. If multiple beans exist in the spring application context with the same name, this causes ambiguity. Spring throws a fatal exception in that case.
Let us consider two entities SalesRep and MarketingRep which extend from the Employee.
SalesRep.java
@Component("salesRep")
public class SalesRep extends Employee{
    public void execute() {
        System.out.println("Executing Sales Activity");
    }
}
MarketingRep.java
@Component("marketingRep")
public class MarketingRep extends Employee{
    public void execute() {
        System.out.println("Executing Marketing Activity");
    }
}
Now the Employee bean is auto-wired into an EmployeeService service layer class to perform business transactions
EmployeeService.java
public class EmployeeService {
    @Autowired
    private Employee employee;
    //.....further code....
}
Here we have two concrete instances of the Employee class. Thus two beans of same type are available for Spring to inject. As a result of this ambiguity, Spring will throw an NoUniqueBeanDefinitionException when the EmployeeService class is being instantiated. Exception:
Caused by: org.springframework.beans.factory.NoUniqueBeanDefinitionException: No qualifying bean of type [com.autowire.sample.Employee] is defined:
expected single matching bean but found 2: salesRep,marketingRep
This issue or ambiguous reference can be resolved with the use of the @Qualifier annotation.
EmployeeService.java
public class EmployeeService {
    @Autowired
    @Qualifier("salesRep")
    private Employee employee;
    //.....further code....
}
Here we explicitly pass the name of the bean to be injected to Spring. Thus Spring context is aware that it needs to inject bean of type salesRep when instantiating the EmployeeService class. This removes the confusion and the exception is resolved.
We can set the bean name of any class using the @Component annotation (as in this example). Or by using the @Bean annotation while defining the beans in the application context. Example:
AppConfig.java
@Configuration
public class AppConfig {

	@Bean
	public Customer customer() {
		Customer c = new Customer();
		c.setType("EComm");
		c.setActive(true);
		return c;
	}

	@Bean
	public Person person() {
		Person p = new Person();
		p.setFirstName("John");
		p.setLastName("Doe");
		p.setPhoneNum("773-876-8978");
		return p;
	}
}
4. Conclusion
In this tutorial, we discussed the concepts of DI and autowiring of beans in the Spring framework. Different types or means of autowiring were discussed. Although any type of injection can be used, for ease of use, property based injection is preferred. But that decision is left to individual developers and their project needs.The use of the @Qualifier annotation shows how to resolve ambigous bean references and make spring context aware of which beans to inject.
5. References
Please go through below links for further conceptual information.
https://en.wikipedia.org/wiki/Dependency_injection
6. Download Source Code
You can download the full source code of this example here: SpringAutowire


