In this post, we present a file upload Example using Spring MVC 5 Servlet 3.0 MultipartConfigElement.
1. Introduction
Multipurpose Internet Mail Extensions (MIME) defines a standard for constructing multipart messages that have file attachments. Spring MVC does not handle multipart requests by default. It does, however, provide multipart support with MultipartResolver. The MultipartResolver parses inbound multipart requests. You can enable multipart support by registering a MultipartResolver bean in the DispatcherServlet application context.
Once the request is parsed, the resolver will wrap the attached file in a MultipartFile object. The request handler can then access the MultipartFilethat is passed in as a request parameter.
The MulitpartConfigElement object is used to set parameters for files sent in a multipart request. You can set limits for the file size, request size, and threshold size (that is, the size after which files will be written to disk). MulitpartConfigElement is also used to specify the directory that Spring MVC will use to store files.
We will clarify with an example.
1.1 Tools Used in this Example
- Eclipse Java EE IDE for Web Developers Version: Oxygen.3a
- Maven 3.3.9 (Embedded in Eclipse)
- Spring Tools Plugins 3.9.4.RELEASE
- Tomcat 9.0
Spring Tools is a set of plugins for Eclipse that speed up the development of Spring applications. You can add Spring Tools to your existing Eclipse installation by going to the Eclipse Marketplace and searching for “Spring IDE”. For more information on Spring Tools for Eclipse visit Spring Tools for Eclipse IDE.
For instructions on Tomcat installation and setup, visit https://tomcat.apache.org/tomcat-9.0-doc/appdev/installation.html.
2. Spring MVC 5 Servlet 3.0 MultipartConfigElement Example
2.1 Create the Spring MVC Maven Project
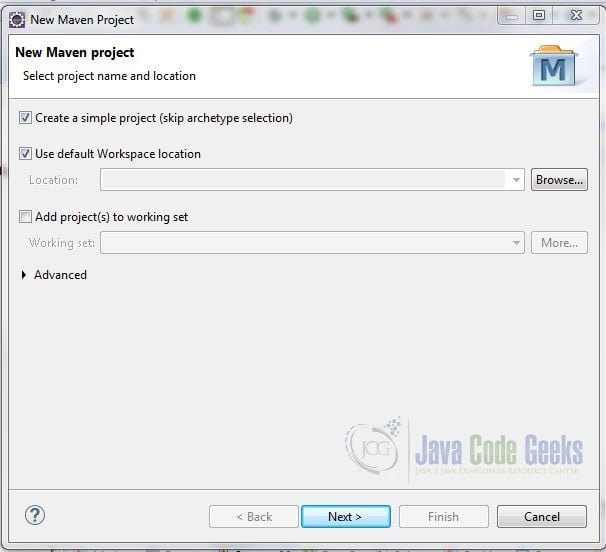
Let’s begin by creating a simple Maven Project. Select the “Create a simple project (skip archetype selection)” checkbox and click “Next”.
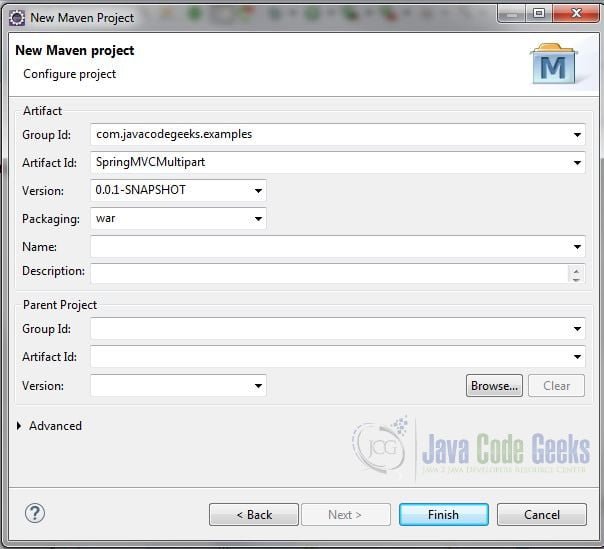
Enter a Group Id, Artifact Id, and select “war” for Packaging and click “Finish”.
Open the pom.xml file and add the following just below the packaging element.
pom.xml
<project xmlns="http://maven.apache.org/POM/4.0.0"
  xmlns:xsi="http://www.w3.org/2001/XMLSchema-instance"
  xsi:schemaLocation="http://maven.apache.org/POM/4.0.0 http://maven.apache.org/xsd/maven-4.0.0.xsd">
  <modelVersion>4.0.0</modelVersion>
  <groupId>com.javacodegeeks.examples</groupId>
  <artifactId>SpringMVCMultipart</artifactId>
  <version>0.0.1-SNAPSHOT</version>
  <packaging>war</packaging>
  <properties>
    <maven.compiler.source>1.8</maven.compiler.source>
    <maven.compiler.target>1.8</maven.compiler.target>
  </properties>
  <build>
    <pluginManagement>
      <plugins>
        <plugin>
          <groupId>org.apache.maven.plugins</groupId>
          <artifactId>maven-war-plugin</artifactId>
          <version>3.1.0</version>
        </plugin>
      </plugins>
    </pluginManagement>
    <finalName>${project.artifactId}</finalName>
  </build>
  <dependencies>
    <dependency>
      <groupId>org.springframework</groupId>
      <artifactId>spring-webmvc</artifactId>
      <version>5.0.7.RELEASE</version>
    </dependency>
    <dependency>
      <groupId>javax.servlet</groupId>
      <artifactId>javax.servlet-api</artifactId>
      <version>3.1.0</version>
      <scope>provided</scope>
    </dependency>
    <dependency>
      <groupId>javax.servlet.jsp</groupId>
      <artifactId>javax.servlet.jsp-api</artifactId>
      <version>2.3.1</version>
      <scope>provided</scope>
    </dependency>
    <dependency>
      <groupId>javax.servlet</groupId>
      <artifactId>jstl</artifactId>
      <version>1.2</version>
    </dependency>
  </dependencies>
</project>
We want Maven to use the Java 8 compiler. This is specified in the properties section. The maven-war-plugin will be used for building the application. This is added in the build section. The name for the WAR file is specified with the <finalName> tag.
Next, the dependencies for Spring MVC, the servlet APIs, and the JSTL tag libraries are included.
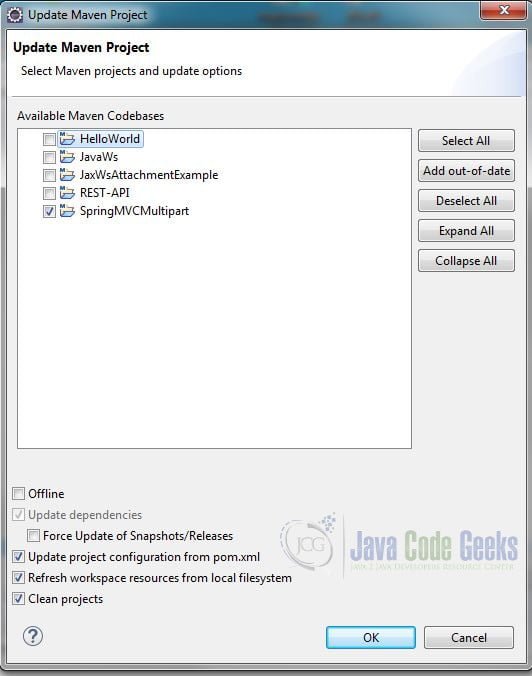
Save the changes and select Maven->Update Project from the project context menu. Select your project from “Available Maven Codebases”. Leave the other defaults and click OK.
2.2 Create the Configuration Class
Create a new package com.javacodegeeks.examples.config and class AppConfig that implements WebMvcConfigurer with the following code:
AppConfig.java
package com.javacodegeeks.examples.config;

import org.springframework.context.annotation.Bean;
import org.springframework.context.annotation.ComponentScan;
import org.springframework.context.annotation.Configuration;
import org.springframework.web.multipart.MultipartResolver;
import org.springframework.web.multipart.support.StandardServletMultipartResolver;
import org.springframework.web.servlet.ViewResolver;
import org.springframework.web.servlet.config.annotation.EnableWebMvc;
import org.springframework.web.servlet.config.annotation.ResourceHandlerRegistry;
import org.springframework.web.servlet.config.annotation.WebMvcConfigurer;
import org.springframework.web.servlet.view.InternalResourceViewResolver;

@Configuration
@EnableWebMvc
@ComponentScan(basePackages= "com.javacodegeeks.examples")
public class AppConfig implements WebMvcConfigurer {

	@Override
	public void addResourceHandlers(ResourceHandlerRegistry registry) {
		registry.addResourceHandler("/resources/**").addResourceLocations("WEB-INF/resources/");
	}

	@Bean
	public ViewResolver viewResolver() {
		return new InternalResourceViewResolver("/WEB-INF/views/", ".jsp");
	}

	@Bean
	public MultipartResolver multipartResolver() {
		return new StandardServletMultipartResolver();
	}
}
The @Configuration annotation informs Spring that this is a configuration class. @EnableWebMvc provides the class with a default Spring MVC configuration. @ComponentScan tells Spring to search for Spring components (beans) starting from the com.javacodegeeks.examples base package.
The addResourceHandlers() method is overridden to specify the path and location of static content for the web application. (We will use a subdirectory of "WEB-INF/resources/" to serve the uploaded files.)
There are two beans defined in the configuration class. We’ll use the InternalResourceViewResolver implementation for the ViewResolver since we will be using JSP and JSTL technology for the views. The other bean in our configuration class is the MultipartResolver.
Spring MVC provides two implementations of the MultipartResolver interface:
CommonsMultipartResolverfor Apache Commons FileUploadStandardServletMultipartResolverfor the Servlet 3.0 API
We are using the StandardServletMultipartResolver implementation in this example.
2.3 Create the Application Initializer Class
Create a new class AppInitializer that extends AbstractAnnotationConfigDispatcherServletInitializer inside the com.javacodegeeks.examples.config package with the following code:
AppInitializer.java
package com.javacodegeeks.examples.config;

import java.io.File;

import javax.servlet.MultipartConfigElement;
import javax.servlet.ServletRegistration.Dynamic;

import org.springframework.web.servlet.support.AbstractAnnotationConfigDispatcherServletInitializer;

public class AppInitializer extends AbstractAnnotationConfigDispatcherServletInitializer {

	private int maxUploadSizeInMb = 1024 * 1024; // 1 MB

	private File uploadDirectory = new File(System.getProperty("java.io.tmpdir"));


	@Override
	protected Class[] getRootConfigClasses() {
		return new Class[] { AppConfig.class };
	}

	@Override
	protected Class[] getServletConfigClasses() {
		return null;
	}

	@Override
	protected String[] getServletMappings() {
		return new String[] {"/"};
	}

    private MultipartConfigElement getMultipartConfigElement() {
		MultipartConfigElement multipartConfigElement = new
			MultipartConfigElement(uploadDirectory.getAbsolutePath(),
				maxUploadSizeInMb, maxUploadSizeInMb * 2, maxUploadSizeInMb / 2);
        return multipartConfigElement;
    }

	@Override
	protected void customizeRegistration(Dynamic registration) {
		registration.setMultipartConfig(getMultipartConfigElement());
	}

}
AbstractAnnotationConfigDispatcherServletInitializer is used to configure the ServletContext and to register a DispatcherServlet. It has two abstract methods that must be implemented. (Since we do not have a context hierarchy in our application, we can return null from getServletConfigClasses().)
- The
AppConfigconfiguration class created in the previous step is added to the root application context ingetRootConfigClasses(). - The servlet mapping “/” is set in
getServletMappings().
Before we can register the MultipartConfigElement in the DispatcherServlet, we must set its properties. We do this through a constructor method:
MultipartConfigElement(java.lang.String location, long maxFileSize, long maxRequestSize, int fileSizeThreshold)
The MulitpartConfigElement constructor takes four parameters:
location– the directory location where files will be storedmaxFileSize– the maximum size allowed for the filemaxRequestSize– the maximum size allowed for multipart requestsfileSizeThreshold– the size threshold after which files will be written to disk
The directory used by the Java Virtual Machine (JVM) to create and store temporary files is used for location. This location is retrieved with a call to System.getProperty("java.io.tmpdir").
The other parameters are based on the maxUploadSizeInMb variable, which is set to 1 MB.
The last step is to register the MulitpartConfigElement with the DispatcherServlet. This is done via the customizeRegistration(Dynamic registration) method.
2.4 Create the Controller Class
Create a new package com.javacodegeeks.examples.controller and class AppController with the following code:
AppController.java
package com.javacodegeeks.examples.controller;

import java.io.File;
import java.io.IOException;
import java.nio.file.Path;
import java.nio.file.Paths;

import javax.servlet.http.HttpServletRequest;

import org.springframework.beans.factory.annotation.Value;
import org.springframework.context.annotation.PropertySource;
import org.springframework.stereotype.Controller;
import org.springframework.ui.Model;
import org.springframework.web.bind.annotation.GetMapping;
import org.springframework.web.bind.annotation.PostMapping;
import org.springframework.web.bind.annotation.RequestParam;
import org.springframework.web.multipart.MultipartFile;

@Controller
@PropertySource("classpath:application.properties")
public class AppController {

	@Value("${file.directory}")
	private String fileDirectory;

	@GetMapping("/uploadForm")
	public String uploadForm() {
		return "upload";
	}

	@PostMapping("/uploadFile")
	public String uploadFile(@RequestParam("file") MultipartFile file, HttpServletRequest request, Model model) throws IOException {

		String rootDirectory = request.getSession().getServletContext().getRealPath("/");
		Path path = Paths.get(rootDirectory + fileDirectory + file.getOriginalFilename());

		try {
			file.transferTo(new File(path.toString()));
		} catch (Exception e) {
			e.printStackTrace();
			throw new RuntimeException("File saving failed", e);
		}
		model.addAttribute("filename", file.getOriginalFilename());

		return "success";
	}

}
The @Controller annotation registers this class in Spring MVC as a controller that handles inbound HTTP requests. The @PropertySource annotation is used to specify the location of resources such as properties files. In this case, we are specifying application.properties. We can then inject the value from the properties file into the fileDirectory variable with @Value("${file.directory}"). This directory will be used to transfer the uploaded files.
The request handler for @GetMapping("/uploadForm") simply returns the name of a view – “upload”. The request handler for @PostMapping("/uploadFile") has three parameters – MultipartFile, HttpServletRequest, and Model.
MultipartFile represents a file received in a multipart request. It has methods for accessing file properties.

The HttpServletRequest is used here to get the path of the web application’s root directory. The root directory, file directory, and the file’s original name are used to create a java.nio.file.Path that will be used to transfer the file.
Next, a call to MultipartFile’s transferTo() method transfers the uploaded file to the newly created file path. Finally, the file’s name is added to the Model and the view name is returned.
2.5 Create the MulitpartExceptionHandler Class
It is important to handle exceptions encountered by the MultipartResolver during the file upload process. We can do this by creating an exception handler class.
Create a new package com.javacodegeeks.examples.exception and class MulitpartExceptionHandler with the following code:
MulitpartExceptionHandler.java
package com.javacodegeeks.examples.exception;

import org.springframework.web.bind.annotation.ControllerAdvice;
import org.springframework.web.bind.annotation.ExceptionHandler;
import org.springframework.web.multipart.MultipartException;
import org.springframework.web.servlet.mvc.support.RedirectAttributes;

@ControllerAdvice
public class MulitpartExceptionHandler {

    @ExceptionHandler(MultipartException.class)
    public String handleError(MultipartException e, RedirectAttributes redirectAttributes) {

        redirectAttributes.addFlashAttribute("error", e.getCause().getMessage());
        return "redirect:/uploadForm";
    }
}
The @ControllerAdvice annotation makes this exception handler class available to all controllers in the application. It has one method that handles MultipartException, as specified by the @ExceptionHandler annotation. The handler stores the error message in a FlashMap and redirects to the upload JSP.
2.6 Create the Properties File
Create a new file application.properties in the src/main/resources directory with the following property:
application.properties
file.directory = WEB-INF/resources/files/
This is the location where the uploaded files will be transferred.
2.7 Create the Web Application Directories
Create the following directories under src/main/webapp/:
- WEB-INF/views/ – This is where the JSPs will exist.
- WEB-INF/resources/files/ – This is where the uploaded files will be copied to.
Also, add a dummy file (such as a text file) in the WEB-INF/resources/files/ directory. Otherwise, the directory will not be included in the WAR archive.
2.8 Create the Java Server Pages
We’ll create the file upload form JSP first. Create upload.jsp in the WEB-INF/views/ directory with the following content:
upload.jsp
<%@ page language="java" contentType="text/html; charset=ISO-8859-1"
pageEncoding="ISO-8859-1"%>
<!DOCTYPE html PUBLIC "-//W3C//DTD HTML 4.01 Transitional//EN" "http://www.w3.org/TR/html4/loose.dtd">
<%@ taglib prefix="form" uri="http://www.springframework.org/tags/form" %>
<%@ taglib prefix="c" uri="http://java.sun.com/jsp/jstl/core" %>
<html>
<head>
<meta http-equiv="Content-Type" content="text/html; charset=ISO-8859-1">
<title>Upload File</title>
<style>
table {
border-spacing: 5px;
background-color: #FFFFF0;
}
td {
padding: 5px;
text-align: left;
}
h4.error {
color: #ff0000;
}
</style>
</head>
<body>
<h3>Spring MVC 5 Servlet 3.0 MultipartElement Example </h3>
<br>
<c:if test="${not empty error}">
<h4 class=error>An error occurred: ${error}</h4>
<br>
</c:if>

<form:form method="POST"
action="${pageContext.request.contextPath}/uploadFile"
enctype="multipart/form-data">
<table>
<tr>
<td>Select a file to upload</td>
<td><input type="file" name="file"></td>
</tr>
<tr>
<td><input type="submit" value="Upload"></td>
<td></td>
</tr>
</table>
</form:form>
</body>
</html>
There are just a few things to note:
- If there is an exception during the file upload process, the error message will be displayed above the form. We can check for the existence of an error message with a simple test:
<c:if test="${not empty error}"> - The
enctype="multipart/form-data"attribute is used in the form because a file will be included in the form data. - An
<input type="file" name="file">is used. This will render a button that will, when clicked, allow the user to select a file from the file system that will be included in the POST request.
In other words, you must use the enctype="multipart/form-data" attribute if you have a file input in your form.
Next, create the affirmation JSP. Create success.jsp with the following content:
success.jsp
<%@ page language="java" contentType="text/html; charset=ISO-8859-1"
pageEncoding="ISO-8859-1"%>
<%@ taglib prefix="spring" uri="http://www.springframework.org/tags"%>
<%@ taglib prefix="c" uri="http://java.sun.com/jsp/jstl/core" %>
<!DOCTYPE html PUBLIC "-//W3C//DTD HTML 4.01 Transitional//EN" "http://www.w3.org/TR/html4/loose.dtd">
<html>
<head>
<meta http-equiv="Content-Type" content="text/html; charset=ISO-8859-1">
<title>File Uploaded Successfully</title>
</head>
<body>
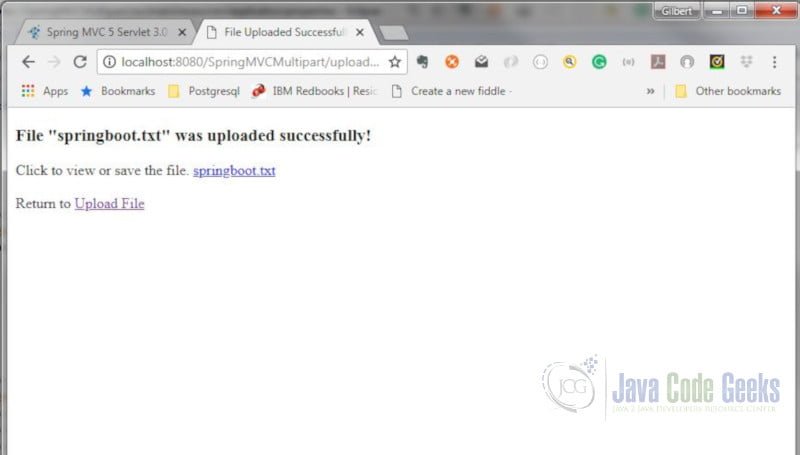
<h3>File "${filename}" was uploaded successfully!</h3>
Click to view or save the file. <a href='<c:url value="/resources/files/${ filename }" />'>${filename}</a>
<br>
<br>
Return to <a href="<c:url value='/uploadForm' />">Upload File</a>
</body>
</html>
If the upload operation is successful, this page will show an affirmative message. This page also provides a link to the uploaded file.
2.9 Create the WAR File and Deploy the Application
Right-click the project and select Run As -> Maven Install. Maven will build a WAR file and place it in the “target” directory. Copy the WAR file to the {tomcat-installation-folder}/webapps folder.

2.10 Run and Test the Application
Open a command prompt and change to the {tomcat-installation-folder}/bin directory. Run the catalina start command.
On Mac OS X: $ ./catalina.sh start
On Windows: >catalina start
This will start the Tomcat server. Enter the following URL in a browser: http://localhost:8080/{project-name}/uploadForm. For example, http://localhost:8080/SpringMVCMultipart/uploadForm.
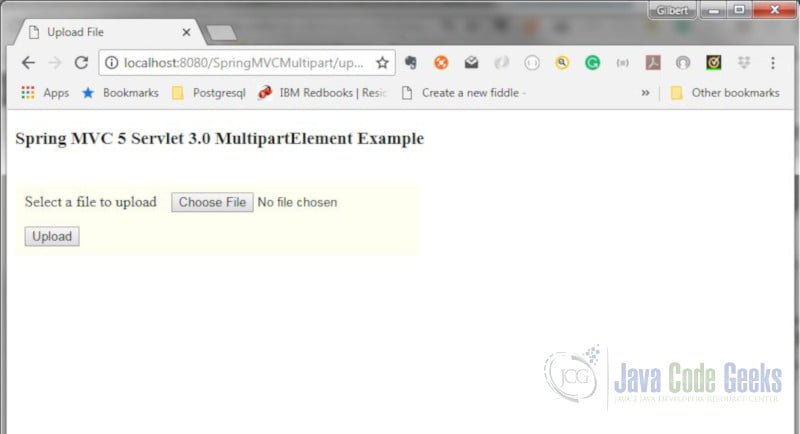
Click the Choose File button and select a file whose size is less than the maximum file size specified for MultipartConfigElement. Click the Upload button. The affirmation view will be displayed.
Click the link for the uploaded file. Depending on the file type, the file will either be displayed in the browser or you will be prompted to save the file.
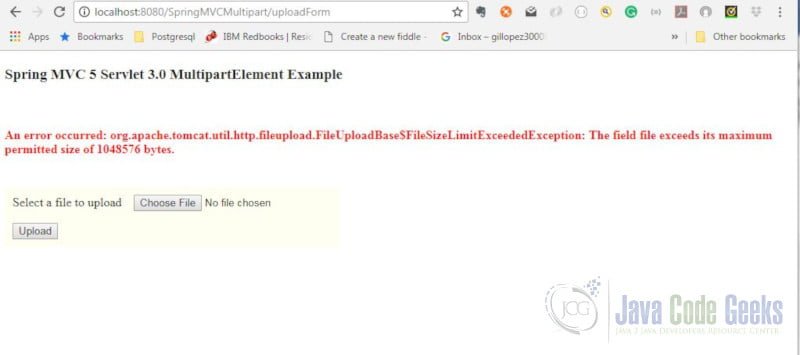
Go back to the upload page. Click the Choose File button and select a file whose size is greater than the maximum file size specified for the MultipartConfigElement. Click the Upload button. You are redirected back to the upload page and an error message is displayed.
3. Summary
In this post we demonstrated how to develop a file upload web application using Spring MVC and the MultipartConfigElement.
4. Download the Source Code
This was a Spring MVC 5 Servlet 3.0 MultipartConfigElement Example.
You can download the full source code of this example here: SpringMVCMultipart
