This tutorial is about integration of AngularJS with Spring MVC version 4. Before proceeding with this article, we assume readers have a working knowledge of Java and its frameworks. We will see how AngularJS will request the data through the HTTP protocol and we will write a Restful web service that returns response in JSON format.
1. Introduction
Spring MVC is a Model-View-Controller (MVC) web framework build on notion of a central Front Controller servlet (DispatcherServlet) which is responsible for dispatching each request to appropriate handlers, resolving views and finally returning the response.
AngularJS is a JavaScript framework, with the core goal of simplification. It excels at building dynamic, single page web apps (SPAs) and supports the Model View Controller (MVC) programming structure. Lets proceed to see how Spring MVC and AngularJS can be integrated to give us a complete example.
We will be using Eclipse Indigo and Java8 to demonstrate this example.
2. Spring MVC 4 AngularJS – Code example
2.1 Creating a Maven project
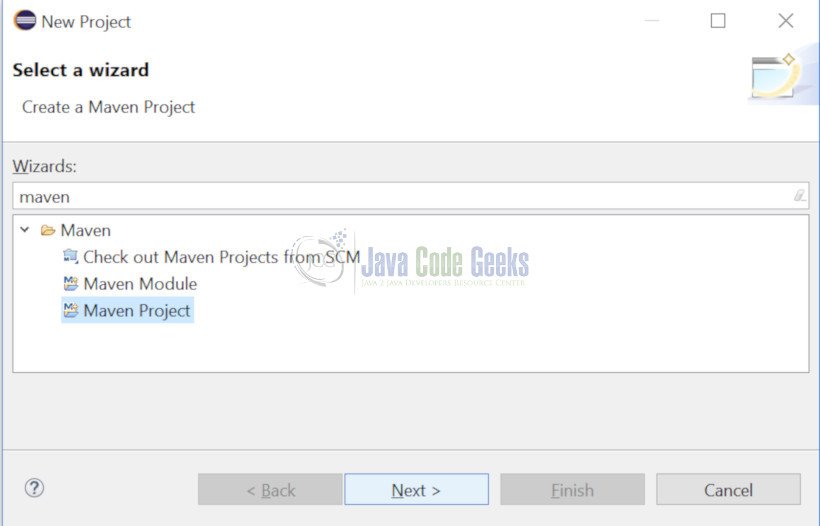
Lets create a simple Maven project in eclipse using File menu -> New -> Project.

Search Maven in the wizard and select Maven Project.
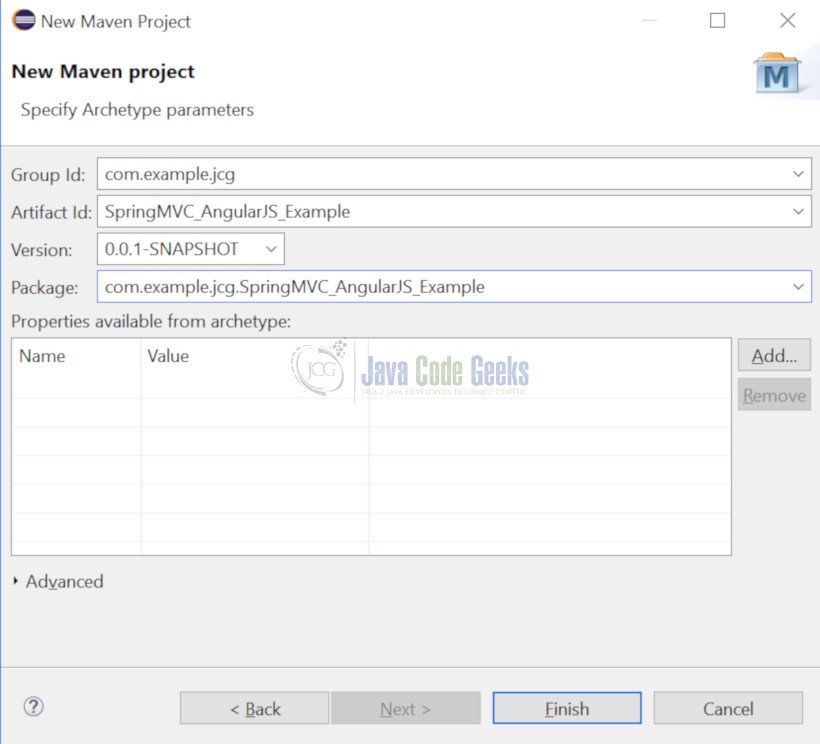
Click Next and keep the default selections. Enter groupId, artifactId and package name as shown below in the screenshot.
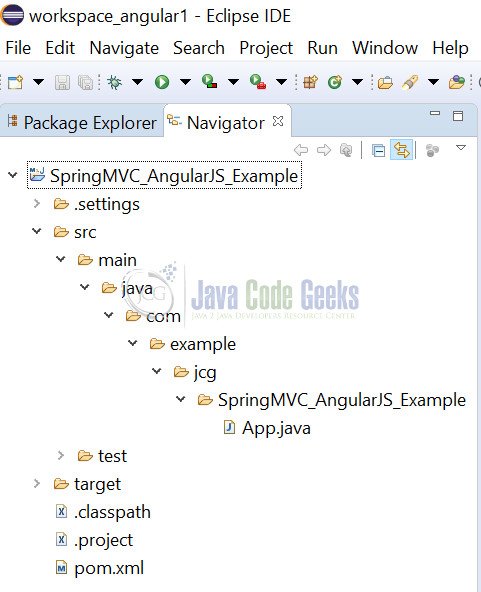
Click Finish and a new Maven project gets created in the eclipse workspace. The initial project structure looks like the one below.
2.2 Adding dependencies to the pom.xml
Open the pom.xml and add the following dependencies. The new pom.xml will have the following dependencies.
pom.xml
<project xmlns="http://maven.apache.org/POM/4.0.0" xmlns:xsi="http://www.w3.org/2001/XMLSchema-instance"
xsi:schemaLocation="http://maven.apache.org/POM/4.0.0 http://maven.apache.org/xsd/maven-4.0.0.xsd">
 <modelVersion>4.0.0</modelVersion>
 <groupId>com.example.jcg</groupId>
 <artifactId>SpringMVC_AngularJS_Example</artifactId>
 <version>0.0.1-SNAPSHOT</version>
 <packaging>war</packaging>
 <name>SpringMVC_AngularJS_Example</name>
 <url>http://maven.apache.org</url>
<properties>
 <project.build.sourceEncoding>UTF-8</project.build.sourceEncoding>
</properties>
<dependencies>
 <dependency>
  <groupId>org.springframework</groupId>
  <artifactId>spring-context</artifactId>
  <version>4.2.4.RELEASE</version>
 </dependency>
 <dependency>
  <groupId>org.springframework</groupId>
  <artifactId>spring-core</artifactId>
  <version>4.2.4.RELEASE</version>
 </dependency>
 <dependency>
  <groupId>org.springframework</groupId>
  <artifactId>spring-webmvc</artifactId>
  <version>4.2.4.RELEASE</version>
 </dependency>
 <dependency>
  <groupId>javax.servlet</groupId>
  <artifactId>javax.servlet-api</artifactId>
  <version>3.1.0</version>
 </dependency>
 <dependency>
  <groupId>jstl</groupId>
  <artifactId>jstl</artifactId>
  <version>1.2</version>
 </dependency>
 <dependency>
  <groupId>com.fasterxml.jackson.core</groupId>
  <artifactId>jackson-databind</artifactId>
  <version>2.3.3</version>
 </dependency>
</dependencies>
<build>
 <finalName>SpringMVC_AngularJS_Example</finalName>
</build>
</project>
2.3 Creating java classes
Create two Java classes HelloController.java and UserDetails.java under com.example.jcg package. The code for both classes look as below.
HelloController.java
package com.example.jcg;

import org.springframework.web.bind.annotation.RequestMapping;
import org.springframework.web.bind.annotation.RequestMethod;
import org.springframework.web.bind.annotation.RestController;
import org.springframework.web.servlet.ModelAndView;

@RestController
public class HelloController
	{
	    @RequestMapping(value="/hello")
	    public ModelAndView hello()
	    {
	        return new ModelAndView("hello");
	    }
	    @RequestMapping(value="/userdetails",method=RequestMethod.GET,produces="application/json")
	    public UserDetails userdetails()
	    {
	        UserDetails userDetails = new UserDetails();
	        userDetails.setName("JavaCodeGeeks");
	        userDetails.setDepartment("Article");

	        return userDetails;
	    }
	}
HelloController class will act as the RESTFul Webservice. It has two methods.
1. hello() method – This method serves the request “/hello” and simply redirects the user to hello.jsp file. The method returns a ModelAndView object, passing "hello" as view name to the servlet.
2. userdetails() method – This method serves the request “/userdetails” and returns the user information in the JSON format. A new UserDetails object is created in the method and the values are populated in the POJO. The values can be seen on the UI when application is run and a request to this method is there.
UserDetails.java
package com.example.jcg;

import javax.xml.bind.annotation.XmlAccessType;
import javax.xml.bind.annotation.XmlAccessorType;
import javax.xml.bind.annotation.XmlAttribute;
import javax.xml.bind.annotation.XmlRootElement;

@XmlRootElement
@XmlAccessorType(XmlAccessType.FIELD)
public class UserDetails
{
    @XmlAttribute
    private String name;
    @XmlAttribute
    private String department;
    public UserDetails()
    {
        super();
    }
    public UserDetails(String name, String department)
    {
        super();
        this.name = name;
        this.department = department;
    }
    public String getName()
    {
        return name;
    }
    public void setName(String name)
    {
        this.name = name;
    }
    public String getDepartment()
    {
        return department;
    }
    public void setDepartment(String department)
    {
        this.department = department;
    }
}
UserDetails.java class is a simple POJO class consisting the details of the user such as name and department with their corresponding getter and setter methods.
2.4 Create jsp files
Create a file index.jsp in src/main/webapp/ package. The code for index.jsp looks like below.
The index.jsp page redirects the user to /hello. The control then passes onto the HelloController.java, hello() method which passes "hello" in ModelAndView and redirects the user to hello.jsp.
index.jsp
 <%@ taglib uri="http://java.sun.com/jsp/jstl/core" prefix="c" %>
<%response.sendRedirect("hello");%>
<html>
<body>
<h2>Hello World!</h2>
</body>
</html>
The code for hello.jsp looks like the one below.
hello.jsp
<!doctype html>
<html ng-app>
<head>
<title>SpringMVC_AngularJS_Example</title>
<script src="https://ajax.googleapis.com/ajax/libs/angularjs/1.0.8/angular.min.js"></script>
<script>
function Hello($scope, $http) {
$scope.getUserDetails = function()
{
$http.get('http://localhost:8080/SpringMVC_AngularJS_Example/userdetails').
success(function(data) {
$scope.user = data;
});
}
}
</script>
</head>
<body>
<div ng-controller="Hello">
<h2>SpringMVC_AngularJS_Example!!</h2>
<button ng-click="getUserDetails()">Get User Details</button>
<p>Name : {{user.name}}</p>
<p>Department : {{user.department}}</p>
</div>
</body>
</html>
As you see the code for hello.jsp, we are creating a button, Get User Details. When this button is clicked, the getUserDetails() method is called. The getUserDetails() method defined in the hello.jsp calls the http service and hits our Rest service class, HelloController -> userDetails() method and return the userDetails object in JSON format. The JSON response is then binded with the corresponding fields on the UI and displayed to the user.

2.5 Creating web.xml
The web.xml contains the information that the server need to run the application. This file is placed under the src/main/webapp/WEB-INF directory. It contains the name of the Spring Configuration file, which is used when the DispatcherServlet is initialized. The Spring framework will then try to load a configuration file “[servlet-name]-servlet.xml” under the WEB-INF directory.
The code for web.xml looks as below:
web.xml
<!DOCTYPE web-app PUBLIC
"-//Sun Microsystems, Inc.//DTD Web Application 2.3//EN"
"http://java.sun.com/dtd/web-app_2_3.dtd" >

<web-app>
<display-name>SpringMVC_AngularJS_Example</display-name>
<servlet>
<servlet-name>SpringAngular</servlet-name>
<servlet-class>org.springframework.web.servlet.DispatcherServlet</servlet-class>
</servlet>
<servlet-mapping>
<servlet-name>SpringAngular</servlet-name>
<url-pattern>/</url-pattern>
</servlet-mapping>
</web-app>
2.6 Creating SpringAngular-servlet.xml
The SpringAngular-servlet.xml is also placed under the WEB-INF directory alongwith web.xml.
The tag <context:component-scan> will let the Spring Container to search for all the annotations under the package “com.example.jcg”.
<mvc:annotation-driven/> annotation will activate the @Controller, @RequestMapping, @Valid etc annotations.
The view is resolved through “org.springframework.web.servlet.view.InternalResourceViewResolver” which searches for the jsp files under the /WEB-INF/jsp/ directory.
The code for SpringAngular-servlet.xml looks like below:
SpringAngular-servlet.xml
<beans xmlns="http://www.springframework.org/schema/beans"
xmlns:xsi="http://www.w3.org/2001/XMLSchema-instance"
xmlns:context="http://www.springframework.org/schema/context"
xmlns:mvc="http://www.springframework.org/schema/mvc"
xsi:schemaLocation="http://www.springframework.org/schema/beans
http://www.springframework.org/schema/beans/spring-beans.xsd
http://www.springframework.org/schema/context
http://www.springframework.org/schema/context/spring-context.xsd
http://www.springframework.org/schema/mvc
http://www.springframework.org/schema/mvc/spring-mvc.xsd">

<context:component-scan base-package="com.example.jcg" />
<mvc:annotation-driven />

<bean class="org.springframework.web.servlet.view.InternalResourceViewResolver">
<property name="prefix" value="/WEB-INF/jsp/" />
<property name="suffix" value=".jsp" />
</bean>
</beans>
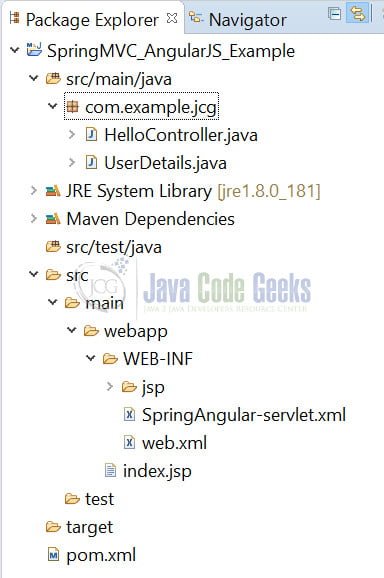
3. Complete project structure
The complete project structure looks like the one below:
4. Output
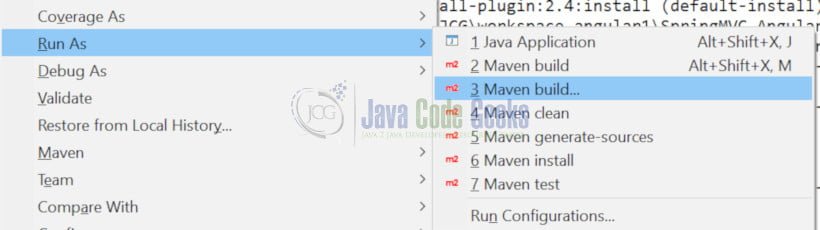
4.1 Run Maven Build
Next step is to do a clean Maven build to run the project. Right click the project and first select Maven Clean and then the Maven Build to get the project war file. The war file gets created in the project directory target folder.
4.2 Deploy war
The war file created can be deployed in Tomcat. After placing the war file in ../tomcat/webapps directory, start the server and hit the application url to get to the application.
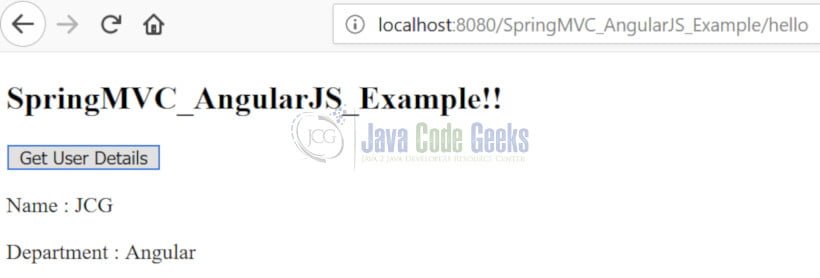
The URL will be "http://localhost:8080/SpringMVC_AngularJS_Example/hello" for this particular example.

Click on Get User Details button and the fields Name and Department get populated as below.
5. Download the Source Code
This was an example of Spring MVC with Angular JS and how the data flow happens in such an application.
You can download the full source code of this example here: SpringMVC_AngularJS_Example

This is interesting. Thanks for the article! :)