File Upload and Database Persistence with Spring Framework
Spring Mvc framework provides an out of box support for the file upload functionality in any application. In this tutorial, we will show how to implement the file upload functionality with the Spring MVC framework and saving the file attachment in the database. To handle the file uploads capabilities in a web application, spring provides a MultipartResolver bean which is responsible for resolving the multipart request.
Table Of Contents
1. Introduction
1.1 Spring Framework
- Spring is an open-source framework created to address the complexity of an enterprise application development
- One of the chief advantages of the Spring framework is its layered architecture, which allows developers to be selective about which of its components they can use while providing a cohesive framework for
J2EEapplication development - Spring framework provides support and integration to various technologies for e.g.:
- Support for Transaction Management
- Support for interaction with the different databases
- Integration with the Object Relationship frameworks for e.g. Hibernate, iBatis etc
- Support for Dependency Injection which means all the required dependencies will be resolved with the help of containers
- Support for
RESTstyle web-services
1.2 Spring MVC Framework
Model-View-Controller (MVC) is a well-known design pattern for designing the GUI based applications. It mainly decouples the business logic from UI by separating the roles of Model, View, and Controller in an application. This pattern divides the application into three components to separate the internal representation of the information from the way it is being presented to the user. The three components are:
- Model (M): Model’s responsibility is to manage the application’s data, business logic, and the business rules. It is a
POJOclass which encapsulates the application data given by the controller - View (V): A view is an output representation of the information, such as displaying information or reports to the user either as a text-form or as charts. Views are usually the
JSPtemplates written with Java Standard Tag Library (JSTL) - Controller (C): Controller’s responsibility is to invoke the Models to perform the business logic and then update the view based on the model’s output. In spring framework, the controller part is played by the Dispatcher Servlet

1.3 Spring Framework’s Support for File Upload
Spring Mvc framework provides a built-in multipart support to handle the file uploads in a web application. To handle the file uploads, spring provides a MultipartResolver bean which is responsible for resolving the multipart request. This resolver is working with two file upload libraries:
- The
org.springframework.web.multipart.commons.CommonsMultipartResolveris Servlet baseorg.springframework.web.multipart.MultipartResolverimplementation for the Apache Common File Upload. In order to use the Apache Common File Upload in a spring application, developers need to add thecommons-fileupload.jarin the project’s classpath or add a dependency in thepom.xmlfile and declare theMultipartResolverbean in the spring’s context file<bean id="multipartResolver" class="org.springframework.web.multipart.commons.CommonsMultipartResolver"> <!-- Maximum Upload Size (In Bytes) --> <property name="maxUploadSize" value="20971520" /> <!-- Maximum Size Of The File In Memory (In Bytes) --> <property name="maxInMemorySize" value="1048576" /> </bean>Do note, Apache Commons is not specific to the Servlet 3.0 environment but it works equally well with the Servlet 3.x containers
- The
org.springframework.web.multipart.cos.CosMultipartResolveris the bean class for the COS (i.e.com.oreilly.servlet). In order to use the COS in a spring application, developers need to add thecos.jarin the project’s classpath or add a dependency in thepom.xmlfile and declare theCosMultipartResolverbean in the spring’s context file<bean id="multipartResolver" class="org.springframework.web.multipart.cos.CosMultipartResolver"> <!-- Maximum Upload Size (In Bytes) --> <property name="maxUploadSize" value="2000000" /> <!-- Other Properties --> </bean>
As Apache Commons File Upload is popular and preferred over the COS, we will use the CommonsMultipartResolver in this tutorial for handling the multipart requests. Now, open up the Eclipse IDE and let’s see how to implement the file upload functionality in the Spring framework!
2. Spring MVC File Upload & Database Persistence Tutorial
Here is a step-by-step guide for implementing the file upload functionality using the spring’s framework org.springframework.web.multipart.commons.CommonsMultipartResolver class.
2.1 Tools Used
We are using Eclipse Kepler SR2, JDK 8 and Maven. Having said that, we have tested the code against JDK 1.7 and it works well.
2.2 Project Structure
Firstly, let’s review the final project structure, in case you are confused about where you should create the corresponding files or folder later!
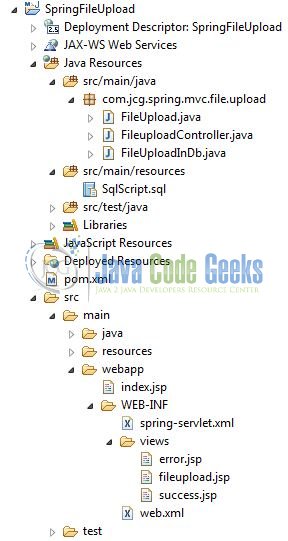
2.3 Project Creation
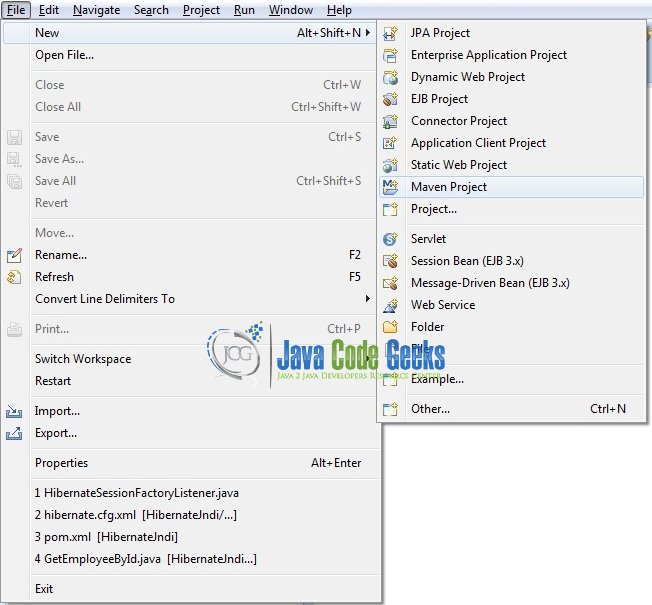
This section will demonstrate on how to create a Java-based Maven project with Eclipse. In Eclipse IDE, go to File -> New -> Maven Project.
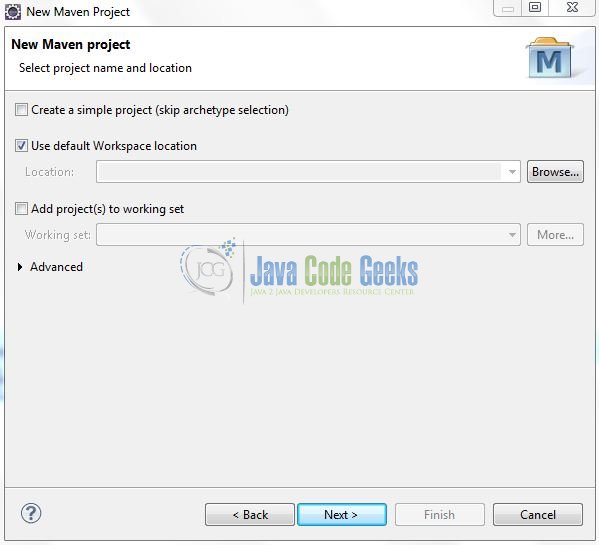
In the New Maven Project window, it will ask you to select project location. By default, ‘Use default workspace location’ will be selected. Just click on next button to proceed.
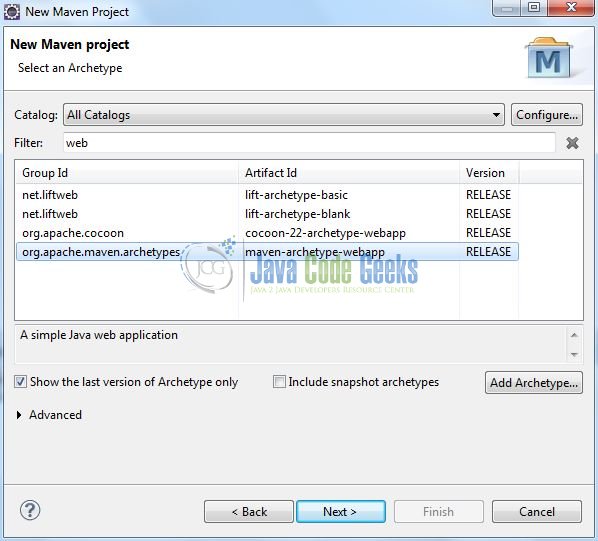
Select the Maven Web App Archetype from the list of options and click next.
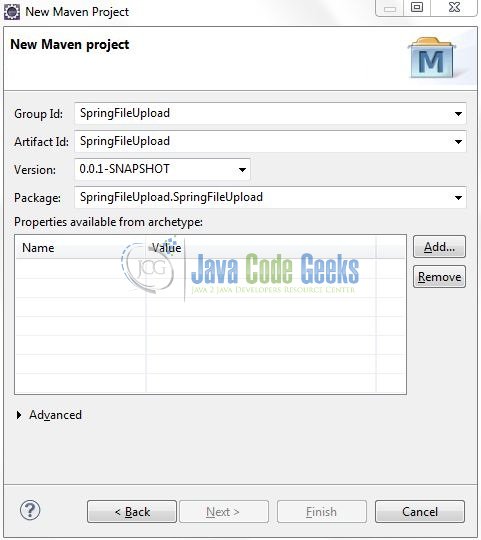
It will ask you to ‘Enter the group and the artifact id for the project’. We will input the details as shown in the below image. The version number will be by default: 0.0.1-SNAPSHOT.
Click on Finish and the creation of a maven project is completed. If you observe, it has downloaded the maven dependencies and a pom.xml file will be created. It will have the following code:
pom.xml
<project xmlns="http://maven.apache.org/POM/4.0.0" xmlns:xsi="http://www.w3.org/2001/XMLSchema-instance" xsi:schemaLocation="http://maven.apache.org/POM/4.0.0 http://maven.apache.org/xsd/maven-4.0.0.xsd">
	<modelVersion>4.0.0</modelVersion>
	<groupId>SpringFileUpload</groupId>
	<artifactId>SpringFileUpload </artifactId>
	<version>0.0.1-SNAPSHOT</version>
	<packaging>war</packaging>
</project>
We can start adding the dependencies that developers want like Spring Core, Spring Mvc, Spring Jdbc, and Apache Commons etc. Let’s start building the application!
3. Application Building
Below are the steps involved in developing this application.
3.1 Database & Table Creation
The following MySQL script is used to create a database called fileDb with table: files_upload. Open the MySQL or the workbench terminal and execute the SQL script:
CREATE DATABASE IF NOT EXISTS fileDb;

USE fileDb;

CREATE TABLE IF NOT EXISTS files_upload (
  file_id INT(100) NOT NULL AUTO_INCREMENT,
  file_name VARCHAR(200) DEFAULT NULL,
  file_description VARCHAR(300) DEFAULT NULL,
  file_data longblob,
  PRIMARY KEY (file_id)
);
If everything goes well, the database and the table will be shown in the MySQL Workbench.
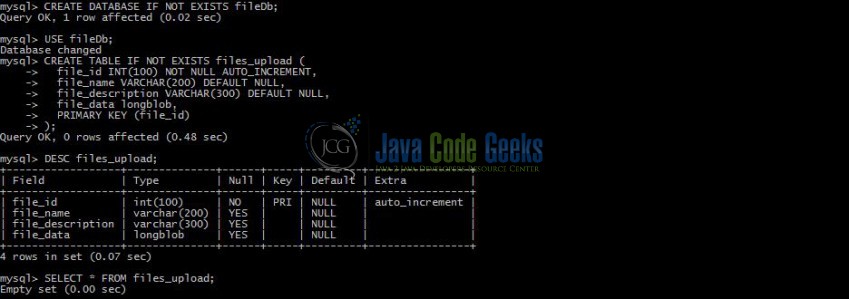
3.2 Maven Dependencies
Here, we specify the dependencies for the spring framework and the file upload functionality. The rest dependencies such as Spring Beans, Spring Web etc will be automatically resolved by Maven. The updated file will have the following code:
pom.xml
<project xmlns="http://maven.apache.org/POM/4.0.0" xmlns:xsi="http://www.w3.org/2001/XMLSchema-instance"
	xsi:schemaLocation="http://maven.apache.org/POM/4.0.0 http://maven.apache.org/maven-v4_0_0.xsd">
	<modelVersion>4.0.0</modelVersion>
	<groupId>SpringFileUpload</groupId>
	<artifactId>SpringFileUpload</artifactId>
	<packaging>war</packaging>
	<version>0.0.1-SNAPSHOT</version>
	<name>SpringFileUpload Maven Webapp</name>
	<url>http://maven.apache.org</url>
	<dependencies>
		<!-- Servlet API Dependency -->
		<dependency>
			<groupId>javax.servlet</groupId>
			<artifactId>servlet-api</artifactId>
			<version>3.0-alpha-1</version>
		</dependency>
		<dependency>
			<groupId>javax.servlet.jsp</groupId>
			<artifactId>jsp-api</artifactId>
			<version>2.1</version>
		</dependency>
		<!-- Spring Framework Dependencies -->
		<dependency>
			<groupId>org.springframework</groupId>
			<artifactId>spring-core</artifactId>
			<version>4.3.11.RELEASE</version>
		</dependency>
		<dependency>
			<groupId>org.springframework</groupId>
			<artifactId>spring-context</artifactId>
			<version>4.3.11.RELEASE</version>
		</dependency>
		<dependency>
			<groupId>org.springframework</groupId>
			<artifactId>spring-webmvc</artifactId>
			<version>4.3.11.RELEASE</version>
		</dependency>
		<!-- Spring Framework Jdbc Dependency -->
		<dependency>
			<groupId>org.springframework</groupId>
			<artifactId>spring-jdbc</artifactId>
			<version>4.3.11.RELEASE</version>
		</dependency>
		<!-- MySQL Connector Java Dependency -->
		<dependency>
			<groupId>mysql</groupId>
			<artifactId>mysql-connector-java</artifactId>
			<version>5.1.40</version>
		</dependency>
		<!-- File Upload Dependencies -->
		<dependency>
			<groupId>commons-fileupload</groupId>
			<artifactId>commons-fileupload</artifactId>
			<version>1.3</version>
		</dependency>
		<dependency>
			<groupId>commons-io</groupId>
			<artifactId>commons-io</artifactId>
			<version>2.5</version>
		</dependency>
	</dependencies>
	<build>
		<finalName>${project.artifactId}</finalName>
	</build>
</project>
3.3 Java Class Creation
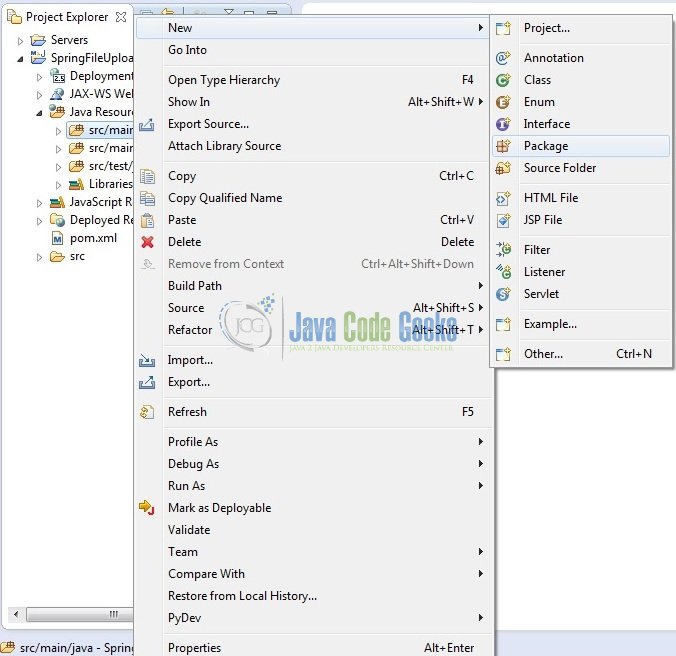
Let’s create the required Java files. Right-click on src/main/java folder, New -> Package.
A new pop window will open where we will enter the package name as: com.jcg.spring.mvc.file.upload.
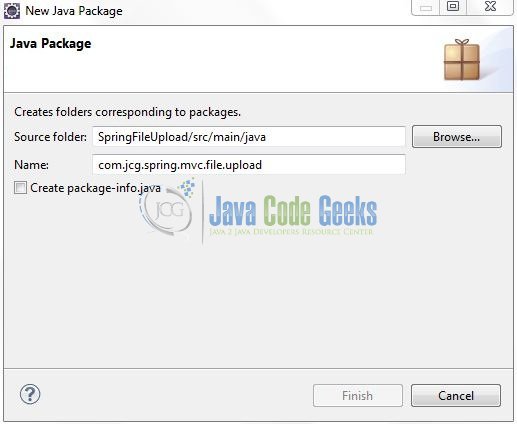
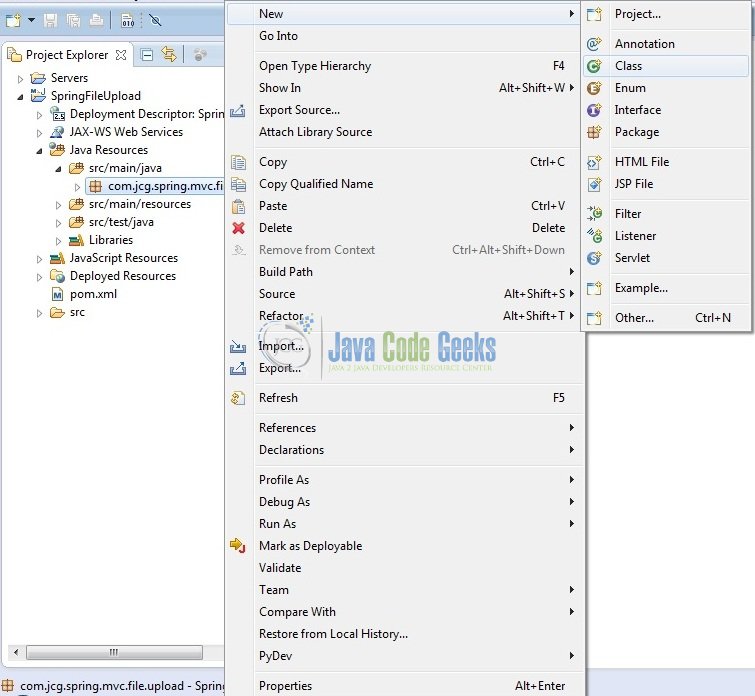
Once the package is created in the application, we will need to create the Controller, Model, and the Database Interaction classes. Right-click on the newly created package: New -> Class.
A new pop window will open and enter the file name as: FileuploadController. The controller class will be created inside the package: com.jcg.spring.mvc.file.upload.
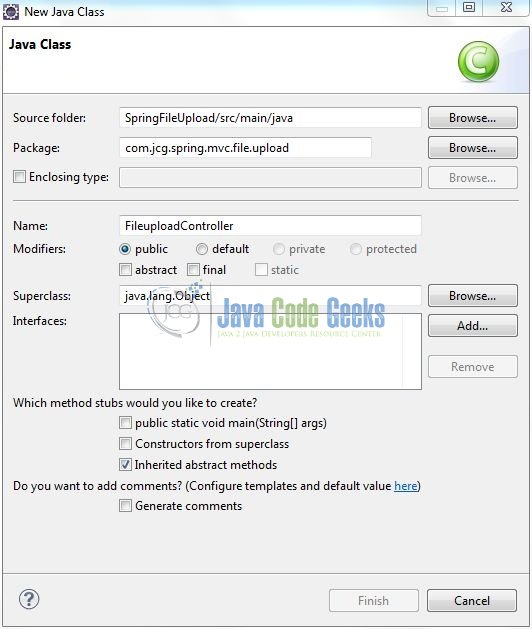
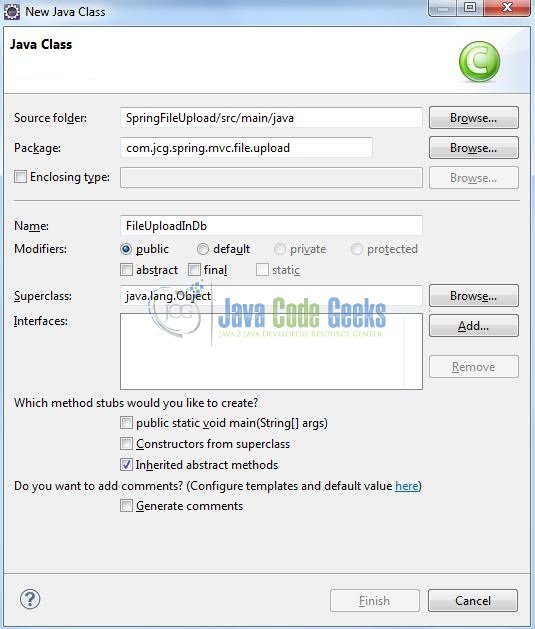
Repeat the step (i.e. Fig. 10) and enter the filename as: FileUploadInDb. The database interaction class will be used to perform the database operations and is created inside the package: com.jcg.spring.mvc.file.upload.
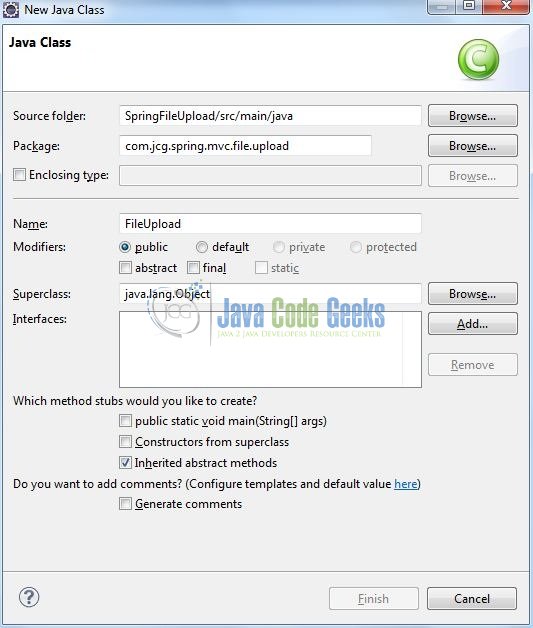
Again, repeat the step listed in Fig. 10 and enter the file name as: FileUpload. The model class will be created inside the package: com.jcg.spring.mvc.file.upload.
3.3.1 Implementation of Controller Class
It is a simple class where the @Controller annotation is used to specify this class as a spring controller and is responsible for handling the file upload form’s submission which is configured by the @RequestMapping annotation.
The second parameter of the saveUploadedFileInDatabase() method is annotated by @RequestParam annotation which maps the file-upload form field: attachFileObj to a CommonsMultipartFile object that represents an uploaded file. Do note, we have used an array of the CommonsMultipartFile objects in order to handle the multiple files.
In the saveUploadedFileInDatabase() method, we print the value of the Description field and then iterate over an array of CommonsMultipartFile objects and call the fileSaveInDb(fileUploadObj) method to permanently save the uploaded file into the database. Finally, the controller redirects the user to a result page whose logical name is: success. Add the following code to it:
FileuploadController.java
package com.jcg.spring.mvc.file.upload;

import java.io.IOException;

import javax.servlet.http.HttpServletRequest;

import org.springframework.stereotype.Controller;
import org.springframework.ui.ModelMap;
import org.springframework.web.bind.annotation.RequestMapping;
import org.springframework.web.bind.annotation.RequestMethod;
import org.springframework.web.bind.annotation.RequestParam;
import org.springframework.web.multipart.commons.CommonsMultipartFile;
import org.springframework.web.servlet.ModelAndView;

@Controller
public class FileuploadController {

	static String fileDescription;
	static FileUpload fileUploadObj;
	static String saveDirectory = "uploadedFiles";
	static ModelAndView modelViewObj;

	@RequestMapping(value = {"/", "fileupload"}, method = RequestMethod.GET)
	public ModelAndView showUploadFileForm(ModelMap model) {
		modelViewObj = new ModelAndView("fileupload");
		return  modelViewObj;
	}

	// This Method Is Used To Get Or Retrieve The Uploaded File And Save It In The Db
	@RequestMapping(value = "uploadFile", method = RequestMethod.POST)
	public ModelAndView saveUploadedFileInDatabase(HttpServletRequest request, final @RequestParam CommonsMultipartFile[] attachFileObj) throws IllegalStateException, IOException {

		// Reading File Upload Form Input Parameters
		fileDescription = request.getParameter("description");

		// Logging The Input Parameter (i.e. File Description) For The Debugging Purpose
		System.out.println("\nFile Description Is?= " + fileDescription + "\n");

		// Determine If There Is An File Upload. If Yes, Attach It To The Client Email
		if ((attachFileObj != null) && (attachFileObj.length > 0) && (!attachFileObj.equals(""))) {
			for (CommonsMultipartFile aFile : attachFileObj) {
				if(aFile.isEmpty()) {
					continue;
				} else {
					System.out.println("Attachment Name?= " + aFile.getOriginalFilename() + "\n");
					if (!aFile.getOriginalFilename().equals("")) {
						fileUploadObj = new FileUpload();
						fileUploadObj.setFileName(aFile.getOriginalFilename());
						fileUploadObj.setFileDescription(fileDescription);
						fileUploadObj.setData(aFile.getBytes());

						// Calling The Db Method To Save The Uploaded File In The Db
						FileUploadInDb.fileSaveInDb(fileUploadObj);
					}
				}
				System.out.println("File Is Successfully Uploaded & Saved In The Database.... Hurrey!\n");
			}
		} else {
			// Do Nothing
		}
		modelViewObj = new ModelAndView("success","messageObj","Thank You! The File(s) Is Successfully Uploaded!");
		return  modelViewObj;
	}
}Note: If the user doesn’t pick up a file to be uploaded and saved in a database, the attachFileObj will be empty and an error message will be displayed to the user upon the form submission
3.3.2 Implementation of Database Layer
This is the database implementation class that performs the SQL Insert operation using the Jdbc with Spring Jdbc Template. Add the following code to it:
FileUploadInDb.java
package com.jcg.spring.mvc.file.upload;

import java.sql.SQLException;

import org.springframework.jdbc.core.JdbcTemplate;
import org.springframework.jdbc.datasource.SimpleDriverDataSource;

public class FileUploadInDb {

	static JdbcTemplate jdbcTemplateObj;
	static SimpleDriverDataSource dataSourceObj;

	// Database Configuration Parameters
	static String DB_USERNAME = "root", DB_PASSWORD = "", DB_URL = "jdbc:mysql://localhost:3306/fileDb";

	private static SimpleDriverDataSource getDatabaseConnection()  {
		dataSourceObj = new SimpleDriverDataSource();
		try {
			dataSourceObj.setDriver(new com.mysql.jdbc.Driver());
			dataSourceObj.setUrl(DB_URL);
			dataSourceObj.setUsername(DB_USERNAME);
			dataSourceObj.setPassword(DB_PASSWORD);
		} catch(SQLException sqlException) {
			sqlException.printStackTrace();
		}
		return dataSourceObj;
	}

	// This Method Is Used To Save The Uploaded File In The Database
	public static void fileSaveInDb(FileUpload fileUploadObj) {

		// This Code Is Used To Set Driver Class Name, Database URL, Username & Password
		jdbcTemplateObj = new JdbcTemplate(getDatabaseConnection());

		if(null != jdbcTemplateObj) {

			// Performing The Sql 'Insert' Operation
			String sqlInsertQuery = "INSERT INTO files_upload (file_name, file_description, file_data) VALUES (?, ?, ?)";
			int insertCount = jdbcTemplateObj.update(sqlInsertQuery, fileUploadObj.getFileName(), fileUploadObj.getFileDescription(), fileUploadObj.getData());
			if(insertCount == 1) {
				System.out.println("The Uploaded File Is Successfully Saved In The Database...!" + "\n");
			} else {
				System.out.println("Error Occured While Saving The Uploaded File In The Database... Please Check...!" + "\n");
			}
		} else {
			System.out.print("Application Is Not Able To Bind With The Database! Please Check!");
		}
	}
}Note: Developers should change the Database URL, Username and Password according to the settings on their environment
3.3.3 Implementation of Model Class
This class simply maps a row in the files_upload table to a Java object. Add the following code to it:
FileUpload.java
package com.jcg.spring.mvc.file.upload;

public class FileUpload {

	private byte[] data;
	private String fileName, fileDescription;

	public String getFileName() {
		return fileName;
	}

	public void setFileName(String fileName) {
		this.fileName = fileName;
	}

	public String getFileDescription() {
		return fileDescription;
	}

	public void setFileDescription(String fileDescription) {
		this.fileDescription = fileDescription;
	}

	public byte[] getData() {
		return data;
	}

	public void setData(byte[] data) {
		this.data = data;
	}
}
3.4 Configuration Files
Let’s write all the configuration files involved in this application.
3.4.1 Spring Configuration File
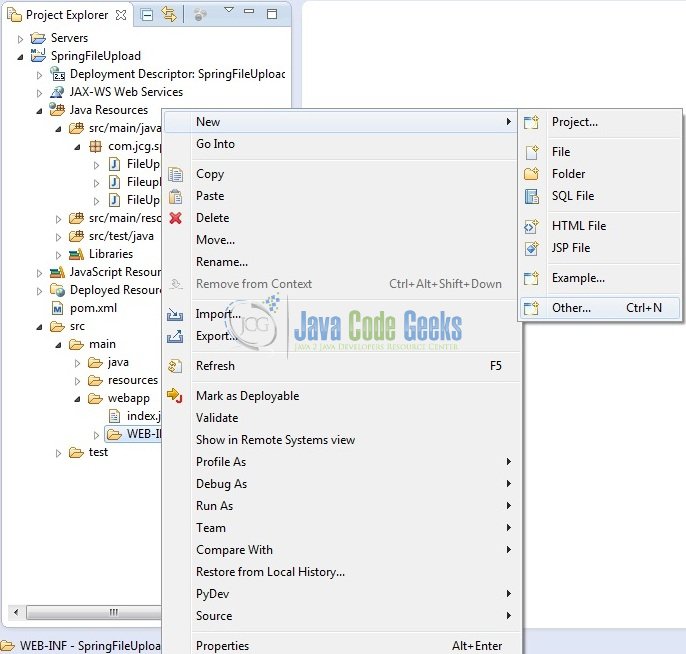
To configure the spring framework, we need to implement a bean configuration file i.e. spring-servlet.xml which provides an interface between the basic Java class and the outside world. Right-click on SpringFileUpload/src/main/webapp/WEB-INF folder, New -> Other.
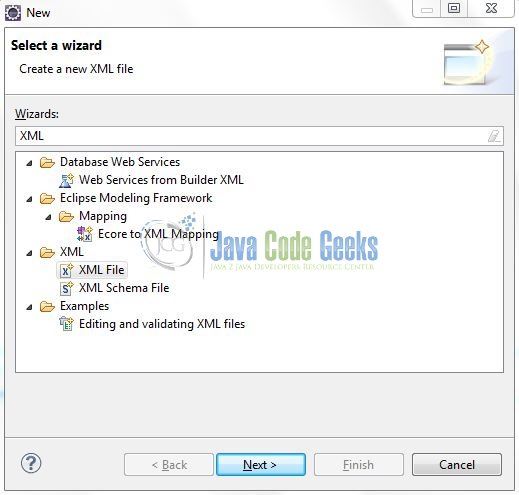
A new pop window will open and select the wizard as an XML file.
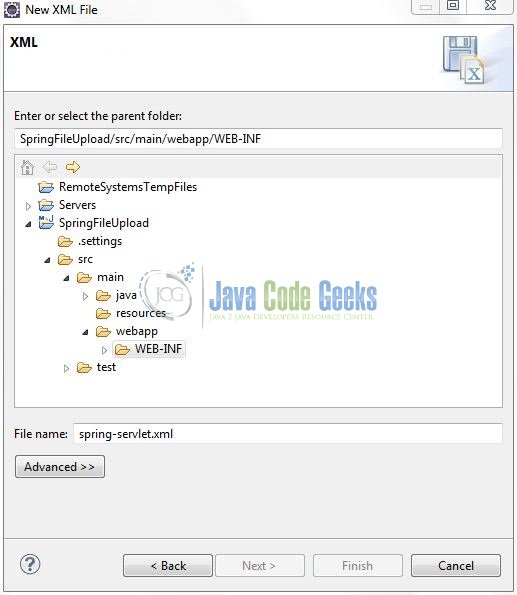
Again, a pop-up window will open. Verify the parent folder location as: SpringFileUpload/src/main/webapp/WEB-INF and enter the file name as: spring-servlet.xml. Click Finish.
Once the XML file is created, we will add the following code to it:
spring-servlet.xml
<?xml version="1.0" encoding="UTF-8"?>
<beans xmlns="http://www.springframework.org/schema/beans" xmlns:xsi="http://www.w3.org/2001/XMLSchema-instance" xmlns:p="http://www.springframework.org/schema/p" xmlns:context="http://www.springframework.org/schema/context" xsi:schemaLocation="http://www.springframework.org/schema/beans               http://www.springframework.org/schema/beans/spring-beans-3.0.xsd               http://www.springframework.org/schema/context               http://www.springframework.org/schema/context/spring-context-3.0.xsd">

    <context:component-scan base-package="com.jcg.spring.mvc.file.upload" />

    <!-- Resolves Views Selected For Rendering by @Controllers to *.jsp Resources in the /WEB-INF/ Folder -->
    <bean class="org.springframework.web.servlet.view.InternalResourceViewResolver">
        <property name="prefix" value="/WEB-INF/views/" />
        <property name="suffix" value=".jsp" />
    </bean>

    <!-- Spring File Upload Configuration -->
    <bean id="multipartResolver" class="org.springframework.web.multipart.commons.CommonsMultipartResolver">
        <!-- Maximum Upload Size (In Bytes) - 20 MB -->
        <property name="maxUploadSize" value="20971520" />
        <!-- Maximum Size Of The File In Memory (In Bytes) - 10 MB-->
        <property name="maxInMemorySize" value="1048576" />
    </bean>

    <!-- File Upload Exception Resolver i.e. In Case Of Exception The Controller Will Navigate To 'error.jsp' & Will Display The Exception Message -->
    <bean class="org.springframework.web.servlet.handler.SimpleMappingExceptionResolver">
		<property name="exceptionMappings">
			<props>
				<prop key="java.lang.Exception">error</prop>
			</props>
		</property>
	</bean>
</beans>
Notes: This file is loaded by the spring’s Dispatcher Servlet which receives all the requests coming into the application and dispatches them to the controller for processing. There are three beans declared in this configuration which draws our attention:
InternalResourceViewResolver: This bean declaration tells the framework how to find the physicalJSPfiles according to the logical view names returned by the controllers, by attaching the prefix and the suffix to a view name. For e.g. If a controller’s method returnshomeas the logical view name, then the framework will find a physical filehome.jspunder the/WEB-INF/viewsdirectory<context:component-scan />: This tells the framework which packages to be scanned when using the annotation-based strategy. Here the framework will scan all classes under the package:com.jcg.spring.mvc.file.uploadmultipartResolver: This bean id is for parsing the multi-part request with theCommonsMultipartResolverimplementation which is based on the Apache Commons File Upload. We will also configure the file upload settings as follows:maxUploadSize: It is the maximum size (in bytes) of the multipart request, including the upload file. For this example, it is set to 20 MBmaxInMemorySize: It is a threshold (in bytes) beyond which upload file will be saved to the disk instead of the memory. For this example, it is set to 10 MB
SimpleMappingExceptionResolver: This specifies theerror.jspwhich handles the exceptions
3.4.2 Web Deployment Descriptor
The web.xml file declares one servlet (i.e. Dispatcher Servlet) to receive all kind of the requests and specifies the default page (i.e. fileupload.jsp) when accessing the application. Dispatcher servlet here acts as a front controller. Add the following code to it:
web.xml
<?xml version="1.0" encoding="UTF-8"?>
<web-app xmlns="http://java.sun.com/xml/ns/javaee" xmlns:xsi="http://www.w3.org/2001/XMLSchema-instance" version="2.5" xsi:schemaLocation="http://java.sun.com/xml/ns/javaee              http://java.sun.com/xml/ns/javaee/web-app_2_5.xsd">

    <display-name>Spring Mvc File Upload Example</display-name>

    <!-- Spring Configuration - Processes Application Requests -->
    <servlet>
        <servlet-name>SpringController</servlet-name>
        <servlet-class>org.springframework.web.servlet.DispatcherServlet</servlet-class>
        <init-param>
            <param-name>contextConfigLocation</param-name>
            <param-value>/WEB-INF/spring-servlet.xml</param-value>
        </init-param>
        <load-on-startup>1</load-on-startup>
    </servlet>
    <servlet-mapping>
        <servlet-name>SpringController</servlet-name>
        <url-pattern>/</url-pattern>
    </servlet-mapping>

    <!-- Welcome File List -->
    <welcome-file-list>
        <welcome-file>fileupload.jsp</welcome-file>
    </welcome-file-list>
</web-app>
3.5 Creating JSP Views
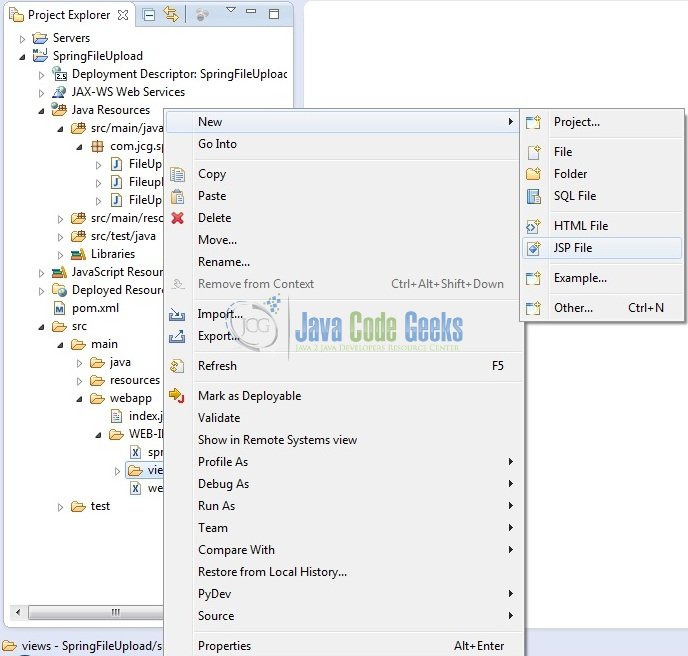
Spring Mvc supports many types of views for different presentation technologies. These include – JSP, HTML, XML etc. So let us write a simple view in SpringFileUpload/src/main/webapp/WEB-INF/views. Right-click on SpringFileUpload/src/main/webapp/WEB-INF/views folder, New -> JSP File.
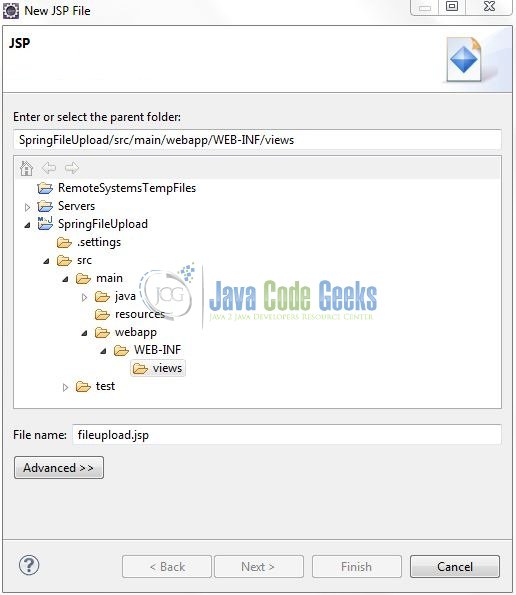
Verify the parent folder location as: SpringFileUpload/src/main/webapp/WEB-INF/views and enter the filename as: fileupload.jsp. Click Finish.
This is a simple form with two fields: Description and Attachment which are the necessary attributes for a file upload functionality. There are few notices for this HTML form i.e.
action="uploadFile": This specifies the action name which will handle submission of this formenctype="multipart/form-data": This tells the browser that this form contains the multipart data (i.e. file-upload) so it will construct a multipart request to be sent to the server<input type="file" … />: This tag shows a file browse button from which the user can pick up a file
Add the following code to it:
fileupload.jsp
<%@ page language="java" contentType="text/html; charset=UTF-8" pageEncoding="UTF-8"%>
<!DOCTYPE html PUBLIC "-//W3C//DTD HTML 4.01 Transitional//EN" "http://www.w3.org/TR/html4/loose.dtd">
<html>
   <head>
      <meta http-equiv="Content-Type" content="text/html; charset=UTF-8">
      <script type="text/javascript" src="https://examples.javacodegeeks.com/wp-content/litespeed/localres/aHR0cHM6Ly9hamF4Lmdvb2dsZWFwaXMuY29tL2FqYXgvlibs/jquery/2.1.1/jquery.min.js"></script>
      <title>Spring MVC File Upload Example</title>
      <script type="text/javascript">
         $(document).ready(function() {
        	 $("#fileUploadErr").hide();

        	 // Hide The Error Message When The Attachment Btn Is Clicked.
        	 $('#pickUpFileAttachment').click(function(eObj) {
        		 $("#fileUploadErr").hide();
             });

        	 // Validating Whether The Attachment Is Uploaded Or Not.
         	 $('#fileUploadBtn').click(function(eObj) {
                 var file = $("#pickUpFileAttachment").map(function() {
                     return $(this).val().trim() ? true : false;
                 }).get();
                 if (file.includes(true)) {
                      // Do Nothing...!
                 } else {
                	  $("#fileUploadErr").css({'color':'red', 'font-weight': 'bold'}).show();
                	  eObj.preventDefault();
                 }
             });
         });
      </script>
      <style type="text/css">
         #fileUploadBtn {
         	float: left;
         	margin-top: 22px;
         }
      </style>
   </head>
   <body>
      <center>
         <h2>Spring MVC File Upload Example</h2>
         <form id="fileUploadForm" method="post" action="uploadFile" enctype="multipart/form-data">
            <table id="fileUploadFormBeanTable" border="0" width="80%">
               <tr>
                  <td>Description:</td>
                  <td><input id="fileDescription" type="text" name="description" size="65" /></td>
               </tr>
               <tr>
                  <td>Attachment:</td>
                  <td>
                  		<input id="pickUpFileAttachment" type="file" name="attachFileObj" size="60" />
                  		<span id="fileUploadErr">Please Upload A File!</span>
                  </td>
               </tr>
               <tr>
                  <td colspan="2" align="center"><input id="fileUploadBtn" type="submit" value="Upload" /></td>
               </tr>
            </table>
         </form>
      </center>
   </body>
</html>
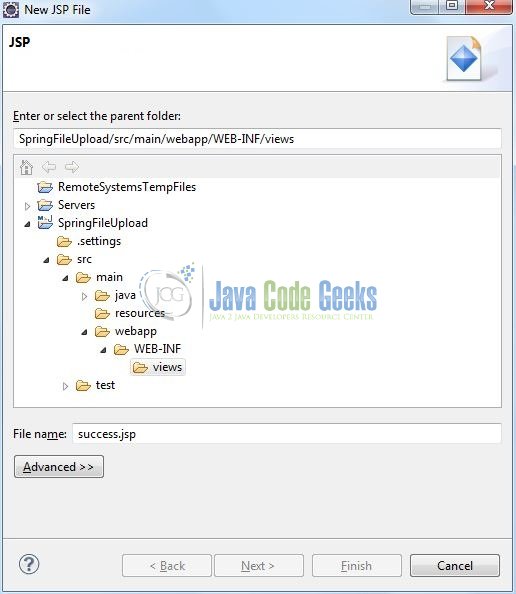
Repeat the step (i.e. Fig. 17) and enter the filename as: success.jsp.
This page will simply show a success message after the file is successfully saved in the database. Add the following code it:
success.jsp
<%@ page language="java" contentType="text/html; charset=ISO-8859-1" pageEncoding="ISO-8859-1"%>
<!DOCTYPE html PUBLIC "-//W3C//DTD HTML 4.01 Transitional//EN" "http://www.w3.org/TR/html4/loose.dtd">
<html>
	<head>
	    <meta http-equiv="Content-Type" content="text/html; charset=UTF-8">
	    <title>Spring MVC File Upload Example</title>
	    <style type="text/css">
	    	#fileUploadDiv {
	    		text-align: center;
    			padding-top: 16px;
	    	}
    		#fileUploadFormPage {
    			text-decoration: none;
    			text-align: center;
    			cursor: pointer;
    		}
    		#successMessage {
    			text-align: center;
    			color: green;
    			font-size: 25px;
    			padding-top: 17px;
    		}
    	</style>
	</head>
	<body>
	    <center>
	    	<h2>Spring MVC File Upload Example</h2>
	    </center>
	    <div id="successMessage">
	        <strong>${messageObj}</strong>
	    </div>
	    <div id="fileUploadDiv">
	    	<a id="fileUploadFormPage" href="fileupload">Go To File Upload Form Page</a>
	    </div>
	</body>
</html>
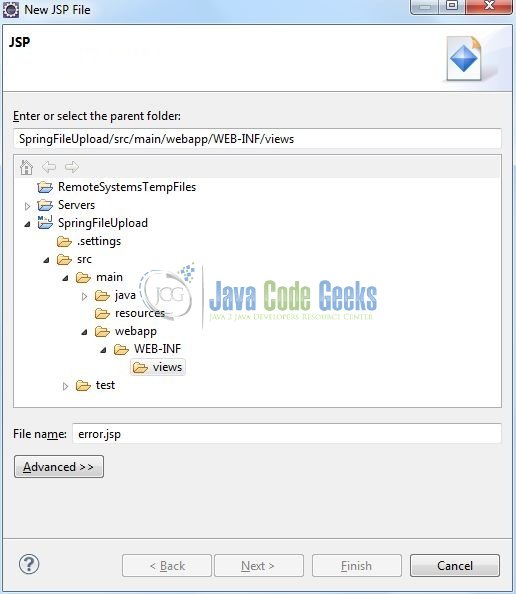
Again repeat the step (i.e. Fig. 17) and enter the filename as: error.jsp.
This page displays an error message in case of exceptions thrown, such as the upload file’s size exceeds the limit or the database connection settings are incorrect. Add the following code it:
error.jsp
<%@ page language="java" contentType="text/html; charset=UTF-8" pageEncoding="UTF-8"%>
<!DOCTYPE html PUBLIC "-//W3C//DTD HTML 4.01 Transitional//EN" "http://www.w3.org/TR/html4/loose.dtd">
<html>
	<head>
	    <meta http-equiv="Content-Type" content="text/html; charset=UTF-8">
	    <title>Spring MVC File Upload Example</title>
	    <style type="text/css">
    		#errorMessage {
    			text-align: center;
    			font-size: 25px;
    			padding-top: 17px;
    		}
    		#errorMessage span {
    			color: red;
    		}
    	</style>
	</head>

	<body>
	    <center>
	        <h2>Spring MVC File Upload Example</h2>
	    </center>
	    <br /> <br />
	    <div id="errorMessage">
	        <strong>Sorry, The File Was Not Successfully Upload Because Of The Following Error!</strong>
	        <span id="exceptionTrace">${exception.message}</span>
	    </div>
	</body>
</html>
4. Run the Application
As we are ready with all the changes, let us compile the project and deploy the application on the Tomcat7 server. To deploy the application on Tomat7, right-click on the project and navigate to Run as -> Run on Server.
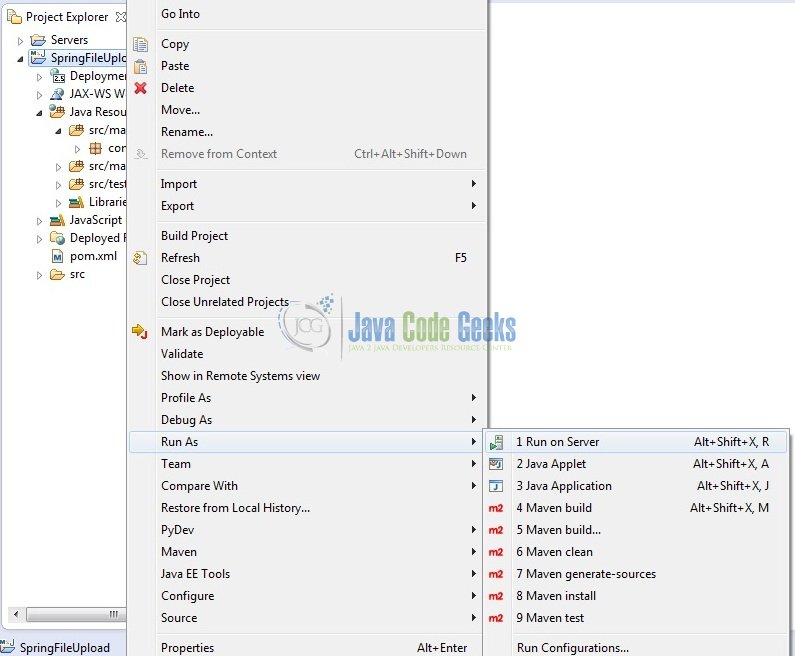
Tomcat will deploy the application in its web-apps folder and shall start its execution to deploy the project so that we can go ahead and test it on the browser.
5. Project Demo
Open your favorite browser and hit the following URL. The output page will be displayed.
http://localhost:8085/SpringFileUpload/
Server name (localhost) and port (8085) may vary as per your tomcat configuration. Developers can debug the example and see what happens after every step. Enjoy!

The file upload form is displayed. Type something into the Description field and pick up an arbitrary file. Then hit the Upload button. It may take a while for the database transaction to be completed and a successful message appears on the result page in case everything goes well.

In case of an error (such as database connection settings are incorrect or the pick-up file size is larger than the configured maximum upload size etc.), the error page will be displayed.
That’s all for this post. Happy Learning!!
6. Conclusion
In this section, developers learned how to create a sample Spring Mvc application that allows the file upload functionality. Developers can download the sample application as an Eclipse project in the Downloads section, and remember to update the database connection settings.
7. Download the Eclipse Project
This was an example of File Upload with Spring MVC.
You can download the full source code of this example here: SpringFileUpload




How to update The file in Spring MVC so that the old file will be deleted and new file will be inserted