In this example we shall show you how to use Spring Autowiring features to wire beans in other beans. The Spring container can autowire relationships between collaborating beans. Spring offers the auto-wiring modes below:
- Auto-Wiring ‘no’ : It is the default mode that includes no autowiring. Bean references must be defined via a
refelement. Changing the default setting is not recommended for larger deployments, because specifying collaborators explicitly gives greater control and clarity. To some extent, it documents the structure of a system. - Auto-Wiring ‘byName’ : Autowiring by property name. Spring looks for a bean with the same name as the property that needs to be autowired. For example, if a bean definition is set to autowire by name, and it contains a master property (that is, it has a setMaster(..) method), Spring looks for a bean definition named master, and uses it to set the property.
- Auto-Wiring ‘byType’ : Allows a property to be autowired if exactly one bean of the property type exists in the container. If more than one exists, a fatal exception is thrown, which indicates that you may not use
byTypeautowiring for that bean. If there are no matching beans, nothing happens; the property is not set. - Auto-Wiring ‘constructor’ : Analogous to
byType, but applies to constructor arguments. If there is not exactly one bean of the constructor argument type in the container, a fatal error is raised.
The easiest way to autowire a bean is by using the @Autowire annotation, to avoid the xml configuration. It can be used to autowire a bean on the setter method, on a constructor or a field.
Below, we will introduce all possible ways to autowire a bean in Spring.
Our preferred development environment is Eclipse. We are using Eclipse Juno (4.2) version, along with Maven Integration plugin version 3.1.0. You can download Eclipse from here and Maven Plugin for Eclipse from here. The installation of Maven plugin for Eclipse is out of the scope of this tutorial and will not be discussed. We are also using Spring version 3.2.3 and the JDK 7_u_21.
Let’s begin,
1. Create a new Maven project
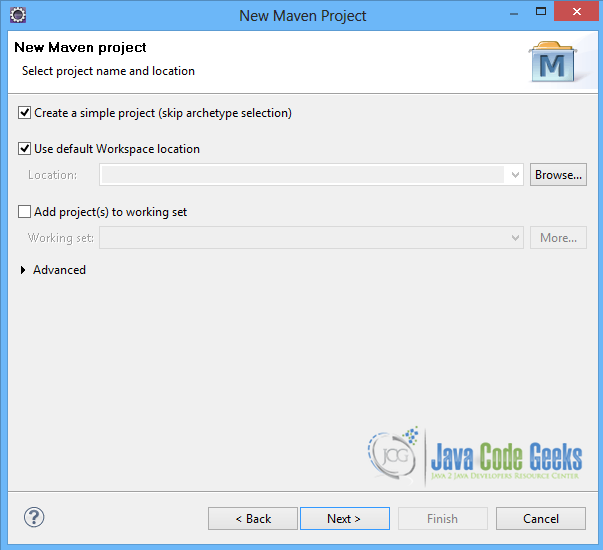
Go to File -> Project ->Maven -> Maven Project.

In the “Select project name and location” page of the wizard, make sure that “Create a simple project (skip archetype selection)” option is checked, hit “Next” to continue with default values.
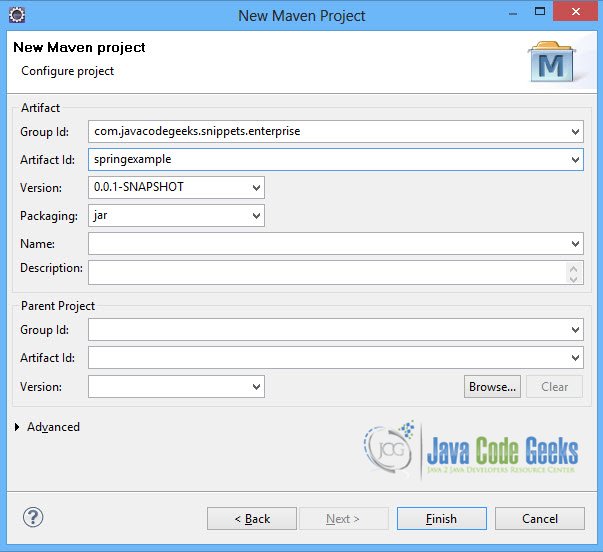
In the “Enter an artifact id” page of the wizard, you can define the name and main package of your project. We will set the “Group Id” variable to "com.javacodegeeks.snippets.enterprise" and the “Artifact Id” variable to "springexample". The aforementioned selections compose the main project package as "com.javacodegeeks.snippets.enterprise.springexample" and the project name as "springexample". Hit “Finish” to exit the wizard and to create your project.
The Maven project structure is shown below:
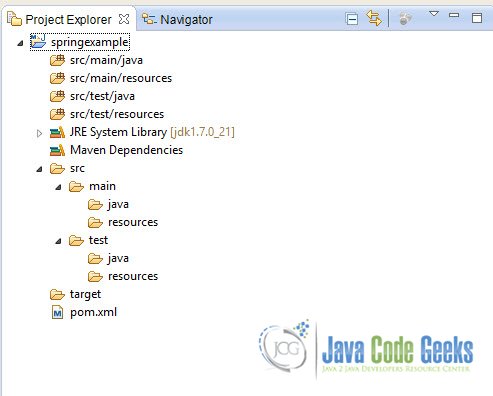
- It consists of the following folders:
- /src/main/java folder, that contains source files for the dynamic content of the application,
- /src/test/java folder contains all source files for unit tests,
- /src/main/resources folder contains configurations files,
- /target folder contains the compiled and packaged deliverables,
- the pom.xml is the project object model (POM) file. The single file that contains all project related configuration.
2. Add Spring 3.2.3 dependency
- Locate the “Properties” section at the “Overview” page of the POM editor and perform the following changes:
Create a new property with name org.springframework.version and value 3.2.3.RELEASE. - Navigate to the “Dependencies” page of the POM editor and create the following dependencies (you should fill the “GroupId”, “Artifact Id” and “Version” fields of the “Dependency Details” section at that page):
Group Id : org.springframework Artifact Id : spring-web Version : ${org.springframework.version}
Alternatively, you can add the Spring dependencies in Maven’s pom.xml file, by directly editing it at the “Pom.xml” page of the POM editor, as shown below:
pom.xml:
<project xmlns="http://maven.apache.org/POM/4.0.0"; xmlns:xsi="http://www.w3.org/2001/XMLSchema-instance"
	xsi:schemaLocation="http://maven.apache.org/POM/4.0.0 http://maven.apache.org/xsd/maven-4.0.0.xsd">
	<modelVersion>4.0.0</modelVersion>
	<groupId>com.javacodegeeks.snippets.enterprise</groupId>
	<artifactId>springexample</artifactId>
	<version>0.0.1-SNAPSHOT</version>

	<dependencies>
		<dependency>
			<groupId>org.springframework</groupId>
			<artifactId>spring-core</artifactId>
			<version>${spring.version}</version>
		</dependency>
		<dependency>
			<groupId>org.springframework</groupId>
			<artifactId>spring-context</artifactId>
			<version>${spring.version}</version>
		</dependency>
	</dependencies>

	<properties>
		<spring.version>3.2.3.RELEASE</spring.version>
	</properties>
</project>
As you can see Maven manages library dependencies declaratively. A local repository is created (by default under {user_home}/.m2 folder) and all required libraries are downloaded and placed there from public repositories. Furthermore intra – library dependencies are automatically resolved and manipulated.
3. Create a class to be used as the bean to be autowired
Color.java will be the bean that we will use to autowire in all possible ways. It is a class that represents the color of an animal. It has two attributes, the baseColor that is the base color of an animal’s skin and the textureColor that is the texture color of an animal’s skin.
Color.java
package com.javacodegeeks.snippets.enterprise;

public class Color {

	private String baseColor;

	private String textureColor;

	public String getBaseColor() {
		return baseColor;
	}

	public void setBaseColor(String baseColor) {
		this.baseColor = baseColor;
	}

	public String getTextureColor() {
		return textureColor;
	}

	public void setTextureColor(String textureColor) {
		this.textureColor = textureColor;
	}

	@Override
	public String toString() {
		return baseColor + " base skin color and " + textureColor + " texture color." ;

	}
}
4. Auto-Wiring ‘no’
This is the default mode. The only thing needed here is to wire your bean via the ref attribute in the bean definition. Cat.java is the bean that will be used to wire the color bean with the auto-wiring 'no' mode.
Cat.java
package com.javacodegeeks.snippets.enterprise;

public class Cat {

	private String name;

	private Color color;

	public String getName() {
		return name;
	}

	public void setName(String name) {
		this.name = name;
	}

	public Color getColor() {
		return color;
	}

	public void setColor(Color color) {
		this.color= color;
	}

	@Override
	public String toString() {
		return "The " + name + " has " + color.toString();

	}
}
The two beans are defined below:
applicationContext.xml
<beans xmlns="http://www.springframework.org/schema/beans"
	xmlns:xsi="http://www.w3.org/2001/XMLSchema-instance" xmlns:p="http://www.springframework.org/schema/p"
	xmlns:aop="http://www.springframework.org/schema/aop" xmlns:context="http://www.springframework.org/schema/context"
	xmlns:jee="http://www.springframework.org/schema/jee" xmlns:tx="http://www.springframework.org/schema/tx"
	xmlns:task="http://www.springframework.org/schema/task"
	xsi:schemaLocation="http://www.springframework.org/schema/aop http://www.springframework.org/schema/aop/spring-aop-3.2.xsd http://www.springframework.org/schema/beans http://www.springframework.org/schema/beans/spring-beans-3.2.xsd http://www.springframework.org/schema/context http://www.springframework.org/schema/context/spring-context-3.2.xsd http://www.springframework.org/schema/jee http://www.springframework.org/schema/jee/spring-jee-3.2.xsd http://www.springframework.org/schema/tx http://www.springframework.org/schema/tx/spring-tx-3.2.xsd http://www.springframework.org/schema/task http://www.springframework.org/schema/task/spring-task-3.2.xsd">

	<bean id="color" class="com.javacodegeeks.snippets.enterprise.Color">
		<property name="baseColor" value="white" />
		<property name="textureColor" value="grey" />
	</bean>

	<bean id="cat" class="com.javacodegeeks.snippets.enterprise.Cat">
		<property name="name" value="cat" />
		<property name="color" ref="color" />
	</bean>
</beans>
5. Auto-Wiring ‘byName’
We are using the Dog.java class to wire the color bean in the auto-wiring byName mode.
Dog.java
package com.javacodegeeks.snippets.enterprise;

public class Dog {
	private String name;

	private Color color;

	public String getName() {
		return name;
	}

	public void setName(String name) {
		this.name = name;
	}

	public Color getColor() {
		return color;
	}

	public void setColor(Color color) {
		this.color= color;
	}

	@Override
	public String toString() {
		return "The " + name + " has " + color.toString();

	}
}
applicationContext.xml
<beans xmlns="http://www.springframework.org/schema/beans"
	xmlns:xsi="http://www.w3.org/2001/XMLSchema-instance" xmlns:p="http://www.springframework.org/schema/p"
	xmlns:aop="http://www.springframework.org/schema/aop" xmlns:context="http://www.springframework.org/schema/context"
	xmlns:jee="http://www.springframework.org/schema/jee" xmlns:tx="http://www.springframework.org/schema/tx"
	xmlns:task="http://www.springframework.org/schema/task"
	xsi:schemaLocation="http://www.springframework.org/schema/aop http://www.springframework.org/schema/aop/spring-aop-3.2.xsd http://www.springframework.org/schema/beans http://www.springframework.org/schema/beans/spring-beans-3.2.xsd http://www.springframework.org/schema/context http://www.springframework.org/schema/context/spring-context-3.2.xsd http://www.springframework.org/schema/jee http://www.springframework.org/schema/jee/spring-jee-3.2.xsd http://www.springframework.org/schema/tx http://www.springframework.org/schema/tx/spring-tx-3.2.xsd http://www.springframework.org/schema/task http://www.springframework.org/schema/task/spring-task-3.2.xsd">

	<bean id="color" class="com.javacodegeeks.snippets.enterprise.Color">
		<property name="baseColor" value="white" />
		<property name="textureColor" value="grey" />
	</bean>

	<bean id="cat" class="com.javacodegeeks.snippets.enterprise.Cat">
		<property name="name" value="cat" />
		<property name="color" ref="color" />
	</bean>

	<bean id="dog" class="com.javacodegeeks.snippets.enterprise.Dog" autowire="byName">
		<property name="name" value="dog" />
	</bean>
</beans>
Note that an exception is thrown when the property name of the bean does not match the bean. For example if we change the name color to colorBean in Color.java bean definition Spring will not be able to achieve the auto-wiring since it is different from the property name in dog bean definition to be autowired.
6. Auto-Wiring ‘byType’
The Elephant.java class will be used to wire the color bean with auto-wiring byType mode.
Elephant.java
package com.javacodegeeks.snippets.enterprise;

public class Elephant {

	private String name;

	private Color color;

	public String getName() {
		return name;
	}

	public void setName(String name) {
		this.name = name;
	}

	public Color getColor() {
		return color;
	}

	public void setColor(Color color) {
		this.color= color;
	}

	@Override
	public String toString() {
		return "The " + name + " has " + color.toString();

	}
}
applicationContext.xml
<beans xmlns="http://www.springframework.org/schema/beans"
	xmlns:xsi="http://www.w3.org/2001/XMLSchema-instance" xmlns:p="http://www.springframework.org/schema/p"
	xmlns:aop="http://www.springframework.org/schema/aop" xmlns:context="http://www.springframework.org/schema/context"
	xmlns:jee="http://www.springframework.org/schema/jee" xmlns:tx="http://www.springframework.org/schema/tx"
	xmlns:task="http://www.springframework.org/schema/task"
	xsi:schemaLocation="http://www.springframework.org/schema/aop http://www.springframework.org/schema/aop/spring-aop-3.2.xsd http://www.springframework.org/schema/beans http://www.springframework.org/schema/beans/spring-beans-3.2.xsd http://www.springframework.org/schema/context http://www.springframework.org/schema/context/spring-context-3.2.xsd http://www.springframework.org/schema/jee http://www.springframework.org/schema/jee/spring-jee-3.2.xsd http://www.springframework.org/schema/tx http://www.springframework.org/schema/tx/spring-tx-3.2.xsd http://www.springframework.org/schema/task http://www.springframework.org/schema/task/spring-task-3.2.xsd">

	<bean id="color" class="com.javacodegeeks.snippets.enterprise.Color">
		<property name="baseColor" value="white" />
		<property name="textureColor" value="grey" />
	</bean>

	<bean id="cat" class="com.javacodegeeks.snippets.enterprise.Cat">
		<property name="name" value="cat" />
		<property name="color" ref="color" />
	</bean>

	<bean id="dog" class="com.javacodegeeks.snippets.enterprise.Dog" autowire="byName">
		<property name="name" value="dog" />
	</bean>

       <bean id="elephant" class="com.javacodegeeks.snippets.enterprise.Elephant" autowire="byType">
		<property name="name" value="elephant" />
	</bean>

</beans>
Here you must note that when two bean definitions of the same data type exist in applicationContext.xml then an exception is thrown.
7. Auto-Wiring ‘constructor’
The Frog.java class is used to wire the color bean with this mode.
Frog.java
package com.javacodegeeks.snippets.enterprise;

public class Frog {
	private String name;

	private Color color;

	public Frog(Color color){
		this.color= color;
	}

	public String getName() {
		return name;
	}

	public void setName(String name) {
		this.name = name;
	}

	public Color getColor() {
		return color;
	}

	public void setColor(Color color) {
		this.color= color;
	}

	@Override
	public String toString() {
		return "The " + name + " has " + color.toString();

	}
}
applicationContext.xml
<beans xmlns="http://www.springframework.org/schema/beans"
	xmlns:xsi="http://www.w3.org/2001/XMLSchema-instance" xmlns:p="http://www.springframework.org/schema/p"
	xmlns:aop="http://www.springframework.org/schema/aop" xmlns:context="http://www.springframework.org/schema/context"
	xmlns:jee="http://www.springframework.org/schema/jee" xmlns:tx="http://www.springframework.org/schema/tx"
	xmlns:task="http://www.springframework.org/schema/task"
	xsi:schemaLocation="http://www.springframework.org/schema/aop http://www.springframework.org/schema/aop/spring-aop-3.2.xsd http://www.springframework.org/schema/beans http://www.springframework.org/schema/beans/spring-beans-3.2.xsd http://www.springframework.org/schema/context http://www.springframework.org/schema/context/spring-context-3.2.xsd http://www.springframework.org/schema/jee http://www.springframework.org/schema/jee/spring-jee-3.2.xsd http://www.springframework.org/schema/tx http://www.springframework.org/schema/tx/spring-tx-3.2.xsd http://www.springframework.org/schema/task http://www.springframework.org/schema/task/spring-task-3.2.xsd">

	<bean id="color" class="com.javacodegeeks.snippets.enterprise.Color">
		<property name="baseColor" value="white" />
		<property name="textureColor" value="grey" />
	</bean>

	<bean id="cat" class="com.javacodegeeks.snippets.enterprise.Cat">
		<property name="name" value="cat" />
		<property name="color" ref="color" />
	</bean>

	<bean id="dog" class="com.javacodegeeks.snippets.enterprise.Dog" autowire="byName">
		<property name="name" value="dog" />
	</bean>

       <bean id="elephant" class="com.javacodegeeks.snippets.enterprise.Elephant" autowire="byType">
		<property name="name" value="elephant" />
	</bean>

       <bean id="frog" class="com.javacodegeeks.snippets.enterprise.Frog"	autowire="constructor">
		<property name="name" value="frog" />
	</bean>
</beans>
Note that this mode is similar to just defining the color bean reference using the constructor-arg element in the frog bean definition.
8.Auto-Wiring with @Autowired annotation
The @Autowired annotation can be used to auto wire a bean on the setter method, constructor or a field. We will create another class, Tiger.java that will use the annotation to autowire the color bean. In order to define the tiger bean, will have to register the AutowiredAnnotationBeanPostProcessor. There are two ways to do so:
context:annotation-config element in applicationcontext.xml, as shown below:applicationContext.xml
<beans xmlns="http://www.springframework.org/schema/beans"
	xmlns:xsi="http://www.w3.org/2001/XMLSchema-instance" xmlns:p="http://www.springframework.org/schema/p"
	xmlns:aop="http://www.springframework.org/schema/aop" xmlns:context="http://www.springframework.org/schema/context"
	xmlns:jee="http://www.springframework.org/schema/jee" xmlns:tx="http://www.springframework.org/schema/tx"
	xmlns:task="http://www.springframework.org/schema/task"
	xsi:schemaLocation="http://www.springframework.org/schema/aop http://www.springframework.org/schema/aop/spring-aop-3.2.xsd http://www.springframework.org/schema/beans http://www.springframework.org/schema/beans/spring-beans-3.2.xsd http://www.springframework.org/schema/context http://www.springframework.org/schema/context/spring-context-3.2.xsd http://www.springframework.org/schema/jee http://www.springframework.org/schema/jee/spring-jee-3.2.xsd http://www.springframework.org/schema/tx http://www.springframework.org/schema/tx/spring-tx-3.2.xsd http://www.springframework.org/schema/task http://www.springframework.org/schema/task/spring-task-3.2.xsd">

	<context:annotation-config />

	<bean id="color" class="com.javacodegeeks.snippets.enterprise.Color">
		<property name="baseColor" value="white" />
		<property name="textureColor" value="grey" />
	</bean>

	<bean id="cat" class="com.javacodegeeks.snippets.enterprise.Cat">
		<property name="name" value="cat" />
		<property name="color" ref="color" />
	</bean>

	<bean id="dog" class="com.javacodegeeks.snippets.enterprise.Dog" autowire="byName">
		<property name="name" value="dog" />
	</bean>

       <bean id="elephant" class="com.javacodegeeks.snippets.enterprise.Elephant" autowire="byType">
		<property name="name" value="elephant" />
	</bean>

       <bean id="frog" class="com.javacodegeeks.snippets.enterprise.Frog"	autowire="constructor">
		<property name="name" value="frog" />
	</bean>

       <bean id="tiger" class="com.javacodegeeks.snippets.enterprise.Tiger">
		<property name="name" value="tiger" />
	 </bean>
</beans>
AutowiredAnnotationBeanPostProcessor bean definition in applicationcontext.xml, as described below:applicationContext.xml
<beans xmlns="http://www.springframework.org/schema/beans"
	xmlns:xsi="http://www.w3.org/2001/XMLSchema-instance" xmlns:p="http://www.springframework.org/schema/p"
	xmlns:aop="http://www.springframework.org/schema/aop" xmlns:context="http://www.springframework.org/schema/context"
	xmlns:jee="http://www.springframework.org/schema/jee" xmlns:tx="http://www.springframework.org/schema/tx"
	xmlns:task="http://www.springframework.org/schema/task"
	xsi:schemaLocation="http://www.springframework.org/schema/aop http://www.springframework.org/schema/aop/spring-aop-3.2.xsd http://www.springframework.org/schema/beans http://www.springframework.org/schema/beans/spring-beans-3.2.xsd http://www.springframework.org/schema/context http://www.springframework.org/schema/context/spring-context-3.2.xsd http://www.springframework.org/schema/jee http://www.springframework.org/schema/jee/spring-jee-3.2.xsd http://www.springframework.org/schema/tx http://www.springframework.org/schema/tx/spring-tx-3.2.xsd http://www.springframework.org/schema/task http://www.springframework.org/schema/task/spring-task-3.2.xsd">

<bean class="org.springframework.beans.factory.annotation.AutowiredAnnotationBeanPostProcessor" />

	<bean id="color" class="com.javacodegeeks.snippets.enterprise.Color">
		<property name="baseColor" value="white" />
		<property name="textureColor" value="grey" />
	</bean>

	<bean id="cat" class="com.javacodegeeks.snippets.enterprise.Cat">
		<property name="name" value="cat" />
		<property name="color" ref="color" />
	</bean>

	<bean id="dog" class="com.javacodegeeks.snippets.enterprise.Dog" autowire="byName">
		<property name="name" value="dog" />
	</bean>

       <bean id="elephant" class="com.javacodegeeks.snippets.enterprise.Elephant" autowire="byType">
		<property name="name" value="elephant" />
	</bean>

       <bean id="frog" class="com.javacodegeeks.snippets.enterprise.Frog"	autowire="constructor">
		<property name="name" value="frog" />
	</bean>

      <bean id="tiger" class="com.javacodegeeks.snippets.enterprise.Tiger">
		<property name="name" value="tiger" />
	 </bean>

</beans>
Let’s see the new class now. The Tiger.class will autowire the color bean, using all possible ways.

8.1 @Autowired setter method
First, the @Autowired annotation is used in the setter method.
Tiger.java
package com.javacodegeeks.snippets.enterprise;

import org.springframework.beans.factory.annotation.Autowired;
import org.springframework.beans.factory.annotation.Qualifier;

public class Tiger {

	private String name;

	private Color color;

	public String getName() {
		return name;
	}

	public void setName(String name) {
		this.name = name;
	}

	public Color getColor() {
		return color;
	}

	@Autowired
	public void setColor(Color color) {
		this.color= color;
	}

	@Override
	public String toString() {
		return "The " + name + " has " + color.toString();

	}
}
8.2 @Autowired constructor
Then, the @Autowired annotation is used in the constructor.
Tiger.java
package com.javacodegeeks.snippets.enterprise;

import org.springframework.beans.factory.annotation.Autowired;
import org.springframework.beans.factory.annotation.Qualifier;

public class Tiger {

	private String name;

	private Color color;

	@Autowired
	public Tiger(Color color) {
		this.color = color;
	}

	public String getName() {
		return name;
	}

	public void setName(String name) {
		this.name = name;
	}

	public Color getColor() {
		return color;
	}

	public void setColor(Color color) {
		this.color= color;
	}

	@Override
	public String toString() {
		return "The " + name + " has " + color.toString();

	}
}
8.3 @Autowired field
And then the @Autowired annotation is used in a field.
Tiger.java
package com.javacodegeeks.snippets.enterprise;

import org.springframework.beans.factory.annotation.Autowired;
import org.springframework.beans.factory.annotation.Qualifier;

public class Tiger {

	private String name;

	@Autowired
	private Color color;

	public String getName() {
		return name;
	}

	public void setName(String name) {
		this.name = name;
	}

	public Color getColor() {
		return color;
	}

	public void setColor(Color color) {
		this.color= color;
	}

	@Override
	public String toString() {
		return "The " + name + " has " + color.toString();

	}
}
8.4 Dependency checking
By default, the @Autowired annotation will perform the dependency checking to make sure the property has been wired properly. But if there is no matching bean to wire, Spring will throw an exception. To avoid this exception we can disable this checking feature by setting the required attribute of @Autowired to false. In that case, if Spring does not find a matching bean, it will leave the property unset.
Tiger.java
package com.javacodegeeks.snippets.enterprise;

import org.springframework.beans.factory.annotation.Autowired;
import org.springframework.beans.factory.annotation.Qualifier;

public class Tiger {

	private String name;

	@Autowired(required=false)
	private Color color;

	public String getName() {
		return name;
	}

	public void setName(String name) {
		this.name = name;
	}

	public Color getColor() {
		return color;
	}

	public void setColor(Color color) {
		this.color= color;
	}

	@Override
	public String toString() {
		return "The " + name + " has " + color.toString();

	}
}
8.5 Using the @Qualifier annotation
The @Qualifier annotation can be used to control which bean should be autowired on a field. For example, if there are two beans defined in applicationContext.xml of the class Color.java, then the @Qualifier annotation is used to show Spring which of the two beans will be autowired in tiger bean.
We define anotherColor bean in applicationContext.xml.
applicationContext.xml
<beans xmlns="http://www.springframework.org/schema/beans"
	xmlns:xsi="http://www.w3.org/2001/XMLSchema-instance" xmlns:p="http://www.springframework.org/schema/p"
	xmlns:aop="http://www.springframework.org/schema/aop" xmlns:context="http://www.springframework.org/schema/context"
	xmlns:jee="http://www.springframework.org/schema/jee" xmlns:tx="http://www.springframework.org/schema/tx"
	xmlns:task="http://www.springframework.org/schema/task"
	xsi:schemaLocation="http://www.springframework.org/schema/aop http://www.springframework.org/schema/aop/spring-aop-3.2.xsd http://www.springframework.org/schema/beans http://www.springframework.org/schema/beans/spring-beans-3.2.xsd http://www.springframework.org/schema/context http://www.springframework.org/schema/context/spring-context-3.2.xsd http://www.springframework.org/schema/jee http://www.springframework.org/schema/jee/spring-jee-3.2.xsd http://www.springframework.org/schema/tx http://www.springframework.org/schema/tx/spring-tx-3.2.xsd http://www.springframework.org/schema/task http://www.springframework.org/schema/task/spring-task-3.2.xsd">

	<context:annotation-config />

	<bean id="color" class="com.javacodegeeks.snippets.enterprise.Color">
		<property name="baseColor" value="white" />
		<property name="textureColor" value="grey" />
	</bean>

	<bean id="tiger" class="com.javacodegeeks.snippets.enterprise.Tiger">
		<property name="name" value="tiger" />
	 </bean>

<bean id="anotherColor" class="com.javacodegeeks.snippets.enterprise.Color">
		<property name="baseColor" value="yellow" />
		<property name="textureColor" value="black" />
	</bean>

</beans>
Now, we can use the @Qualifier annotation under the @Autowired annotation to tell Spring to autowire the anotherColor bean.
Tiger.java
package com.javacodegeeks.snippets.enterprise;

import org.springframework.beans.factory.annotation.Autowired;
import org.springframework.beans.factory.annotation.Qualifier;

public class Tiger {

	private String name;

	@Autowired
	@Qualifier("anotherColor")
	private Color color;

	public String getName() {
		return name;
	}

	public void setName(String name) {
		this.name = name;
	}

	public Color getColor() {
		return color;
	}

	public void setColor(Color color) {
		this.color= color;
	}

	@Override
	public String toString() {
		return "The " + name + " has " + color.toString();

	}
}
9. Run the application
In order to run the above application we have to comment the anotherColor bean in applicationContext.xml, since the byType autowiring in elephant bean will find two beans of the same type to autowire and throw an exception. So we will run the example, using only the color bean and remove the @Qualifier annotation from tiger bean.
The App.class loads the beans, as shown below:
App.java
package com.javacodegeeks.snippets.enterprise;

import org.springframework.context.ConfigurableApplicationContext;
import org.springframework.context.support.ClassPathXmlApplicationContext;

public class App {

	public static void main(String[] args) {

			ConfigurableApplicationContext context = new ClassPathXmlApplicationContext("applicationContext.xml");
			Cat cat = (Cat) context.getBean("cat");
			System.out.println(cat.toString());
			Dog dog = (Dog) context.getBean("dog");
			System.out.println(dog.toString());
			Elephant elephant = (Elephant) context.getBean("elephant");
			System.out.println(elephant.toString());
			Frog frog = (Frog) context.getBean("frog");
			System.out.println(frog.toString());
			Tiger tiger = (Tiger) context.getBean("tiger");
			System.out.println(tiger.toString());
			context.close();
	}
}
After running the application the output is shown below:
The cat has white base skin color and grey texture color.
The dog has white base skin color and grey texture color.
The elephant has white base skin color and grey texture color.
The frog has white base skin color and grey texture color.
The tiger has white base skin color and grey texture color.
Now, in order to check how the @Qualifier annotation works, we will uncomment the anotherColor bean in applicationContext.xml and comment the elephant bean. The App.class now loads the beans as shown below:
App.java
package com.javacodegeeks.snippets.enterprise;

import org.springframework.context.ConfigurableApplicationContext;
import org.springframework.context.support.ClassPathXmlApplicationContext;

public class App {

	public static void main(String[] args) {

			ConfigurableApplicationContext context = new ClassPathXmlApplicationContext("applicationContext.xml");
			Cat cat = (Cat) context.getBean("cat");
			System.out.println(cat.toString());
			Dog dog = (Dog) context.getBean("dog");
			System.out.println(dog.toString());
			Frog frog = (Frog) context.getBean("frog");
			System.out.println(frog.toString());
			Tiger tiger = (Tiger) context.getBean("tiger");
			System.out.println(tiger.toString());
			context.close();
	}
}
In this case, after running the application the output is the one below:
The cat has white base skin color and grey texture color.
The dog has white base skin color and grey texture color.
The frog has white base skin color and grey texture color.
The tiger has yellow base skin color and black texture color.
This was an example of autowiring beans in all modes Spring provides.
Download the Eclipse project of this tutorial : SpringAutowiringExample.zip
