Hello readers, in this tutorial, we will show you how to set up the File Upload and Download functionality in a Servlet based Java web application.
Table Of Contents
1. Introduction
1.1 What is Servlet?
Servlet is a Java program which exists and executes in the J2EE servers and is used to receive the HTTP protocol request, process it and send back the response to the client. Servlets make use of the Java standard extension classes in the packages javax.servlet and javax.servlet.http. Since Servlets are written in the highly portable Java language and follow a standard framework, they provide a means to create the sophisticated server extensions in a server and operating system in an independent way.
Typical uses for HTTP Servlets include:
- Processing and/or storing the data submitted by an
HTMLform - Providing dynamic content i.e. returning the results of a database query to the client
- Managing state information on top of the stateless
HTTPi.e. for an online shopping cart system which manages the shopping carts for many concurrent customers and maps every request to the right customer
As Servlet technology uses the Java language, thus web applications made using Servlet are Secured, Scalable, and Robust. Now let’s move ahead and understand the Upload & Download functionality in Servlet 3.0.
1.2 Servlet File Upload
Before Servlet 3.0 there was no direct API to handle the Multipart request for the file uploads. Thus, those time developers require the third party jars such as Apache’s commons-fileupload and Apache’s commons-io to handle the file upload functionality. The Servlet 3.0 provides some new APIs for working with upload data:
- From Servlet
3.0onwards Servlet support API to handle the Multipart request - To enable the Servlet
3.0Multipart Request Handling, developers configure the@MultipartConfigannotation @MultipartConfigannotation have parameters which are responsible to handle themultipart/form-datarequests i.e.fileSizeThreshold: If the file size that is greater than the threshold value, the file will be directly written to the disk instead of saving in the memorymaxFileSize: This is the maximum size (in bytes) for a single upload filemaxRequestSize: Maximum size (in bytes) allowed for themultipart/form-datarequest which contains the file upload datalocation: The directory where files will be stored via thePart.write()method
- Interface
Partrepresents a part in amultipart/form-datarequest. This interface defines some methods for working with the upload data (to name a few):getInputStream(): This returns anInputStreamobject which can be used to read the content of the partgetSize(): This returns the size of an upload data (in Bytes)write(String filename): This is the conventional method to save the upload data to file on the disk. The file is created relative to the location specified in the@MultipartConfigannotation
- New methods introduced in the
HttpServletRequestinterface:getParts(): Returns a collection of thePartobjectsgetPart(String name): Retrieves an individualPartobject with a given name.
1.3 Servlet File Download
To download a file from the servlet we have used the following methods of the HttpServletResponse.
- Read the file on the server using the
FileInputStreamobject - To download a file, we will set the content-type as
application/octet-streamin the response object by using thesetContentType()method - Set the header in the response object by using the
setHeader()method i.e.response.setHeader("Content-Disposition","attachment;filename=" + fileName); - Using the
getOutputStream()which returns the stream to write the binary data into the response - In case, if the file doesn’t exist, we will set the content-type as
text/htmland write file not found message in the response
These new APIs make a developer life easier, really! Now let’s apply the new Servlet 3.0 API to build the file upload & download capability.
2. Java Servlet File Download and File Upload Example
Here is a step-by-step guide for implementing the Servlet framework in Java.
2.1 Tools Used
We are using Eclipse Kepler SR2, JDK 8 and Maven. Having said that, we have tested the code against JDK 1.7 and it works well.
2.2 Project Structure
Firstly, let’s review the final project structure, in case you are confused about where you should create the corresponding files or folder later!

2.3 Project Creation
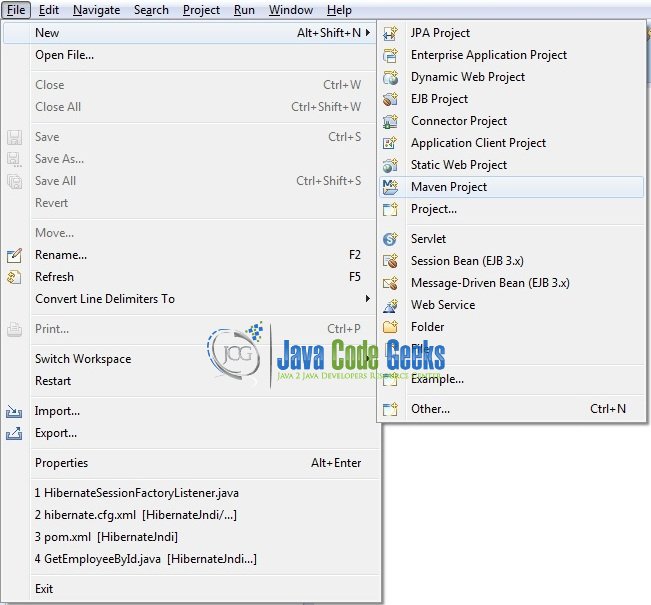
This section will demonstrate on how to create a Java-based Maven project with Eclipse. In Eclipse Ide, go to File -> New -> Maven Project.
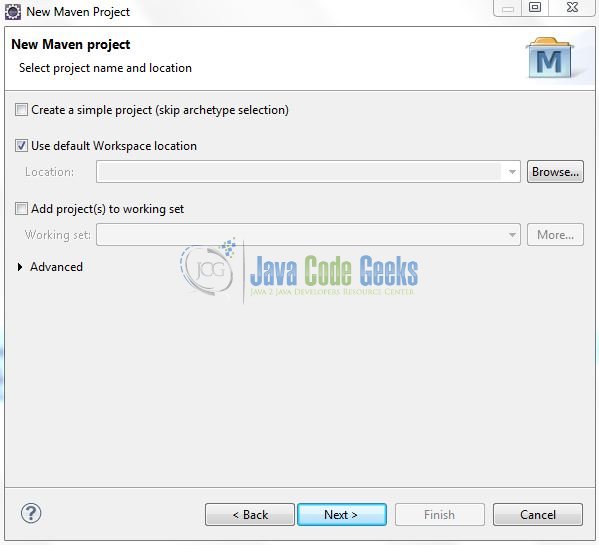
In the New Maven Project window, it will ask you to select project location. By default, ‘Use default workspace location’ will be selected. Just click on next button to proceed.
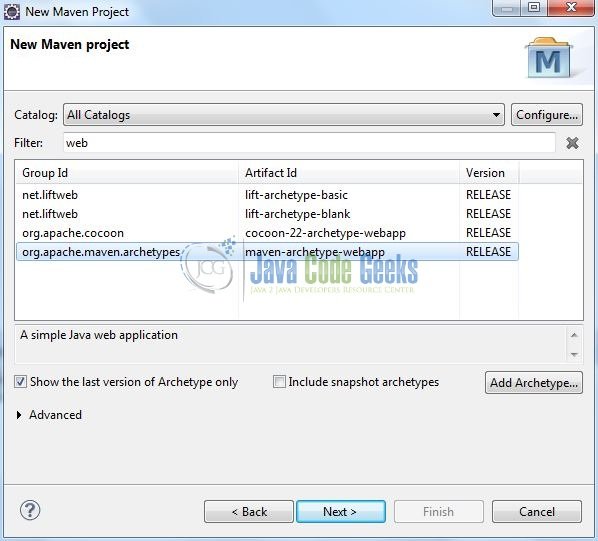
Select the ‘Maven Web App’ Archetype from the list of options and click next.
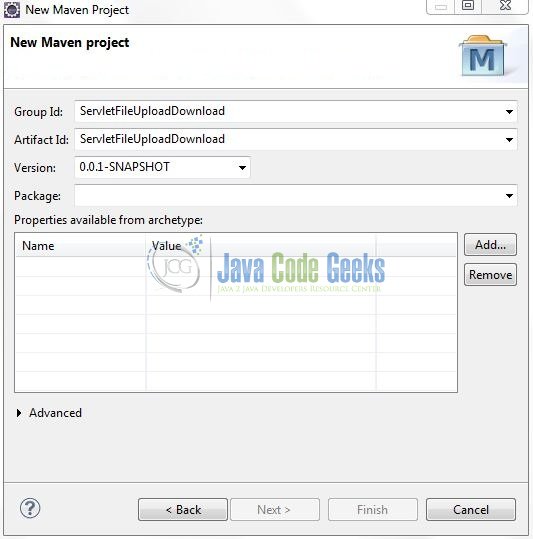
It will ask you to ‘Enter the group and the artifact id for the project’. We will input the details as shown in the below image. The version number will be by default: 0.0.1-SNAPSHOT.
Click on Finish and the creation of a maven project is completed. If you observe, it has downloaded the maven dependencies and a pom.xml file will be created. It will have the following code:
pom.xml
<project xmlns="http://maven.apache.org/POM/4.0.0" xmlns:xsi="http://www.w3.org/2001/XMLSchema-instance" xsi:schemaLocation="http://maven.apache.org/POM/4.0.0 http://maven.apache.org/xsd/maven-4.0.0.xsd">
	<modelVersion>4.0.0</modelVersion>
	<groupId>ServletFileUploadDownload</groupId>
	<artifactId>ServletFileUploadDownload</artifactId>
	<version>0.0.1-SNAPSHOT</version>
	<packaging>war</packaging>
</project>
We can start adding the dependencies that developers want like Servlets, Junit etc. Let’s start building the application!
3. Application Building
Below are the steps involved in developing this application.
3.1 Maven Dependencies
Here, we specify the dependencies for the Servlet API. The rest dependencies will be automatically resolved by the Maven framework and the updated file will have the following code:
pom.xml
<?xml version="1.0" encoding="UTF-8"?>
<project xmlns="http://maven.apache.org/POM/4.0.0" xmlns:xsi="http://www.w3.org/2001/XMLSchema-instance" xsi:schemaLocation="http://maven.apache.org/POM/4.0.0 http://maven.apache.org/maven-v4_0_0.xsd">
   <modelVersion>4.0.0</modelVersion>
   <groupId>ServletFileUploadDownload</groupId>
   <artifactId>ServletFileUploadDownload</artifactId>
   <packaging>war</packaging>
   <version>0.0.1-SNAPSHOT</version>
   <name>ServletFileUploadDownload Maven Webapp</name>
   <url>http://maven.apache.org</url>
   <dependencies>
      <!-- Servlet API Dependency -->
      <dependency>
         <groupId>javax.servlet</groupId>
         <artifactId>javax.servlet-api</artifactId>
         <version>3.1.0</version>
      </dependency>
      <dependency>
         <groupId>javax.servlet.jsp</groupId>
         <artifactId>jsp-api</artifactId>
         <version>2.1</version>
      </dependency>
   </dependencies>
   <build>
      <finalName>${project.artifactId}</finalName>
   </build>
</project>
3.2 Java Class Creation
Let’s create the required Java files. Right-click on src/main/java folder, New -> Package.
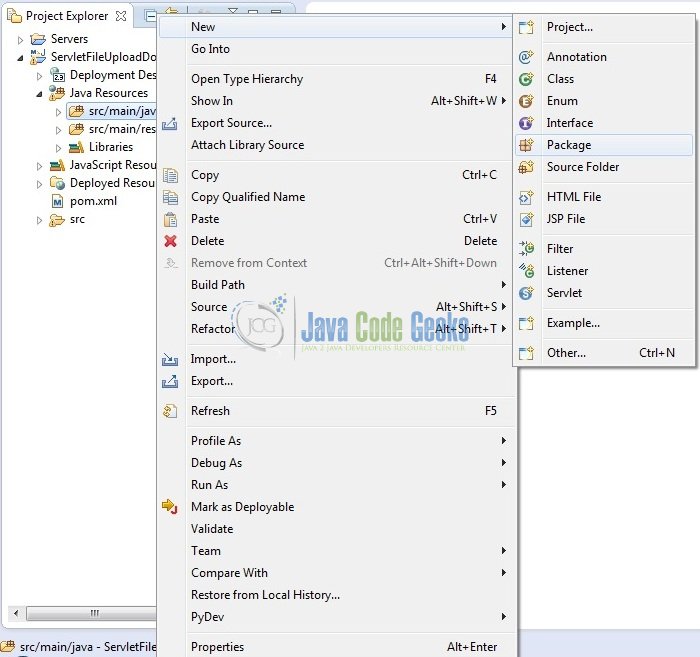
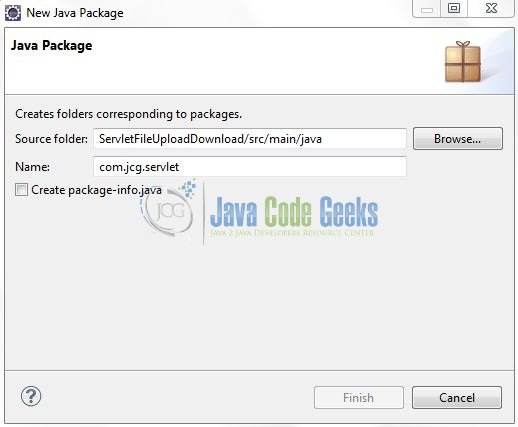
A new pop window will open where we will enter the package name as: com.jcg.servlet.
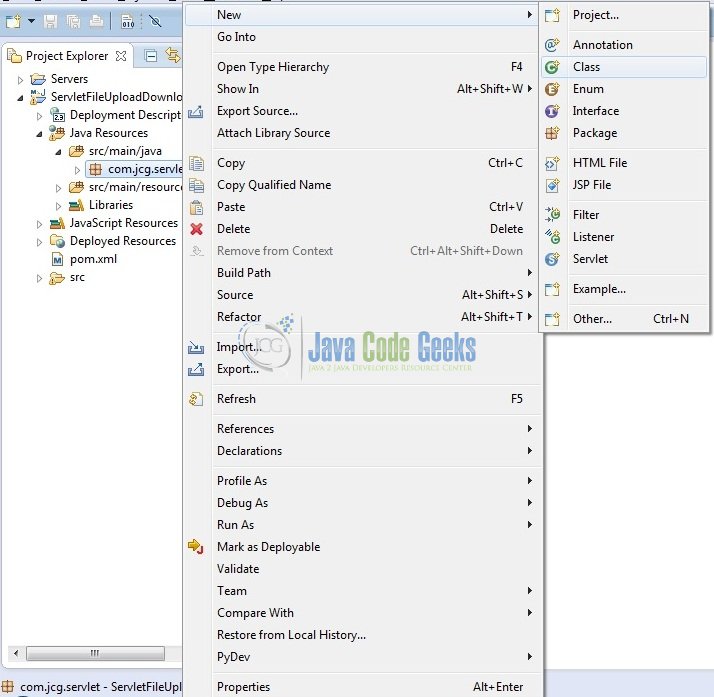
Once the package is created in the application, we will need to create the 3 different servlet controller classes and a Model class. Right-click on the newly created package: New -> Class.
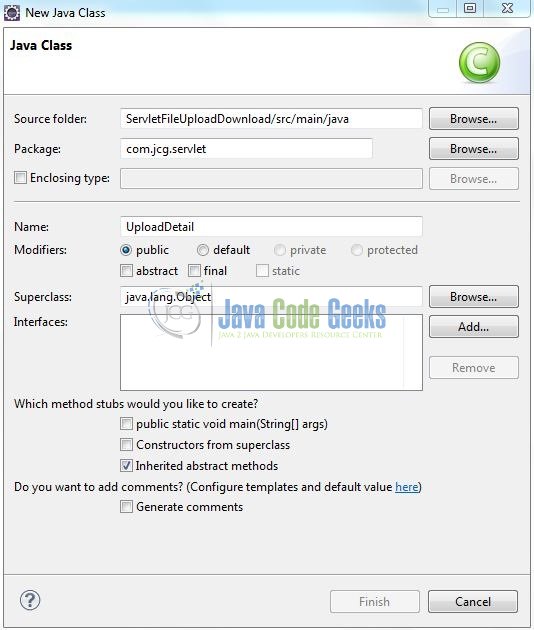
A new pop window will open and enter the file name as: UploadDetail. The file upload model class (i.e. POJO) will be created inside the package: com.jcg.servlet.
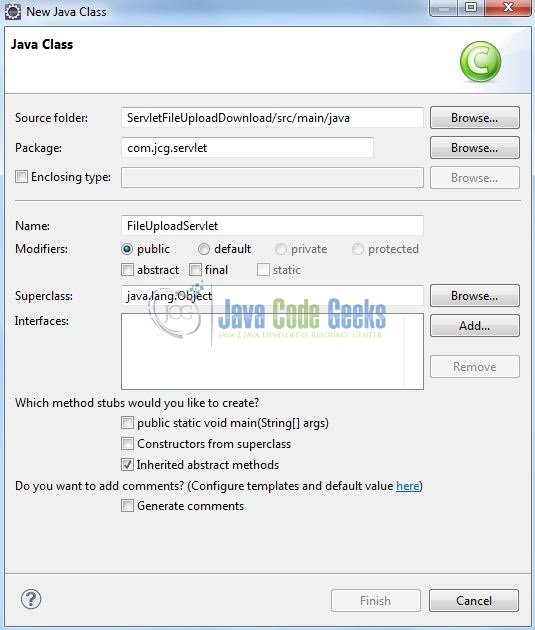
Repeat the step (i.e. Fig. 8) and enter the filename as: FileUploadServlet. The file upload controller class will be created inside the package: com.jcg.servlet.
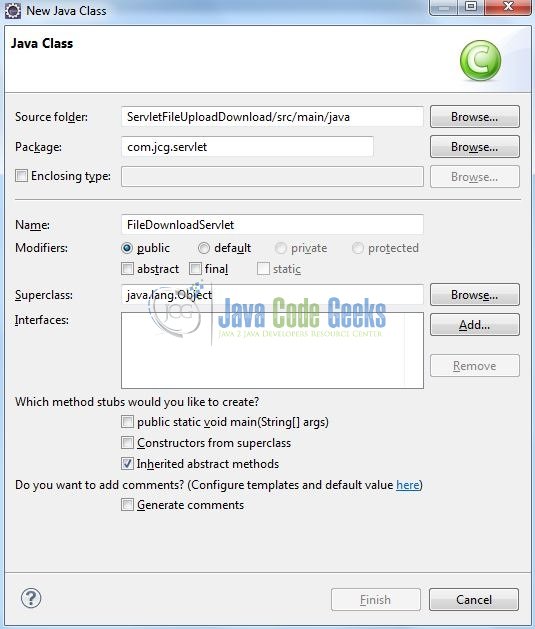
Again, repeat the step (i.e. Fig. 8) and enter the filename as: FileDownloadServlet. The file download controller class will be created inside the package: com.jcg.servlet.
3.2.1 Implementation of Model Class
This POJO class is used to store the uploaded file status i.e. File name, File Status, and File Upload Status. Let’s see the simple code snippet.
UploadDetail.java
package com.jcg.servlet;

import java.io.Serializable;

public class UploadDetail implements Serializable {

	private long fileSize;
	private String fileName, uploadStatus;

	private static final long serialVersionUID = 1L;

	public long getFileSize() {
		return fileSize;
	}

	public void setFileSize(long fileSize) {
		this.fileSize = fileSize;
	}

	public String getFileName() {
		return fileName;
	}

	public void setFileName(String fileName) {
		this.fileName = fileName;
	}

	public String getUploadStatus() {
		return uploadStatus;
	}

	public void setUploadStatus(String uploadStatus) {
		this.uploadStatus = uploadStatus;
	}
}
3.2.2 Implementation of File Upload Controller
This controller class is used to upload a file. The servlet is annotated with the @MultipartConfig annotation with File Size Threshold as 10 MB, Maximum File Size as 30 MB, and Maximum Request Size as 50 MB. Let’s see the simple code snippet that follows this implementation.
FileUploadServlet.java
package com.jcg.servlet;

import java.io.File;
import java.io.IOException;
import java.util.ArrayList;
import java.util.List;

import javax.servlet.RequestDispatcher;
import javax.servlet.ServletException;
import javax.servlet.annotation.MultipartConfig;
import javax.servlet.annotation.WebServlet;
import javax.servlet.http.HttpServlet;
import javax.servlet.http.HttpServletRequest;
import javax.servlet.http.HttpServletResponse;
import javax.servlet.http.Part;

@WebServlet(description = "Upload File To The Server", urlPatterns = { "/fileUploadServlet" })
@MultipartConfig(fileSizeThreshold = 1024 * 1024 * 10, maxFileSize = 1024 * 1024 * 30, maxRequestSize = 1024 * 1024 * 50)
public class FileUploadServlet extends HttpServlet {

	private static final long serialVersionUID = 1L;
	public static final String UPLOAD_DIR = "uploadedFiles";

	/***** This Method Is Called By The Servlet Container To Process A 'POST' Request *****/
	public void doPost(HttpServletRequest request, HttpServletResponse response) throws ServletException, IOException {
		handleRequest(request, response);
	}

	public void handleRequest(HttpServletRequest request, HttpServletResponse response) throws ServletException, IOException {

		/***** Get The Absolute Path Of The Web Application *****/
		String applicationPath = getServletContext().getRealPath(""),
				uploadPath = applicationPath + File.separator + UPLOAD_DIR;

		File fileUploadDirectory = new File(uploadPath);
		if (!fileUploadDirectory.exists()) {
			fileUploadDirectory.mkdirs();
		}

		String fileName = "";
		UploadDetail details = null;
		List<UploadDetail> fileList = new ArrayList<UploadDetail>();

		for (Part part : request.getParts()) {
			fileName = extractFileName(part);
			details = new UploadDetail();
			details.setFileName(fileName);
			details.setFileSize(part.getSize() / 1024);
			try {
				part.write(uploadPath + File.separator + fileName);
				details.setUploadStatus("Success");
			} catch (IOException ioObj) {
				details.setUploadStatus("Failure : "+ ioObj.getMessage());
			}
			fileList.add(details);
		}

		request.setAttribute("uploadedFiles", fileList);
		RequestDispatcher dispatcher = request.getRequestDispatcher("/fileuploadResponse.jsp");
		dispatcher.forward(request, response);
	}

	/***** Helper Method #1 - This Method Is Used To Read The File Names *****/
	private String extractFileName(Part part) {
		String fileName = "",
				contentDisposition = part.getHeader("content-disposition");
		String[] items = contentDisposition.split(";");
		for (String item : items) {
			if (item.trim().startsWith("filename")) {
				fileName = item.substring(item.indexOf("=") + 2, item.length() - 1);
			}
		}
		return fileName;
	}
}
3.2.3 Implementation of Controller to Display the Uploaded Files
This controller class is used to display the files which are already uploaded to the server. Let’s see the simple code snippet that follows this implementation.
UploadedFilesServlet.java
package com.jcg.servlet;

import java.io.File;
import java.io.IOException;
import java.util.ArrayList;
import java.util.List;

import javax.servlet.RequestDispatcher;
import javax.servlet.ServletException;
import javax.servlet.annotation.WebServlet;
import javax.servlet.http.HttpServlet;
import javax.servlet.http.HttpServletRequest;
import javax.servlet.http.HttpServletResponse;

@WebServlet(description = "List The Already Uploaded Files", urlPatterns = { "/uploadedFilesServlet" })
public class UploadedFilesServlet extends HttpServlet {

	private static final long serialVersionUID = 1L;
	public static final String UPLOAD_DIR = "uploadedFiles";

	/***** This Method Is Called By The Servlet Container To Process A 'GET' Request *****/
	public void doGet(HttpServletRequest request, HttpServletResponse response) throws ServletException, IOException {
		handleRequest(request, response);
	}

	public void handleRequest(HttpServletRequest request, HttpServletResponse response) throws ServletException, IOException {

		/***** Get The Absolute Path Of The Web Application *****/
		String applicationPath = getServletContext().getRealPath(""),
				uploadPath = applicationPath + File.separator + UPLOAD_DIR;

		File fileUploadDirectory = new File(uploadPath);
		if (!fileUploadDirectory.exists()) {
			fileUploadDirectory.mkdirs();
		}

		UploadDetail details = null;
		File[] allFiles = fileUploadDirectory.listFiles();
		List<UploadDetail> fileList = new ArrayList<UploadDetail>();

		for (File file : allFiles) {
			details = new UploadDetail();
			details.setFileName(file.getName());
			details.setFileSize(file.length() / 1024);
			fileList.add(details);
		}

		request.setAttribute("uploadedFiles", fileList);
		RequestDispatcher dispatcher = request.getRequestDispatcher("/allfiles.jsp");
		dispatcher.forward(request, response);
	}
}
3.2.4 Implementation of File Download Controller
This controller class is used to download the file from the server. Let’s see the simple code snippet that follows this implementation.

FileDownloadServlet.java
package com.jcg.servlet;

import java.io.File;
import java.io.FileInputStream;
import java.io.IOException;
import java.io.OutputStream;

import javax.servlet.ServletException;
import javax.servlet.annotation.WebServlet;
import javax.servlet.http.HttpServlet;
import javax.servlet.http.HttpServletRequest;
import javax.servlet.http.HttpServletResponse;

@WebServlet(description = "Download File From The Server", urlPatterns = { "/downloadServlet" })
public class FileDownloadServlet extends HttpServlet {

	private static final long serialVersionUID = 1L;

	public static int BUFFER_SIZE = 1024 * 100;
	public static final String UPLOAD_DIR = "uploadedFiles";

	/***** This Method Is Called By The Servlet Container To Process A 'GET' Request *****/
	public void doGet(HttpServletRequest request, HttpServletResponse response) throws ServletException, IOException {
		handleRequest(request, response);
	}

	public void handleRequest(HttpServletRequest request, HttpServletResponse response) throws ServletException, IOException {

		/***** Get The Absolute Path Of The File To Be Downloaded *****/
		String fileName = request.getParameter("fileName"),
				applicationPath = getServletContext().getRealPath(""),
				downloadPath = applicationPath + File.separator + UPLOAD_DIR,
				filePath = downloadPath + File.separator + fileName;

		File file = new File(filePath);
		OutputStream outStream = null;
		FileInputStream inputStream = null;

		if (file.exists()) {

			/**** Setting The Content Attributes For The Response Object ****/
			String mimeType = "application/octet-stream";
			response.setContentType(mimeType);

			/**** Setting The Headers For The Response Object ****/
			String headerKey = "Content-Disposition";
			String headerValue = String.format("attachment; filename=\"%s\"", file.getName());
			response.setHeader(headerKey, headerValue);

			try {

				/**** Get The Output Stream Of The Response ****/
				outStream = response.getOutputStream();
				inputStream = new FileInputStream(file);
				byte[] buffer = new byte[BUFFER_SIZE];
				int bytesRead = -1;

				/**** Write Each Byte Of Data Read From The Input Stream Write Each Byte Of Data  Read From The Input Stream Into The Output Stream ****/
				while ((bytesRead = inputStream.read(buffer)) != -1) {
					outStream.write(buffer, 0, bytesRead);
				}
			} catch(IOException ioExObj) {
				System.out.println("Exception While Performing The I/O Operation?= " + ioExObj.getMessage());
			} finally {
				if (inputStream != null) {
					inputStream.close();
				}

				outStream.flush();
				if (outStream != null) {
					outStream.close();
				}
			}
		} else {

			/***** Set Response Content Type *****/
			response.setContentType("text/html");

			/***** Print The Response *****/
			response.getWriter().println("<h3>File "+ fileName +" Is Not Present .....!</h3>");
		}
	}
}
3.3 Creating JSP Views
Let’s see the simple code snippet to implement the different JSP views.
3.3.1 File Upload Form Page
This page contains the upload form to upload a single or multiple files. Add the following code to it.
fileupload.jsp
<%@ page language="java" contentType="text/html; charset=UTF-8" pageEncoding="UTF-8"%>
<!DOCTYPE html>
<html>
	<head>
	    <meta http-equiv="Content-Type" content="text/html; charset=UTF-8">
	    <title>Servlet File Upload/Download</title>

	    <link rel="stylesheet" href="resource/css/main.css" />
	    <script type="text/javascript" src="resource/js/jquery-3.2.1.min.js"></script>
	    <script type="text/javascript" src="resource/js/fileupload.js"></script>
	</head>
	<body>
	    <div class="panel">
	        <h1>File Upload</h1>
	        <h3>Press 'CTRL' Key+Click On File To Select Multiple Files in Open Dialog</h3>
	        <form id="fileUploadForm" method="post" action="fileUploadServlet" enctype="multipart/form-data">
	            <div class="form_group">
	                <label>Upload File</label><span id="colon">: </span><input id="fileAttachment" type="file" name="fileUpload" multiple="multiple" />
	                <span id="fileUploadErr">Please Upload A File!</span>
	            </div>
	            <button id="uploadBtn" type="submit" class="btn btn_primary">Upload</button>
	        </form>
	    </div>

	    <!-- List All Uploaded Files -->
	    <div class="panel">
	        <a id="allFiles" class="hyperLink" href="<%=request.getContextPath()%>/uploadedFilesServlet">List all uploaded files</a>
	    </div>
	</body>
</html>
3.3.2 File Upload Response Page
This page is used to display the result of the uploaded files. In this JSP, we iterate on the list of the UploadDetail objects and print the tabular data of the uploaded files information. Also, on this page, we have created the last column as a download link for the uploaded files. Add the following code to it.
fileuploadResponse.jsp
<%@page import="java.util.List"%>
<%@page import="com.jcg.servlet.UploadDetail"%>
<%@page language="java" contentType="text/html; charset=UTF-8" pageEncoding="UTF-8"%>
<!DOCTYPE html>
<html>
	<head>
		<meta http-equiv="Content-Type" content="text/html; charset=UTF-8">
		<title>Servlet File Upload/Download</title>

		<link rel="stylesheet" href="resource/css/main.css" />
	</head>
	<body>
		<div class="panel">
			<h1>File Upload Status</h1>
		    <table class="bordered_table">
		    	<thead>
		    		<tr align="center"><th>File Name</th><th>File Size</th><th>Upload Status</th><th>Action</th></tr>
		    	</thead>
		    	<tbody>
		    		<% List<UploadDetail> uploadDetails = (List<UploadDetail>)request.getAttribute("uploadedFiles");
		    			for(int i=0; i<uploadDetails.size(); i++) {
		    	    %>
		    	    <tr>
		    	     	<td align="center"><span id="fileName"><%=uploadDetails.get(i).getFileName() %></span></td>
                     	<td align="center"><span id="fileSize"><%=uploadDetails.get(i).getFileSize() %> KB</span></td>
                  	 	<td align="center"><span id="fileuploadStatus"><%=uploadDetails.get(i).getUploadStatus() %></span></td>
                  	 	<td align="center"><span id="fileDownload"><a id="downloadLink" class="hyperLink" href="<%=request.getContextPath()%>/downloadServlet?fileName=<%=uploadDetails.get(i).getFileName() %>">Download</a></span></td>
		    	    </tr>
		    	    <% } %>
		    	</tbody>
		    </table>
		    <div class="margin_top_15px">
		    	<a id="fileUpload" class="hyperLink" href="<%=request.getContextPath()%>/fileupload.jsp">Back</a>
		    </div>
		</div>
	</body>
</html>
3.3.3 Page to Display the Already Uploaded Files
This page is used to display the result for the total files that are residing on the server. Add the following code to it.
allfiles.jsp
<%@page import="java.util.List"%>
<%@page import="com.jcg.servlet.UploadDetail"%>
<%@page language="java" contentType="text/html; charset=UTF-8" pageEncoding="UTF-8"%>
<!DOCTYPE html>
<html>
    <head>
        <meta http-equiv="Content-Type" content="text/html; charset=UTF-8">
        <title>Servlet File Upload/Download</title>

        <link rel="stylesheet" href="resource/css/main.css" />
    </head>
    <body>
        <div class="panel">
            <h1>Uploaded Files</h1>
            <table class="bordered_table">
               <thead>
                  <tr align="center"><th>File Name</th><th>File Size</th><th>Action</th></tr>
               </thead>
               <tbody>
                  <% List<UploadDetail> uploadDetails = (List<UploadDetail>)request.getAttribute("uploadedFiles");
                     if(uploadDetails != null && uploadDetails.size() > 0) {
                     for(int i=0; i<uploadDetails.size(); i++) {
                  %>
                  <tr>
                     <td align="center"><span id="fileName"><%=uploadDetails.get(i).getFileName() %></span></td>
                     <td align="center"><span id="fileSize"><%=uploadDetails.get(i).getFileSize() %> KB</span></td>
                     <td align="center"><span id="fileDownload"><a id="downloadLink" class="hyperLink" href="<%=request.getContextPath()%>/downloadServlet?fileName=<%=uploadDetails.get(i).getFileName() %>">Download</a></span></td>
                  </tr>
                  <% }
                   } else { %>
                  <tr>
                     <td colspan="3" align="center"><span id="noFiles">No Files Uploaded.....!</span></td>
                  </tr>
                  <% } %>
               </tbody>
            </table>
            <div class="margin_top_15px">
               <a id="fileUpload" class="hyperLink" href="<%=request.getContextPath()%>/fileupload.jsp">Back</a>
            </div>
         </div>
     </body>
</html>
4. Run the Application
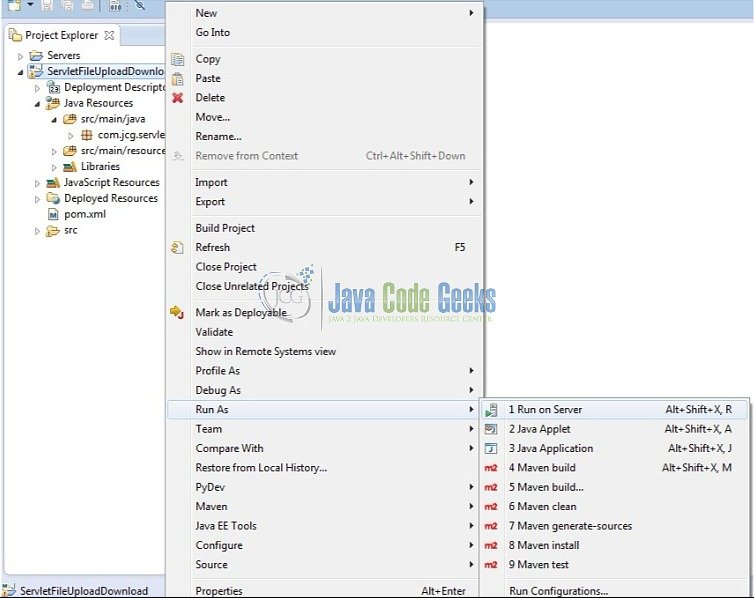
As we are ready for all the changes, let us compile the project and deploy the application on the Tomcat7 server. To deploy the application on Tomat7, right-click on the project and navigate to Run as -> Run on Server.
Tomcat will deploy the application in its web-apps folder and shall start its execution to deploy the project so that we can go ahead and test it in the browser.
5. Project Demo
Open your favorite browser and hit the following URL. The output page (i.e. the file upload form) will be displayed.
http://localhost:8085/ServletFileUploadDownload/fileupload.jsp
Server name (localhost) and port (8085) may vary as per your Tomcat configuration. Developers can debug the example and see what happens after every step. Enjoy!
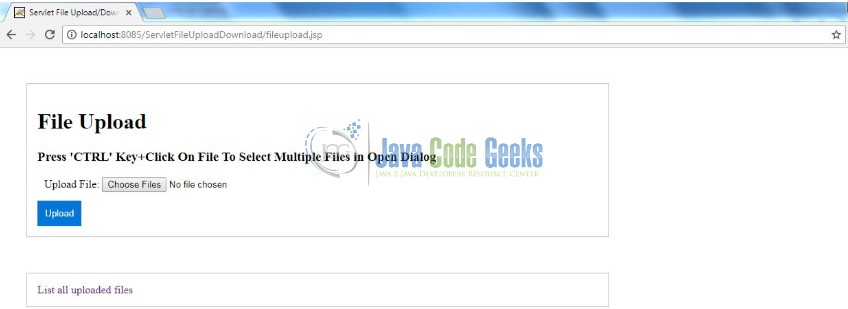
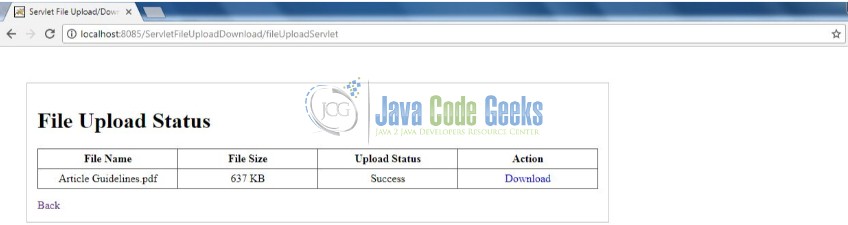
Click on Choose File button to pick up a file, and hit the Upload button. After the file is successfully uploaded to the server, the file upload status page will be displayed and we will get the response like the below image.
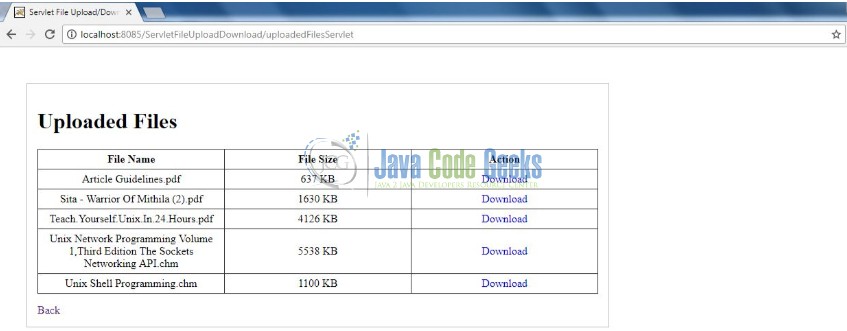
In the above image, a user can click on the Download link to download the file. Now, in order to view the files which are already uploaded to the server, a user will click on the List all uploaded files link. The Uploaded Files page will be displayed and we will get the response like the below image. In case, no files will be present at the server we will get the “No Files Uploaded…..!” error message.
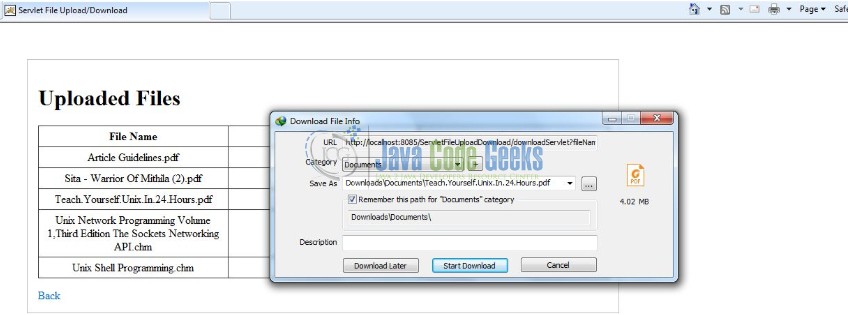
The user can click on the Download link to download the required file(s) and the browser should ask the user to download the file as shown in the below image.
That’s all for this post. Happy Learning!!
6. Conclusion
In this section, developers learned how to implement the file upload and download functionality. Developers can download the sample application as an Eclipse project in the Downloads section. I hope this article served you with whatever developers were looking for.
7. Download the Eclipse Project
This was an example of Servlet file upload and download functionality.
You can download the full source code of this example here: ServletFileUploadDownload

Hi : Thanks for the details .I just copy pasted your code . I am getting below error :
Failure : java.io.FileNotFoundException: D:\Automation_Jetkins\.metadata\.plugins\org.eclipse.wst.server.core\tmp1\wtpwebapps\ServletFileUploadDownLoad\uploadedFiles\D:\Excel File\ReplenFlag.xlsx (The filename, directory name, or volume label syntax is incorrect).
Can you please help me this. also .js and .css files is missing from the project and explanation.
Manny, the css and the js files are present in the resource folder (i.e.
ServletFileUploadDownload\src\main\webapp\resource). Please navigate to this path.Regarding the exception – It seems like the
uploadedFilesfolder is not getting created at the server location (due to some policy constraints). Can you please give any randomly hardcoded path for theuploadedFilesfolder and see if it helps?In my case, I tried as follows (in FileUploadServlet.java) and it works well.
uploadPath = applicationPath + UPLOAD_DIR+””;
fileName = = fileName.substring(fileName.lastIndexOf(File.separator) + 1);
Thanks. I am also getting the error:
Failure : java.io.FileNotFoundException: D:\………..\.metadata\.plugins\org.eclipse.wst.server.core\tmp1\wtpwebapps\ServletFileUploadDownLoad\uploadedFiles\D:\………..* (The filename, directory name, or volume label syntax is incorrect).
Can you please help me this.
It seems like the
uploadedFilesfolder is not getting created at the server location (due to some policy constraints). Can you please give any randomly hardcoded path for theuploadedFilesfolder and see if it helps?Thanks for reply.
I tried as follows (in FileUploadServlet.java) and it works well. Thanks.
uploadPath = applicationPath + UPLOAD_DIR+””;
fileName = = fileName.substring(fileName.lastIndexOf(File.separator) + 1);
Where are the uploaded files located at? I can’t seem to find them…
C:\ServletFileUploadDownload\target\ServletFileUploadDownload\uploadedFiles
check here
You should never implement static file servers in a Servlet.
The Upload portion is fine, but the Download portion is a nightmare. There’s so many dozens of potential security issues solved in other file servers like NGINX.
Please whoever is reading this, only use the Upload example, never use the Download example. Instead configure your Glassfish/Tomcat/Jetty server to serve static content from a folder you upload to with the Upload example.