Selenium IDE Tutorial
1.Introduction
In this tutorial, we are going to show how you can test your web app by Selenium IDE. Selenium IDE is the Firefox plugin, which can record the user browser action and run it automatically further. We are going to install the Selenium IDE, explain most useful controlls and panels, record the simple use cases and run it automatically by Selenium IDE, add the schedule for tests, export this test case to programming languages.
Selenium IDE has special commands. Selenium commands emulate user activities. You can emulate any user activities: insert the text, submit the form, navigate in apps, click on link, click on checkbox, select the options in combobox. The main benefic about Selenium IDE is that you don’t need to have any experience in programming languages. All you need is install the Selenium plugin, record the use activities and run the tests. It is so user-friendly. Selenium IDE uses the native browser API for testing, so you can use all specters commands, which Firefox browser supports. Let’s start to install the Selenium IDE.
2.Installation
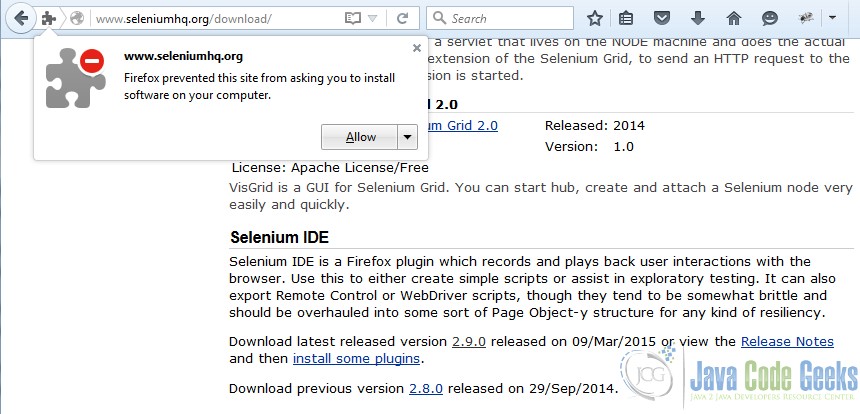
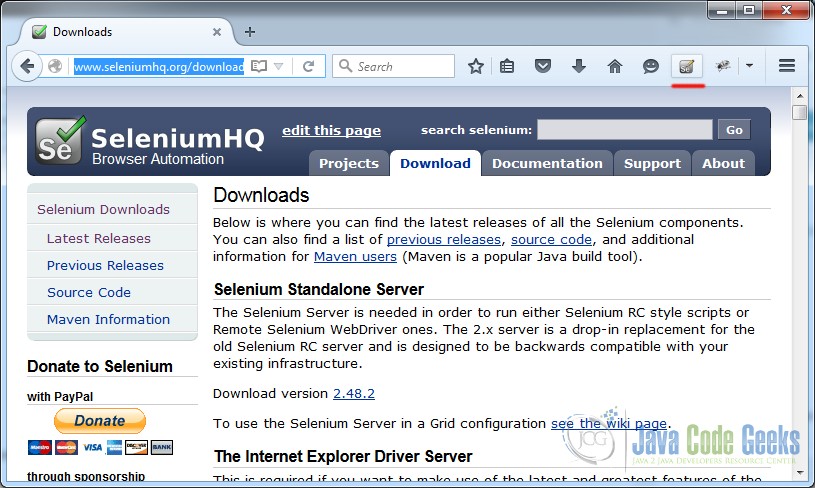
First of all, we go to the download page and select the last version of Selenium ide there – http://docs.seleniumhq.org/download/
After we downloaded this plugin, Firefox browser offers to install this addons. You need to allow this process. Selenium IDE is installed and we can see the Selenium IDE button on the right-top corner in Firefox.
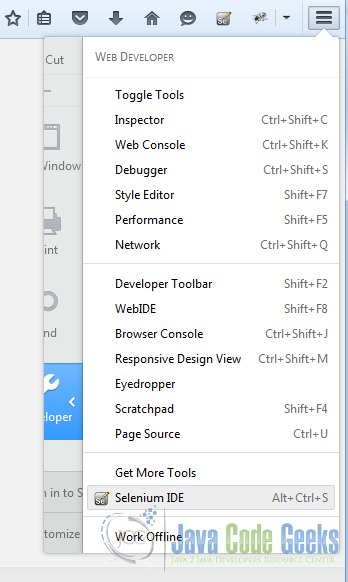
Then you need to open the Selenium IDE, you can click on this button or select the Selenium IDE in development tools in Firefox, as show below.
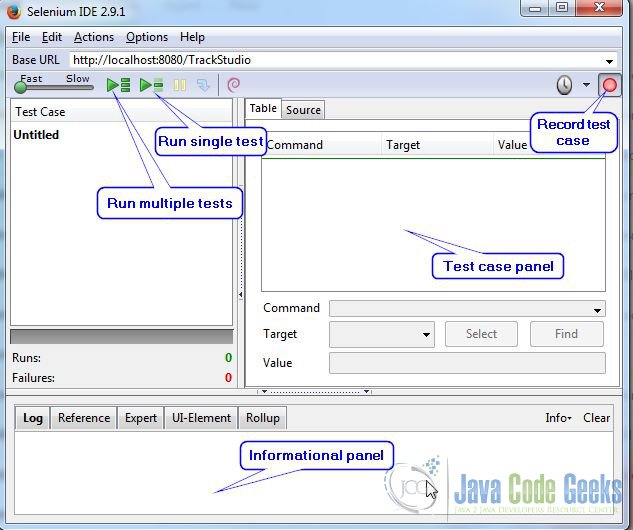
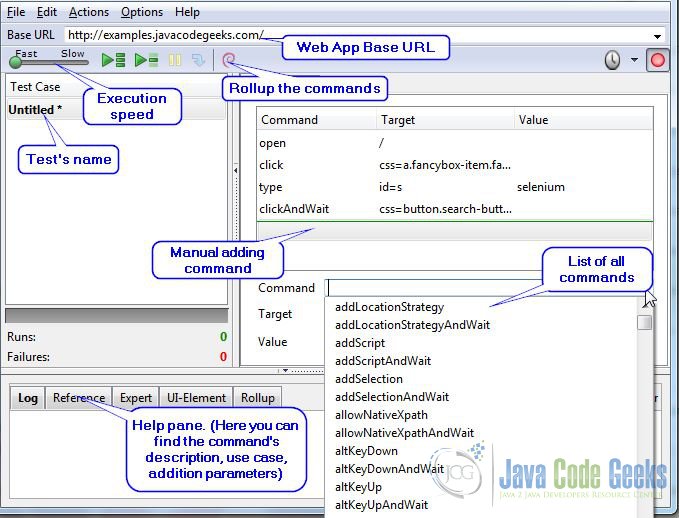
Selenium IDE looks as show below.
Let’s describe the main useful controll:
- Record user activities – it is the toggle button, when it turns on, it records the user activities in the main browser window.
- Run single test – it run the single selected test.
- Run multiple tests – it run all tests, which it was opened in Selenium IDE.
- Base url – this input box defines the webapp url, when we go to this url in main browser window, Selenium IDE startes to record all activities on this window.
- Test case panel – this panel contains all user activities, which Selenium IDE records.
Next, we are ready to record our first test case.
3.Testing
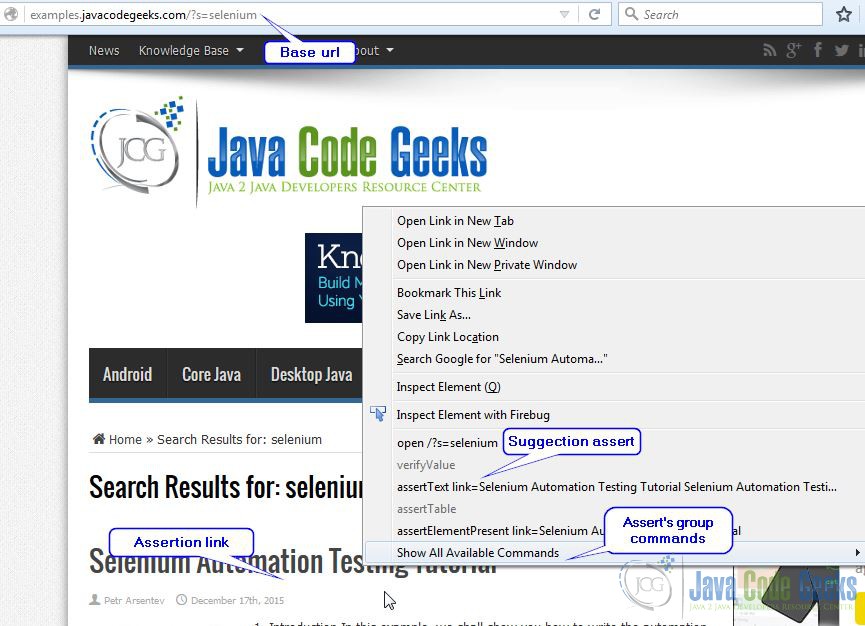
Let’s imagine, that we need to test the searching function in this site – http://examples.javacodegeeks.com. First, we should turn the record button on, put the base URL and go to main browser window. We go to this site, find the search input, type the necessary text, submit the form. After that, we get the searching result and now we need to verify this result. We need to select the necessary element and open the right mouse menu, as show below.
This menu contains addition Selenium IDE options: list of available commands, assert’s commands. We need to select the assert command, if we want to check the result. Now our test case is ready and we can go to Selenium IDE to see how it looks in Selenium code.
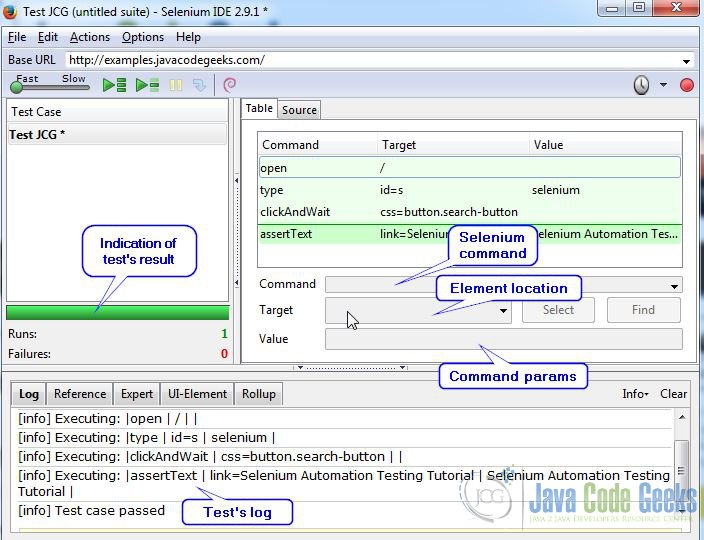
How we can see the test case panel is fulled. This table contains the emulations user activities. Sometimes, we need to add the command manually.
You need to click on empty row in the table and fill the input controls below. Let’s run our test and see the result. We click on run button and wait until test finishs.
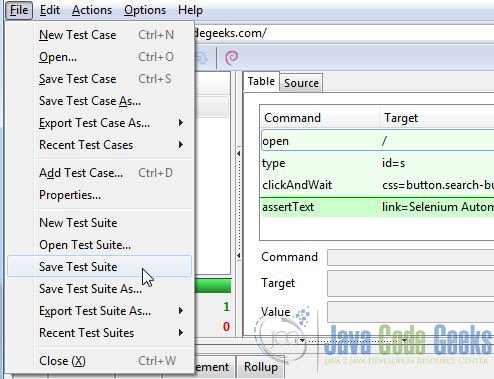
We need to save out test case, that we can use it further.
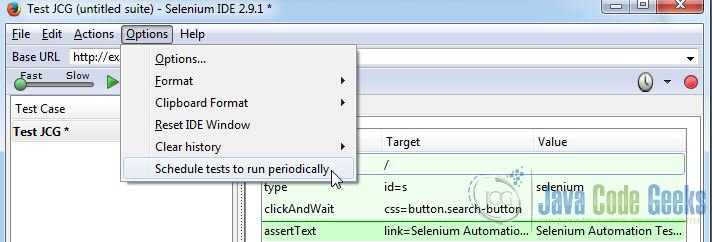
Sometimes, we need to run the test periodically. Selenium IDE supports this functionality too. Go to Main menu - Options - Schedule tests to run periodically, as shown below.
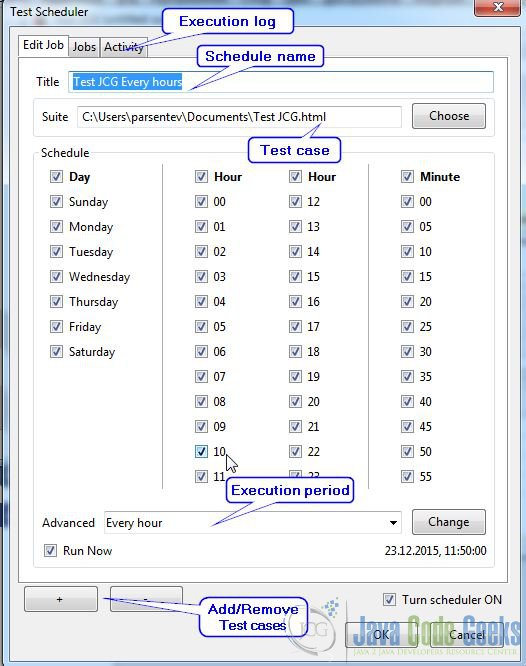
You can make the configuration in open windows. For example, we chose to run our test case every hour. Then you need to turn test schedule on.
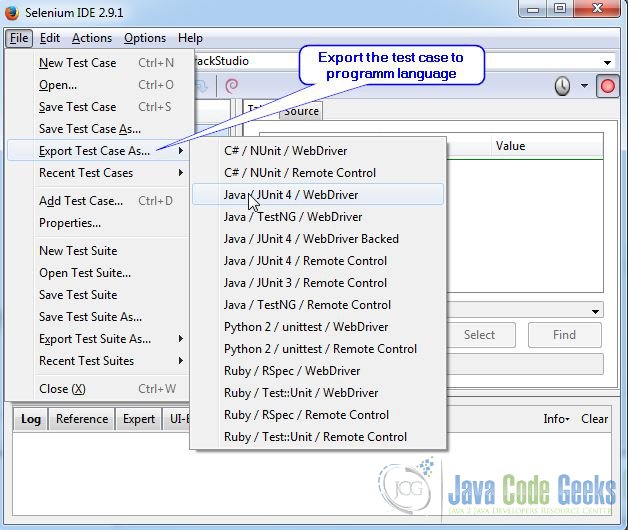
Selenium IDE can export your case tests to your favorite programming languages.
4.Conclusion
In this article, we show you how you can use Selenium IDE to test your web apps. Selenium IDE is the great tool for building automations tests easily.
- You can find more information about this tool on the official website link.

