Container Authentication With JAX-WS
In this example we shall see how to create a Web Service that requires container authentication with JAX-WS using Tomcat. We have already seen how to perform authentication in the application level in Application Authentication With JAX-WS tutorial. The main deference in this is that the client has to authenticate himself to the server, not the application. Thus the authentication is declerative. In application level authentication all the users could access the application, but only those who gave valid credentials could obtain restricted content. In container level authentication, one can have access to the service only if he is a trusted user, from the server’s perpective. If the user is unable to authenticate himself to the server, he will not be able to access the Web Service at all.
In this example we are going to use Tomcat as our Container. Tomcat has a list of its trusted users in an XML file located in CATALINA_BASE/conf/tomcat-users.xml. Additonally, Tomcat implemets container authentication with its Security Realm. A sercurity realm is a mechanism that enables Tomcat to support container security, using a “database” of usernames, passwords and roles.
Before proceeding with this example it would be useful to read carefully JAX-WS Web Services On Tomcat example.
1. Service Endpoint
In order to create our Web Service Endpoint:
- First you have to create a Web Service Endpoint Interface. This interface will contain the declerations of all the methods you want to include in the Web Service.
- Then you have to create a class that actually implements the above interface, which will be your Endpoint implementation.
Web Service Endpoint Interface
WebServiceInterface.java:
package com.javacodegeeks.enterprise.ws;

import javax.jws.WebMethod;
import javax.jws.WebService;
import javax.jws.soap.SOAPBinding;
import javax.jws.soap.SOAPBinding.Style;

@WebService
@SOAPBinding(style = Style.RPC)
public interface WebServiceInterface {

	@WebMethod
	String printMessage();

}
Web Service Endpoint Implementation
WebServiceImpl.java:
package com.javacodegeeks.enterprise.ws;

import javax.jws.WebService;

@WebService(endpointInterface = "com.javacodegeeks.enterprise.ws.WebServiceInterface")
public class WebServiceImpl implements WebServiceInterface{

	@Override
	public String printMessage() {
		return "Hello from Java Code Geeks Restricted Access Server";
	}

}
As you can see you don’t have to do anything special in your code, as the authentication is in the Container level, not in the application.
Create the web.xml file
Go to WebContent/WEB-INF folder and create a new XML file .This is a classic web.xml file to deploy a Web Service. In this file you will have to specify a security-constraint element defining the role of the authorised user, the URLs that this role is required for the user, as well as declare that the application will use BASIC HTTP authentication.
web.xml:
<?xml version="1.0" encoding="UTF-8"?>
<!DOCTYPE web-app PUBLIC "-//Sun Microsystems,
Inc.//DTD Web Application 2.3//EN"
"http://java.sun.com/j2ee/dtds/web-app_2_3.dtd">

<web-app>

	<listener>
		<listener-class>
			com.sun.xml.ws.transport.http.servlet.WSServletContextListener
		</listener-class>
	</listener>

	<servlet>
		<servlet-name>sayhelloAUTH</servlet-name>
		<servlet-class>
			com.sun.xml.ws.transport.http.servlet.WSServlet
		</servlet-class>
		<load-on-startup>1</load-on-startup>
	</servlet>

	<servlet-mapping>
		<servlet-name>sayhelloAUTH</servlet-name>
		<url-pattern>/sayhelloAUTH</url-pattern>
	</servlet-mapping>

	<session-config>
		<session-timeout>30</session-timeout>
	</session-config>

	<security-constraint>
      	<web-resource-collection>
        	<web-resource-name>Operator Roles Security</web-resource-name>
        	<url-pattern>/sayhelloAUTH</url-pattern>
      	</web-resource-collection>

      	<auth-constraint>
        	<role-name>operator</role-name>
      	</auth-constraint>
      	<user-data-constraint>
          	<transport-guarantee>NONE</transport-guarantee>
      	</user-data-constraint>
   	</security-constraint>

	<login-config>
      	<auth-method>BASIC</auth-method>
   	</login-config>

	<security-role>
		<description>Normal operator user</description>
		<role-name>operator</role-name>
	</security-role>

</web-app>
If you want to make the use of HTTPS obligatory, instead of HTTP, you have to change the transpor-qurantee value to <transport-guarantee>CONFIDENTIAL</transport-guarantee>. When doing so, all HTTP requests to that specific URL, will be redirected to HTTPS requests. This can also be handled in the cong/server.xml configuration file as well. In that case it might be useful to take a look at How To Configure Tomcat To Support SSL Or Https example.
Create sun-jaxws.xml file
You have to define the Service Endpoint Implementation class as the endpoint of your project, along with the URL pattern of the Web Service. Go toWebContent/WEB-INF folder and create a new XML file
sun-jaxws.xml:
<?xml version="1.0" encoding="UTF-8"?>
<endpoints xmlns="http://java.sun.com/xml/ns/jax-ws/ri/runtime"
	version="2.0">
	<endpoint name="WebServiceImpl"
		implementation="com.javacodegeeks.enterprise.ws.WebServiceImpl"
		url-pattern="/sayhelloAUTH" />
</endpoints>
You can find more info in the JAX-WS Documentation.
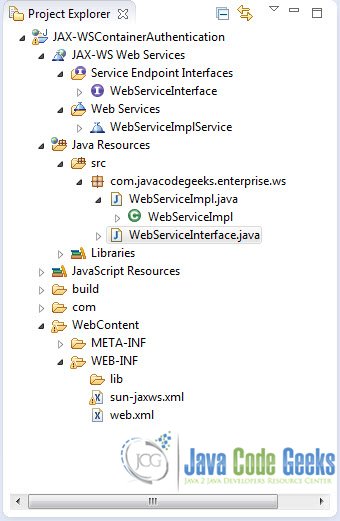
This is the Eclipse Project Structure:
Export WAR file
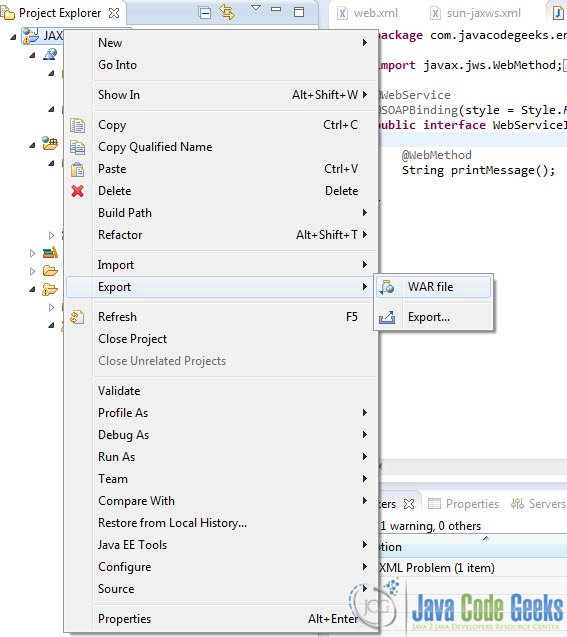
Now, go to the Package explorer and Right Click on the Project -> Export -> WAR file :
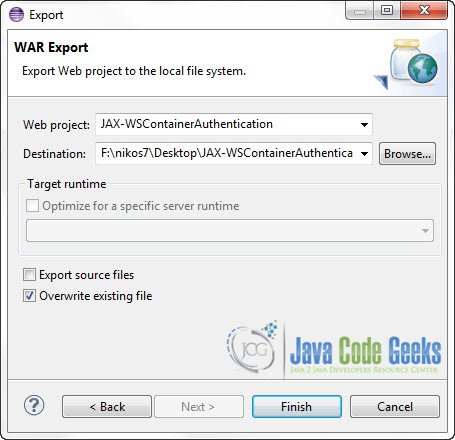
Now you have to save the WAR file:
After exporting the WAR file you have to copy it to CATALINA_BASE/webapps folder. There are quite a few ways to create the WAR file. You can use Maven, Ant, or even the jar command line tool.
2. Tomcat configuration
Add Tomcat User
To add a new Tomcat role and user go to CATALINA_BASE/conf/tomcat_users.xml:
CATALINA_BASE/conf/tomcat_users.xml:
<?xml version='1.0' encoding='utf-8'?>

<tomcat-users>
 <role rolename="manager-gui"/>
 <role rolename="operator"/>
 <user username="nikos" password="ak47" roles="admin,manager-gui"/>
 <user username="javacodegeeks" password="password" roles="operator"/>

</tomcat-users>
Tomcat Security Realm
Now you have to define the database that Tomcat reads its trusted users from. The dafault UserDatabaseRealm to read user credentials would be CATALINA_BASE/conf/tomcat-users.xml. You can see that in CATALINA_BASE/conf/server.xml.
CATALINA_BASE/conf/server.xml:
<GlobalNamingResources>
    <!-- Editable user database that can also be used by
         UserDatabaseRealm to authenticate users
    -->
    <Resource auth="Container" description="User database that can be updated and saved" factory="org.apache.catalina.users.MemoryUserDatabaseFactory" name="UserDatabase" pathname="conf/tomcat-users.xml" type="org.apache.catalina.UserDatabase"/>
  </GlobalNamingResources>
.
.
.
<Realm className="org.apache.catalina.realm.UserDatabaseRealm"
             resourceName="UserDatabase"/>
Of course you can change the security realm as you wish.
Now you can start Tomcat. Then put the following URL in your Web Browser :
http://localhost:8080/JAX-WSContainerAuthentication/sayhelloAUTH
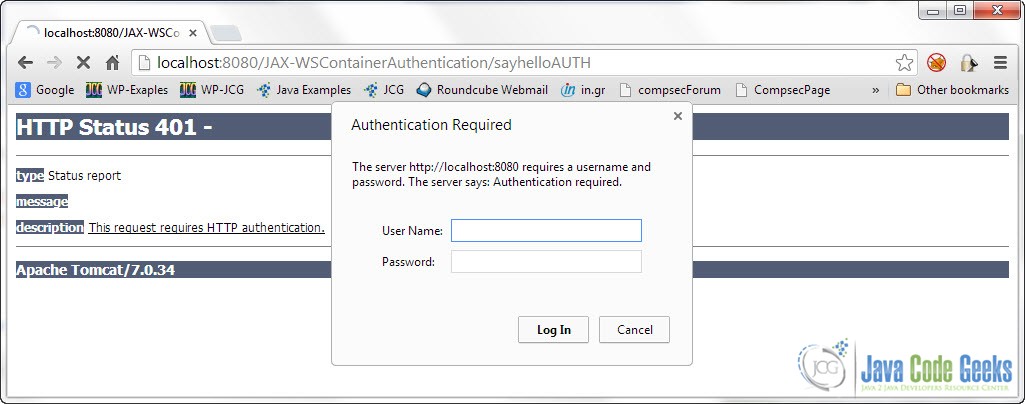
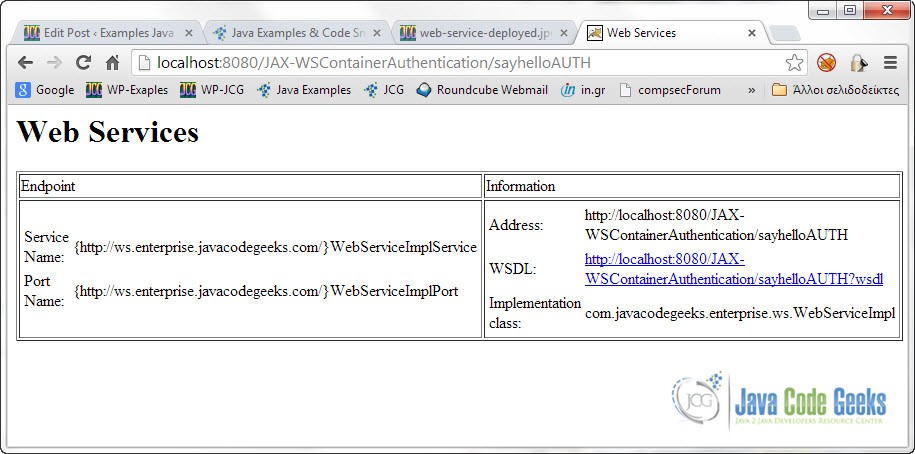
If everything is ok this is what you should get:
If you provide the right credentials as defined in tomcat-users.xml for the role operator, you can have access to the service:
3. Web Service Client
Our Client, written in Java, will have to provide the correct credentials to the server in order to gain access to the Web Service. Remember that the authentication is in container level (HTTP level authentication) and not in the application. And because of that it is impossible to gain access to the WSDL file as you normally would via the URL. You would have to create a new authenticated session with the server, download the file and then parse it. In this example for simplicity, we just downloaded the file manually as we have access to the server, and stored it in our system. Then we can parse it from there.
Here is the WSDL file of our Web Service:
WSDL:
<definitions
	xmlns:wsu="http://docs.oasis-open.org/wss/2004/01/oasis-200401-wss-wssecurity-utility-1.0.xsd"
	xmlns:wsp="http://www.w3.org/ns/ws-policy" xmlns:wsp1_2="http://schemas.xmlsoap.org/ws/2004/09/policy"
	xmlns:wsam="http://www.w3.org/2007/05/addressing/metadata" xmlns:soap="http://schemas.xmlsoap.org/wsdl/soap/"
	xmlns:tns="http://ws.enterprise.javacodegeeks.com/" xmlns:xsd="http://www.w3.org/2001/XMLSchema"
	xmlns="http://schemas.xmlsoap.org/wsdl/" targetNamespace="http://ws.enterprise.javacodegeeks.com/"
	name="WebServiceImplService">
	<types />
	<message name="printMessage" />
	<message name="printMessageResponse">
		<part name="return" type="xsd:string" />
	</message>
	<portType name="WebServiceInterface">
		<operation name="printMessage">
			<input
				wsam:Action="http://ws.enterprise.javacodegeeks.com/WebServiceInterface/printMessageRequest"
				message="tns:printMessage" />
			<output
				wsam:Action="http://ws.enterprise.javacodegeeks.com/WebServiceInterface/printMessageResponse"
				message="tns:printMessageResponse" />
		</operation>
	</portType>
	<binding name="WebServiceImplPortBinding" type="tns:WebServiceInterface">
		<soap:binding transport="http://schemas.xmlsoap.org/soap/http"
			style="rpc" />
		<operation name="printMessage">
			<soap:operation soapAction="" />
			<input>
				<soap:body use="literal" namespace="http://ws.enterprise.javacodegeeks.com/" />
			</input>
			<output>
				<soap:body use="literal" namespace="http://ws.enterprise.javacodegeeks.com/" />
			</output>
		</operation>
	</binding>
	<service name="WebServiceImplService">
		<port name="WebServiceImplPort" binding="tns:WebServiceImplPortBinding">
			<soap:address
				location="http://localhost:8080/JAX-WSContainerAuthentication/sayhelloAUTH" />
		</port>
	</service>
</definitions>
This is the client code written in Java.
WebServiceClient.java
package com.javacodegeeks.enterprise.ws;

import java.net.URL;
import javax.xml.namespace.QName;
import javax.xml.ws.BindingProvider;
import javax.xml.ws.Service;

public class WebServiceClient {

	    // http://localhost:8080/JAX-WSContainerAuthentication/sayhelloAUTH?wsdl
	    // is unreachable because of the restricted access in the server
		private static final String WSDL_URI = "file:F:\\nikos7\\Desktop\\AUTHService.wsld";

		public static void main(String[] args) throws Exception {

		    URL url = new URL(WSDL_URI);

		    QName qname = new QName("http://ws.enterprise.javacodegeeks.com/", "WebServiceImplService");

	        Service service = Service.create(url, qname);
	        WebServiceInterface port = service.getPort(WebServiceInterface.class);

	        //add username and password for container authentication (HTTP LEVEL)
	        BindingProvider bp = (BindingProvider) port;
	        bp.getRequestContext().put(BindingProvider.USERNAME_PROPERTY, "javacodegeeks");
	        bp.getRequestContext().put(BindingProvider.PASSWORD_PROPERTY, "password");

	        System.out.println(port.printMessage());

	    }
}
Output:
Hello from Java Code Geeks Restricted Access ServerBut if you provide incorrect credentials the output would be an exception:
Exception in thread "main" com.sun.xml.internal.ws.client.ClientTransportException: The server sent HTTP status code 401: Unauthorized
	at com.sun.xml.internal.ws.transport.http.client.HttpTransportPipe.checkStatusCode(Unknown Source)
	at com.sun.xml.internal.ws.transport.http.client.HttpTransportPipe.createResponsePacket(Unknown Source)
	at com.sun.xml.internal.ws.transport.http.client.HttpTransportPipe.process(Unknown Source)
	at com.sun.xml.internal.ws.transport.http.client.HttpTransportPipe.processRequest(Unknown Source)
	at com.sun.xml.internal.ws.transport.DeferredTransportPipe.processRequest(Unknown Source)
	at com.sun.xml.internal.ws.api.pipe.Fiber.__doRun(Unknown Source)
	at com.sun.xml.internal.ws.api.pipe.Fiber._doRun(Unknown Source)
	at com.sun.xml.internal.ws.api.pipe.Fiber.doRun(Unknown Source)
	at com.sun.xml.internal.ws.api.pipe.Fiber.runSync(Unknown Source)
	at com.sun.xml.internal.ws.client.Stub.process(Unknown Source)
.
.
.
This was an example on Container Authentication With JAX-WS. Download the Eclipse project of this tutorial : JAX-WSContainerAuthentication

