This is an example of how to make use of Hibernate validator API. Hibernate validator can be used to validate data, which is a very important issue in every layer of an application. For example, validating is important when submitting HTML forms. Hibernate validator framework provides many annotations, that can be used to validate input fields of a form against constraints.
In order to check how hibernate validator works, we will make use of Spring-MVC to create a simple form page. Each field in the form has a validation constraint set by the annotations provided by the Hidernate validator package.
You may skip project creation and jump directly to the beginning of the example below.
Our preferred development environment is Eclipse. We are using Eclipse Juno (4.2) version, along with Maven Integration plugin version 3.1.0. You can download Eclipse from here and Maven Plugin for Eclipse from here. The installation of Maven plugin for Eclipse is out of the scope of this tutorial and will not be discussed. We are also using JDK 7_u_21. Hibernate-validator 5.1.0 Final and Spring MVC are inserted as dependencies thruough Maven and Tomcat 7 is the application server.
Let’s begin,
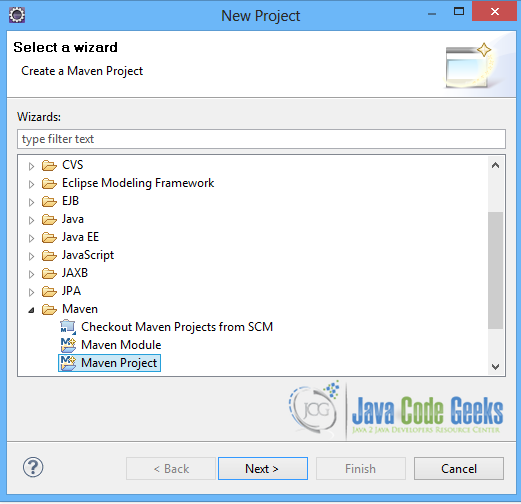
1. Create a new Maven project
Go to File -> Project ->Maven -> Maven Project.
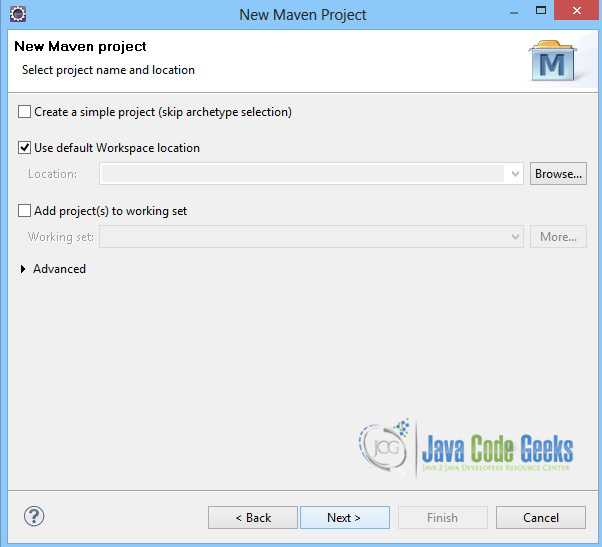
In the “Select project name and location” page of the wizard, make sure that “Create a simple project (skip archetype selection)” option is unchecked, hit “Next” to continue with default values.
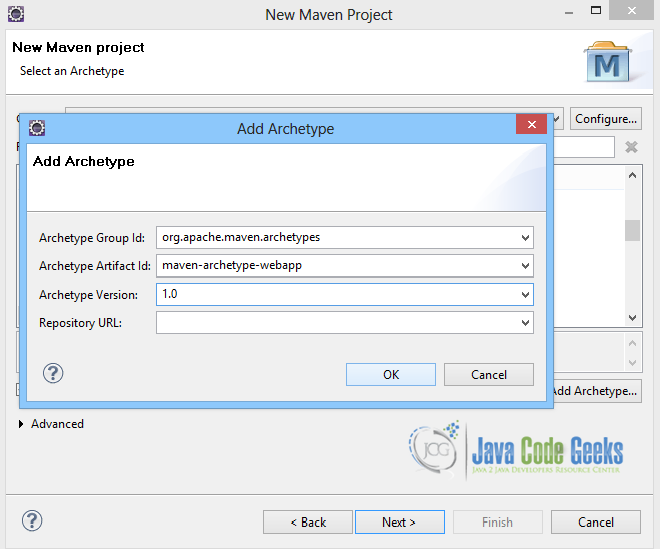
Here the maven archetype for creating a web application must be added. Click on “Add Archetype” and add the archetype. Set the “Archetype Group Id” variable to "org.apache.maven.archetypes", the “Archetype artifact Id” variable to "maven-archetype-webapp" and the “Archetype Version” to "1.0". Click on “OK” to continue.
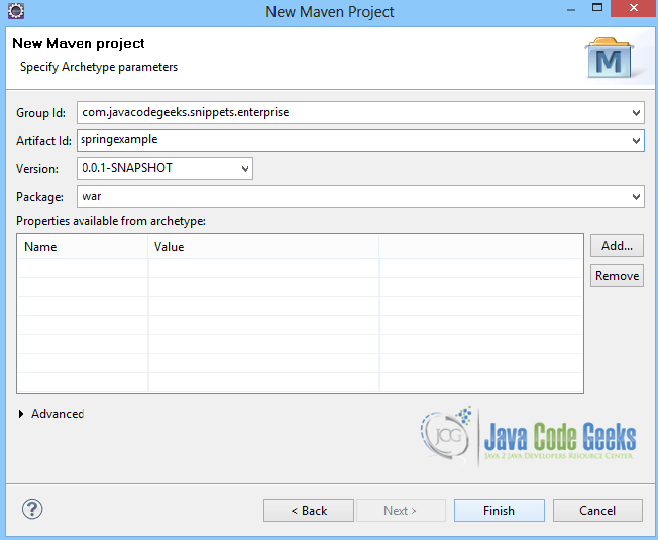
In the “Enter an artifact id” page of the wizard, you can define the name and main package of your project. Set the “Group Id” variable to "com.javacodegeeks.snippets.enterprise" and the “Artifact Id” variable to "springexample". The aforementioned selections compose the main project package as "com.javacodegeeks.snippets.enterprise.springexample" and the project name as "springexample". Set the “Package” variable to "war", so that a war file will be created to be deployed to tomcat server. Hit “Finish” to exit the wizard and to create your project.
The Maven project structure is shown below:
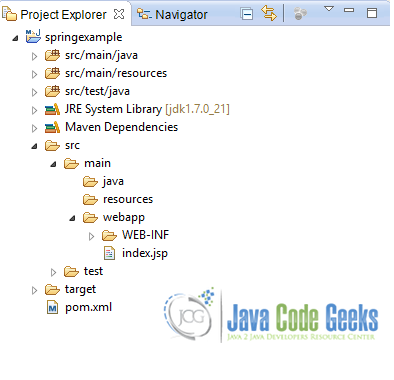
- It consists of the following folders:
- /src/main/java folder, that contains source files for the dynamic content of the application,
- /src/test/java folder contains all source files for unit tests,
- /src/main/resources folder contains configurations files,
- /target folder contains the compiled and packaged deliverables,
- /src/main/resources/webapp/WEB-INF folder contains the deployment descriptors for the Web application ,
- the pom.xml is the project object model (POM) file. The single file that contains all project related configuration.
2. Add dependencies
Add the dependencies in Maven’s pom.xml file, by editing it at the “Pom.xml” page of the POM editor. The dependencies needed are spring-webmvc package, the javax.validation and the hibernate-validator packages:
pom.xml
<project xmlns="http://maven.apache.org/POM/4.0.0" xmlns:xsi="http://www.w3.org/2001/XMLSchema-instance"
	xsi:schemaLocation="http://maven.apache.org/POM/4.0.0 http://maven.apache.org/maven-v4_0_0.xsd">
	<modelVersion>4.0.0</modelVersion>
	<groupId>com.javacodegeeks.snippets.enterprise</groupId>
	<artifactId>springexample</artifactId>
	<packaging>war</packaging>
	<version>0.0.1-SNAPSHOT</version>
	<name>springexample Maven Webapp</name>
	<url>http://maven.apache.org</url>
	<dependencies>

		<dependency>
			<groupId>org.springframework</groupId>
			<artifactId>spring-webmvc</artifactId>
			<version>${spring.version}</version>
		</dependency>

		<dependency>
			<groupId>javax.servlet</groupId>
			<artifactId>servlet-api</artifactId>
			<version>2.5</version>
		</dependency>
		<dependency>
            <groupId>javax.validation</groupId>
            <artifactId>validation-api</artifactId>
            <version>1.1.0.Final</version>
        </dependency>
        <dependency>
            <groupId>org.hibernate</groupId>
            <artifactId>hibernate-validator</artifactId>
            <version>5.1.0.Final</version>
        </dependency>
	</dependencies>
	<build>
		<finalName>springexample</finalName>
	</build>

	<properties>
		<spring.version>3.2.9.RELEASE</spring.version>
	</properties>
</project>
3. Create the model with the validation annotations
The Form.java class is a simple class with fields, that will be used as the MVC model. All the fields have annotations, so when the form is submitted all fields will be validated. The validation annotations used are the ones below:
- @Size : This annotation is used to set the size of the field. It has three properties to configure, the
min,maxand themessageto be set. - @Min : This annotation is used to set the min size of a field
- @NotNull : With this annotation you can make sure that the field has a value.
- @Length : This annotation is similar to @Size.
- @Pattern : This annotation can be used when we want to chack a field against a regular expression. The
regexis set as an attribute to the annotation. - @Range : This annotation can be used to set a range of min and max values to a field.
Form.java
package com.javacodegeeks.snippets.enterprise.form.model;

import javax.validation.constraints.Min;
import javax.validation.constraints.NotNull;
import javax.validation.constraints.Pattern;
import javax.validation.constraints.Size;

import org.hibernate.validator.constraints.Length;
import org.hibernate.validator.constraints.Range;

public class Form {

	@Size(min=5, max=10, message="Your name should be between 5 - 10 characters.")
	private String name;

	@Min(value=5, message="Please insert at least 5 characters")
	private String lastname;

	@NotNull(message="Please select a password")
	@Length(min=5, max=10, message="Password should be between 5 - 10 charactes")
	private String password;

	@Pattern(regexp="[0-9]+", message="Wrong zip!")
	private String zip;

	@Pattern(regexp=".+@.+\\..+", message="Wrong email!")
	private String email;

	@Range(min=18, message="You cannot subscribe if you are under 18 years old.")
	private String age;

	public String getName() {
		return name;
	}

	public void setName(String name) {
		this.name = name;
	}

	public String getLastname() {
		return lastname;
	}

	public void setLastname(String lastname) {
		this.lastname = lastname;
	}

	public String getPassword() {
		return password;
	}

	public void setPassword(String password) {
		this.password = password;
	}

	public String getZip() {
		return zip;
	}

	public void setZip(String zip) {
		this.zip = zip;
	}

	public String getEmail() {
		return email;
	}

	public void setEmail(String email) {
		this.email = email;
	}

	public String getAge() {
		return age;
	}

	public void setAge(String age) {
		this.age = age;
	}

}
4. Create a controller
The Controller is where the DispatcherServlet will delegate requests. The @Controller annotation indicates that the class serves the role of a Controller. The @RequestMapping annotation is used to map a URL to either an entire class or a particular handler method.

The Controller consists of two basic methods, a GET method, which is String initForm(Model model) and a POST method, which is String submitForm(Model model, @Valid Form form, BindingResult result). The first method creates and returns to the "form" view a new instance of the Form.java class. The second method gets the Form object created in the form. Form is annotated with the @Valid annotation, which allows the form object to be validated with the validation annotations set in the Form.java class. BindingResult is where all validation errors are automatically passed, so it can be used to decide the next navigation step. If there are no errors, the validation is successful, so the method returns the String representation of the successForm.jsp page, and the form object is passed at the Model. Otherwise, the returned String is the String representation of the form.jsp page, which also has the error messages, as will be shown below.
FormController.java
package com.javacodegeeks.snippets.enterprise.form;

import javax.validation.Valid;

import org.springframework.stereotype.Controller;
import org.springframework.ui.Model;
import org.springframework.validation.BindingResult;
import org.springframework.web.bind.annotation.RequestMapping;
import org.springframework.web.bind.annotation.RequestMethod;

import com.javacodegeeks.snippets.enterprise.form.model.Form;

@Controller
@RequestMapping("/form.htm")
public class FormController {

	@RequestMapping(method = RequestMethod.GET)
	public String initForm(Model model) {
		Form form = new Form();
		model.addAttribute("form", form);
		return "form";
	}

	@RequestMapping(method = RequestMethod.POST)
	public String submitForm(@Valid Form form, BindingResult result) {
		String returnVal = "successForm";
		if(result.hasErrors()) {
			returnVal = "form";
		}
		return returnVal;
	}

}
5. Create a view
We make use of the form:form tag. Its method property is set to POST, and the commandName property is set to the name of the backing bean that is binded to the Model, which is the Form.java class.
The form:input tag is used to create all the input fields, with its path property set to every field binded to it. The form:errors tag defines where the error message of the specified field will be displayed in the view. Finally, the input tag, with type property set to submit is used for the submit button.
form.jsp
<%@ taglib prefix="form" uri="http://www.springframework.org/tags/form"%>
<html>
<head>
<title>Spring MVC form submission</title>
</head>

<body>
	<h2>Fill your form!</h2>

	<form:form method="POST" commandName="form">
		<table>
			<tr>
				<td>Enter your name:</td>
				<td><form:input path="name" /></td>
				<td><form:errors path="name" cssStyle="color: #ff0000;"/></td>
			</tr>
			<tr>
				<td>Enter your lastname:</td>
				<td><form:input path="lastname" /></td>
				<td><form:errors path="lastname" cssStyle="color: #ff0000;" /></td>
			</tr>
			<tr>
				<td>Enter your password:</td>
				<td><form:input path="password" /></td>
				<td><form:errors path="password" cssStyle="color: #ff0000;" /></td>
			</tr>
			<tr>
				<td>Enter your zip:</td>
				<td><form:input path="zip" /></td>
				<td><form:errors path="zip" cssStyle="color: #ff0000;" /></td>
			</tr>
			<tr>
				<td>Enter your email:</td>
				<td><form:input path="email" /></td>
				<td><form:errors path="email" cssStyle="color: #ff0000;" /></td>
			</tr>
			<tr>
				<td>Enter your age:</td>
				<td><form:input path="age" /></td>
				<td><form:errors path="age" cssStyle="color: #ff0000;" /></td>
			</tr>
			<tr>
				<td><input type="submit" name="submit" value="Submit"></td>
			</tr>
			<tr>
		</table>
	</form:form>

</body>
</html>
When validation succeeds, the page below will be rendered:
successForm.jsp
<html>
<head>
<title>Spring MVC form submission</title>
</head>

<body>
Form successfully submitted.
</body>
</html>
6. Configure the application
The files that we must configure in the application are the web.xml file and the mvc-dispatcher-servlet.xml file. You can check how to configure these files in detail here.
7. Run the application
Now, let’s run the application. We first build the project with Maven and place the .war file produced in webapps folder of tomcat. Then, we can start the server.
Hit on:
http://localhost:8080/springexample/form.htm
Press the submit button before having entered any values:
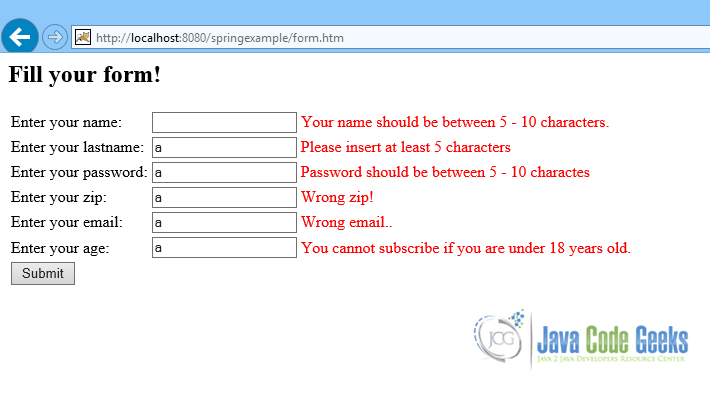
As a result all validation messages are rendered. Now complete your form correctly and press on submit button:
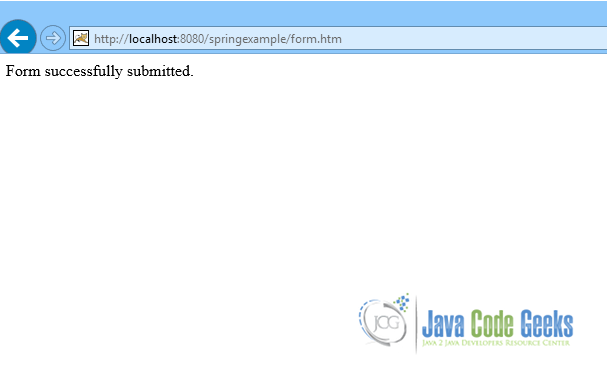
The form is submitted sucessfully.
8. Download the Eclipse Project
This was an example of how to use Hibernate for validation.
You can download the full source code of this example here: HibernateValidatorExample

а как сделать чтобы он @size генерировал сам а то приходится в ручную прописывать. Например брал с таблицы бд. Hibernate persistances есть возможность генерировать private String bankId;
@Id
@Column(name = “BANK_ID”, nullable = false, length = 5)
public String getBankId() {
return bankId;
}