Eclipse Hibernate Tools plugin Tutorial
In this example, we will learn to install the Hibernate tools plugin for eclipse. Further, we will look at the features available through the plugin, which ease development using hibernate ORM within eclipse.
Hibernate is an object-relational mapping library for the Java language, providing a framework for mapping an object-oriented domain model to a traditional relational database. Hibernate eases object-relational development by replacing direct persistence-related database accesses with high-level object handling functions.
Internally, hibernate maps from Java classes to database tables (and from Java data types to SQL data types). It also provides data query and retrieval facilities by generating SQL calls and relieves the developer from manual result set handling and object conversion.
In this tutorial, the following tools (with versions) have been used:
Installing the Hibernate tools Plugin
The Hibernate tools for Eclipse Kepler is available as part of JBoss Tools plugin. The Hibernate tools plugin is available as a separate installation without the other JBoss tools for earlier versions of Eclipse.
Go to Help –> Eclipse Marketplace
- For version BELOW Eclipse 4.3, search for Hibernate
- For version ABOVE Eclipse 4.3, search for JBoss
Select the appropriate Hibernate / JBoss tools plugin version based on your Eclipse release. Click Install.
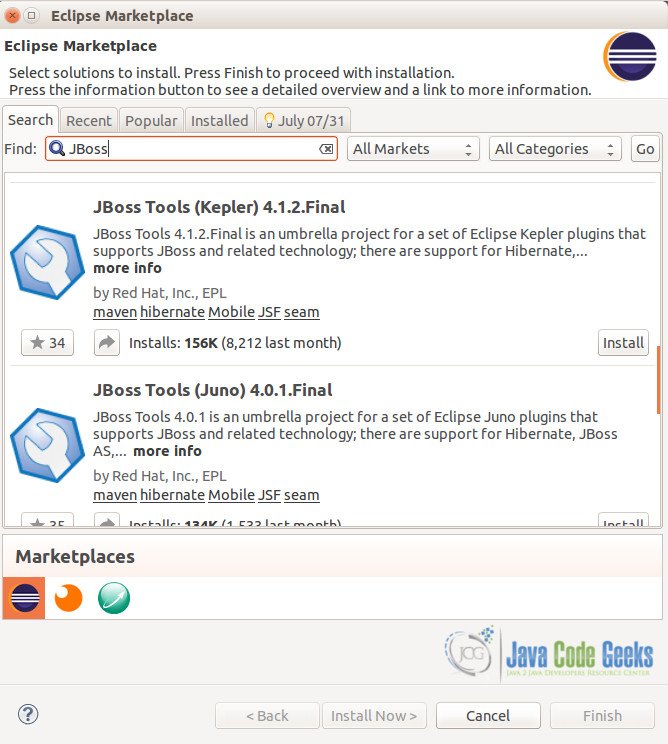
On the next page, in case you are installing using the JBoss plugin, please select only the “Hibernate Tools” since the others are specifically related to other general JBoss tools and may take a lot of time to be installed.
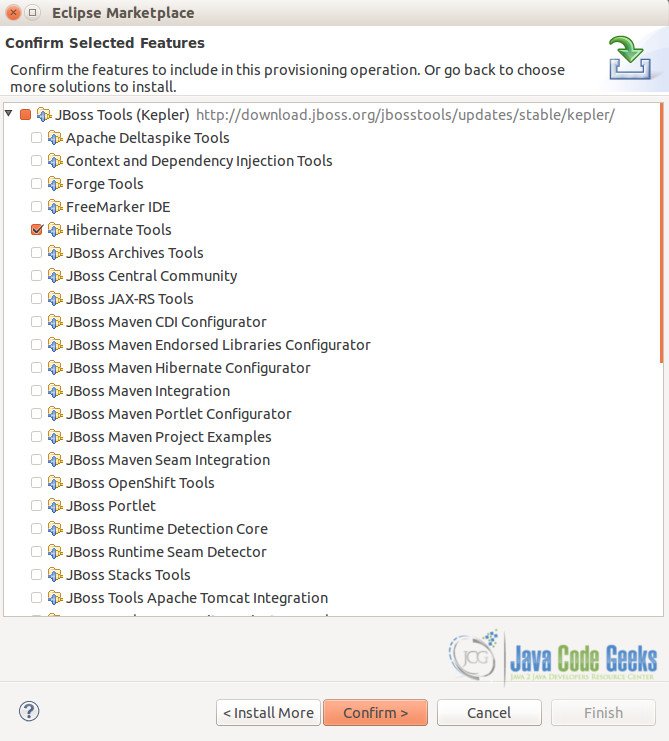
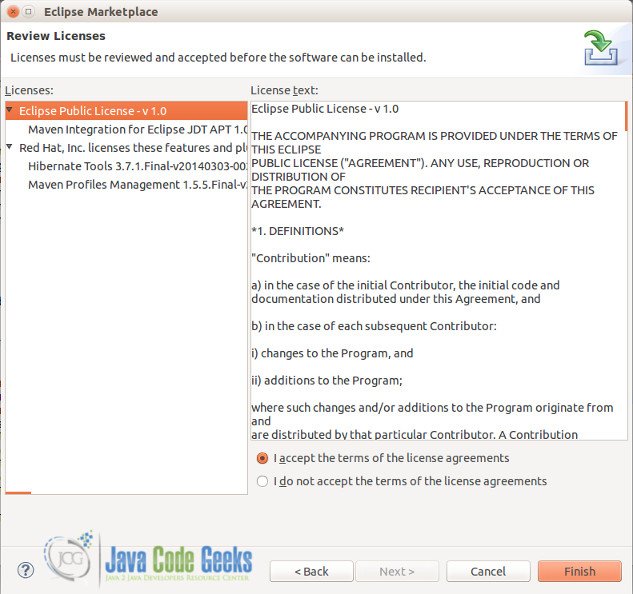
Accept the terms before the installation.
Accept any unsigned content if prompted and re-start eclipse once the installation completes.
Verify the Hibernate Tools plugin
Once the installation completes, you can verify the successful plugin installation.
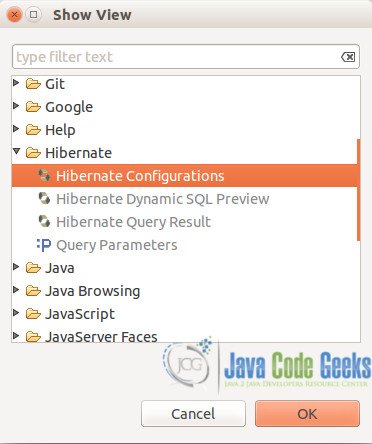
Browse to Menu –> Window –> Show View. Search for Hibernate. If the installation is successful, you would find the Configurations, Dynamic SQL Preview and Hibernate Query Results View.
Features of the Hibernate tools plugin
Let us begin with creating a new Java project.
In this tutorial, we have used the maven archetype quick start to create a Java Project. A normal Java project is also good for learning purposes.
Include the hibernate jars as appropriate OR add dependency for hibernate jars for maven.
- Wizard & Editor (new hibernate configurations / files)
The plugin provides several wizards which assist in quickly generating hibernate configuration files (database connection properties) and hibernate mapping files (Java to database objects).
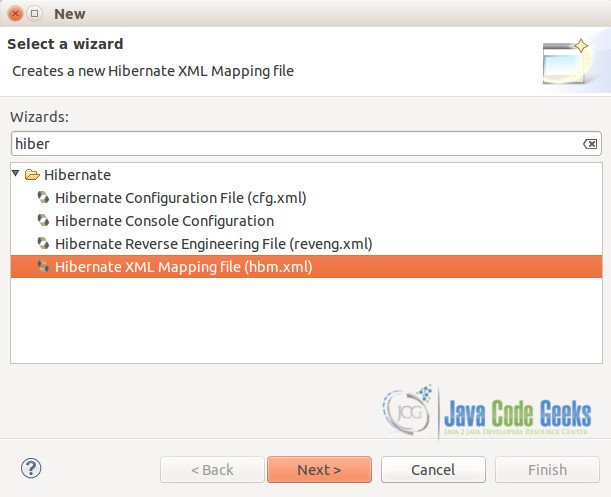
Right click on the project created above, and click New. Search Hibernate and select Hibernate Configuration File (cfg.xml). Enter the desired file name and location for the configuration file. Click Next.
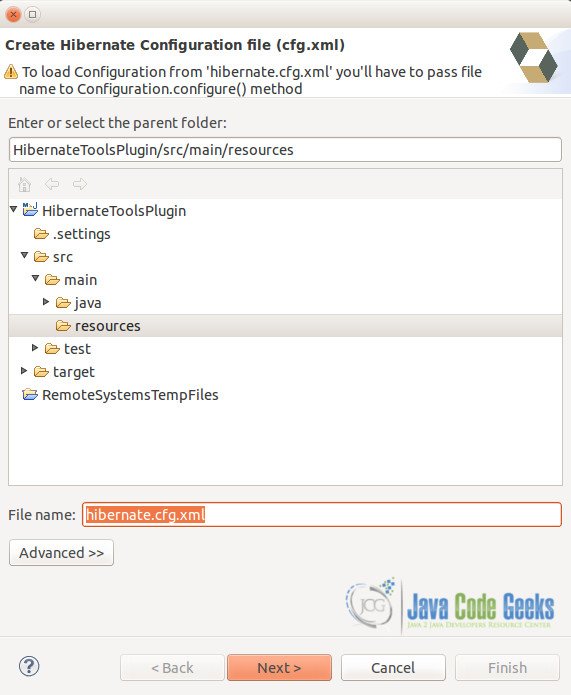
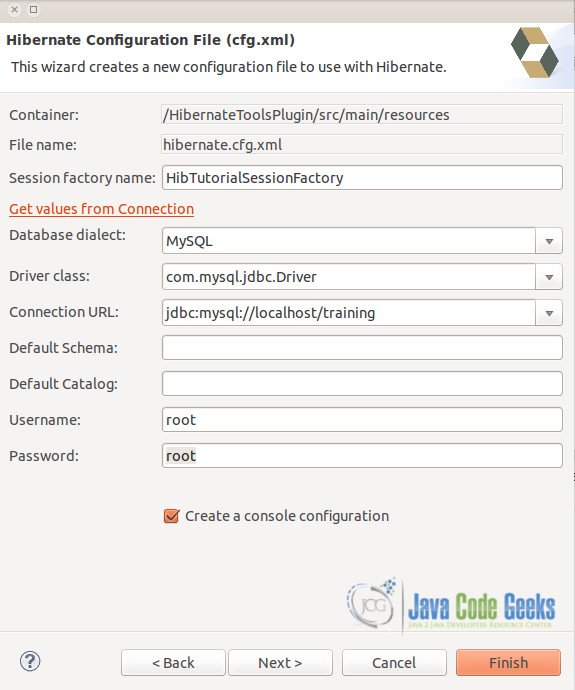
In this page of the wizard, enter the details of the database for the Hibernate Session Factory to create Sessions / connections to. The Database dialect input is a drop down providing various vendors / databases that Hibernate supports. On selecting the dialect, the driver dropdown updates to the respective values of drivers for the database selected in the dialect. This feature helps avoid any typo errors or eases the developer from remembering the options. Enter the jdbc url for the database along with username and password. Click Finish.
Notice that the Create Console Configuration check-box is checked.
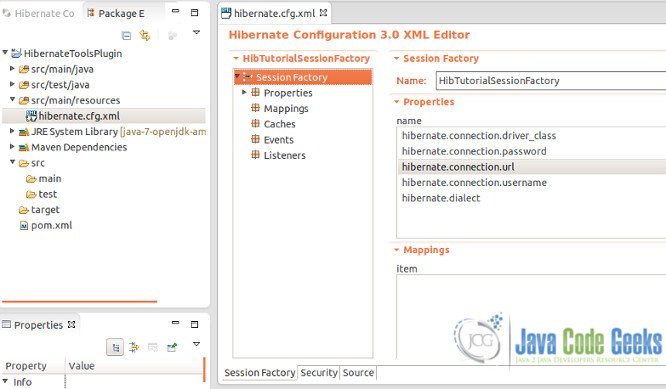
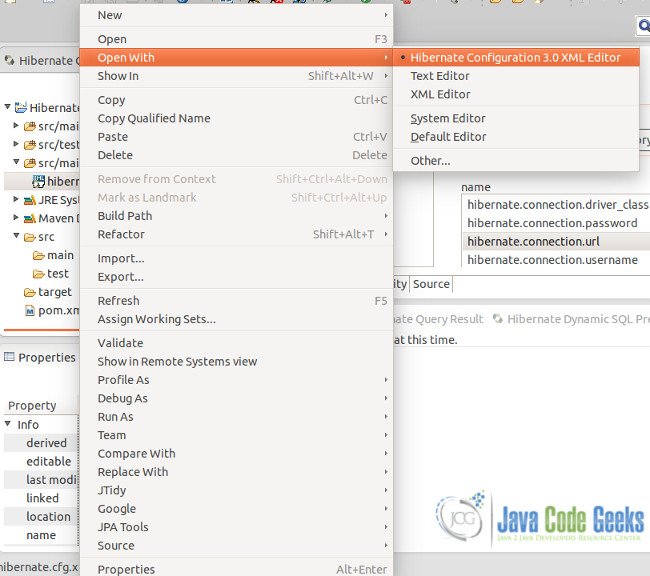
Once the hibernate configuration file is created, you can open it using the Hibernate configuration Editor.
The hibernate configuration editor segregates the configuration and properties and allows addition / modifications to the same. It allows adding mappings and security contexts.
- Hibernate Console Configuration
A Console configuration describes how the Hibernate plugin should configure Hibernate and what configuration files and classpaths are needed to load the POJO’s, JDBC drivers etc. It is required to make use of query prototyping, reverse engineering and code generation. You can have multiple named console configurations.
You can create a console configuration by running the Console Configuration Wizard. In this tutorial, the wizard appears directly from step above, since we had enabled the Create Console Configuration option while creating the hibernate configuration file.
The console configuration lists the Session Factory and also provides the list of tables (database objects) in the database for which the hibernate configuration has been created.
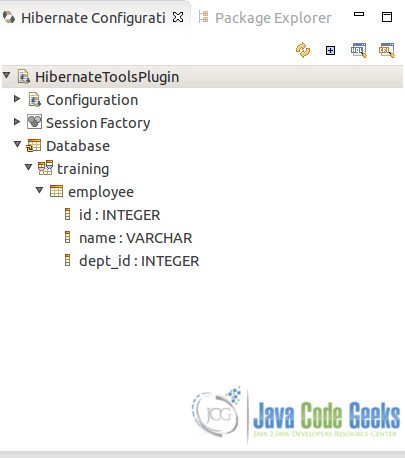
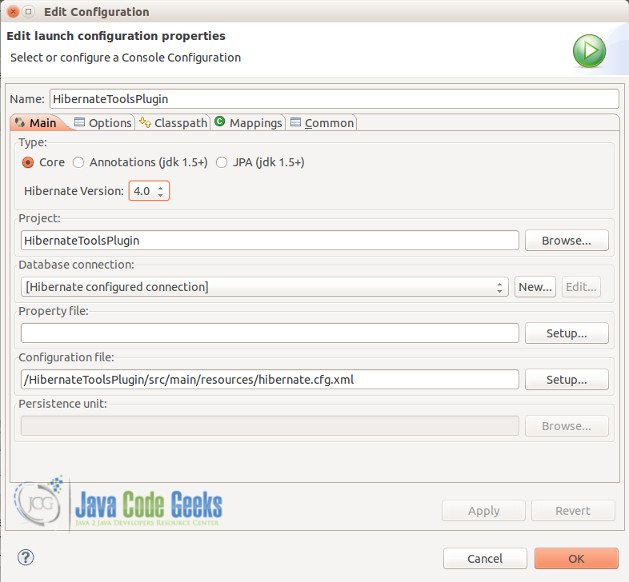
The console configuration can be changed to use a different hibernate version, classpath entries, etc using the Edit Configuration right click menu item. These properties need to be specified if a console configuration is created using the New Wizard (and not through the hibernate config file as we created in the steps above).
- Mapping Editor
Let us now create a hibernate mapping file to see the features offered by the mapping editor.
Before we create a mapping, we need the Java Class. We will create an Employee which contains three variables – empId, Name and departmentId.
Employee.java
package com.javacodegeeks.training.pojo;


public class Employee {
	private int employeeId;
	private String employeeName;
	private int deptId;

	public Employee() {
	}

	public Employee(int employeeId, String employeeName, int deptId) {
		this.employeeId = employeeId;
		this.employeeName = employeeName;
		this.deptId = deptId;
	}
	public int getEmployeeId() {
		return employeeId;
	}
	public void setEmployeeId(int employeeId) {
		this.employeeId = employeeId;
	}
	public String getEmployeeName() {
		return employeeName;
	}
	public void setEmployeeName(String employeeName) {
		this.employeeName = employeeName;
	}
	public int getDeptId() {
		return deptId;
	}
	public void setDeptId(int deptId) {
		this.deptId = deptId;
	}
}
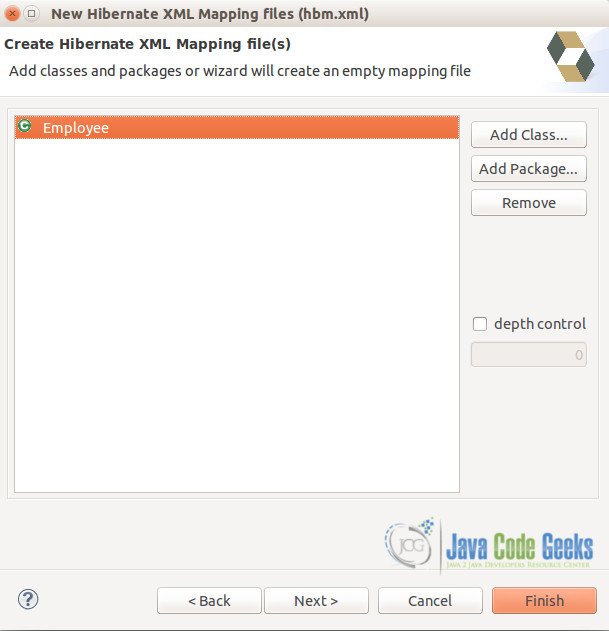
Right click on an appropriate package / folder to create a new hibernate mapping file.
Select the Employee class created in step above.
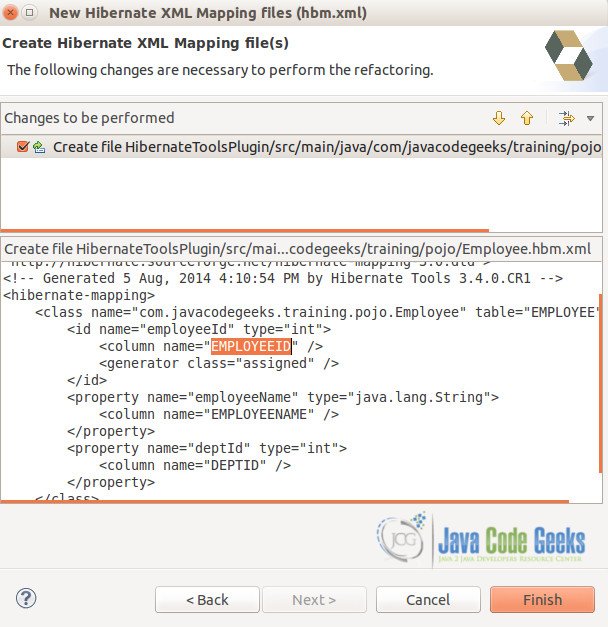
The wizard helps create the necessary code which can later be changed to provide exact column names if different from the variables in the POJO.
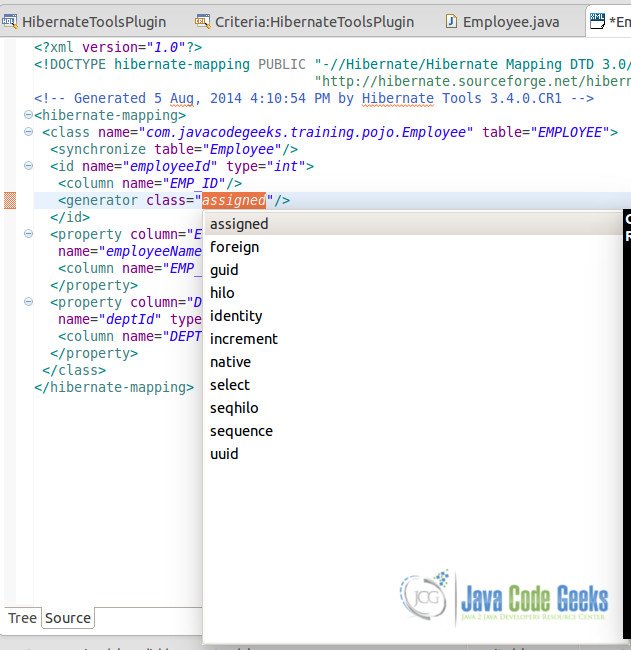
The mapping editor offers the numerous code content assists for tags, their attributes, tables, columns and properties within the mapping files.
- Console
Once the mapping file is created, let us use the HQL Editor and Hibernate Criteria Editor to create HQL queries using the Eclipse IDE. The plugin provides the query editor to query data using the Session Factory created along with the mappings generated.
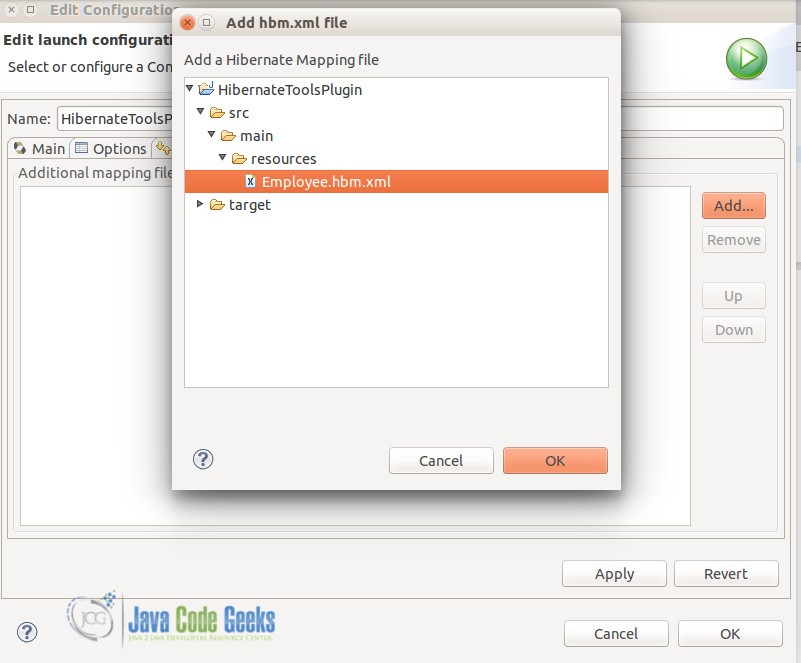
Right click on the Hibernate Configuration, navigate to Mappings tab and add the Employee POJO created in step above.
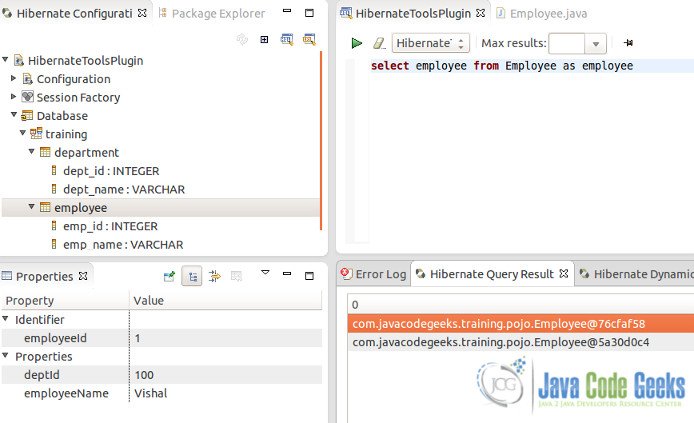
Right click on the Employee table and query it using the HQL Editor. Notice the values in the object.
- Reverse Engineering
The most powerful feature of Hibernate Tools is a database reverse engineering tool that can generate domain model classes and Hibernate mapping files, annotated EJB3 entity beans, HTML documentation or even an entire JBoss Seam application.
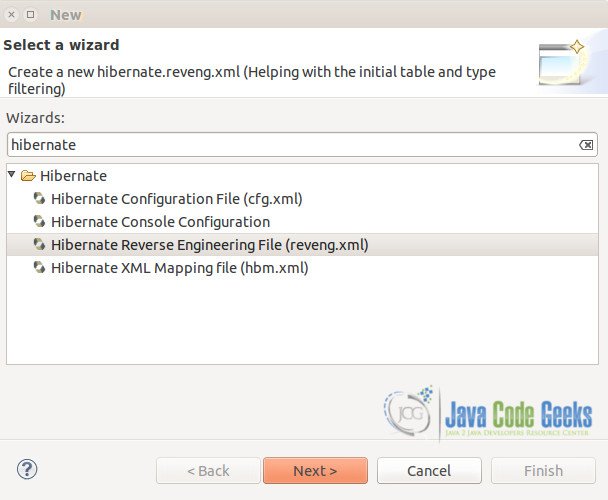
Go to Menu –> New –> Hibernate –> Hibernate Reverse Engineering File (reveng.xml). Click Next and enter location and name of the xml file.
In the next step as part of the wizard, select the Hibernate configuration of the database to connect to. Once the Schema objects are visible, select the list of objects / tables for which the model classes and hibernate mapping files need to be generated. Then, click Finish.
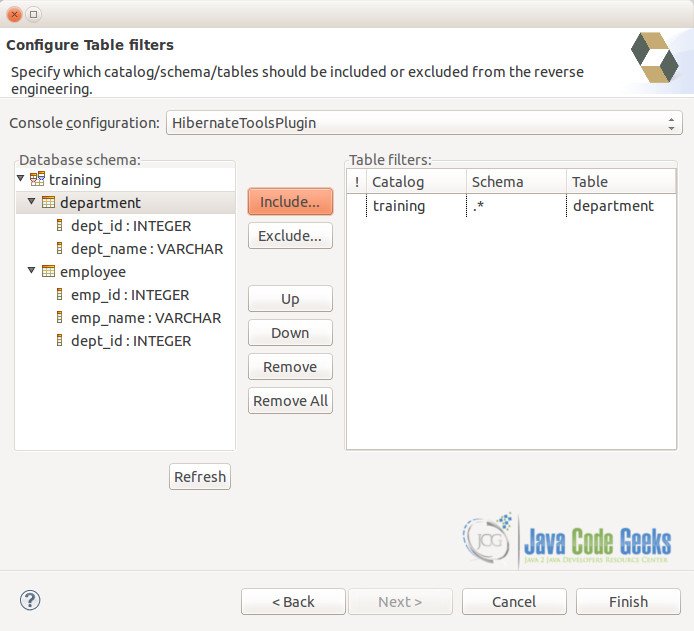
After the file is generated, you still have an option to set filters for objects to be included / excluded while reverse engineering the hibernate code.
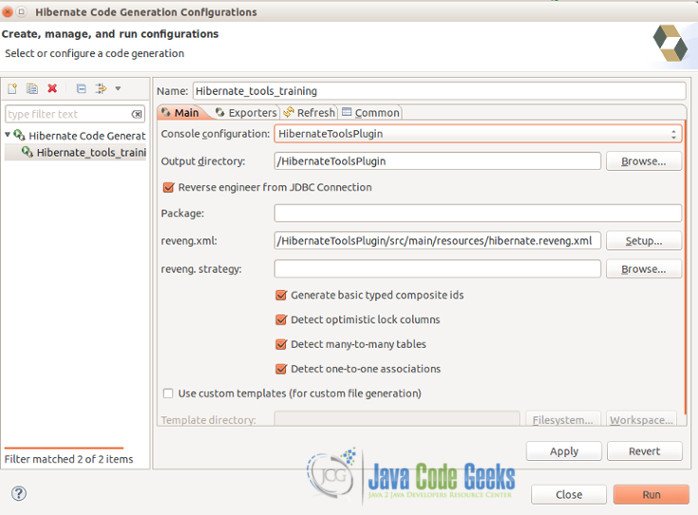
Create a new Launch configuration for Hibernate Code Configurations. Select the Hibernate Console Configuration and the reverse engineering xml file created in steps above.
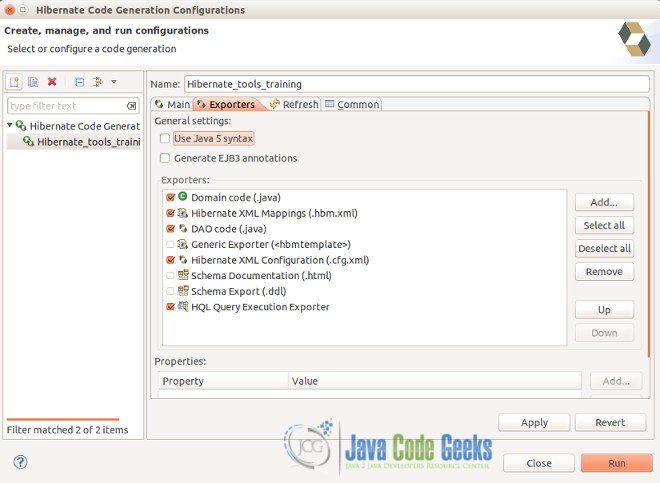
Navigate to Exporters and select the desired files to be generated from the schema.
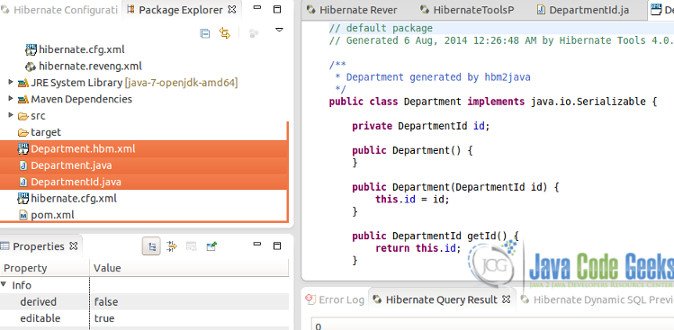
Once the Reverse Engineering launcher configuration is executed, you will notice the hibernate related java and xml files created (highlighted below).
- Other Features
The plugin also offers features like a Mapping Editor (to view the mappings between java objects to tables) and Hibernate Criteria Editor (to test criterias during development).
The plugin also includes feature to attach query params to HQL / Criteria queries and view the results in Eclipse.
Hibernate development
Let us go ahead and complete the hibernate code to create a new Employee row in the database and retrieve all the rows from the same table.
The TestHibernate shown below, initializes the SessionFactory for hibernate using the Configuration object. The Configuration uses either the hibernate configuration xml or properties and creates the session factory for hibernate. A hibernate session is then opened using the factory. Transactions are then created using the hibernate sessions to persist objects to database AND also access the database rows. This is done within the TestHibernate through two methods – addEmployee and getAllEmployees which help create a new employee row in the database table and retrieve all rows from the table, respectively.
TestHibernate.java
package com.javacodegeeks.traning.HibernateToolsPlugin;

import java.util.ArrayList;
import java.util.List;

import org.hibernate.HibernateException;
import org.hibernate.Session;
import org.hibernate.SessionFactory;
import org.hibernate.Transaction;
import org.hibernate.boot.registry.StandardServiceRegistryBuilder;
import org.hibernate.cfg.Configuration;
import org.hibernate.service.ServiceRegistry;

import com.javacodegeeks.training.pojo.Employee;

public class TestHibernate {
	private static SessionFactory factory;
	private static ServiceRegistry serviceRegistry;

	public static void main(String[] args) {
		Configuration configuration = new Configuration();
		configuration.configure();
		configuration.addAnnotatedClass(Employee.class);
		serviceRegistry = new StandardServiceRegistryBuilder().applySettings(
				configuration.getProperties()).build();

		factory = configuration.buildSessionFactory(serviceRegistry);
		TestHibernate testWorker = new TestHibernate();
		testWorker.addEmployee(3, "JavaCodeGeeks", 401);

		List allEmployees = testWorker.getAllEmployees();
		for(Employee emp : allEmployees){
			System.out.print(emp.getEmployeeId() + "  ");
			System.out.print(emp.getEmployeeName() + "  ");
			System.out.print(emp.getDeptId() + "  ");
                        System.out.println();
		}

	}

	private int addEmployee(int empId, String empName, int deptId) {
		Session session = factory.openSession();
		Transaction tx = null;
		Integer empIdSaved = null;
		try {
			tx = session.beginTransaction();
			Employee emp = new Employee(empId, empName, deptId);
			empIdSaved = (Integer) session.save(emp);
			tx.commit();
		} catch (HibernateException e) {
			if (tx != null)
				tx.rollback();
			e.printStackTrace();
		} finally {
			session.close();
		}
		return empIdSaved;
	}

	@SuppressWarnings("unchecked")
	private List  getAllEmployees(){
		Session session = factory.openSession();
		Transaction tx = null;
		List employees = new ArrayList();
		try {
			tx = session.beginTransaction();
			employees = (List)session.createQuery("FROM Employee").list();
			tx.commit();
		} catch (HibernateException e) {
			if (tx != null)
				tx.rollback();
			e.printStackTrace();
		} finally {
			session.close();
		}
		return employees;
	}
}
Before executing the program, confirm the number of rows in the table:
mysql> select * from employee;
+--------+----------+---------+
| emp_id | emp_name | dept_id |
+--------+----------+---------+
|      1 | Vishal   |     100 |
|      2 | Rajpal   |     202 |
+--------+----------+---------+
2 rows in set (0.00 sec)
Execute the program, and the below output is seen:
The hibernate initialization and mapping logs have been ignored.
1  Vishal  100
2  Rajpal  202
3  JavaCodeGeeks  401
Re-run the query in the database, and verify the new row created:
mysql> select * from employee;
+--------+---------------+---------+
| emp_id | emp_name      | dept_id |
+--------+---------------+---------+
|      1 | Vishal        |     100 |
|      2 | Rajpal        |     202 |
|      3 | JavaCodeGeeks |     401 |
+--------+---------------+---------+
3 rows in set (0.00 sec)
Download the Eclipse Project
This was an example demonstrating use of Hibernate tools plugin in eclipse.
You can download the full source code of this example here : HibernateToolsPlugin.zip




Thanks a lot for the tutorial, this helped a lot to create a simple Hibernate example. However there was one typo which I had to correct to get the program to work: In TestHibernate.java, line 23, the method call should be to addClass, not addAnnotatedClass, since the Employee class misses annotations.