JavaFX Text Example
This is a JavaFX Text Example. We will discuss, how to create and manipulate a Text Node (e.g. Font, Size, etc.).
A text node is an instance of the Text class that is used to render text. The Text class contains several properties to customize the appearance of text. The Text class and all its related classes are in the javafx.scene.text package.
The following table shows an overview of the whole tutorial:
Table Of Contents
The following examples uses Java SE 7 and JavaFX 2.2.
1. Creating a Text Node
1.1 The Code
FxTextExampleSimple.java
import javafx.application.Application;
import javafx.scene.Scene;
import javafx.scene.layout.VBox;
import javafx.scene.text.Text;
import javafx.stage.Stage;

public class FxTextExampleSimple extends Application
{
	public static void main(String[] args)
	{
		Application.launch(args);
	}

	@Override
	public void start(Stage stage)
	{
		// Create the first Text Node
		Text text1 = new Text("This is my first Text Node");

		// Create the second Text Node
		Text text2 = new Text();
		text2.setText("This is my second Text Node");

		// Create the VBox
		VBox root = new VBox();
		// Add the Text Nodes to the VBox
		root.getChildren().addAll(text1, text2);
		// Set the Spacing to 10 px
		root.setSpacing(10);

		// Set the Styles of the VBox
		root.setStyle("-fx-padding: 10;" +
				"-fx-border-style: solid inside;" +
				"-fx-border-width: 2;" +
				"-fx-border-insets: 5;" +
				"-fx-border-radius: 5;" +
				"-fx-border-color: blue;");

		// Create the Scene
		Scene scene = new Scene(root,300,200);
		// Add the scene to the Stage
		stage.setScene(scene);
		// Set the title of the Stage
		stage.setTitle("A simple Text Node Example");
		// Display the Stage
		stage.show();
	}
}
An instance of the Text class represents a Text node. A Text node contains text and properties to render the text.
You can create a Text node using one of the constructors of the Text class:
- Text()
- Text(String text)
- Text(double x, double y, String text)
The no-args constructor creates a Text node with an empty string as its text. Other constructors let you specify the text and position the node. The text property of the Text class specifies the text of the Text node. The x and y properties specify the x and y coordinates of the text origin, which are described in the next section.
The following code snippet shows the usage of the constructors:
// Create the first Text Node
Text text1 = new Text("This is my first Text Node");

// Create the second Text Node
Text text2 = new Text();
text2.setText("This is my second Text Node");
1.2 The GUI
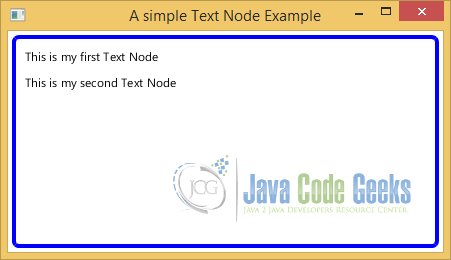
The following image shows the GUI of the above example:
2. The Text Origin
Apart from the local and parent coordinate system, a Text node has an additional coordinate system. It is the coordinate system used for drawing the text. Three properties of the Text class define the text coordinate system:
- x
- y
- textOrigin
The x and y properties define the x and y coordinates of the text origin. The textOrigin property is of type VPos. Its value could be VPos.BASELINE, VPos.TOP, VPos.CENTER, and VPos.BOTTOM. The default is VPos.BASELINE. It defines where the x-axis of the text coordinate system lies within the text height.
2.1 The Code
FxTextExampleCentered.java
import javafx.application.Application;
import javafx.geometry.VPos;
import javafx.scene.Group;
import javafx.scene.Scene;
import javafx.scene.text.Text;
import javafx.stage.Stage;

public class FxTextExampleCentered extends Application
{
	public static void main(String[] args)
	{
		Application.launch(args);
	}

	@Override
	public void start(Stage stage)
	{
		// Create the Text Node
		Text text = new Text("An Example of a Centered Text Node");

		// We have to set the textOrigian to VPos.TOP to center the text node vertcially within the scene
		text.setTextOrigin(VPos.TOP);

		// Create the Group
		Group root = new Group();
		// Add the Text Node to the Group
		root.getChildren().add(text);

		// Create the Scene
		Scene scene = new Scene(root,300,200);

		// Set the Position of the Text
		text.layoutXProperty().bind(scene.widthProperty().
subtract(text.layoutBoundsProperty().get().getWidth()).divide(2));
		text.layoutYProperty().bind(scene.heightProperty().
subtract(text.layoutBoundsProperty().get().getHeight()).divide(2));

		// Add the scene to the Stage
		stage.setScene(scene);
		// Set the title of the Stage
		stage.setTitle("An Example of Centering a Text Node in a Scene");
		// Set the width and height of this Window to match the size of the content of the Scene.
		stage.sizeToScene();
		// Display the Stage
		stage.show();
	}

}
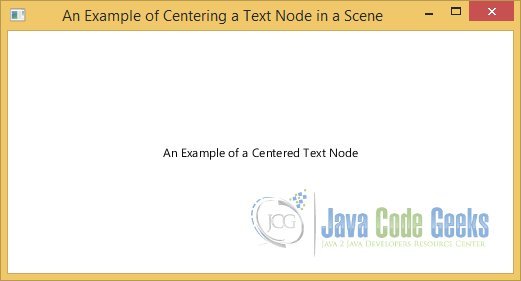
When the textOrigin is VPos.TOP, the x-axis of the text coordinate system is aligned with the top of the text. That is, the y property of the Text node is the distance between the x-axis of the local coordinate system and the top of the displayed text. A font places its characters on a line called the baseline. The VPos.BASELINE aligns the x-axis of the text coordinate system with the baseline of the font. The VPos.BOTTOM aligns the x-axis of the text coordinate system with the bottom of the displayed text accounting for the descent for the font. The VPos.CENTER aligns the x-axis of the text coordinate system in the middle of the displayed text, accounting for the ascent and descent for the font.
At first, we create a Text Node and sets the textOrigian to VPos.TOP:
// Create the Text Node
Text text = new Text("An Example of a Centered Text Node");

// We have to set the textOrigian to VPos.TOP to center the text node vertcially within the scene
text.setTextOrigin(VPos.TOP);
Thereafter we calculate and set the X- and Y-Properties:
// Set the Position of the Text
text.layoutXProperty().bind(scene.widthProperty().subtract(text.layoutBoundsProperty().get().getWidth()).divide(2));
text.layoutYProperty().bind(scene.heightProperty().subtract(text.layoutBoundsProperty().get().getHeight()).divide(2));
2.2 The GUI
The following image shows the result of our calculations:

3. Multiline Text
3.1 The Code
FxTextExampleMultiline.java
import javafx.application.Application;
import javafx.scene.Scene;
import javafx.scene.layout.HBox;
import javafx.scene.text.Text;
import javafx.scene.text.TextAlignment;
import javafx.stage.Stage;

public class FxTextExampleMultiline  extends Application
{
	public static void main(String[] args)
	{
		Application.launch(args);
	}

	@Override
	public void start(Stage stage)
	{

		String text =
			"'Doubt thou the stars are fire; \n" +
			"Doubt that the sun doth move; \n" +
			"Doubt truth to be a liar; \n" +
			"But never doubt I love.' \n" +
			" - William Shakespeare";

		// Create a default Text Node
		Text text1 = new Text(text);

		// Create a Text node with an alignment
		Text text2 = new Text(text);
		text2.setTextAlignment(TextAlignment.RIGHT);

		// Create a Text Node with a specific width
		Text text3 = new Text(text);
		text3.setWrappingWidth(100);

		// Create the HBox
		HBox root = new HBox();
		// Add the Text Nodes to the HBox
		root.getChildren().addAll(text1, text2, text3);
		// Set the Spacing to 10 px
		root.setSpacing(20);

		// Set the Styles of the HBox
		root.setStyle("-fx-padding: 10;" +
				"-fx-border-style: solid inside;" +
				"-fx-border-width: 2;" +
				"-fx-border-insets: 5;" +
				"-fx-border-radius: 5;" +
				"-fx-border-color: blue;");

		// Create the Scene
		Scene scene = new Scene(root);
		// Add the scene to the Stage
		stage.setScene(scene);
		// Set the title of the Stage
		stage.setTitle("Using Multiline Text Nodes");
		// Display the Stage
		stage.show();
	}

}
A Text node is capable of displaying multiple lines of text. It creates a new line in two cases:
- A newline character ‘\n’ in the text creates a new line causing the characters following the newline to wrap to the next line.
- The Text class contains a wrappingWidth property, which is 0.0 by default. Its value is specified in pixels, not characters. If it is greater than zero, the text in each line is wrapped to at the specified value.
The lineSpacing property specifies the vertical spacing in pixels between two lines. It is 0.0 by default. The textAlignment property specifies the horizontal alignment of the text lines in the bounding box. The widest line defines the width of the bounding box. Its value has no effect in a single line Text node. Its value can be one of the constants of the TextAlignment enumeration:
- LEFT
- RIGHT
- CENTER
- JUSTIFY
The default is TextAlignment.LEFT.
In our example, we set the Text Alignment to TextAlignment.RIGHT:
// Create a Text node with an alignment
Text text2 = new Text(text);
text2.setTextAlignment(TextAlignment.RIGHT);
3.2 The GUI
The following image shows the same text with different text alignments. The first node uses the default LEFT text alignment. The second node uses RIGHT text alignment. The third node uses a wrappingWidth of 100px. A new line is created at 100px as well as a newline character ‘\n’.

4. Setting Text Fonts
4.1 The Code
FxTextExampleFonts.java
import javafx.application.Application;
import javafx.scene.Scene;
import javafx.scene.layout.VBox;
import javafx.scene.text.Font;
import javafx.scene.text.FontPosture;
import javafx.scene.text.FontWeight;
import javafx.scene.text.Text;
import javafx.stage.Stage;

public class FxTextExampleFonts extends Application
{
	public static void main(String[] args)
	{
		Application.launch(args);
	}

	@Override
	public void start(Stage stage)
	{
		// Create the first Text Node with default Font and Size
		Text text1 = new Text();
		text1.setText(text1.getFont().toString());

		// Create the first Text Node with Arial Font and Size 12
		Text text2 = new Text();
		text2.setFont(Font.font("Arial", 12));
		text2.setText(text2.getFont().toString());

		// Create the first Text Node with Arial Bold Font and Size 14
		Text text3 = new Text();
		text3.setFont(Font.font("Arial", FontWeight.BLACK, 14));
		text3.setText(text3.getFont().toString());

		// Create the fourth Text Node with Arial Italic Font and Size 16
		Text text4 = new Text();
		text4.setFont(Font.font("Arial", FontWeight.THIN, FontPosture.ITALIC, 16));
		text4.setText(text4.getFont().toString());

		// Create the VBox
		VBox root = new VBox();
		// Add the Text Nodes to the VBox
		root.getChildren().addAll(text1, text2, text3, text4);
		// Set the Spacing to 10 px
		root.setSpacing(10);

		// Set the Styles of the VBox
		root.setStyle("-fx-padding: 10;" +
			"-fx-border-style: solid inside;" +
			"-fx-border-width: 2;" +
			"-fx-border-insets: 5;" +
			"-fx-border-radius: 5;" +
			"-fx-border-color: blue;");

		// Create the Scene
		Scene scene = new Scene(root);
		// Add the scene to the Stage
		stage.setScene(scene);
		// Set the title of the Stage
		stage.setTitle("Setting Fonts for Text Nodes");
		// Display the Stage
		stage.show();
	}
}
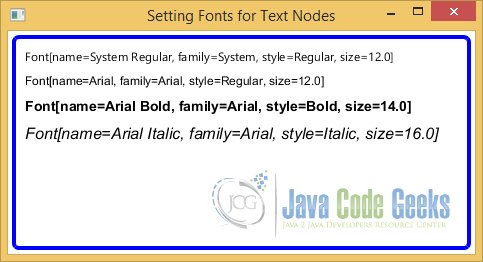
The font property of the Text class defines the font for the text. The default font used is from ‘System’ font family with the “Regular” style. The size of the default font is dependent on the platform and the desktop settings of the user.
A font has a family and a family name. A font family is also known as a typeface. A font family defines shapes for characters. The same characters appear differently when displayed using fonts belonging to different font families. Variants of a font are created by applying styles. Each variant of the font has a name that consists of the family name and the style names. For example, Arial is a family name of a font whereas Arial Regular, Arial Bold, and Arial Bold Italic are names of the variants of the Arial font.
The corresponding lines of codes are the followings:
// Create the first Text Node with default Font and Size
Text text1 = new Text();
text1.setText(text1.getFont().toString());

// Create the first Text Node with Arial Font and Size 12
Text text2 = new Text();
text2.setFont(Font.font("Arial", 12));
text2.setText(text2.getFont().toString());

// Create the first Text Node with Arial Bold Font and Size 14
Text text3 = new Text();
text3.setFont(Font.font("Arial", FontWeight.BLACK, 14));
text3.setText(text3.getFont().toString());

// Create the fourth Text Node with Arial Italic Font and Size 16
Text text4 = new Text();
text4.setFont(Font.font("Arial", FontWeight.THIN, FontPosture.ITALIC, 16));
text4.setText(text4.getFont().toString());
4.2 The GUI
The result of our code is a VBox, which contains four Text Nodes with different fonts:

5. Setting Text Fill, Stroke an Decorations
5.1 The Code
FxTextExampleDecorations.java
import javafx.application.Application;
import javafx.scene.Scene;
import javafx.scene.layout.VBox;
import javafx.scene.paint.Color;
import javafx.scene.text.Font;
import javafx.scene.text.Text;
import javafx.stage.Stage;

public class FxTextExampleDecorations extends Application
{
	public static void main(String[] args)
	{
		Application.launch(args);
	}

	@Override
	public void start(Stage stage)
	{
		// Create the first Text Node
		Text t1 = new Text("A stroked and filled Text Node");
		t1.setStroke(Color.RED);
		t1.setFill(Color.WHITE);
		t1.setFont(new Font(20));

		// Create the second Text Node
		Text t2 = new Text("A Text Node with an Underline");
		t2.setUnderline(true);

		// Create the third Text Node
		Text t3 = new Text("A Text Node with a Strikethrough");
		t3.setStrikethrough(true);

		// Create the VBox
		VBox root = new VBox();
		// Add the Text Nodes to the VBox
		root.getChildren().addAll(t1, t2, t3);
		// Set the Spacing to 20 px
		root.setSpacing(20);

		// Set the Styles of the VBox
		root.setStyle("-fx-padding: 10;" +
			"-fx-border-style: solid inside;" +
			"-fx-border-width: 2;" +
			"-fx-border-insets: 5;" +
			"-fx-border-radius: 5;" +
			"-fx-border-color: blue;");

		// Create the Scene
		Scene scene = new Scene(root);
		// Add the scene to the Stage
		stage.setScene(scene);
		// Set the title of the Stage
		stage.setTitle("Using Decorations for Text Nodes");
		// Display the Stage
		stage.show();
	}
}
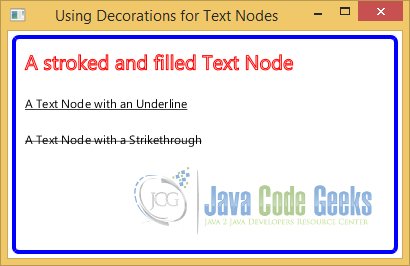
A Text node is a shape. Like a shape, it can have a fill and a stroke. By default, a Text node has null stroke and Color.BLACK fill. The Text class inherits properties and methods for setting its stroke and fill from the Shape class.
The Text class contains two boolean properties to apply text decorations to its text:
- strikethrough
- underline
By default, both properties are set to false. If the strikethrough is set to true, a line is drawn through each line of text. If the underline is set to true, a line is drawn below each line of text.
The following snippet of code uses the decorations for Text nodes:
// Create the first Text Node
Text t1 = new Text("A stroked and filled Text Node");
t1.setStroke(Color.RED);
t1.setFill(Color.WHITE);
t1.setFont(new Font(20));

// Create the second Text Node
Text t2 = new Text("A Text Node with an Underline");
t2.setUnderline(true);

// Create the third Text Node
Text t3 = new Text("A Text Node with a Strikethrough");
t3.setStrikethrough(true);
5.2 The GUI
The following image shows the result of the usage of the text properties:

6. Download Java Source Code
This was an example of javafx.scene.text.Text
You can download the full source code of this example here: JavaFxTextExample.zip


