This is a JavaFX Scene Graph Example. A scene represents the visual contents of a stage. The Scene class in the javafx.scene package represents a Scene in a JavaFX program.
A Scene object is attached to, at the most, one Stage at a time. If an already attached scene is attached to another Stage, it is first detached from the previous Stage. A Stage can have, at the most, one Scene attached to it at any time.
The following table shows an overview of the whole article:
Table Of Contents
The following examples uses Java SE 7 and JavaFX 2.2.
1. What Is a Scene?
1.1 The Code
FxSceneGraphExample1.java
import javafx.application.Application;
import javafx.scene.Scene;
import javafx.scene.control.Button;
import javafx.scene.control.Label;
import javafx.scene.layout.VBox;
import javafx.stage.Stage;

public class FxSceneGraphExample1 extends Application
{
	public static void main(String[] args)
	{
		Application.launch(args);
	}

	@Override
	public void start(Stage stage)
	{
		// Create the Label
		Label label = new Label("A Label");
		// Create the Button
		Button button = new Button("A Button");

		// Create the VBox
		VBox root = new VBox();
		// Add the details to the VBox
		root.getChildren().addAll(label, button);
		// Set the vertical spacing between children to 10px
		root.setSpacing(10);

		// Set the Style-properties of the VBox
		root.setStyle("-fx-padding: 10;" +
				"-fx-border-style: solid inside;" +
				"-fx-border-width: 2;" +
				"-fx-border-insets: 5;" +
				"-fx-border-radius: 5;" +
				"-fx-border-color: blue;");

		// Create the Scene
		Scene scene = new Scene(root,300,200);
		// Add the scene to the Stage
		stage.setScene(scene);
		// Set the title of the Stage
		stage.setTitle("A simple Scene Graph Example");
		// Display the Stage
		stage.show();
	}
}
A Scene contains a scene graph that consists of visual nodes. In this sense, a Scene acts as a container for a scene graph. A scene graph is a tree data structure whose elements are known as nodes. Nodes in a scene graph form a parent-child hierarchical relationship. A Node in a scene graph is an instance of the Node class. A node can be a branch Node or a leaf Node. A branch Node can have children nodes, whereas a leaf Node cannot. The first node in a scene graph is called the root node. The root node can have children nodes.
A Scene always has a root Node. If the root Node is resizable, for example, a Region or a Control, it tracks the size of the Scene. That is, if the Scene is resized, the resizable root Node resizes itself to fill the entire Scene. Based on the policy of a root Node, the scene graph may be laid out again when the size of the Scene changes.
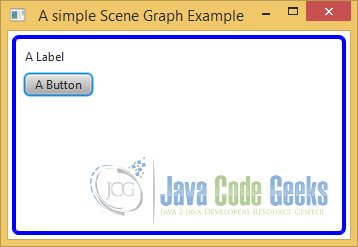
1.2 The GUI
The following image shows a very simple example of a Scene Graph. The Scene Graph only contains a Label and a Button.
2. Setting the Cursor for a Scene
2.1 The Code
FxSceneGraphExample2.java
import javafx.application.Application;
import javafx.scene.Cursor;
import javafx.scene.Scene;
import javafx.scene.control.Button;
import javafx.scene.control.Label;
import javafx.scene.layout.VBox;
import javafx.stage.Stage;

public class FxSceneGraphExample2 extends Application
{
	public static void main(String[] args)
	{
		Application.launch(args);
	}

	@Override
	public void start(Stage stage)
	{
		// Create the Label
		Label label = new Label("A Label");
		// Create the Button
		Button button = new Button("A Button");

		// Create the VBox
		VBox root = new VBox();
		// Add the details to the VBox
		root.getChildren().addAll(label, button);
		// Set the vertical spacing between children to 10px
		root.setSpacing(10);

		// Set the Style-properties of the VBox
		root.setStyle("-fx-padding: 10;" +
				"-fx-border-style: solid inside;" +
				"-fx-border-width: 2;" +
				"-fx-border-insets: 5;" +
				"-fx-border-radius: 5;" +
				"-fx-border-color: blue;");

		// Create the Scene
		Scene scene = new Scene(root,300,200);
		// Get the Hand cursor using its name
		Cursor cursor = Cursor.cursor("HAND");
		// Add the Cursor to the Scene
		scene.setCursor(cursor);
		// Add the scene to the Stage
		stage.setScene(scene);
		// Set the title of the Stage
		stage.setTitle("A Cursor Example");
		// Display the Stage
		stage.show();
	}
}
An instance of the Cursor class represents a mouse cursor. The Cursor class contains many constants, for example, HAND, CLOSED_HAND, DEFAULT, TEXT, NONE, WAIT, for standard mouse cursors. The following snippet of code sets the HAND cursor for a Scene:
// Create the Scene
Scene scene = new Scene(root,300,200);
// Get the Hand cursor using its name
Cursor cursor = Cursor.cursor("HAND");
// Add the Cursor to the Scene
scene.setCursor(cursor);
You can also create and set a custom cursor to a Scene. The cursor(String name) static method of the Cursor class returns a standard cursor if the specified name is the name of a standard cursor.
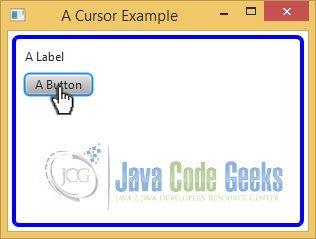
2.2 The GUI
The following image shows an example of a Scene Graph using a Cursor:
3. The Focus Owner in a Scene
3.1 The Code
FxSceneGraphExample3.java
import javafx.application.Application;
import javafx.event.ActionEvent;
import javafx.event.EventHandler;
import javafx.scene.Scene;
import javafx.scene.control.Button;
import javafx.scene.control.Label;
import javafx.scene.control.TextField;
import javafx.scene.layout.VBox;
import javafx.stage.Stage;

public class FxSceneGraphExample3 extends Application
{
	public static void main(String[] args)
	{
		Application.launch(args);
	}

	@Override
	public void start(Stage stage)
	{
		// Create the Label
		Label label = new Label("A Label");
		// Create the Button
		Button button = new Button("A Button");
		// Create the TextField
		final TextField  text = new TextField("A TextField");

		// Add EventHandler to the Button
		button.setOnAction(new EventHandler<ActionEvent>()
		{
            @Override public void handle(ActionEvent e)
            {
            	text.requestFocus();
            }
        });

		// Create the VBox
		VBox root = new VBox();
		// Add the details to the VBox
		root.getChildren().addAll(label, button, text);
		// Set the vertical spacing between children to 10px
		root.setSpacing(10);

		// Set the Style-properties of the VBox
		root.setStyle("-fx-padding: 10;" +
				"-fx-border-style: solid inside;" +
				"-fx-border-width: 2;" +
				"-fx-border-insets: 5;" +
				"-fx-border-radius: 5;" +
				"-fx-border-color: blue;");

		// Create the Scene
		Scene scene = new Scene(root,300,200);

		// Add the scene to the Stage
		stage.setScene(scene);
		// Set the title of the Stage
		stage.setTitle("A Focus Owner Example");
		// Display the Stage
		stage.show();
	}
}
Only one Node in a scene can be the focus owner. The focusOwner property of the Scene class tracks the Node class that has the focus. Note that the focusOwner property is read-only. If you want a specific Node in a Scene to be the focus owner, you need to call the requestFocus() method of the Node class.
You can use the getFocusOwner() method of the Scene class to get the reference of the node having the focus in the Scene. A Scene may not have a focus owner, and in that case, the getFocusOwner() method returns null. For example, a Scene does not have a focus owner when it is created but is not attached to a Window.
It is important to understand the distinction between a focus owner and a node having focus. Each Scene may have a focus owner. For example, if you open two windows, you will have two scenes and you can have two focus owners. However, only one of the two focus owners can have the focus at a time. The focus owner of the active window will have the focus. To check if the focus owner node also has the focus, you need to use the focused property of the Node class. The following snippet of code shows the typical logic in using the focus owner:

// Add EventHandler to the Button
button.setOnAction(new EventHandler()
{
	@Override public void handle(ActionEvent e)
	{
		text.requestFocus();
	}
});
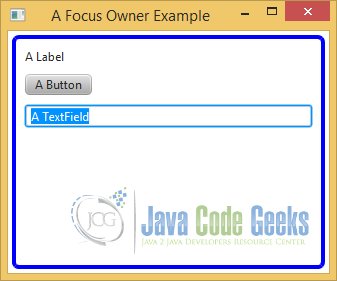
3.2 The GUI
The following image shows how the focus owner can be set in a Scene. In our case, the click on the Button will do this action.
4. Using Builder Classes
4.1 The Code
FxSceneGraphExample4.java
package FXSceneGraph;

import javafx.application.Application;
import javafx.scene.Scene;
import javafx.scene.SceneBuilder;
import javafx.scene.control.LabelBuilder;
import javafx.scene.layout.VBox;
import javafx.scene.layout.VBoxBuilder;
import javafx.scene.paint.Color;
import javafx.scene.shape.Rectangle;
import javafx.scene.shape.RectangleBuilder;
import javafx.stage.Stage;

public class FxSceneGraphExample4 extends Application
{
	public static void main(String[] args)
	{
		Application.launch(args);
	}

	@Override
	public void start(Stage stage)
	{
		// Creating a blue Rectangle
		Rectangle rectangle1 = new Rectangle(10, 10, 20, 20);
		rectangle1.setFill(Color.BLUE);

		// Createing a green Rectangle by usage of a RectangleBuilder
		Rectangle rectangle2 = RectangleBuilder.create()
			.x(100).y(10).width(20).height(20).fill(Color.GREEN).build();

		// Create the RectangleBuilder
		RectangleBuilder builder = RectangleBuilder.create()
			.width(20).height(20).fill(Color.RED);

		// Create two rectangles with the RectangleBuilder
		Rectangle rectangle3 = builder.x(180).y(40).build();
		Rectangle rectangle4 = builder.x(120).y(20).build();

		// Create the VBox by usage of a VBoxBuilder
		VBox root = VBoxBuilder.create().children(LabelBuilder.create()
			.text("A Scene Builder Example").build(),rectangle1,rectangle2,rectangle3,rectangle4).build();

		// Set the vertical spacing between children to 10px
		root.setSpacing(10);

		// Set the Style-properties of the VBox
		root.setStyle("-fx-padding: 10;" +
				"-fx-border-style: solid inside;" +
				"-fx-border-width: 2;" +
				"-fx-border-insets: 5;" +
				"-fx-border-radius: 5;" +
				"-fx-border-color: blue;");

		// Create the Scene by usage of a SceneBuilder
		Scene scene = SceneBuilder.create().width(300).height(200).root(root).build();

		// Add the scene to the Stage
		stage.setScene(scene);
		// Set the title of the Stage
		stage.setTitle("A Scene Builder Example");
		// Display the Stage
		stage.show();
	}
}
JavaFX provides two classes for creating and configuring objects that constitute the building blocks of a scene graph. One class is named after the type of object that the class represents. Another with the former class name suffixed with the word “Builder”. For example, Rectangle and RectangleBuilder classes exist to work with rectangles, Scene and SceneBuilder classes exist to work with scenes, and so on.
Builder classes provide three types of methods:
- They have a create() static method to create an instance of the builder class.
- They contain methods to set properties. Method names are the same as the property names that they set.
- They have a build() method that returns the object of the class for which the builder class exists.
For example, the build() method of the RectangleBuilder class returns an object of the Rectangle class. Builder classes are designed to use method chaining. Their methods to configure properties return the same builder instance.
The following snippet of code creates a rectangle, using the Rectangle class, with (x, y) coordinates at (10, 20), with a width of 20px and a height of 20px. It also sets the fill property to blue:
// Creating a blue Rectangle
Rectangle rectangle1 = new Rectangle(10, 10, 20, 20);
rectangle1.setFill(Color.BLUE);
You can use the RectangleBuilder class to create a green rectangle:
// Createing a green Rectangle by usage of a RectangleBuilder
Rectangle rectangle2 = RectangleBuilder.create()
	.x(100).y(10).width(20).height(20).fill(Color.GREEN).build();
Using builder classes requires longer code. However, it is more readable compared to using constructors to set the properties. Another advantage of builder classes is that they can be reused to build objects with slightly different properties. Suppose you want to create multiple rectangles with a 20px width and a 20px height, filled with the color red. However, they have different x and y coordinates. You can do so with the following code:
// Create the RectangleBuilder
RectangleBuilder builder = RectangleBuilder.create()
	.width(20).height(20).fill(Color.RED);

// Create two rectangles with the RectangleBuilder
Rectangle rectangle3 = builder.x(180).y(40).build();
Rectangle rectangle4 = builder.x(120).y(20).build();
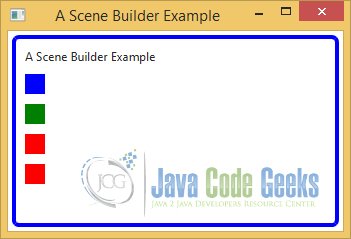
4.2 The GUI
The last image shows how Scene Builder Classes ca be used to generate objects of different classes:
5. Download Java Source Code
This was an example of javafx.scene.
