JavaFX FXML Tutorial
This is a JavaFX FXML Tutorial. In this tutorial we will discuss how to use FXML for creating the GUI of an application. The first three chapters are also part of the article JavaFX FXML Controller Example. Given the fact, that this article represents a tutorial, it contains also the Controller Example.
FXML is an XML-based language designed to build the user interface for JavaFX applications. You can use FXML to build an entire Scene or part of a Scene. FXML allows application developers to separate the logic for building the UI from the business logic. If the UI part of the application changes, you do not need to recompile the JavaFX code. Instead you can change the FXML using a text editor and rerun the application. You still use JavaFX to write business logic using the Java language. An FXML document is an XML document.
A JavaFX scene graph is a hierarchical structure of Java objects. XML format is well suited for storing information representing some kind of hierarchy. Therefore, using FXML to store the scene-graph is very intuitive. It is common to use FXML to build a scene graph in a JavaFX application.
The following table shows an overview of the whole article:
Table Of Contents
The following examples uses Java SE 8.
1. Introduction to FXML
1.1 The FXML Code
FxFXMLExample1.fxml
<?xml version="1.0" encoding="UTF-8"?>
<?language JavaScript?>

<?import javafx.scene.control.*?>
<?import javafx.scene.layout.*?>

<VBox fx:id="vbox" layoutX="10.0" layoutY="10.0" prefHeight="250.0" prefWidth="300.0" spacing="10" xmlns:fx="http://javafx.com/fxml/1" xmlns="http://javafx.com/javafx/2.2">
  <style>
	-fx-padding: 10;
	-fx-border-style: solid inside;
	-fx-border-width: 2;
	-fx-border-insets: 5;
	-fx-border-radius: 5;
	-fx-border-color: blue;
  </style>
  <children>
    <Label fx:id="inputLbl" alignment="CENTER_LEFT" cache="true" cacheHint="SCALE" prefHeight="30.0" prefWidth="200.0" text="Please insert Your Input here:" textAlignment="LEFT" />
    <TextField fx:id="inputText" prefWidth="100.0" />
    <Button fx:id="okBtn" alignment="CENTER_RIGHT" contentDisplay="CENTER" mnemonicParsing="false" text="OK" textAlignment="CENTER" />
    <Label fx:id="outputLbl" alignment="CENTER_LEFT" cache="true" cacheHint="SCALE" prefHeight="30.0" prefWidth="200.0" text="Your Input:" textAlignment="LEFT" />
    <TextArea fx:id="outputText" prefHeight="100.0" prefWidth="200.0" wrapText="true" />
  </children>
</VBox>
1.2 Adding UI Elements
The root element of the FXML document is the top-level object in the object-graph. The top-level object of the above example is a VBox. Therefore, the root element of your FXML would be:
<VBox>
</VBox>
How do you know that to represent a VBox in the object-graph, you need to use a tag in FXML? It is both difficult and easy. It is difficult because there is no documentation for FXML tags. It is easy because FXML has a few rules explaining what constitutes a tag name. For example, if a tag name is the simple or fullqualified name of a class, the tag will create an object of that class. The above element will create an object of the VBox class. The above FXML can be rewritten using the fully qualified class name:
<javafx.scene.layout.VBox>
</javafx.scene.layout.VBox>
In JavaFX, layout panes have children. In FXML, layout panes have children as their child elements. You can add a Label and a Button and other elements to the VBox as follows:
<children>
	<Label/>
	<TextField/>
	<Button/>
	<Label/>
	<TextArea/>
</children>
This defines the basic structure of the object-graph for our application. It will create a VBox with two labels, a TextField, a TextArea and a Button.
1.3 Importing Java Types in FXML
To use the simple names of Java classes in FXML, you must import the classes as you do in Java programs. There is one exception. In Java programs, you do not need to import classes from the java.lang package. However, in FXML, you need to import classes from all packages, including the java.lang package. An import processing instruction is used to import a class or all classes from a package. The following processing instructions import the VBox, Label, and Button classes:
<?import javafx.scene.layout.VBox?>
<?import javafx.scene.control.Label?>
<?import javafx.scene.control.Button?>
The following import processing instructions import all classes from the javafx.scene.control and java.lang packages:
<?import javafx.scene.control.*?>
<?import java.lang.*?>
1.4 Setting Properties in FXML
You can set properties for Java objects in FXML. A property for an object can be set in FXML if the property declaration follows the JavaBean conventions. The attribute name or the property element name is the same as the name of the property being set. The following FXML creates a TextField and sets its prefWidth property using an attribute:
<TextField fx:id="inputText" prefWidth="100.0" />
1.5 Specifying FXML Namespace
FXML does not have an XML schema. It uses a namespace that needs to be specified using the namespace prefix “fx”. For the most part, the FXML parser will figure out the tag names such as tag names that are classes, properties of the classes, and so on. FXML uses special elements and attribute names, which must be qualified with the “fx” namespace prefix. Optionally, you can append the version of the FXML in the namespace URI. The FXML parser will verify that it can parse the specified.
The following FXML declares the “fx” namespace prefix.
<VBox xmlns:fx="http://javafx.com/fxml/1" xmlns="http://javafx.com/javafx/2.2">...</VBox>
1.6 Assigning an Identifier to an Object
An object created in FXML can be referred to somewhere else in the same document. It is common to get the reference of UI objects created in FXML inside the JavaFX code. You can achieve this by first identifying the objects in FXML with an fx:id attribute. The value of the fx:id attribute is the identifier for the object. If the object type has an id property, the value will be also set for the property. Note that each Node in JavaFX has an id property that can be used to refer to them in CSS. The following is an example of specifying the fx:id attribute for a Label.
<Label fx:id="inputLbl"/>
1.7 The Corresponding Java Class
FxFXMLExample1.java
import java.io.FileInputStream;
import java.io.IOException;

import javafx.application.Application;
import javafx.fxml.FXMLLoader;
import javafx.scene.Scene;
import javafx.scene.layout.VBox;
import javafx.stage.Stage;

public class FxFXMLExample1 extends Application
{
	public static void main(String[] args)
	{
		Application.launch(args);
	}

	@Override
	public void start(Stage stage) throws IOException
	{
		// Create the FXMLLoader
		FXMLLoader loader = new FXMLLoader();
		// Path to the FXML File
		String fxmlDocPath = "Path-To-Your-FXML-Files/FxFXMLExample1.fxml";
		FileInputStream fxmlStream = new FileInputStream(fxmlDocPath);

		// Create the Pane and all Details
		VBox root = (VBox) loader.load(fxmlStream);

		// Create the Scene
		Scene scene = new Scene(root);
		// Set the Scene to the Stage
		stage.setScene(scene);
		// Set the Title to the Stage
		stage.setTitle("A simple FXML Example");
		// Display the Stage
		stage.show();
	}
}
An FXML document defines the view part (the GUI) of a JavaFX application. You need to load the FXML document to get the object-graph it represents. Loading an FXML is performed by an instance of the FXMLLoader class. The FXMLLoader class provides several constructors that let you specify the location, charset, resource bundle, and other elements to be used for loading the document. FXMLLoader supports loading a FXML document using an InputStream. The following snippet of code loads the same FXML document using an InputStream.
// Create the FXMLLoader
FXMLLoader loader = new FXMLLoader();
// Path to the FXML File
String fxmlDocPath = "Path-To-Your-FXML-Files/FxFXMLExample1.fxml";
FileInputStream fxmlStream = new FileInputStream(fxmlDocPath);
Internally, the FXMLLoader reads the document using streams, which may throw an IOException. All versions of the load() method in FXMLLoader class throw IOException. In your application, you will need to handle the exception. The FXMLLoader class contains several versions of the load() method. Some of them are instance methods and some static methods. You need to create an FXMLLoader instance and use the instance load() method, if you want to retrieve more information from the loader, such as the controller reference, resource bundle, the location, charset, and root object.
// Create the Pane and all Details
VBox root = (VBox) loader.load(fxmlStream);
What do you do next after loading an FXML document? The loader returns a VBox, which is set as the root for the Scene. The rest of the code is the same as you have been using except for one difference in the declaration of the start() method. The method declares that it may throw an IOException, which you had to add because you have called the load() method of the FXMLLoader inside the method.
// Create the Scene
Scene scene = new Scene(root);
// Set the Scene to the Stage
stage.setScene(scene);
// Set the Title to the Stage
stage.setTitle("A simple FXML Example");
// Display the Stage
stage.show();
1.8 The GUI
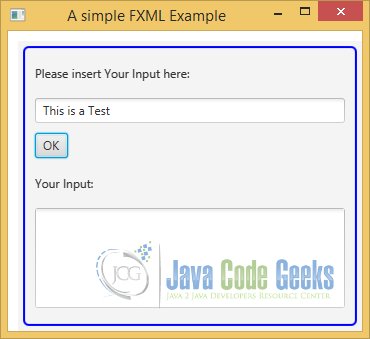
The following mage shows the application after starting. But at this time, a click on the OK-Button has no effect. The reason for this behaviour is the fact, that we have not defined an EventHandler at this time.
2. Using Script Event Handlers
2.1 The FXML Code
FxFXMLExample2.fxml
<?xml version="1.0" encoding="UTF-8"?>
<?language JavaScript?>

<?import javafx.scene.control.*?>
<?import javafx.scene.layout.*?>

<VBox fx:id="vbox" layoutX="10.0" layoutY="10.0" prefHeight="250.0" prefWidth="300.0" spacing="10" xmlns:fx="http://javafx.com/fxml/1" xmlns="http://javafx.com/javafx/2.2">
  <style>
	-fx-padding: 10;
	-fx-border-style: solid inside;
	-fx-border-width: 2;
	-fx-border-insets: 5;
	-fx-border-radius: 5;
	-fx-border-color: blue;
  </style>
  <children>
    <Label fx:id="inputLbl" alignment="CENTER_LEFT" cache="true" cacheHint="SCALE" prefHeight="30.0" prefWidth="200.0" text="Please insert Your Input here:" textAlignment="LEFT" />
    <TextField fx:id="inputText" prefWidth="100.0" />
    <Button fx:id="okBtn" alignment="CENTER_RIGHT" contentDisplay="CENTER" mnemonicParsing="false" onAction="printOutput();" text="OK" textAlignment="CENTER" />
    <Label fx:id="outputLbl" alignment="CENTER_LEFT" cache="true" cacheHint="SCALE" prefHeight="30.0" prefWidth="200.0" text="Your Input:" textAlignment="LEFT" />
    <TextArea fx:id="outputText" prefHeight="100.0" prefWidth="200.0" wrapText="true" />
    <fx:script>
		function printOutput()
		{
			outputText.setText(inputText.getText());
		}
	</fx:script>
  </children>
</VBox>
You can set event handlers for nodes in FXML. Setting an event handler is similar to setting any other properties. In FXML, you can specify two types of event handlers:
- Script Event Handlers
- Controller Event Handlers
In this chapter we will discuss Script Event Handlers. The Controller Event Handlers will be discussed in the following chapter.
The script event handler is used when the event handler is defined in a scripting language. The value of the attribute is the script itself, such as a function call or one or more statements. The following snippet of FXML sets the ActionEvent handler for a Button that calls the printOutput() function defined using JavaScript.
<?language JavaScript?>

<fx:script>
	function printOutput()
	{
		outputText.setText(inputText.getText());
	}
</fx:script>
If you want to execute the function printOutput() when the Button is clicked, you can set the event handler as:
<Button fx:id="okBtn" onAction="printOutput();" text="OK" textAlignment="CENTER" />
2.2 The Corresponding Java Class
FxFXMLExample2.java
import java.io.FileInputStream;
import java.io.IOException;

import javafx.application.Application;
import javafx.fxml.FXMLLoader;
import javafx.scene.Scene;
import javafx.scene.layout.VBox;
import javafx.stage.Stage;

public class FxFXMLExample2 extends Application
{
	public static void main(String[] args)
	{
		Application.launch(args);
	}

	@Override
	public void start(Stage stage) throws IOException
	{
		// Create the FXMLLoader
		FXMLLoader loader = new FXMLLoader();
		// Path to the FXML File
		String fxmlDocPath = "Path-To-Your-FXML-Files/FxFXMLExample2.fxml";
		FileInputStream fxmlStream = new FileInputStream(fxmlDocPath);

		// Create the Pane and all Details
		VBox root = (VBox) loader.load(fxmlStream);

		// Create the Scene
		Scene scene = new Scene(root);
		// Set the Scene to the Stage
		stage.setScene(scene);
		// Set the Title to the Stage
		stage.setTitle("A FXML Example with a Script Event Handler");
		// Display the Stage
		stage.show();

	}
}
2.3 The GUI
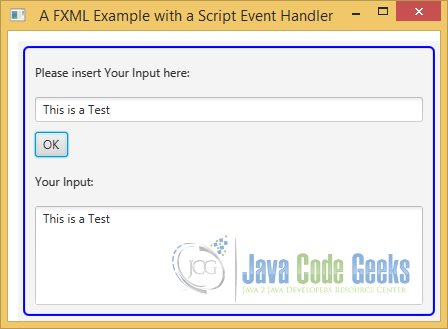
The following image shows the result of our program after inserting a Text in the TextField and pressing the Button “OK”:
3. Using Controller Event Handlers
3.1 The FXML Code
FxFXMLExample3.fxml
<?xml version="1.0" encoding="UTF-8"?>

<?import javafx.scene.control.*?>
<?import javafx.scene.layout.*?>

<VBox fx:id="vbox" layoutX="10.0" layoutY="10.0" prefHeight="250.0" prefWidth="300.0" spacing="10" xmlns:fx="http://javafx.com/fxml/1" xmlns="http://javafx.com/javafx/2.2" fx:controller="FxFXMLController">
  <style>
	-fx-padding: 10;
	-fx-border-style: solid inside;
	-fx-border-width: 2;
	-fx-border-insets: 5;
	-fx-border-radius: 5;
	-fx-border-color: blue;
  </style>
  <children>
    <Label fx:id="inputLbl" alignment="CENTER_LEFT" cache="true" cacheHint="SCALE" prefHeight="30.0" prefWidth="200.0" text="Please insert Your Input here:" textAlignment="LEFT" />
    <TextField fx:id="inputText" prefWidth="100.0" />
    <Button fx:id="okBtn" alignment="CENTER_RIGHT" contentDisplay="CENTER" mnemonicParsing="false" onAction="#printOutput" text="OK" textAlignment="CENTER" />
    <Label fx:id="outputLbl" alignment="CENTER_LEFT" cache="true" cacheHint="SCALE" prefHeight="30.0" prefWidth="200.0" text="Your Input:" textAlignment="LEFT" />
    <TextArea fx:id="outputText" prefHeight="100.0" prefWidth="200.0" wrapText="true" />
  </children>
</VBox>
A controller is simply a class name whose object is created by FXML and used to initialize the UI elements. FXML lets you specify a controller on the root element using the fx:controller attribute. Note that only one controller is allowed per FXML document, and if specified, it must be specified on the root element. The following FXML specifies a controller for the VBox element.
<VBox fx:id="vbox" xmlns:fx="http://javafx.com/fxml/1" xmlns="http://javafx.com/javafx/2.2" fx:controller="FxFXMLController">
A controller needs to conform to some rules and it can be used for different reasons:
- The controller is instantiated by the FXML loader.
- The controller must have a public no-args constructor. If it does not exist, the FXML loader will not be able to instantiate it, which will throw an exception at the load time.
- The controller can have accessible methods, which can be specified as event handlers in FXML.
- The FXML loader will automatically look for accessible instance variables of the controller. If the name of an accessible instance variable matches the fx:id attribute of an element, the object reference from FXML is automatically copied into the controller instance variable. This feature makes the references of UI elements in FXML available to the controller. The controller can use them later, such as binding them to model.
- The controller can have an accessible initialize() method, which should take no arguments and have a return type of void. The FXML loader will call the initialize() method after the loading of the FXML document is complete.
3.2 The Controller Class
FxFXMLController.java
import java.net.URL;
import java.util.ResourceBundle;

import javafx.fxml.FXML;
import javafx.scene.control.TextArea;
import javafx.scene.control.TextField;

public class FxFXMLController
{
	@FXML
	// The reference of inputText will be injected by the FXML loader
	private TextField inputText;

	// The reference of outputText will be injected by the FXML loader
	@FXML
	private TextArea outputText;

	// location and resources will be automatically injected by the FXML loader
	@FXML
	private URL location;

	@FXML
	private ResourceBundle resources;

	// Add a public no-args constructor
	public FxFXMLController()
	{
	}

	@FXML
	private void initialize()
	{
	}

	@FXML
	private void printOutput()
	{
		outputText.setText(inputText.getText());
	}
}
The controller class uses a @FXML annotation on some members. The @FXML annotation can be used on fields and methods. It cannot be used on classes and constructors. By using a @FXML annotation on a member, you are declaring that the FXML loader can access the member even if it is private. A public member used by the FXML loader does not need to be annotated with @FXML. However, annotating a public member with @FXML is not an error. It is better to annotate all members, public and private, used by the FXML loader with the @FXML annotation. This tells the reader of your code how the members are being used.
The following FXML sets the printOutput() method of the controller class as the event handler for the Button:
<VBox fx:id="vbox" layoutX="10.0" layoutY="10.0" prefHeight="250.0" prefWidth="300.0" spacing="10" xmlns:fx="http://javafx.com/fxml/1" xmlns="http://javafx.com/javafx/2.2" fx:controller="FXFXML.FxFXMLController">

<Button fx:id="okBtn" alignment="CENTER_RIGHT" contentDisplay="CENTER" mnemonicParsing="false" onAction="#printOutput" text="OK" textAlignment="CENTER" />
There are two special instance variables that can be declared in the controller and they are automatically injected by the FXML loader:
- @FXML private URL location;
- @FXML private ResourceBundle resources;
The location is the location of the FXML document. The resources is the reference of the ResourceBundle. When the event handler attribute value starts with a hash symbol (#), it indicates to the FXML loader that printOutput() is the method in the controller, not in a script.
The event handler method in the controller should conform to some rules:
- The method may take no arguments or a single argument. If it takes an argument, the argument type must be a type assignment compatible with the event it is supposed to handle.
- Conventionally, the method return type should be void, because there is no taker of the returned value.
- The method must be accessible to the FXML loader: make it public or annotate it with @FXML.
- When the FXML loader is done loading the FXML document, it calls the initialize() method of the controller. The method should not take any argument. It should be accessible to the FXML loader. In the controller, you used the @FXML annotation to make it accessible to the FXML loader.
3.3 The Corresponding Java Class
FxFXMLExample3.java
import java.io.FileInputStream;
import java.io.IOException;

import javafx.application.Application;
import javafx.fxml.FXMLLoader;
import javafx.scene.Scene;
import javafx.scene.layout.VBox;
import javafx.stage.Stage;

public class FxFXMLExample3 extends Application
{
	public static void main(String[] args)
	{
		Application.launch(args);
	}

	@Override
	public void start(Stage stage) throws IOException
	{
		// Create the FXMLLoader
		FXMLLoader loader = new FXMLLoader();
		// Path to the FXML File
		String fxmlDocPath = "Path-To-Your-FXML-Files/FxFXMLExample3.fxml";
		FileInputStream fxmlStream = new FileInputStream(fxmlDocPath);

		// Create the Pane and all Details
		VBox root = (VBox) loader.load(fxmlStream);

		// Create the Scene
		Scene scene = new Scene(root);
		// Set the Scene to the Stage
		stage.setScene(scene);
		// Set the Title to the Stage
		stage.setTitle("A FXML Example with a Controller");
		// Display the Stage
		stage.show();

	}
}
3.4 The GUI
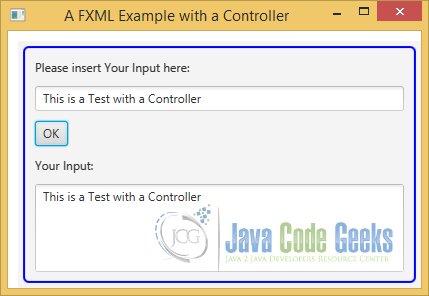
The following image shows the result of our program:
4. Including FXML Files
4.1 The FXML Code
In this example the FXML Code is divided into three FXML Files.
A separate FXML File for creating a Label:
FxFXMLLabel.fxml
<?import javafx.scene.control.*?>
<?import java.lang.Integer?>

<Label alignment="CENTER_LEFT" cache="true" cacheHint="SCALE" prefHeight="30.0" prefWidth="200.0" textAlignment="$position" />
A separate FXML File for creating a Button:
FxFXMLButton.fxml
<?import javafx.scene.control.*?>

<Button alignment="CENTER_RIGHT" contentDisplay="CENTER" mnemonicParsing="false" textAlignment="CENTER" />
And at least, the main FXML File:
FxFXMLExample4.fxml
<?xml version="1.0" encoding="UTF-8"?>

<?import javafx.scene.control.*?>
<?import javafx.scene.layout.*?>

<VBox fx:id="vbox" layoutX="10.0" layoutY="10.0" prefHeight="250.0" prefWidth="300.0" spacing="10" xmlns:fx="http://javafx.com/fxml/1" xmlns="http://javafx.com/javafx/2.2" fx:controller="FXFXML.FxFXMLController">
  <style>
	-fx-padding: 10;
	-fx-border-style: solid inside;
	-fx-border-width: 2;
	-fx-border-insets: 5;
	-fx-border-radius: 5;
	-fx-border-color: blue;
  </style>
  <children>
    <fx:include source="/FXFXML/FxFXMLLabel.fxml" fx:id="inputLbl" text="Please insert Your Input here:"/>
    <TextField fx:id="inputText" prefWidth="100.0" />
    <fx:include source="/FXFXML/FxFXMLButton.fxml" fx:id="okBtn" text="OK" onAction="#printOutput" />
    <fx:include source="/FXFXML/FxFXMLLabel.fxml" fx:id="outputLbl" text="Your Input:"/>
    <TextArea fx:id="outputText" prefHeight="100.0" prefWidth="100.0" />
  </children>
</VBox>
An FXML document can include another FXML document using the <fx:include> element. The objectgraph generated by the nested document is included at the position where the nested document occurs in the containing document. The <fx:include> element takes a source attribute whose value is the path of the nested document.
<fx:include source="/FXFXML/FxFXMLLabel.fxml" fx:id="inputLbl" text="Please insert Your Input here:"/>
If the nested document path starts with a leading forward slash, the path is resolved relative to the CLASSPATH. Otherwise, it is resolved related to the containing document path. The <fx:include> element can have the fx:id attribute and all attributes that are available for the included object. The attributes specified in the containing document override the corresponding attributes in the included document.
For example, if you include an FXML document, which creates a Label, you can specify the text property in the included document as well as the containing document. When the containing document is loaded, the text property from the containing document will be used.
<fx:include source="/FXFXML/FxFXMLLabel.fxml" fx:id="inputLbl" text="Please insert Your Input here:"/>
For example, if you include an FXML document, which creates a Button, you can specify the text property in the included document as well as the containing document. When the containing document is loaded, the text property from the containing document will be used.
<fx:include source="/FXFXML/FxFXMLButton.fxml" fx:id="okBtn" text="OK" onAction="#printOutput" />
An FXML document may optionally specify a controller using the fx:controller attribute for the root element. The rule is that you can have maximum of one controller per FXML document. When you nest documents, each document can have its own controller.
<VBox fx:id="vbox" layoutX="10.0" layoutY="10.0" prefHeight="250.0" prefWidth="300.0" spacing="10" xmlns:fx="http://javafx.com/fxml/1" xmlns="http://javafx.com/javafx/2.2" fx:controller="FXFXML.FxFXMLController">
4.2 The Corresponding Java Class
import java.io.FileInputStream;
import java.io.IOException;

import javafx.application.Application;
import javafx.fxml.FXMLLoader;
import javafx.scene.Scene;
import javafx.scene.layout.VBox;
import javafx.stage.Stage;

public class FxFXMLExample4 extends Application
{
	public static void main(String[] args)
	{
		Application.launch(args);
	}

	@Override
	public void start(Stage stage) throws IOException
	{
		// Create the FXMLLoader
		FXMLLoader loader = new FXMLLoader();
		// Path to the FXML File
		String fxmlDocPath = "Path-To-Your-FXML-Files/FxFXMLExample4.fxml";
		FileInputStream fxmlStream = new FileInputStream(fxmlDocPath);

		// Create the Pane and all Details
		VBox root = (VBox) loader.load(fxmlStream);

		// Create the Scene
		Scene scene = new Scene(root);
		// Set the Scene to the Stage
		stage.setScene(scene);
		// Set the Title to the Stage
		stage.setTitle("A FXML Example which includes FXML Files");
		// Display the Stage
		stage.show();
	}
}
4.3 The GUI
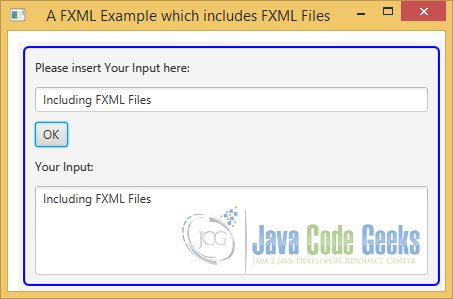
The following image shows the GUI of the above example. It loads the FxFXMLExample4.fxml and adds the loaded VBox to the Scene. It displays a window with the OK Button from the FxFXMLButton.fxml file and the labels are loaded from the FxFXMLLabel.fxml file.
5. Reusable Objects and Referencing Another Element
5.1 The FXML Code
FxFXMLExample5.fxml
<?import javafx.scene.layout.VBox?>
<?import javafx.scene.image.Image?>
<?import javafx.scene.image.ImageView?>

<VBox fx:id="vbox" layoutX="10.0" layoutY="10.0" prefHeight="250.0" prefWidth="300.0" spacing="10" xmlns:fx="http://javafx.com/fxml/1" xmlns="http://javafx.com/javafx/2.2" >
	<fx:define>
		<Image url="/FXFXML/JavaFx.jpg" fx:id="javaImg"/>
	</fx:define>
	<children>
    	<fx:include source="/FXFXML/FxFXMLLabel.fxml" fx:id="javaLbl" text="The JavaFX Image:"/>
		<ImageView fx:id="view">
			<image>
				<fx:reference source="javaImg"/>
			</image>
		</ImageView>
	</children>
</VBox>
5.2 Creating Reusable Objects in FXML
Sometimes, you need to create objects that are not directly part of the object-graph. However, they may be used somewhere else in the FXML document. You can create an object in FXML without making it part of the object-group using the <fx:define> block. You can refer to the objects created in the block by their fx:id in the attribute value of other elements. The attribute value must be prefixed with a dollar symbol ($).
<fx:define>
	<Image url="/FXFXML/JavaFx.jpg" fx:id="javaImg"/>
</fx:define>
5.3 Referencing Another Element
You can reference another element in the document using the <fx:reference> element. The fx:id attribute specifies the fx:id of the referred element. <fx:reference source="fx:id of the source element"/>
The following FXML content uses an <fx:reference> element to refer to an Image.
<ImageView fx:id="view">
	<image>
		<fx:reference source="javaImg"/>
	</image>
</ImageView>
5.4 The Corresponding Java Class
FxFXMLExample5.java
import java.io.FileInputStream;
import java.io.IOException;

import javafx.application.Application;
import javafx.fxml.FXMLLoader;
import javafx.scene.Scene;
import javafx.scene.layout.VBox;
import javafx.stage.Stage;

public class FxFXMLExample5 extends Application
{
	public static void main(String[] args)
	{
		Application.launch(args);
	}

	@Override
	public void start(Stage stage) throws IOException
	{
		// Create the FXMLLoader
		FXMLLoader loader = new FXMLLoader();
		// Path to the FXML File
		String fxmlDocPath = "Path-To-Your-FXML-Files/FxFXMLExample5.fxml";
		FileInputStream fxmlStream = new FileInputStream(fxmlDocPath);

		// Create the Pane and all Details
		VBox root = (VBox) loader.load(fxmlStream);

		// Create the Scene
		Scene scene = new Scene(root);
		// Set the Scene to the Stage
		stage.setScene(scene);
		// Set the Title to the Stage
		stage.setTitle("A FXML Example with Reuseable Objects");
		// Display the Stage
		stage.show();
	}
}
5.5 The GUI
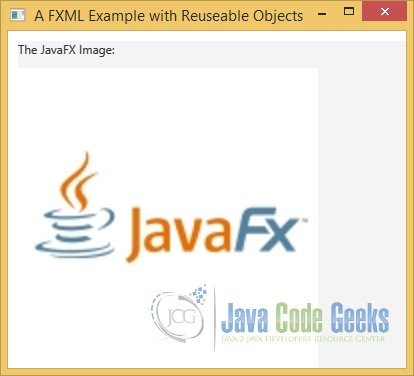
In the following GUI, you can see the effect of using a referenced element in FXML:
6. Using Constants
6.1 The FXML Code
FxFXMLExample6.fxml
<?xml version="1.0" encoding="UTF-8"?>
<?language JavaScript?>

<?import javafx.scene.control.*?>
<?import javafx.scene.layout.*?>
<?import javafx.geometry.Pos?>

<VBox fx:id="vbox" layoutX="10.0" layoutY="10.0" prefHeight="250.0" prefWidth="300.0" spacing="10" xmlns:fx="http://javafx.com/fxml/1" xmlns="http://javafx.com/javafx/2.2" fx:controller="FXFXML.FxFXMLController">
  <style>
	-fx-padding: 10;
	-fx-border-style: solid inside;
	-fx-border-width: 2;
	-fx-border-insets: 5;
	-fx-border-radius: 5;
	-fx-border-color: blue;
  </style>
  	<alignment><Pos fx:constant="CENTER" fx:id="alignCenter"/></alignment>
  <children>
    <Label fx:id="inputLbl" alignment="$alignCenter" cache="true" cacheHint="SCALE" prefHeight="30.0" prefWidth="200.0" text="Please insert Your Input here:" />
    <TextField fx:id="inputText" prefWidth="100.0" />
    <Button fx:id="okBtn" alignment="$alignCenter" mnemonicParsing="false" onAction="#printOutput" text="OK" />
    <Label fx:id="outputLbl" alignment="$alignCenter" cache="true" cacheHint="SCALE" prefHeight="30.0" prefWidth="200.0" text="Your Input:" />
    <TextArea fx:id="outputText" prefHeight="100.0" prefWidth="200.0" wrapText="true" />
  </children>
</VBox>
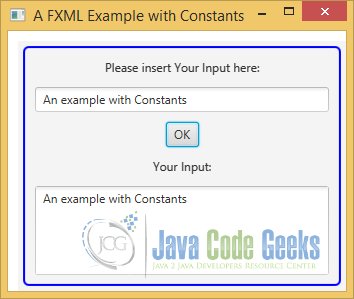
Classes, interfaces, and enums may define constants, which are static, final variables. You can refer to those constants using the fx:constant attribute. The attribute value is the name of the constant. The name of the element is the name of the type that contains the constant.
Note that all enum constants belong to this category and they can be accessed using the fx:constant attribute. The following element accesses the Pos.CENTER enum constant.
<alignment><Pos fx:constant="CENTER" fx:id="alignCenter"/></alignment>
6.2 The Corresponding Java Class
FxFXMLExample6.java
import java.io.FileInputStream;
import java.io.IOException;

import javafx.application.Application;
import javafx.fxml.FXMLLoader;
import javafx.scene.Scene;
import javafx.scene.layout.VBox;
import javafx.stage.Stage;

public class FxFXMLExample6 extends Application
{
	public static void main(String[] args)
	{
		Application.launch(args);
	}

	@Override
	public void start(Stage stage) throws IOException
	{
		// Create the FXMLLoader
		FXMLLoader loader = new FXMLLoader();
		// Path to the FXML File
		String fxmlDocPath = "Path-To-Your-FXML-Files/FxFXMLExample6.fxml";
		FileInputStream fxmlStream = new FileInputStream(fxmlDocPath);

		// Create the Pane and all Details
		VBox root = (VBox) loader.load(fxmlStream);

		// Create the Scene
		Scene scene = new Scene(root);
		// Set the Scene to the Stage
		stage.setScene(scene);
		// Set the Title to the Stage
		stage.setTitle("A FXML Example with Constants");
		// Display the Stage
		stage.show();
	}
}
6.3 The GUI
The following GUI represents the effect of the usage of the constant alignCenter:
7. Binding Properties
7.1 The FXML Code
FxFXMLExample7.fxml
<?xml version="1.0" encoding="UTF-8"?>

<?import javafx.scene.control.*?>
<?import javafx.scene.layout.*?>

<VBox fx:id="vbox" layoutX="10.0" layoutY="10.0" prefHeight="250.0" prefWidth="300.0" spacing="10" xmlns:fx="http://javafx.com/fxml/1" xmlns="http://javafx.com/javafx/2.2" >
  <style>
	-fx-padding: 10;
	-fx-border-style: solid inside;
	-fx-border-width: 2;
	-fx-border-insets: 5;
	-fx-border-radius: 5;
	-fx-border-color: blue;
  </style>
  <children>
    <fx:include source="/FXFXML/FxFXMLLabel.fxml" fx:id="inputLbl" text="Please insert Your Input here:"/>
    <TextField fx:id="inputText" prefWidth="100.0" />
    <fx:include source="/FXFXML/FxFXMLLabel.fxml" fx:id="outputLbl" text="Your Input:"/>
    <TextArea fx:id="outputText" text="${inputText.text}" prefHeight="100.0" prefWidth="100.0" />
  </children>
</VBox>
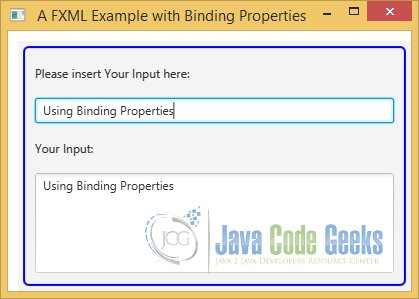
FXML supports simple property bindings. You need to use an attribute for the property to bind it to the property of another element or a document variable. The attribute value starts with a $ symbol, which is followed with a pair of curly braces.
The following FXML content creates a VBox with two TextFields. The text property of the outputText field is bound to the text property of the inputText field.
<TextArea fx:id="outputText" text="${inputText.text}" prefHeight="100.0" prefWidth="100.0" />
7.2 The Corresponding Java Class
FxFXMLExample7.java
import java.io.FileInputStream;
import java.io.IOException;

import javafx.application.Application;
import javafx.fxml.FXMLLoader;
import javafx.scene.Scene;
import javafx.scene.layout.VBox;
import javafx.stage.Stage;

public class FxFXMLExample7 extends Application
{
	public static void main(String[] args)
	{
		Application.launch(args);
	}

	@Override
	public void start(Stage stage) throws IOException
	{
		// Create the FXMLLoader
		FXMLLoader loader = new FXMLLoader();
		// Path to the FXML File
		String fxmlDocPath = "Path-To-Your-FXML-Files/FxFXMLExample7.fxml";
		FileInputStream fxmlStream = new FileInputStream(fxmlDocPath);

		// Create the Pane and all Details
		VBox root = (VBox) loader.load(fxmlStream);

		// Create the Scene
		Scene scene = new Scene(root);
		// Set the Scene to the Stage
		stage.setScene(scene);
		// Set the Title to the Stage
		stage.setTitle("A FXML Example with Binding Properties");
		// Display the Stage
		stage.show();
	}
}
7.3 The GUI
In the following GUI the text from the TextField will be direct copied to the TextArea:
8. Using Resource Bundles
8.1 The FXML Code
FxFXMLExample8.fxml
<?xml version="1.0" encoding="UTF-8"?>
<?language JavaScript?>

<?import javafx.scene.control.*?>
<?import javafx.scene.layout.*?>
<?import javafx.geometry.Pos?>

<VBox fx:id="vbox" layoutX="10.0" layoutY="10.0" prefHeight="250.0" prefWidth="300.0" spacing="10" xmlns:fx="http://javafx.com/fxml/1" xmlns="http://javafx.com/javafx/2.2" fx:controller="FXFXML.FxFXMLController">
  <style>
	-fx-padding: 10;
	-fx-border-style: solid inside;
	-fx-border-width: 2;
	-fx-border-insets: 5;
	-fx-border-radius: 5;
	-fx-border-color: blue;
  </style>
  	<alignment><Pos fx:constant="CENTER_LEFT" fx:id="alignCenter"/></alignment>
  <children>
    <Label fx:id="inputLbl" alignment="$alignCenter" cache="true" cacheHint="SCALE" prefHeight="30.0" prefWidth="200.0" text="%input" />
    <TextField fx:id="inputText" prefWidth="100.0" />
    <Button fx:id="okBtn" alignment="$alignCenter" mnemonicParsing="false" onAction="#printOutput" text="OK" />
    <Label fx:id="outputLbl" alignment="$alignCenter" cache="true" cacheHint="SCALE" prefHeight="30.0" prefWidth="200.0" text="%output" />
    <TextArea fx:id="outputText" prefHeight="100.0" prefWidth="200.0" wrapText="true" />
  </children>
</VBox>
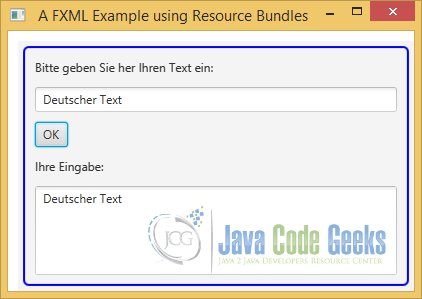
Using a ResourceBundle in FXML is much easier than using it in Java code. Specifying the keys from a ResourceBundle in attribute values uses the corresponding values for the default Locale. If an attribute value starts with a % symbol, it is considered as the key name from the resource bundle.
At runtime, the attribute value will come from the specified ResourceBundle in the FXMLLoader. If you want to use a leading % symbol in an attribute value, escape it with a backward slash (e.g., “\%key”).
Our example uses “%input” and “%output” as the value for the text property of the Label. The attribute value starts with a % symbol. The FXMLLoader will look up the value of the “input” and “output” in the ResourceBundle and use it for the text property.
<Label fx:id="inputLbl" alignment="$alignCenter" cache="true" cacheHint="SCALE" prefHeight="30.0" prefWidth="200.0" text="%input" />
<Label fx:id="outputLbl" alignment="$alignCenter" cache="true" cacheHint="SCALE" prefHeight="30.0" prefWidth="200.0" text="%output" />
8.2 The Properties Files for the Resource Bundles
In our example, we are using three ResourceBundle files: one for default Locale named Labels.properties, one for the German Locale named Labels_de.properties and one for the English Locale named Labels_en.properties:
Labels.properties
input=Input:
output=Output:
Labels_de.properties
input=Bitte geben Sie her Ihren Text ein:
output=Ihre Eingabe:
Labels_en.properties
input=Please insert Your Input here:
output=Your Input:
8.2 The Corresponding Java Class
FxFXMLExample8.java
import java.io.IOException;
import java.util.Locale;
import java.util.ResourceBundle;

import javafx.application.Application;
import javafx.fxml.FXMLLoader;
import javafx.scene.Scene;
import javafx.scene.layout.VBox;
import javafx.stage.Stage;

public class FxFXMLExample8 extends Application
{
	public static void main(String[] args)
	{
		Application.launch(args);
	}

	@Override
	public void start(Stage stage) throws IOException
	{
		FXMLLoader fxmlLoader = new FXMLLoader();
        fxmlLoader.setResources(ResourceBundle.getBundle("FXFXML.Labels", new Locale("de")));
        VBox root = (VBox) fxmlLoader.load(this.getClass().getResource("FxFXMLExample8.fxml").openStream());
        // replace the content
		// Create the Scene
		Scene scene = new Scene(root);
		// Set the Scene to the Stage
		stage.setScene(scene);
		// Set the Title to the Stage
		stage.setTitle("A FXML Example using Resource Bundles");
		// Display the Stage
		stage.show();
	}
}
8.3 The GUI
The following GUI shows the effect of using a ResourceBundle for the German Locale:
9. Download Java Source Code
This was a JavaFX FXML Tutorial.
You can download the full source code of this example here: JavaFxFXMLTutorial.zip



Refer this channel for java fxml tutorials
https://www.youtube.com/channel/UCy7h_BhQIXkX-lbu_Cd9jRw
this is so helping. thanks