IntelliJ IDEA Remove Project Example
1. Introduction
In this post, we feature a comprehensive Example on IntelliJ IDEA Remove Project. IntelliJ IDEA is a Java integrated development environment (IDE) developed by JetBrains (formerly known as IntelliJ). It is one of the leading IDE softwares that provides comprehensive facilities to the programmer fraternity for software development. It has number of features e.g. code completion, refactoring, code compilation and execution, navigation among project files, integration with version control systems like Git, Mercurial, Perforce, and SVN etc. These features go a long way in boosting the productivity of developers by saving a lot of their time and minimizing the manual errors while refactoring the code.
But, sometimes, a common feature like removing an unwanted project forces the users to check all the menu options and search Internet for the way out. In this article, I am going to help you in figuring out exactly the same.
2. Technologies used
- IntelliJ IDEA 14.0.3
3. Create a simple project
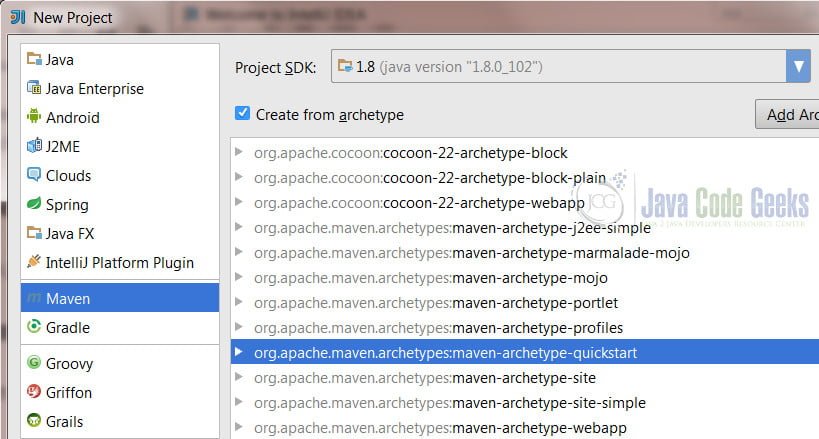
Let’s first see how can we create a new project. There are mainly 2 ways. Firstly, we can create it from the Welcome screen. Secondly, this can be done from File menu by choosing New Project. Here, I’ll follow the Welcome screen option and click on Create New Project.

IntelliJ IDEA is quite a versatile IDE and it provides plethora of options for creating various types of projects. As these options deserve to be covered separately, I’ll simply choose the Maven quickstart archetype for creating our sample project. If you are wandering about what archetype means here, it is a Maven project templating toolkit that creates a standard structure of a project for ease of development.

Click Next button and enter Maven GAV coordinate i.e. GroupId, ArtifactId and Version of your project as shown below.
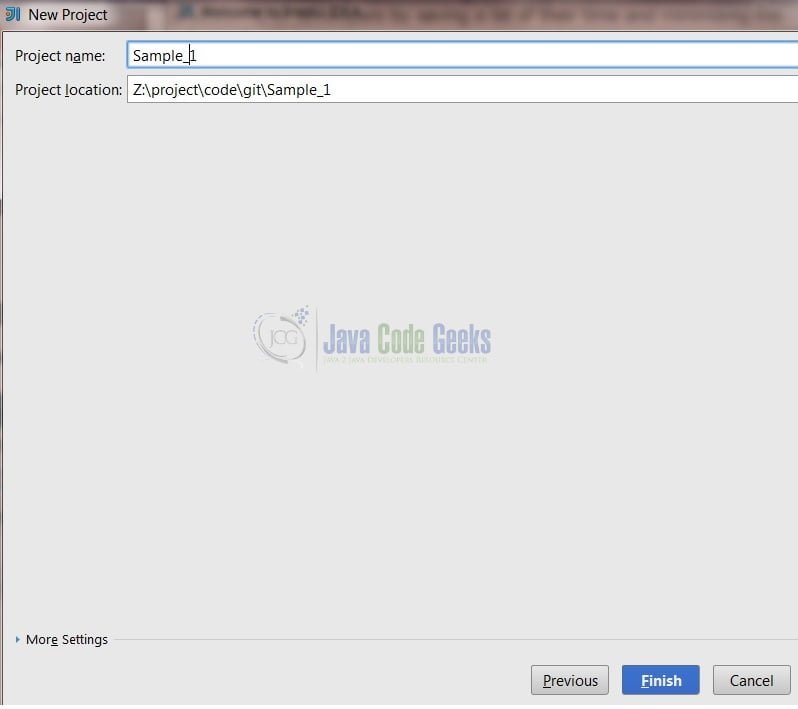
Now, enter the project name and specify the location where you want the project files to reside.
Press Finish button.
4. Removing a project from IDE
As we have created a new project, it’s time to see how this can now be removed. The below image shows the project Sample_1 that we created in the previous step.

To remove this project, first of all, you need to close this project by going to the File menu. Choose Close Project.

You will see the Welcome screen of IntelliJ IDEA after closing the project. Here, you need to highlight the project that you want to remove. You can do this by using the Up/Down arrow keys or by simply using your mouse.

Now, press DEL button (In previous versions, there was an “X” icon for doing the same action). A confirmation dialog will appear and you will need to choose either OK or Cancel.

On pressing OK, the desired project gets removed from the list of recent projects.

5. Removing a project from the disk
The above steps won’t remove the physical project files from your computer. You can delete these from disk using your favorite file manager (e.g. Explorer on Windows).
6. Summary
In the above example, I have demonstrated an IntelliJ IDEA Remove Project Example. Unlike many other powerful features of this IDE, it is not intuitive but by using the above steps, you will be able to achieve it quite easily.


