JDBC ResultSetExtractor Example
Spring provides a simplification in handling database access with the Spring JDBC Template. The org.springframework.jdbc.core.ResultSetExtractor interface is a callback interface used by JdbcTemplate’s query methods. Implementations of this interface perform the actual work of extracting results from an SQL ResultSet object.
In this article, we will try to show how the ResultSetExtractor mechanism can be applied to a Java application.
1. Introduction
In Spring JDBC development, developers can use JdbcTemplate and JdbcDaoSupport classes to simplify the overall database operation processes. Spring JdbcTemplate is a powerful mechanism to connect to the database and execute SQL queries. It internally uses JDBC API but eliminates a lot of problems of JDBC API.
The Spring JDBC Template has the following advantages compared with the standard JDBC API,
- The Spring JDBC template allows to clean-up the resources automatically, e.g. release the database connections.
- The Spring JDBC template converts the standard JDBC SQL Exceptions into
RuntimeExceptions. This allows the programmer to react more flexible to the errors. - The Spring JDBC template also converts the vendor specific error messages into better understandable error messages.
1.1 Problems of JDBC API
The problems of JDBC API are as follows:
- We need to write a lot of code before and after executing the query, such as creating
Connection,Statement, ClosingResultSet,Statement, andConnection. - We need to perform exception handling on the database logic.
- We need to handle transactions.
- Repetition of all these codes from one database logic to another is a time-consuming task.
Spring JdbcTemplate eliminates all the above-mentioned problems of JDBC API and provides methods to write the queries directly. Let’s take a look and understand the ResultSetExtractor interface.
1.2 ResultSetExtractor Interface
The org.springframework.jdbc.core.ResultSetExtractor interface can be used to fetch records from the database. It accepts a ResultSet as a method argument and returns the List. Implementation of this interface perform the actual work of extracting results from a ResultSet, but you don’t need to worry about exception handling.
SQL Exceptions will be caught and handled by the calling JdbcTemplate. This interface is mainly used within the JDBC framework itself. The org.springframework.jdbc.core.ResultSetExtractor interface defines only one method extractData that accepts ResultSet instance as a parameter. The syntax of the method is given below:
Method Signature
public List extractData(ResultSet rs) throws SQLException, DataAccessException {
	// Database Logic
}
1.3 Download and Install MySQL
You can watch this video in order to download and install the MySQL database on your windows operations system.
Now, open up the Eclipse IDE and let’s start building the application!
2. JDBC ResultSetExtractor Example
2.1 Tools Used
We are using Eclipse Kepler SR2, JDK 8, MySQL database and Maven (to download the MySQL connector and Spring libraries). Having said that, we have tested the code against JDK 1.7 and it works well.
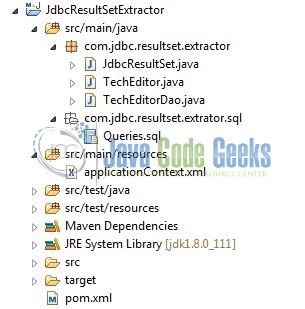
2.2 Project Structure
Firstly, let’s review the final project structure, in case you are confused about where you should create the corresponding files or folder later!
2.3 Project Creation
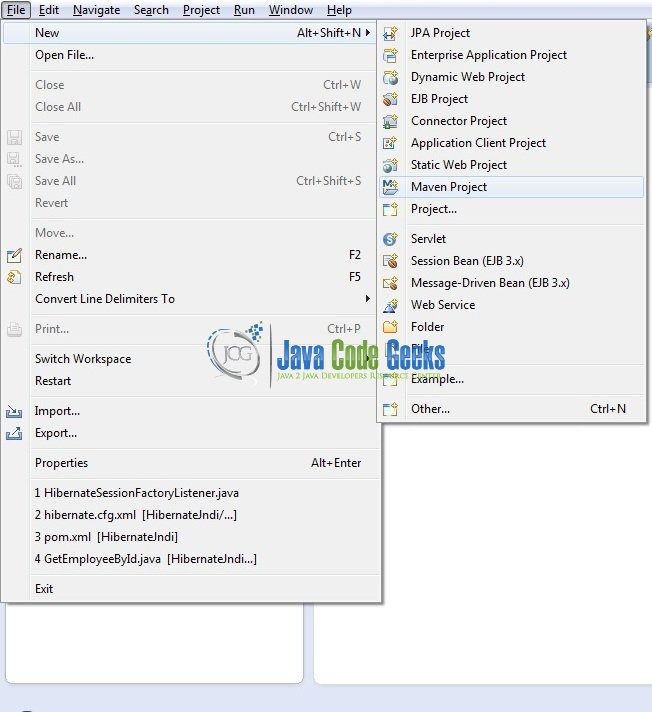
This section will demonstrate on how to create a Dynamic Web Java Maven project with Eclipse. In Eclipse IDE, go to File -> New -> Maven Project
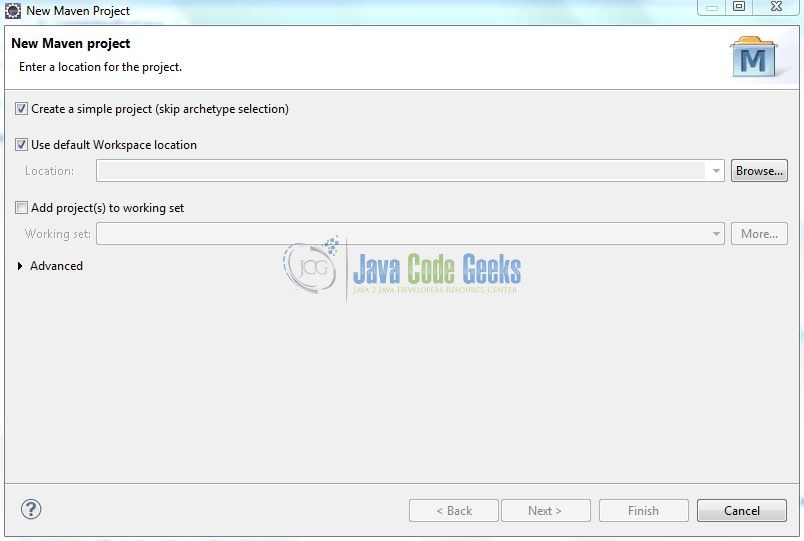
In the New Maven Project window, it will ask you to select project location. By default, ‘Use default workspace location‘ will be selected. Select the ‘Create a simple project (skip archetype selection)‘ checkbox and just click on next button to proceed.
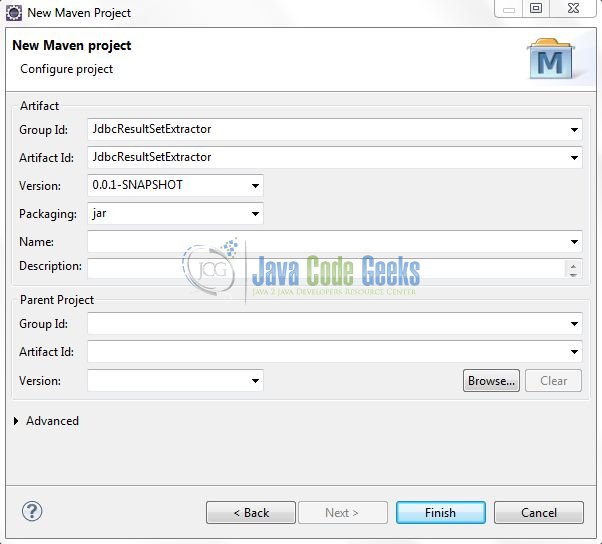
It will ask you to ‘Enter a group id for the artifact.’ We will input the details as shown in the below image. The version number will be by default 0.0.1-SNAPSHOT.
Click on Finish and now the creation of a maven project is completed. If you observe, it has downloaded the maven dependencies and a pom.xml file will be created. It will have the following code:
pom.xml
<project xmlns="http://maven.apache.org/POM/4.0.0" xmlns:xsi="http://www.w3.org/2001/XMLSchema-instance" xsi:schemaLocation="http://maven.apache.org/POM/4.0.0 http://maven.apache.org/xsd/maven-4.0.0.xsd">
	<modelVersion>4.0.0</modelVersion>
	<groupId>JdbcResultSetExtractor</groupId>
	<artifactId>JdbcResultSetExtractor</artifactId>
	<version>0.0.1-SNAPSHOT</version>
</project>
We can start adding the dependencies that developers want like MySQL, Spring Jars etc. Let’s start building the application!
3. Application Building
Below are the steps involved in developing this application:
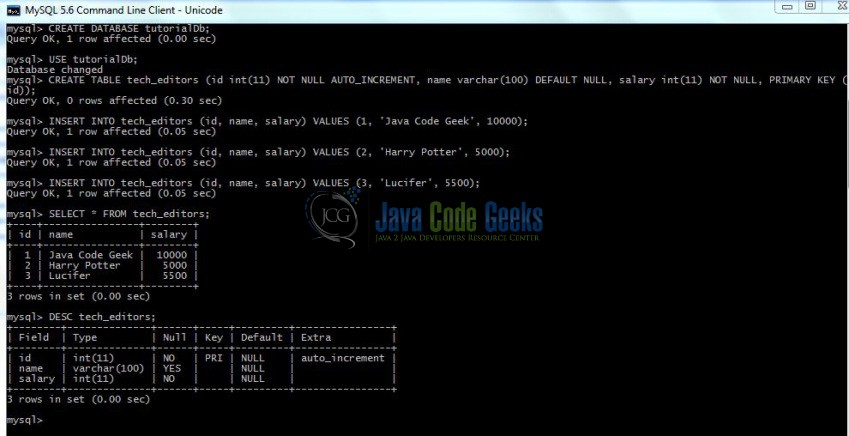
3.1 Database & Table Creation
This tutorial uses a database called tutorialDb. The database is not included when you create the project in eclipse so you first need to create the database to follow this tutorial:
- Create a new database
tutorialDbas:
CREATE DATABASE tutorialDb;
- Use the created database
tutorialDbto create table as:
USE tutorialDb;
- Create the table
tech_editorsas shown below:
CREATE TABLE tech_editors (id int(11) NOT NULL AUTO_INCREMENT, name varchar(100) DEFAULT NULL, salary int(11) NOT NULL, PRIMARY KEY (id));
- Now we shall insert some values into the
tech_editorstable as:
INSERT INTO tech_editors (id, name, salary) VALUES (1, 'Java Code Geek', 10000);

INSERT INTO tech_editors (id, name, salary) VALUES (2, 'Harry Potter', 5000);

INSERT INTO tech_editors (id, name, salary) VALUES (3, 'Lucifer', 5500);
If everything goes well, the table will be shown as below in the MySQL workbench:
3.2 Maven Dependencies
In this example, we are using latest MySQL version i.e. mysql-connector-java-5.1.41 and Spring dependencies. The updated file will have the following code:
pom.xml
<project xmlns="http://maven.apache.org/POM/4.0.0" xmlns:xsi="http://www.w3.org/2001/XMLSchema-instance" xsi:schemaLocation="http://maven.apache.org/POM/4.0.0 http://maven.apache.org/xsd/maven-4.0.0.xsd">
	<modelVersion>4.0.0</modelVersion>
	<groupId>JdbcResultSetExtractor</groupId>
	<artifactId>JdbcResultSetExtractor</artifactId>
	<version>0.0.1-SNAPSHOT</version>
	<packaging>jar</packaging>
	<dependencies>
		<dependency>
			<groupId>mysql</groupId>
			<artifactId>mysql-connector-java</artifactId>
			<version>5.1.41</version>
		</dependency>
		<dependency>
			<groupId>org.springframework</groupId>
			<artifactId>spring-jdbc</artifactId>
			<version>4.3.10.RELEASE</version>
		</dependency>
		<dependency>
			<groupId>org.springframework</groupId>
			<artifactId>spring-context</artifactId>
			<version>4.3.9.RELEASE</version>
		</dependency>
	</dependencies>
	<build>
		<finalName>${project.artifactId}</finalName>
	</build>
</project>
3.3 Java Class Creation
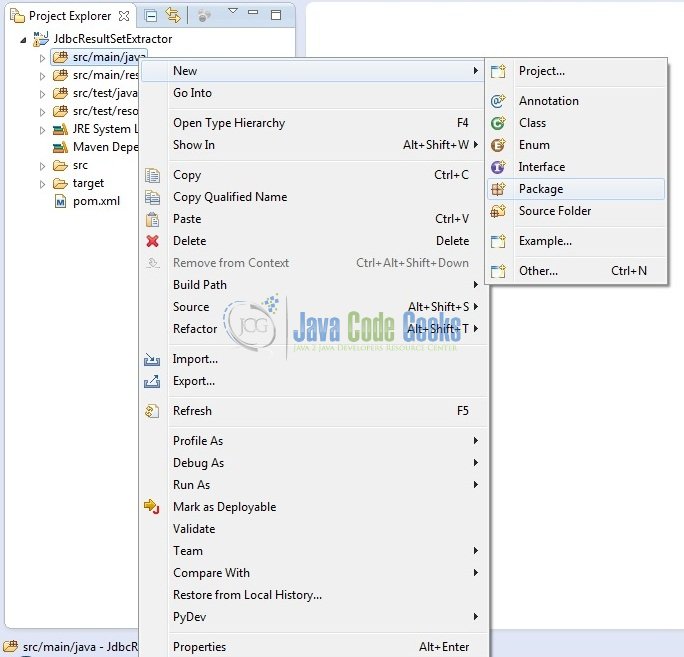
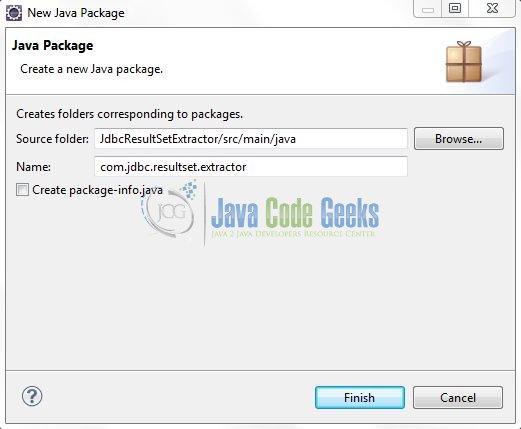
Let’s create the required java files. Right click on src/main/java folder, New -> Package.
A new pop window will open where we will enter the package name as com.jdbc.resultset.extractor.
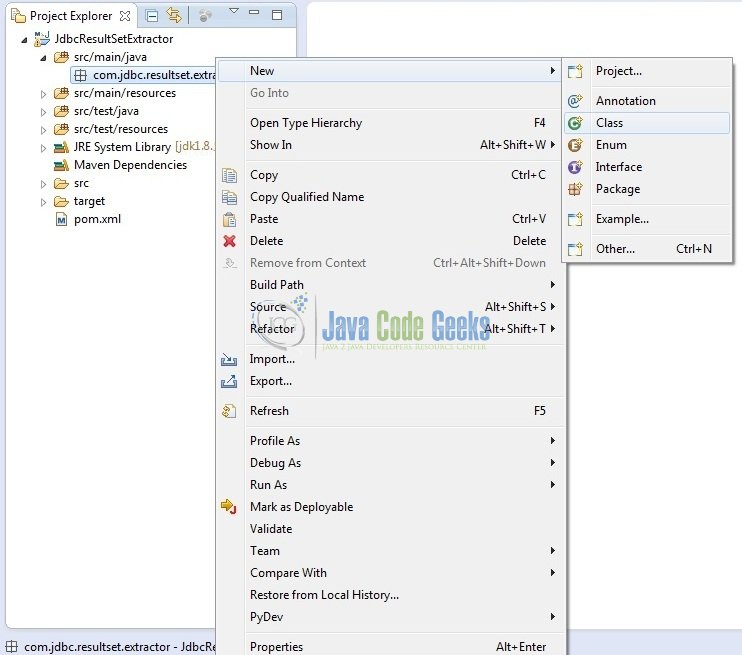
Once the package is created in the application, we will need to create the implementation class. Right click on the newly created package, New -> Class.
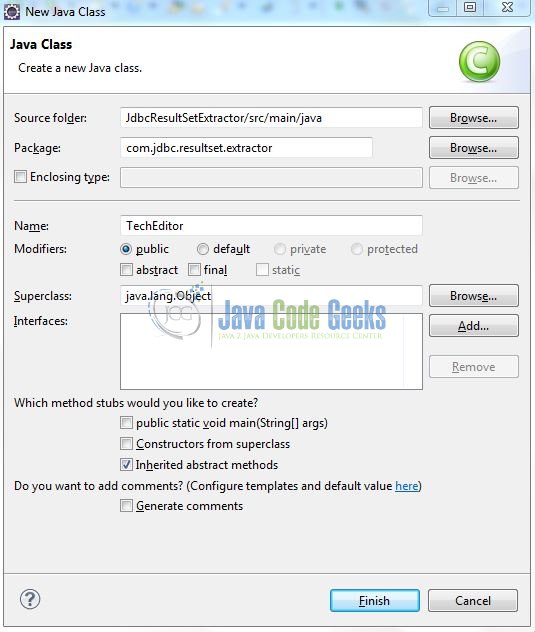
A new pop window will open and enter the file name as TechEditor. The POJO class will be created inside the package: com.jdbc.resultset.extractor.
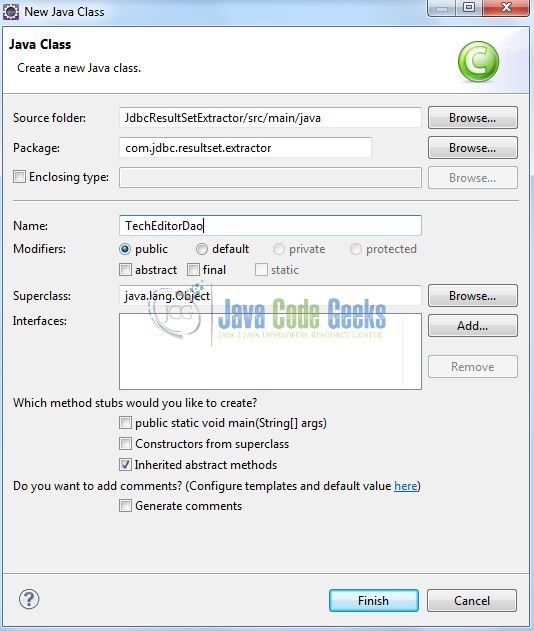
Repeat the step (i.e. Fig. 8) and enter the filename as TechEditorDao. The DAO class with the JDBC Template will be created inside the package: com.jdbc.resultset.extractor.
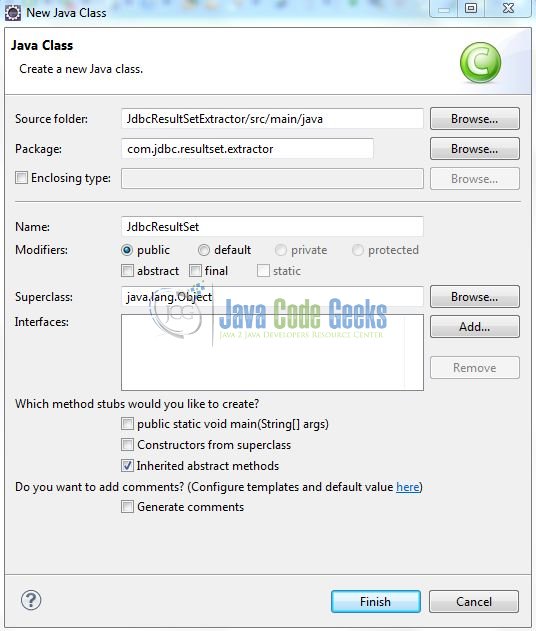
Again, repeat the step listed in Fig. 8 and enter the file name as JdbcResultSet. The implementation class for testing the Spring JDBC Template will be created inside the package: com.jdbc.resultset.extractor.
3.3.1 Implementation of POJO Class
This class contains 3 properties with setter and getters method and also defines an extra method toString(). Add the following code to it:
TechEditor.java
package com.jdbc.resultset.extractor;

public class TechEditor {

	private int editor_id;
	private String editor_name;
	private float editor_salary;

	public int getEditor_id() {
		return editor_id;
	}

	public void setEditor_id(int editor_id) {
		this.editor_id = editor_id;
	}

	public String getEditor_name() {
		return editor_name;
	}

	public void setEditor_name(String editor_name) {
		this.editor_name = editor_name;
	}
	public float getEditor_salary() {
		return editor_salary;
	}

	public void setEditor_salary(float editor_salary) {
		this.editor_salary = editor_salary;
	}

	public String toString() {
		return "Editor Id= " + editor_id + ", Name= " + editor_name + ", Salary= " + editor_salary +" $";
	}
}
3.3.2 Implementation of DAO Class
This class contains the JdbcTemplate property and a method to fetch the records from the database. Add the following code to it:
TechEditorDao.java
package com.jdbc.resultset.extractor;

import java.sql.ResultSet;
import java.sql.SQLException;
import java.util.ArrayList;
import java.util.List;

import org.springframework.dao.DataAccessException;
import org.springframework.jdbc.core.JdbcTemplate;
import org.springframework.jdbc.core.ResultSetExtractor;

public class TechEditorDao {

	private JdbcTemplate templateObj;

	public void setTemplateObj(JdbcTemplate template) {
		this.templateObj = template;
	}

	// Implementing Custom ResultSetExtractor To Fetch Data From The Db
	public List getAllEditors() {
		return templateObj.query("SELECT * FROM tech_editors", new ResultSetExtractor<List>() {
			public List extractData(ResultSet resultSetObj) throws SQLException, DataAccessException {
				List editorList = new ArrayList();
				while(resultSetObj.next()) {
					TechEditor techEditorObj = new TechEditor();
					techEditorObj.setEditor_id(resultSetObj.getInt(1));
					techEditorObj.setEditor_name(resultSetObj.getString("name"));
					techEditorObj.setEditor_salary(resultSetObj.getFloat(3));
					editorList.add(techEditorObj);
				}
				return editorList;
			}
		});
	}
}
3.3.3 Implementation of Main Class
This class gets the DAO bean from the applicationContext.xml file and calls the DAO class method. Add the following code to it:
JdbcResultSet.java
package com.jdbc.resultset.extractor;

import java.util.List;

import org.springframework.context.ApplicationContext;
import org.springframework.context.support.ClassPathXmlApplicationContext;

public class JdbcResultSet {

	@SuppressWarnings("resource")
	public static void main(String[] args) {
		ApplicationContext ctxObj = new ClassPathXmlApplicationContext("applicationContext.xml");
		TechEditorDao daoObj = (TechEditorDao)ctxObj.getBean("techDao");

		// This Method Is Used To Fetch Records From The Db
		List editorList = daoObj.getAllEditors();
		for(TechEditor techEditorObj : editorList) {
			System.out.println(techEditorObj.toString());
		}
	}
}
3.4 Spring Configuration File
Spring loads applicationContext.xml file and creates the ApplicationContext which provides the configuration information to an application. This interface provides standard bean factory lifecycle capabilities. In this file,
- The
DriverManagerDataSourcecontains the information about the database such as driver class name, connection URL, username and password. - A property named
dataSourcein theJdbcTemplateclass oforg.springframework.jdbc.datasource.DriverManagerDataSourcetype.
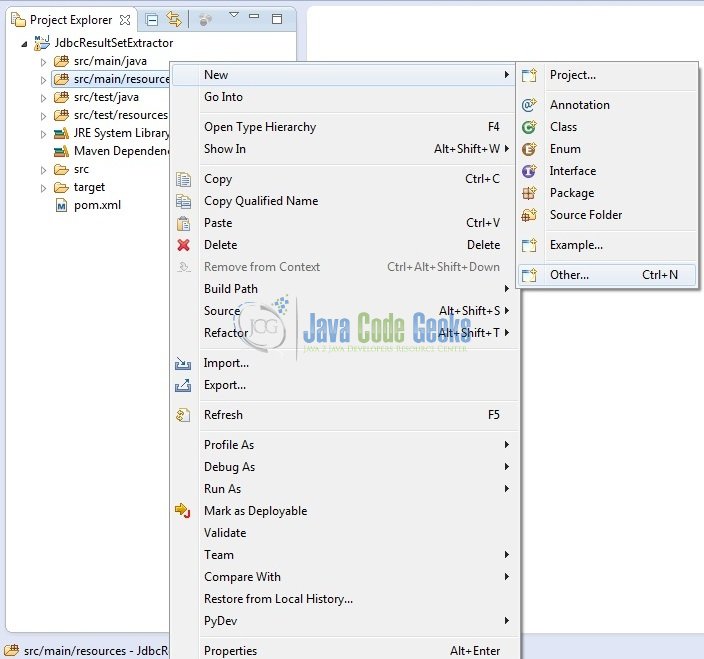
To configure the spring framework, we need to implement a configuration file i.e. applicationContext.xml. Right click on src/main/resources folder, New -> Other.
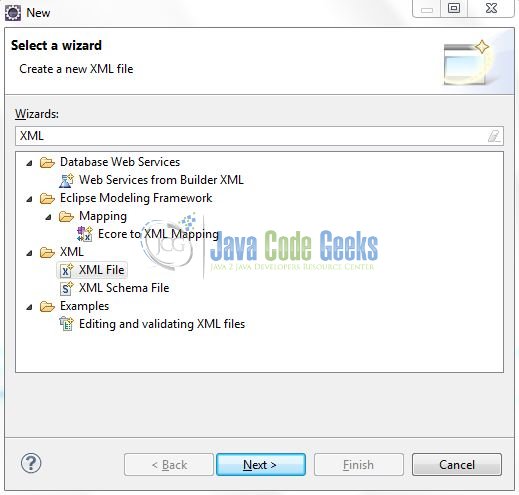
A new pop window will open and select the wizard as the XML file.
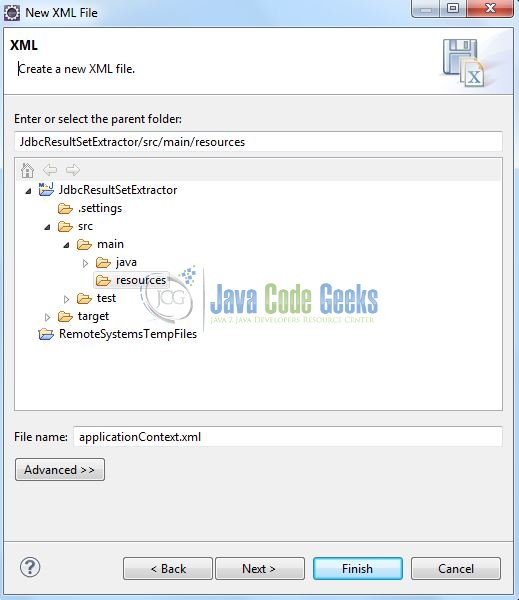
Again, a pop-up window will open. Verify the parent folder location as JdbcResultSetExtractor/src/main/resources and enter the file name as applicationContext.xml. Click Finish.
Once the file is created, add the following code to it:
applicationContext.xml
<?xml version="1.0" encoding="UTF-8"?>
<beans xmlns="http://www.springframework.org/schema/beans" xmlns:xsi="http://www.w3.org/2001/XMLSchema-instance" xmlns:p="http://www.springframework.org/schema/p" xsi:schemaLocation="http://www.springframework.org/schema/beans http://www.springframework.org/schema/beans/spring-beans-3.0.xsd">

	<!-- Database Connection Settings -->
	<bean id="dataSourceObj" class="org.springframework.jdbc.datasource.DriverManagerDataSource">
		<property name="driverClassName" value="com.mysql.jdbc.Driver" />
		<property name="url" value="jdbc:mysql://localhost:3306/tutorialDb" />
		<property name="username" value="root" />
		<property name="password" value="admin@123" />
	</bean>

	<!-- Bean Definition For DataSource -->
	<bean id="templateObj" class="org.springframework.jdbc.core.JdbcTemplate">
		<property name="dataSource" ref="dataSourceObj" />
	</bean>

	<!-- Bean Definition For TechEditorDao -->
	<bean id="techDao" class="com.jdbc.resultset.extractor.TechEditorDao">
		<property name="templateObj" ref="templateObj" />
	</bean>
</beans>
4. Run the Application
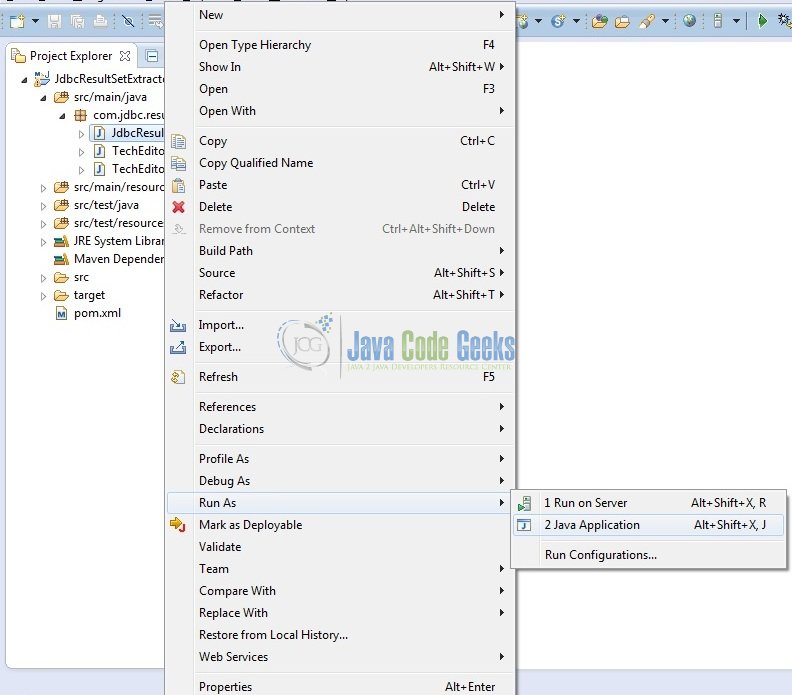
To run the application, Right click on the JdbcResultSet class, Run As -> Java Application.
5. Project Demo
The code shows the following status as output:
That’s all for this post. Happy Learning!!
6. Conclusion
Here, we understood what is ResultSetExtractor interface and how we can implement the same in Java.
7. Download the Eclipse Project
This was an example of JDBC ResultSetExtractor.
You can download the full source code of this example here: JdbcResultSetExtractor

