Data Definition Language (DDL) is a unique set of SQL commands that lets you manipulate the structure of the database. In this article, we will try to show how the JDBC DDL mechanism can be applied to a Java application.
1. Introduction
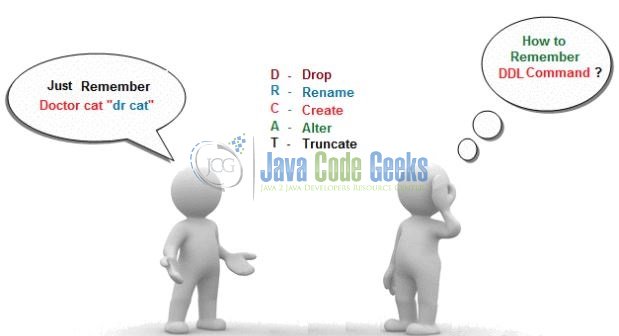
It might sound like its own programming language, but Data Definition Language (DDL) is really a way to view certain SQL commands. These are commands that are used to modify the structure of a database, rather than the database itself (the categorization of those commands is called Data Manipulation Language). All DDL commands are given below:
- CREATE
- DROP
- ALTER
- TRUNCATE
- COMMENT
- RENAME
We’ll take a look at some of the major commands in DDL i.e. CREATE, DROP, RENAME, and ALTER.
1.1 The CREATE Command
The CREATE command is used to create a table or a database. Since we are dealing with the structure of the database, will not insert any data into the table; the command simply builds the table for use. The syntax for the command is given below:
Create Database
CREATE DATABASE database_name;
The create table command requires a table name and at least one column with its corresponding data type (For e.g.: Text, Numeric etc.).
Create Table
CREATE TABLE table_name (
    Column_1 data_type,
    Column_2 data_type,
    ...
);
1.2 The DROP Command
The DROP command is used to drop a database or a table from the database. When a table is dropped, all the data goes with it. However, for this lesson, we are only concerned with tweaking the structure. The syntax for the command is given below:
Drop Database
DROP DATABASE database_name;
The syntax to DROP a table from the database is as follow,
Drop Table
DROP TABLE table_name;
Note: Be careful while dropping a table. Dropping a table will result in loss of complete information stored in the table.
1.3 The ALTER Command
The DROP command is quite extreme, as it completely wipes out the table and any data in it. However, when the data exists in the table(s) of our database, modifying the structure is easier through other means, such as ALTER. ALTER is used to add, change, or remove columns or fields in the table. It can also be used to rename the table.
Let’s break this one down a little and look at each option:
- Adding column(s)
- Modifying column(s)
- Removing columns
1.3.1 Add Column(s)
In order to add a new column, the ALTER command requires syntax similar to the CREATE statement. The table name is required and so are the column names or the definitions. The syntax for the command is given below:
Add Column
ALTER TABLE table_name ADD COLUMN column_name_1 data_type, column_name_2 data_type;
1.3.2 Modify a Column
The MODIFY commands allow you to:
- Modify Column Data Type.
- Modify Column Constraints.
This command requires the table name, the column name(s), and the column data-type(s). The syntax for the command is given below:
Modify Column
ALTER TABLE table_name MODIFY COLUMN column_name data_type;
Suppose that we want to add a new column at a specific position in the table. We can use the ALTER command together with the AFTER keyword.
After Keyword
ALTER TABLE table_name ADD COLUMN column_name data_type AFTER column_name_1;
1.3.3 Remove a Column
The DROP COLUMN command is used to delete a column from the table structure. The syntax for the command is given below:
Drop Column
ALTER TABLE table_name DROP COLUMN column_name;
1.4 The RENAME Command
The RENAME command is used to change the name of an existing database object (like Table, Column) to a new name. Renaming a table does not make it lose any data that is contained within it. The syntax for the command is given below:
Rename Table
RENAME TABLE current_table_name TO new_table_name;
1.5 What is Statement in JDBC?
- The
java.sql.Statementobject is used for executing a static SQL statement and returning the results it produces. - Statement cannot accept parameters at runtime in Java JDBC.
- Statement is slower as compared to
PreparedStatementin java JDBC. - Statement is suitable for executing
DDLcommands –CREATE,DROP,ALTER, andTRUNCATEin Java JDBC. - Statement can’t be used for storing or retrieving images and files in the database (i.e. using BLOB, CLOB data types) in Java JDBC.
- Statement enforces SQL injection because we end up using query formed by concatenated SQL strings in Java JDBC.
java.sql.Statementimportant methods in Java JDBC are:
1.6 Download and Install MySQL
You can watch this video in order to download and install the MySQL database on your windows operations system.
Now, open up the Eclipse IDE and let’s start building the application!
2. JDBC Connection Pool Example
2.1 Tools Used
We are using Eclipse Kepler SR2, JDK 8, MySQL database and Maven (to download the MySQL connector and Log4J library). Having said that, we have tested the code against JDK 1.7 and it works well.
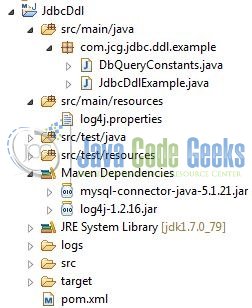
2.2 Project Structure
Firstly, let’s review the final project structure, in case you are confused about where you should create the corresponding files or folder later!
2.3 Project Creation
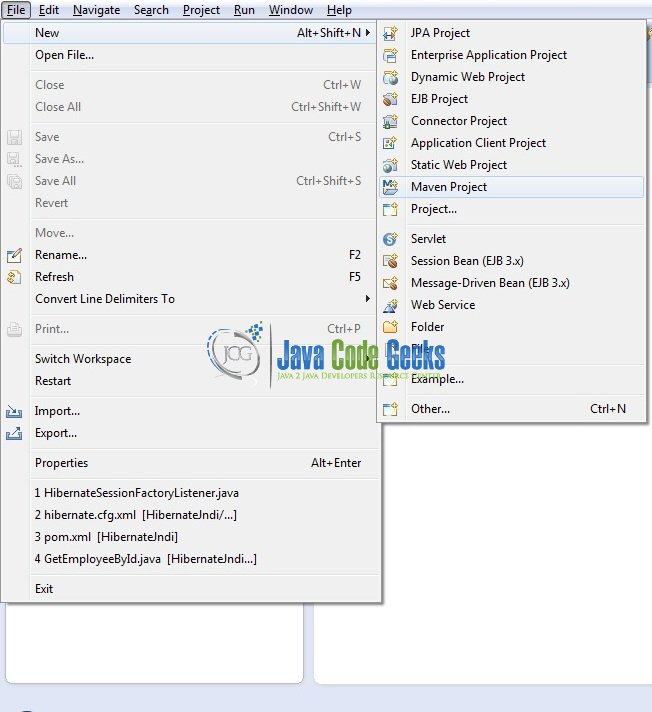
This section will demonstrate on how to create a Dynamic Web Java Maven project with Eclipse. In Eclipse IDE, go to File -> New -> Maven Project
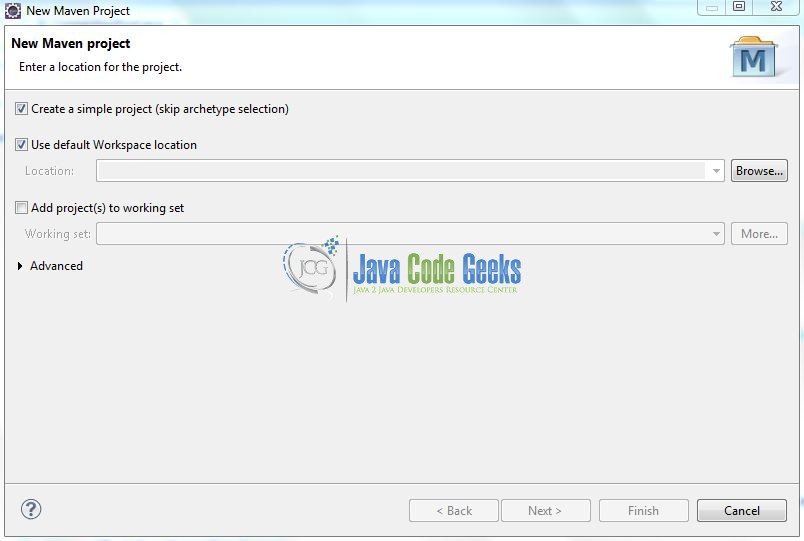
In the New Maven Project window, it will ask you to select project location. By default, ‘Use default workspace location‘ will be selected. Select the ‘Create a simple project (skip archetype selection)‘ checkbox and just click on next button to proceed.
It will ask you to ‘Enter a group id for the artifact.’ We will input the details as shown in the below image. The version number will be by default 0.0.1-SNAPSHOT.
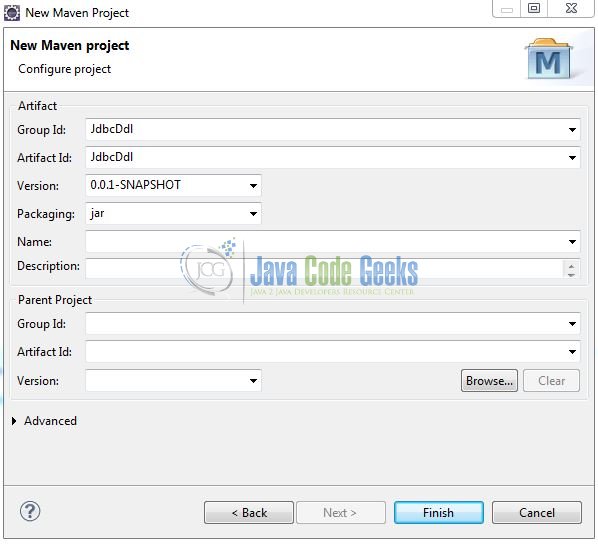
Click on Finish and now creating a maven project is completed. If you observe, it has downloaded the maven dependencies and a pom.xml file will be created. It will have the following code:
pom.xml
<project xmlns="http://maven.apache.org/POM/4.0.0" xmlns:xsi="http://www.w3.org/2001/XMLSchema-instance" xsi:schemaLocation="http://maven.apache.org/POM/4.0.0 http://maven.apache.org/xsd/maven-4.0.0.xsd">
	<modelVersion>4.0.0</modelVersion>
	<groupId>JdbcDdl</groupId>
	<artifactId>JdbcDdl</artifactId>
	<version>0.0.1-SNAPSHOT</version>
</project>
We can start adding the dependencies that developers want like MySQL, Log4J Jars etc. Let’s start building the application!
3. Application Building
Below are the steps involved in developing this application:
3.1 Maven Dependencies
In this example, we are using latest MySQL version i.e. mysql-connector-java-5.1.21 and Log4J dependencies. The updated file will have the following code:
pom.xml
<project xmlns="http://maven.apache.org/POM/4.0.0" xmlns:xsi="http://www.w3.org/2001/XMLSchema-instance"
	xsi:schemaLocation="http://maven.apache.org/POM/4.0.0 http://maven.apache.org/xsd/maven-4.0.0.xsd">
	<modelVersion>4.0.0</modelVersion>
	<groupId>JdbcDdl</groupId>
	<artifactId>JdbcDdl</artifactId>
	<version>0.0.1-SNAPSHOT</version>
	<packaging>jar</packaging>
	<dependencies>
		<dependency>
			<groupId>mysql</groupId>
			<artifactId>mysql-connector-java</artifactId>
			<version>5.1.21</version>
		</dependency>
		<dependency>
			<groupId>log4j</groupId>
			<artifactId>log4j</artifactId>
			<version>1.2.16</version>
		</dependency>
	</dependencies>
	<build>
		<finalName>${project.artifactId}</finalName>
	</build>
</project>
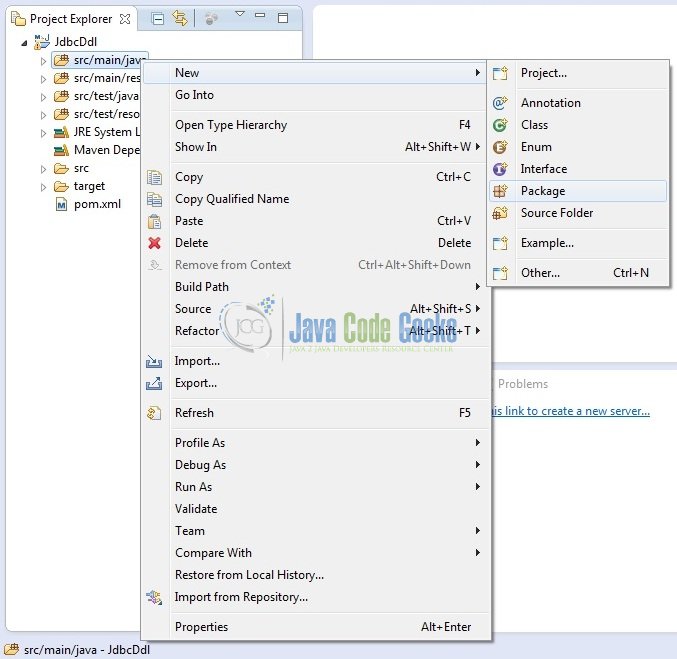
3.2 Java Class Creation
Let’s create the required java files. Right click on src/main/java folder, New -> Package.
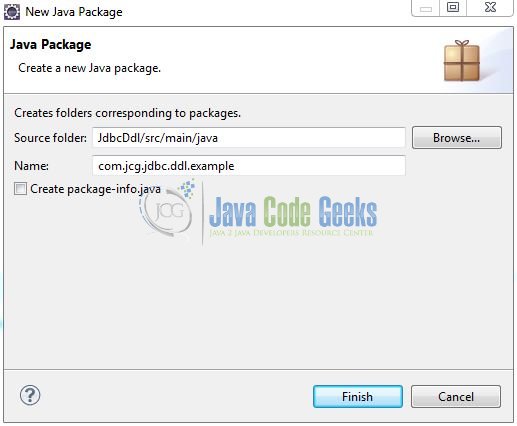
A new pop window will open where we will enter the package name as com.jcg.jdbc.ddl.example.
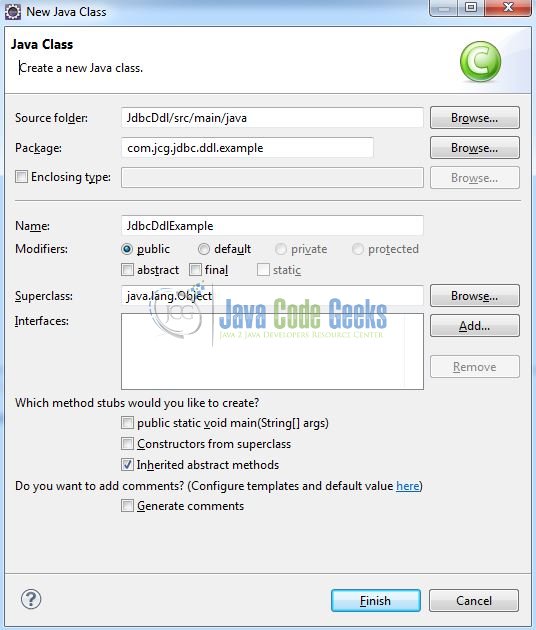
Once the package is created in the application, we will need to create the implementation class. Right click on the newly created package, New -> Class.


A new pop window will open and enter the file name as JdbcDdlExample. The implementation class will be created inside the package: com.jcg.jdbc.ddl.example.
3.2.1 Implementation of Main Class
This is the implementation class where we will be issuing the DDL commands via JDBC statement. To issue a statement, we call the statementObj.execute() method. Add the following code to it:
JdbcDdlExample.java
package com.jcg.jdbc.ddl.example;

import java.sql.Connection;
import java.sql.DatabaseMetaData;
import java.sql.DriverManager;
import java.sql.ResultSet;
import java.sql.SQLException;
import java.sql.Statement;

import org.apache.log4j.Logger;

public class JdbcDdlExample implements DbQueryConstants {

	// JDBC Driver Name & Database URL
	static final String JDBC_DRIVER = "com.mysql.jdbc.Driver";
	static final String JDBC_DB_URL = "jdbc:mysql://localhost:3306";

	// JDBC Database Credentials
	static final String JDBC_USER = "root";
	static final String JDBC_PASS = "";

	public final static Logger logger = Logger.getLogger(JdbcDdlExample.class);

	public static void main(String[] args) {

		Connection connObj = null;
		Statement stmtOBj = null;
		try {
			Class.forName(JDBC_DRIVER);
			connObj = DriverManager.getConnection(JDBC_DB_URL, JDBC_USER, JDBC_PASS);

			stmtOBj = connObj.createStatement();

			// DDL Statement 1 - Create Database Schema!
			logger.info("\n=======CREATE " + DATABASE_NAME + " DATABASE=======");
			stmtOBj.executeUpdate(CREATE_DATABASE_QUERY);
			logger.info("\n=======DATABASE IS SUCCESSFULLY CREATED=======\n");

			logger.info("\n=======USING " + DATABASE_NAME + " DATABASE=======\n");
			stmtOBj.executeUpdate(USE_DATABASE_QUERY);

			// DDL Statement 2 - Create Table!
			logger.info("\n=======CREATE " + TABLE_NAME + " TABLE=======");
			stmtOBj.executeUpdate(CREATE_TABLE_QUERY);
			logger.info("\n=======TABLE IS SUCCESSFULLY CREATED=======\n");

			logger.info("\n=======SHOW TABLE STRUCTURE=======");
			showDbTableStructure();

			// DDL Statement 3(a) - Alter Table Column!
			logger.info("\n=======ALTER " + TABLE_NAME + " TABLE=======");
			stmtOBj.executeUpdate(ALTER_TABLE_QUERY);
			logger.info("\n=======TABLE IS SUCCESSFULLY ALTERED=======\n");

			logger.info("\n=======SHOW TABLE STRUCTURE=======");
			showDbTableStructure();

			// DDL Statement 3(b) - Alter Table Column Using After Clause!
			logger.info("\n=======ALTER " + TABLE_NAME + " TABLE WITH AFTER CLAUSE=======");
			stmtOBj.executeUpdate(ALTER_TABLE_WITH_AFTER_CLAUSE_QUERY);
			logger.info("\n=======TABLE IS SUCCESSFULLY ALTERED=======\n");

			logger.info("\n=======SHOW TABLE STRUCTURE=======");
			showDbTableStructure();

			// DDL Statement 4(a) - Drop Table Column!
			logger.info("\n=======DROP COLUMN=======");
			stmtOBj.executeUpdate(DROP_COLUMN);
			logger.info("\n=======COLUMN IS SUCCESSFULLY DROPPED FROM THE TABLE=======\n");

			logger.info("\n=======SHOW TABLE STRUCTURE=======");
			showDbTableStructure();

			// DDL Statement 4(b) - Drop Table!
			logger.info("\n=======DROP TABLE=======");
			stmtOBj.executeUpdate(DROP_TABLE);
			logger.info("\n=======TABLE IS SUCCESSFULLY DROPPED FROM THE DATABASE=======\n");

			// DDL Statement 4(c) - Drop Database!
			logger.info("\n=======DROP DATABASE=======");
			stmtOBj.executeUpdate(DROP_DATABASE);
			logger.info("\n=======DATABASE IS SUCCESSFULLY DROPPED=======");
		} catch(Exception sqlException) {
			sqlException.printStackTrace();
		} finally {
			try {
				if(stmtOBj != null) {
					stmtOBj.close();	// Close Statement Object
				}
				if(connObj != null) {
					connObj.close();	// Close Connection Object
				}
			} catch (Exception sqlException) {
				sqlException.printStackTrace();
			}
		}
	}

	// This Method Is Used To Print The Table Structure
	private static void showDbTableStructure() throws SQLException {
		StringBuilder builderObj = new StringBuilder();
		DatabaseMetaData metaObj = DriverManager.getConnection(JDBC_DB_URL, JDBC_USER, JDBC_PASS).getMetaData();
		ResultSet resultSetObj = metaObj.getColumns(DATABASE_NAME, null, TABLE_NAME, "%");

		builderObj.append(TABLE_NAME + " Columns Are?= (");
		while (resultSetObj.next()) {
			String columnName = resultSetObj.getString(4);
			builderObj.append(columnName).append(", ");
		}
		builderObj.deleteCharAt(builderObj.lastIndexOf(",")).deleteCharAt(builderObj.lastIndexOf(" ")).append(")").append("\n");
		logger.info(builderObj.toString());
	}
}
4. Run the Application
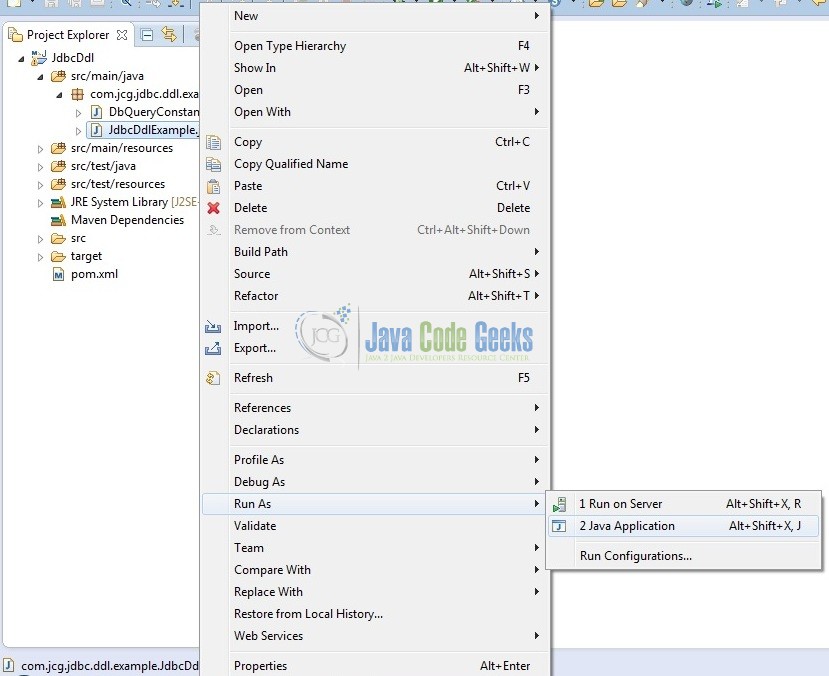
To run the application, Right click on the JdbcDdlExample class, Run As -> Java Application.
5. Project Demo
The code shows the following status as output:
CREATEStatement
Create Database:

Create Table:

ALTERStatement
Alter Table:

Alter Table with After Keyword:

DROPStatement
Drop Column:

Drop Table & Database:

That’s all for this post. Happy Learning!!
6. Conclusion
Here, we understood what are DDL statements and how we can implement the same in Java.
7. Download the Eclipse Project
This was an example of JDBC DDL Commands.
You can download the full source code of this example here: Jdbc Ddl