Connection pooling is a mechanism to create and maintain a collection of JDBC connection objects. The primary objective of maintaining the pool of connection object is to leverage re-usability and improve the overall performance of the application.
In this article, we will try to show how connection pooling mechanism can be applied to a Java application.
1. Introduction
JDBC stands for Java Database Connectivity, which is a standard Java API for database-independent connectivity between the Java programming language and a wide range of databases.
The JDBC library includes API for each of the tasks commonly associated with the database usage:
- Making a connection to the database.
- Creating SQL statements.
- Executing SQL queries in the database.
- Viewing and Modifying the resulting records.
1.1 JDBC Connection Pooling
Connection pooling is a process where we maintain a cache of database connections and has become the standard for middleware database drivers. The process of creating a connection, always an expensive, time-consuming operation, is multiplied in these environments where a large number of users are accessing the database in short, unconnected operations. Creating connections over and over in these environments is simply too expensive.
A connection pool operates by performing the work of creating connections ahead of time. In the case of a JDBC connection pool, a pool of Connection objects are created at the time the application server starts. These objects are then managed by a pool manager that disperses connections as they are requested by clients and returns them to the pool when it determines the client is finished with the Connection object. A great deal of housekeeping is involved in managing these connections.
When the connection pool server starts, it creates a predetermined number of Connection objects. A client application would then perform a lookup to retrieve a reference to a DataSource object that implements the ConnectionPoolDataSource interface. The client application would not need to make any special provisions to use the pooled data source; the code would be no different from code written for a non-pooled DataSource.
When the client application requests a connection from the ConnectionPoolDataSource, the data source implementation would retrieve a physical connection to the client application. The ConnectionPoolDataSource would return a Connection object that implemented the PooledConnection interface.
The PooledConnection interface dictates the use of event listeners. These event listeners allow the connection pool manager to capture important connection events, such as attempts by the client application to close the connection. When the driver traps a close-connection event, it intercedes and performs a pseudo-close operation that merely takes the Connection object, returns it to the pool of available connection, and performs any housekeeping that is necessary.
The operation of the connection pool should be completely transparent to the client application. The triggering of connection events, the manipulation of the object pool, and the creation and destruction of physical connections are all managed by the pool manager. The activities of the connection pool are, however, configurable by the application developer.
1.2 Download and Install MySQL
You can watch this video in order to download and install the MySQL database on your windows operations system.
Now, open up the Eclipse IDE and let’s start building the application!
2. JDBC Connection Pool Example
2.1 Tools Used
We are using Eclipse Kepler SR2, JDK 8, MySQL database and Maven (to download the MySQL connector jar and Connection Pool libraries). Having said that, we have tested the code against JDK 1.7 and it works well.
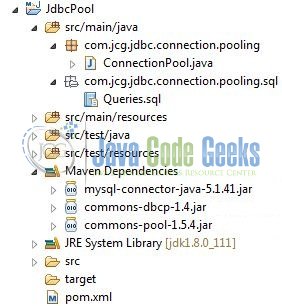
2.2 Project Structure
Firstly, let’s review the final project structure, in case you are confused about where you should create the corresponding files or folder later!
2.3 Project Creation
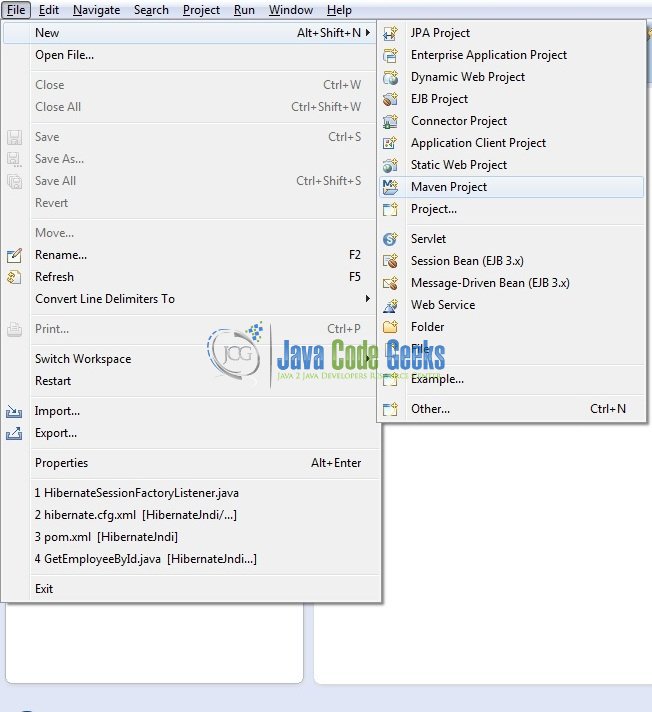
This section will demonstrate on how to create a Dynamic Web Java Maven project with Eclipse. In Eclipse IDE, go to File -> New -> Maven Project
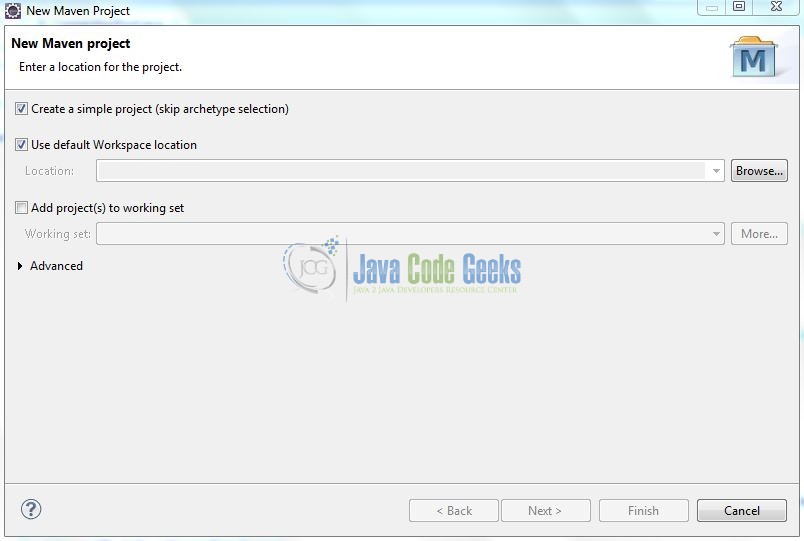
In the New Maven Project window, it will ask you to select project location. By default, ‘Use default workspace location‘ will be selected. Select the ‘Create a simple project (skip archetype selection)‘ checkbox and just click on next button to proceed.
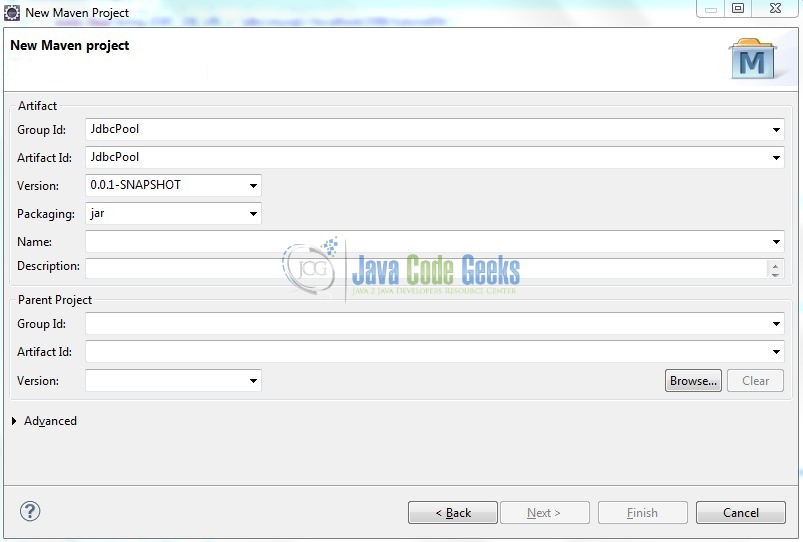
It will ask you to ‘Enter a group id for the artifact.’ We will input the details as shown in the below image. The version number will be by default 0.0.1-SNAPSHOT.
Click on Finish and now creating a maven project is completed. If you observe, it has downloaded the maven dependencies and a pom.xml file will be created. It will have the following code:
pom.xml
<project xmlns="http://maven.apache.org/POM/4.0.0" xmlns:xsi="http://www.w3.org/2001/XMLSchema-instance" xsi:schemaLocation="http://maven.apache.org/POM/4.0.0 http://maven.apache.org/xsd/maven-4.0.0.xsd">
	<modelVersion>4.0.0</modelVersion>
	<groupId>JdbcPool</groupId>
	<artifactId>JdbcPool</artifactId>
	<version>0.0.1-SNAPSHOT</version>
</project>
We can start adding the dependencies that developers want like MySQL, Connection Pooling jars etc. Let’s start building the application!
3. Application Building
Below are the steps involved in developing this application:
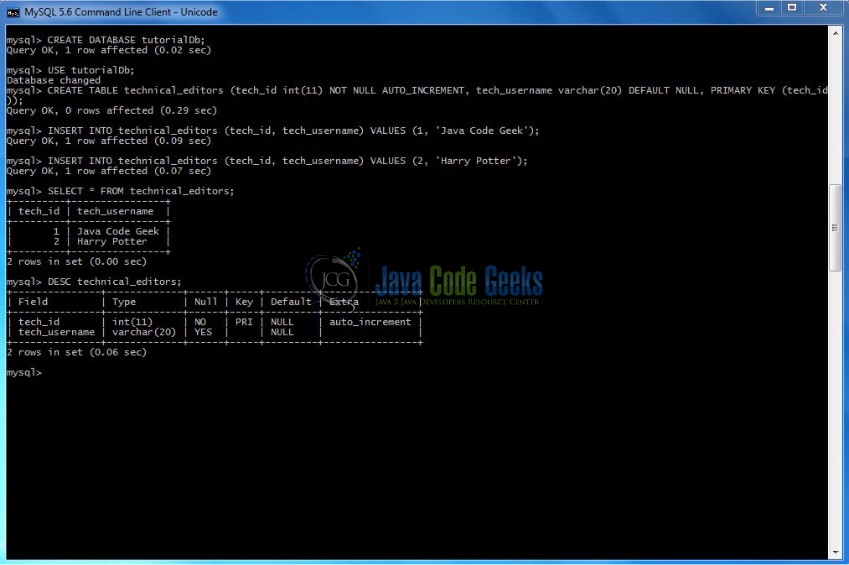
3.1 Database & Table Creation
This tutorial uses a database called tutorialDb . The database is not included when you create the project in Eclipse so you first need to create the database to follow this tutorial:
- Create a new database
tutorialDbas:
CREATE DATABASE tutorialDb;
- Use the created database
tutorialDbto create table as:
USE tutorialDb;
- Create the table
technical_editorsas shown below:
CREATE TABLE technical_editors (tech_id int(11) NOT NULL AUTO_INCREMENT, tech_username varchar(20) DEFAULT NULL, PRIMARY KEY (tech_id));
- Now we shall insert some values into the
technical_editorstable as:
INSERT INTO technical_editors (tech_id, tech_username) VALUES (1, 'Java Code Geek');

INSERT INTO technical_editors (tech_id, tech_username) VALUES (2, 'Harry Potter');
If everything goes well, the table will be shown as below in the MySQL workbench,
3.2 Maven Dependencies
In this example, we are using latest MySQL version i.e. mysql-connector-java-5.1.41 and connection pooling dependencies. The updated file will have the following code:
pom.xml
<project xmlns="http://maven.apache.org/POM/4.0.0" xmlns:xsi="http://www.w3.org/2001/XMLSchema-instance" xsi:schemaLocation="http://maven.apache.org/POM/4.0.0 http://maven.apache.org/xsd/maven-4.0.0.xsd">
	<modelVersion>4.0.0</modelVersion>
	<groupId>JdbcPool</groupId>
	<artifactId>JdbcPool</artifactId>
	<version>0.0.1-SNAPSHOT</version>
	<packaging>jar</packaging>
	<dependencies>
		<dependency>
			<groupId>mysql</groupId>
			<artifactId>mysql-connector-java</artifactId>
			<version>5.1.41</version>
		</dependency>
		<dependency>
			<groupId>commons-dbcp</groupId>
			<artifactId>commons-dbcp</artifactId>
			<version>1.4</version>
		</dependency>
	</dependencies>
</project>
3.3 Java Class Creation
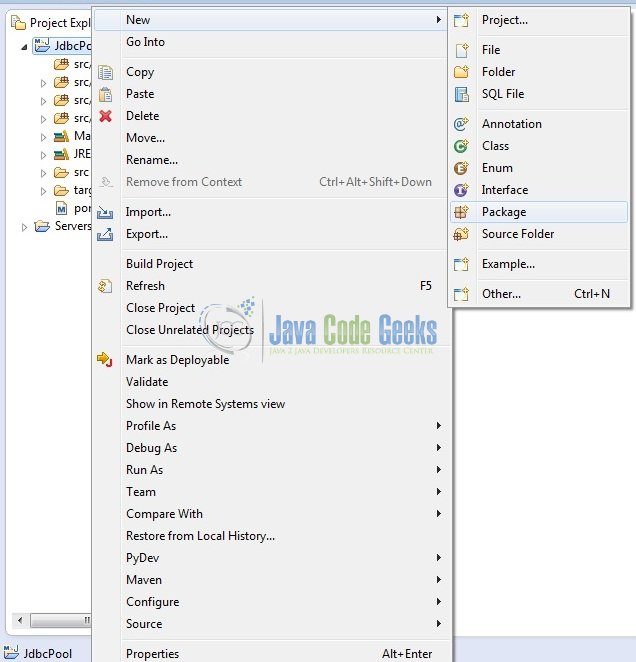
Let’s create the required java files. Right click on src/main/java folder, New -> Package

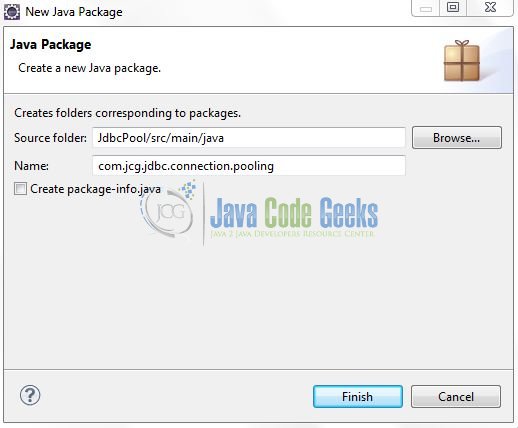
A new pop window will open where we will enter the package name as com.jcg.jdbc.connection.pooling
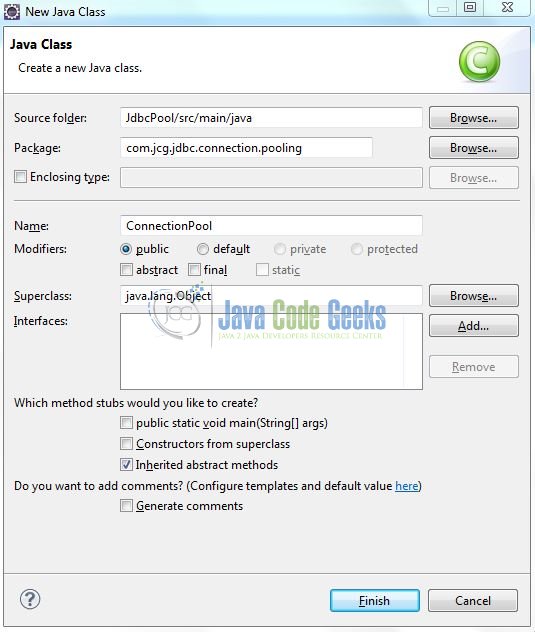
Once the package is created in the application, we will need to create the required implementation class. Right click on the newly created package, New -> Class
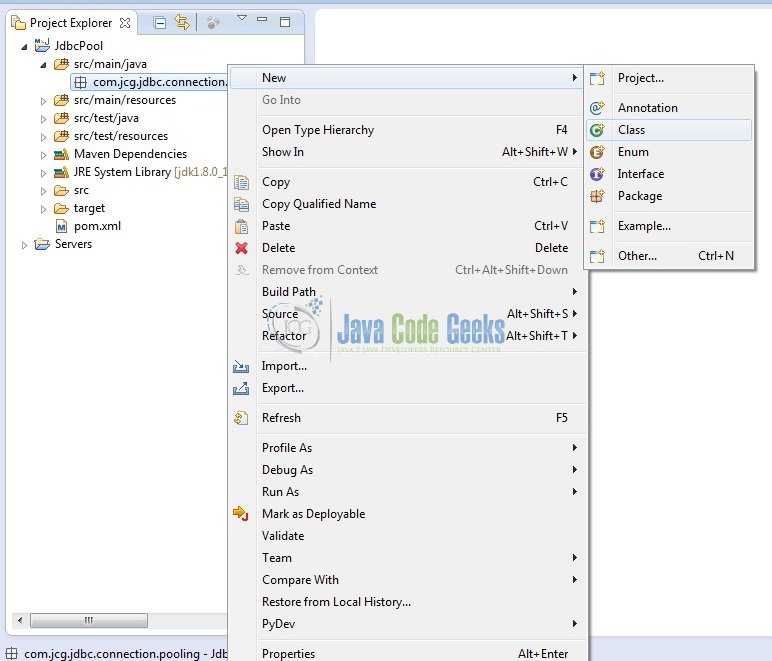
A new pop window will open and enter the file name as ConnectionPool. The implementation class will be created inside the package: com.jcg.jdbc.connection.pooling
3.3.1 Implementation of Main Class
In this class, we are using the GenericObjectPool that provides robust pooling functionality for arbitrary objects and will have the main() method to execute the application. Add the following code to it:
ConnectionPool.java
package com.jcg.jdbc.connection.pooling;

import java.sql.Connection;
import java.sql.PreparedStatement;
import java.sql.ResultSet;

import javax.sql.DataSource;

import org.apache.commons.dbcp.ConnectionFactory;
import org.apache.commons.dbcp.DriverManagerConnectionFactory;
import org.apache.commons.dbcp.PoolableConnectionFactory;
import org.apache.commons.dbcp.PoolingDataSource;
import org.apache.commons.pool.impl.GenericObjectPool;

public class ConnectionPool {

	// JDBC Driver Name & Database URL
	static final String JDBC_DRIVER = "com.mysql.jdbc.Driver";
	static final String JDBC_DB_URL = "jdbc:mysql://localhost:3306/tutorialDb";

	// JDBC Database Credentials
	static final String JDBC_USER = "root";
	static final String JDBC_PASS = "admin@123";

	private static GenericObjectPool gPool = null;

	@SuppressWarnings("unused")
	public DataSource setUpPool() throws Exception {
		Class.forName(JDBC_DRIVER);

		// Creates an Instance of GenericObjectPool That Holds Our Pool of Connections Object!
		gPool = new GenericObjectPool();
		gPool.setMaxActive(5);

		// Creates a ConnectionFactory Object Which Will Be Use by the Pool to Create the Connection Object!
		ConnectionFactory cf = new DriverManagerConnectionFactory(JDBC_DB_URL, JDBC_USER, JDBC_PASS);

		// Creates a PoolableConnectionFactory That Will Wraps the Connection Object Created by the ConnectionFactory to Add Object Pooling Functionality!
		PoolableConnectionFactory pcf = new PoolableConnectionFactory(cf, gPool, null, null, false, true);
		return new PoolingDataSource(gPool);
	}

	public GenericObjectPool getConnectionPool() {
		return gPool;
	}

	// This Method Is Used To Print The Connection Pool Status
	private void printDbStatus() {
		System.out.println("Max.: " + getConnectionPool().getMaxActive() + "; Active: " + getConnectionPool().getNumActive() + "; Idle: " + getConnectionPool().getNumIdle());
	}

	public static void main(String[] args) {
		ResultSet rsObj = null;
		Connection connObj = null;
		PreparedStatement pstmtObj = null;
		ConnectionPool jdbcObj = new ConnectionPool();
		try {
			DataSource dataSource = jdbcObj.setUpPool();
			jdbcObj.printDbStatus();

			// Performing Database Operation!
			System.out.println("\n=====Making A New Connection Object For Db Transaction=====\n");
			connObj = dataSource.getConnection();
			jdbcObj.printDbStatus();

			pstmtObj = connObj.prepareStatement("SELECT * FROM technical_editors");
			rsObj = pstmtObj.executeQuery();
			while (rsObj.next()) {
				System.out.println("Username: " + rsObj.getString("tech_username"));
			}
			System.out.println("\n=====Releasing Connection Object To Pool=====\n");
		} catch(Exception sqlException) {
			sqlException.printStackTrace();
		} finally {
			try {
				// Closing ResultSet Object
				if(rsObj != null) {
					rsObj.close();
				}
				// Closing PreparedStatement Object
				if(pstmtObj != null) {
					pstmtObj.close();
				}
				// Closing Connection Object
				if(connObj != null) {
					connObj.close();
				}
			} catch(Exception sqlException) {
				sqlException.printStackTrace();
			}
		}
		jdbcObj.printDbStatus();
	}
}
4. Run the Application
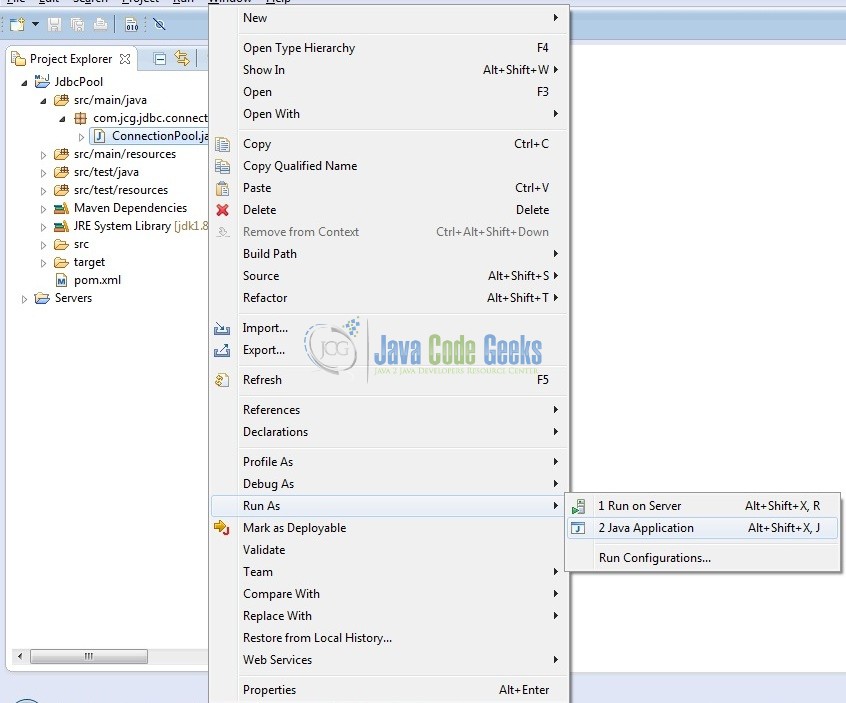
To run the application, Right click on the ConnectionPool class, Run As -> Java Application.
5. Project Demo
The code shows the following status as output:

That’s all for this post. Happy Learning!!
6. Conclusion
Here, we understood what is connection pooling and how we can implement the same using the DBCP library.
7. Download the Eclipse Project
This was an example of JDBC Connection Pooling.
You can download the full source code of this example here: JDBC Connection Pooling

Plz reply to my email
This is very helpful for beginners. Keep it up.