Java Nio Scatter/Gather Example
In Java Nio, the channel provides an important capability known as scatter/gather or vectored I/O in some circles. Scatter/gather is a simple yet powerful concept and this tutorial explains how scatter/gather can be really useful in situations where developers need to separate work with the various parts of the transmitted data.
Table Of Contents
1. Introduction
Java Nio was developed to allow the Java programmers implement the high-speed input-output operations without using the custom native code. Nio moves the time-taking I/O activities like filling, namely and draining buffers etc back into the operating system, thus allows the great increase in the operational speed.
Java Nio consists of the following core components:
- Channel & Buffers: In standard I/O API the character streams and the byte streams are used but in NIO, developers work with the channels and buffers. In this case, the data is always written from a buffer to a channel and read from a channel to a buffer
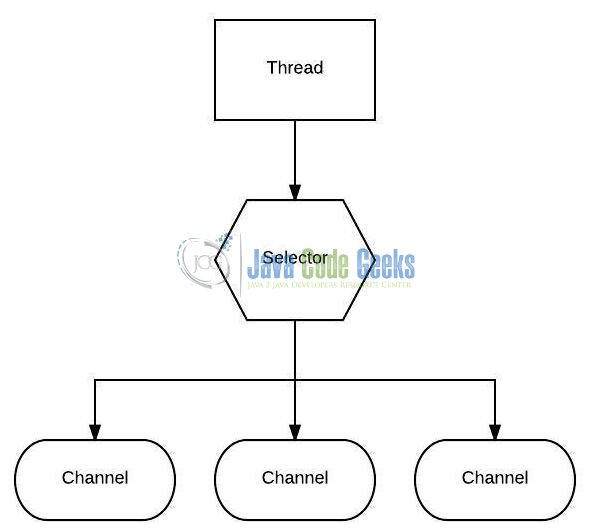
- Selectors: It is an object that can be used for monitoring the multiple channels for events like data arrived, connections opened etc. Thus, a single thread can monitor the multiple channels for the data
- Non-blocking I/O: Here the application immediately returns the available data and application should have a pooling mechanism to find out when more data is available
Do note, Java NIO has more components and classes but the Channel, Buffer, and Selector are used as the core of the API.
1.1 Java Nio Scatter/Gather
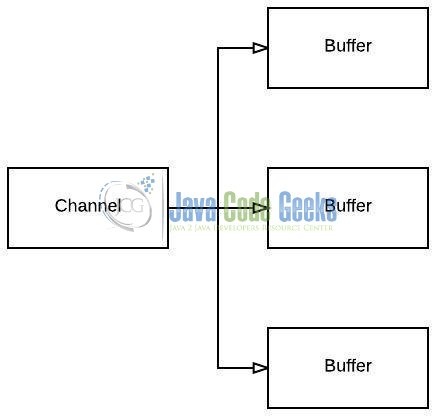
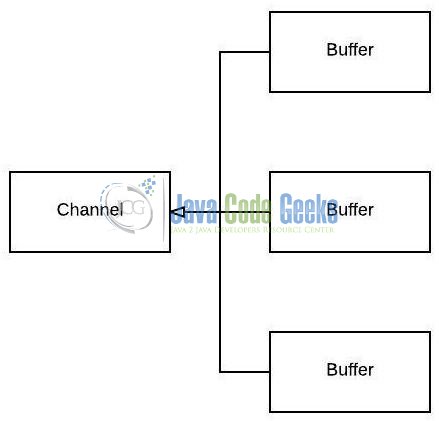
Java Nio comes with built-in scatter/gather support. Scatter/gather are the concepts used for reading from, and writing to channels i.e. Scatter/Gather is a technique through which bytes can be read from a stream into a set of buffers with a single read() invocation and bytes can be written from a set of buffers to a stream with a single write() invocation.
Scatter/Gather can be really useful in situations where developers need to separate work with the various parts of the transmitted data. For e.g., if a message consists of a header and a body, developers can keep the header and body in separate buffers for easy processing.
1.1.1 Scattering Reads
The ‘scattering read‘ is used for reading the data from a single channel into the multiple buffers. Here is an illustration of the Scatter principle:
Let’s see a code snippet that performs a scattering read operation.
ByteBuffer bblen1 = ByteBuffer.allocate(1024);
ByteBuffer bblen2 = ByteBuffer.allocate(1024);

scatter.read(new ByteBuffer[] {bblen1, bblen2});
Notice how the buffers are first inserted into an array, then the array is passed as a parameter to the scatter.read() method. The read() method writes the data from the channel in a sequence that buffers occur in an array. Once a buffer is full, the channel moves on to fill the next buffer.
1.1.2 Gathering Writes
The ‘gathering write‘ is used for writing the data from the multiple buffers into a single channel. Here is an illustration of the Gather principle:
Let’s see a code snippet that performs a gathering write operation.
ByteBuffer bblen1 = ByteBuffer.allocate(1024);
ByteBuffer bblen2 = ByteBuffer.allocate(1024);

gather.write(new ByteBuffer[] {bblen1, bblen2});
The array of buffers are passed into the write() method, which writes the content of the buffers in a sequence they are encountered in an array. Do note, only the data between the position and the limit of the buffers are written.
Now, open up the Eclipse IDE and let’s write a quick example to understand how to use this feature!
2. Java Nio Scatter/Gather Example
2.1 Tools Used
We are using Eclipse Kepler SR2, JDK 8 and Maven. Having said that, we have tested the code against JDK 1.7 and it works well.
2.2 Project Structure
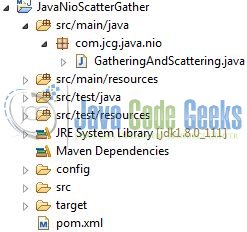
Firstly, let’s review the final project structure, in case you are confused about where you should create the corresponding files or folder later!
2.3 Project Creation
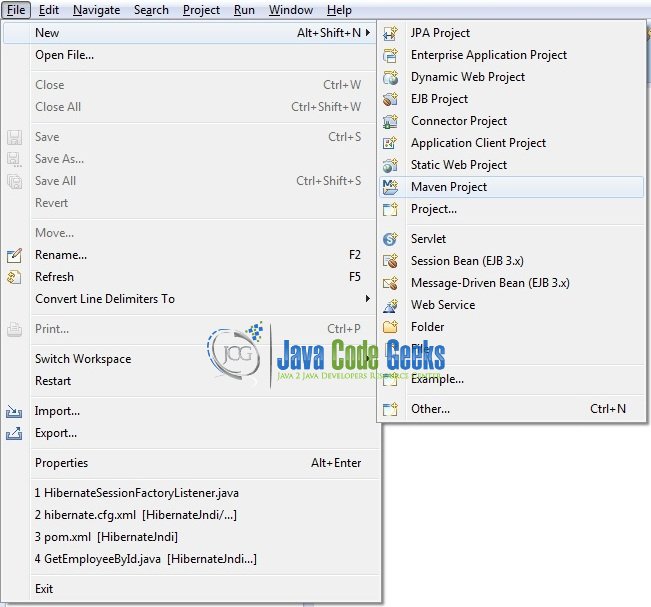
This section will demonstrate on how to create a Java-based Maven project with Eclipse. In Eclipse IDE, go to File -> New -> Maven Project.
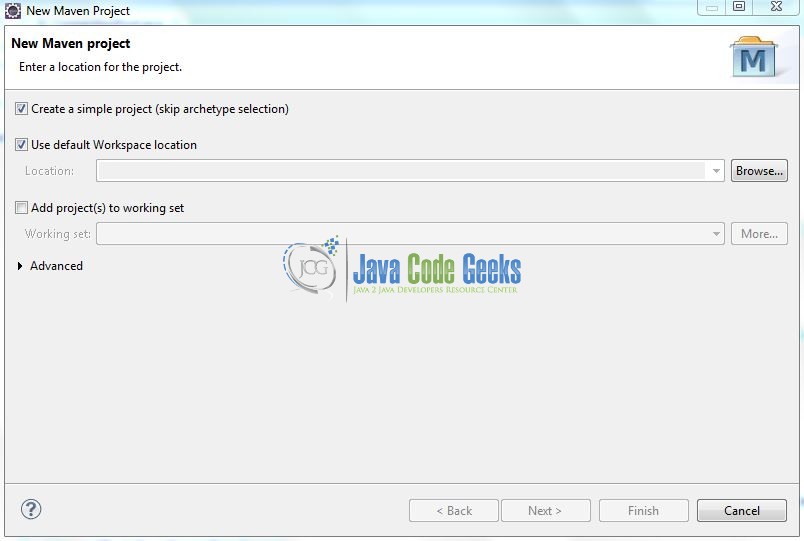
In the New Maven Project window, it will ask you to select project location. By default, ‘Use default workspace location’ will be selected. Select the ‘Create a simple project (skip archetype selection)’ checkbox and just click on next button to proceed.
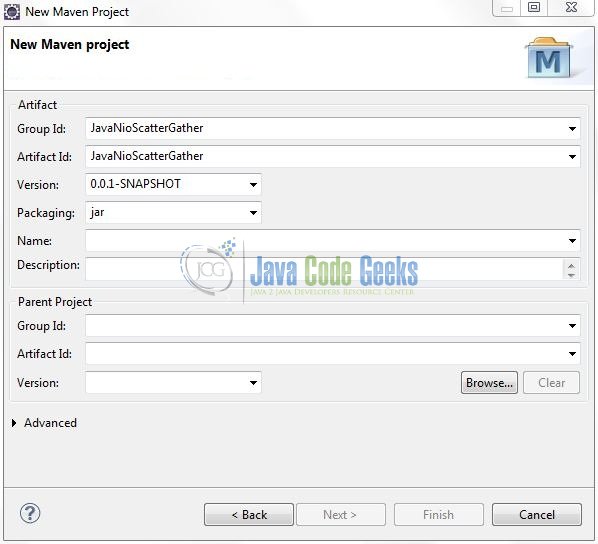
It will ask you to ‘Enter the group and the artifact id for the project’. We will input the details as shown in the below image. The version number will be by default: 0.0.1-SNAPSHOT.
Click on Finish and the creation of a maven project is completed. If you observe, it has downloaded the maven dependencies and a pom.xml file will be created. It will have the following code:
pom.xml
<project xmlns="http://maven.apache.org/POM/4.0.0" xmlns:xsi="http://www.w3.org/2001/XMLSchema-instance" xsi:schemaLocation="http://maven.apache.org/POM/4.0.0 http://maven.apache.org/xsd/maven-4.0.0.xsd">
	<modelVersion>4.0.0</modelVersion>
	<groupId>JavaNioScatterGather</groupId>
	<artifactId>JavaNioScatterGather</artifactId>
	<version>0.0.1-SNAPSHOT</version>
	<packaging>jar</packaging>
</project>
Developers can start adding the dependencies that they want like JUnit etc. Let’s start building the application!
3. Application Building
Below are the steps involved in developing this application.
3.1 Java Class Creation
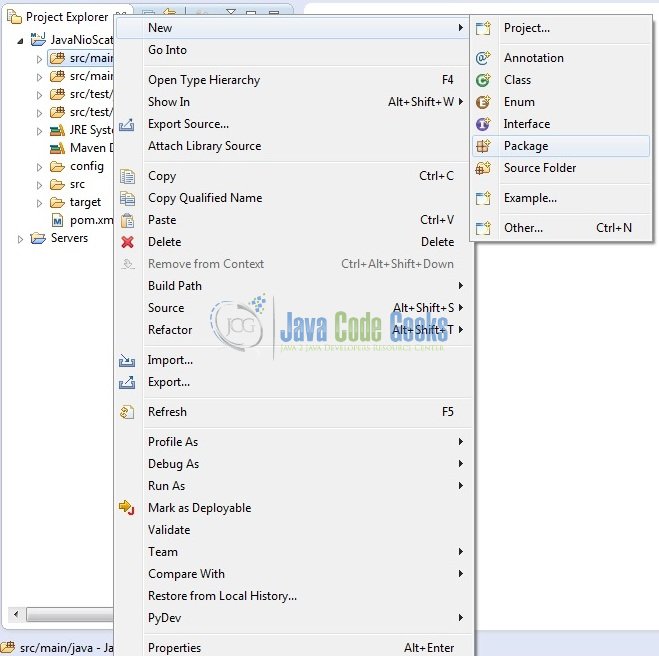
Let’s create the required Java files. Right-click on src/main/java folder, New -> Package.
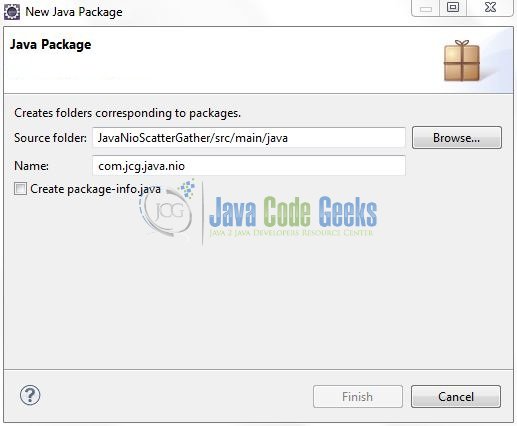
A new pop window will open where we will enter the package name as: com.jcg.java.nio.
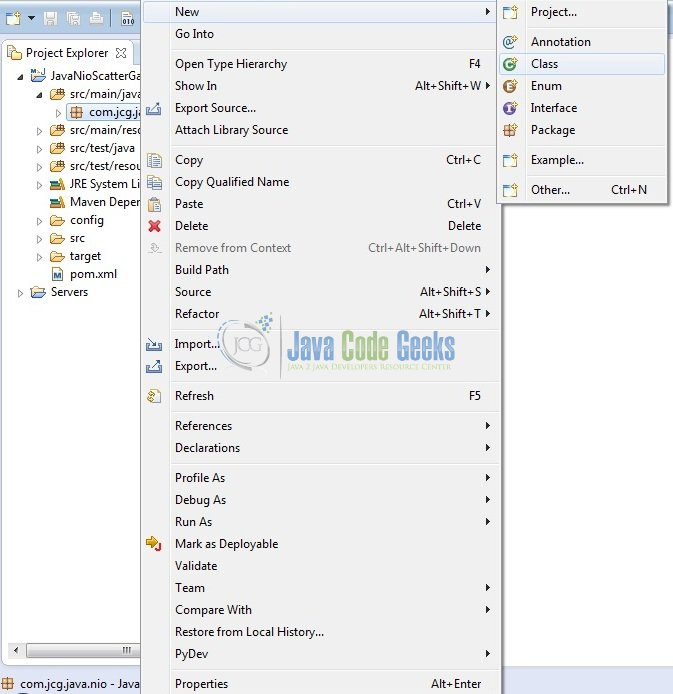
Once the package is created in the application, we will need to create the implementation class. Right-click on the newly created package: New -> Class.
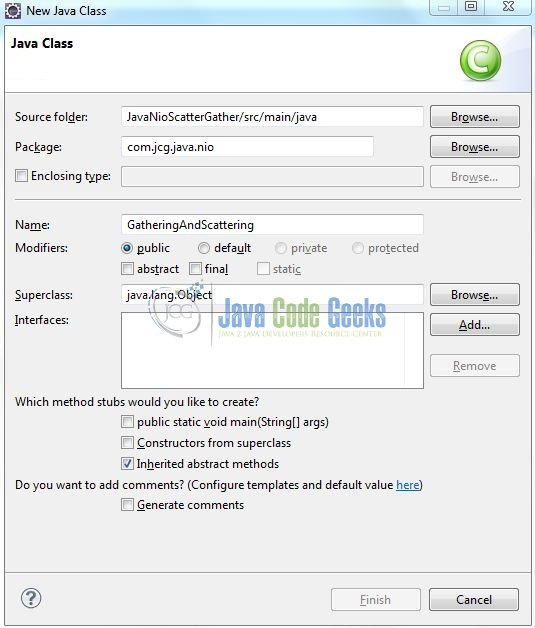
A new pop window will open and enter the file name as: GatheringAndScattering. The receiver class will be created inside the package: com.jcg.java.nio.
3.1.1 Implementation of Utility Class
Let’s see the simple example of two buffers where both buffers hold the data and developers want to write using the scatter/gather mechanism. Add the following code to it:
GatheringAndScattering.java
package com.jcg.java.nio;

import java.io.FileInputStream;
import java.io.FileNotFoundException;
import java.io.FileOutputStream;
import java.io.IOException;
import java.nio.ByteBuffer;
import java.nio.channels.GatheringByteChannel;
import java.nio.channels.ScatteringByteChannel;
import java.nio.charset.Charset;

public class GatheringAndScattering {

	private static String FILENAME = "config/sample.txt";
	private static Charset charset = Charset.forName("UTF-8");

	public static void main(String[] args) {

		String data1 = "1A channel that can write bytes from a sequence of buffers.";
		String data2 = "23A channel that can read bytes into a sequence of buffers.";

		// We are going to store 2 data's to the file using GatheringByteChannel
		gathering(data1, data2);

		scattering();
	}

	private static void scattering() {
		ByteBuffer bblen1 = ByteBuffer.allocate(1024);
		ByteBuffer bblen2 = ByteBuffer.allocate(1024);

		ByteBuffer bbdata1 = null;
		ByteBuffer bbdata2 = null;

		FileInputStream in;
		try {
			in = new FileInputStream(FILENAME);
			ScatteringByteChannel scatter = in.getChannel();

			// Read 2 length first to get the length of 2 data
			scatter.read(new ByteBuffer[] {bblen1, bblen2});

			// We have to call rewind if want to read buffer again. It is same as bblen1.position(0).
			// bblen1.rewind();
			// bblen2.rewind();

			// Seek position to 0 so that we can read the data again.
			bblen1.position(0);
			bblen2.position(0);

			int len1 = bblen1.asIntBuffer().get();
			int len2 = bblen2.asIntBuffer().get();

			// Try to test lengths are correct or not.
			System.out.println("Scattering : Len1= " + len1);
			System.out.println("Scattering : Len2= " + len2);

			bbdata1 = ByteBuffer.allocate(len1);
			bbdata2 = ByteBuffer.allocate(len2);

			// Read data from the channel
			scatter.read(new ByteBuffer[] {bbdata1, bbdata2});

		} catch (FileNotFoundException exObj) {
			exObj.printStackTrace();
		} catch (IOException ioObj) {
			ioObj.printStackTrace();
		}

		// Testing the data is correct or not.
		String data1 = new String(bbdata1.array(), charset);
		String data2 = new String(bbdata2.array(), charset);

		System.out.println(data1);
		System.out.println(data2);
	}

	private static void gathering(String data1, String data2) {
		// Store the length of 2 data using GatheringByteChannel
		ByteBuffer bblen1 = ByteBuffer.allocate(1024);
		ByteBuffer bblen2 = ByteBuffer.allocate(1024);

		// Next two buffer hold the data we want to write
		ByteBuffer bbdata1 = ByteBuffer.wrap(data1.getBytes());
		ByteBuffer bbdata2 = ByteBuffer.wrap(data2.getBytes());

		int len1 = data1.length();
		int len2 = data2.length();

		// Writing length(data) to the Buffer
		bblen1.asIntBuffer().put(len1);
		bblen2.asIntBuffer().put(len2);

		System.out.println("Gathering : Len1= " + len1);
		System.out.println("Gathering : Len2= " + len2);

		// Write data to the file
		try {
			FileOutputStream out = new FileOutputStream(FILENAME);
			GatheringByteChannel gather = out.getChannel();
			gather.write(new ByteBuffer[] {bblen1, bblen2, bbdata1, bbdata2});
			out.close();
			gather.close();
		} catch (FileNotFoundException exObj) {
			exObj.printStackTrace();
		} catch(IOException ioObj) {
			ioObj.printStackTrace();
		}
	}
}
4. Run the Application
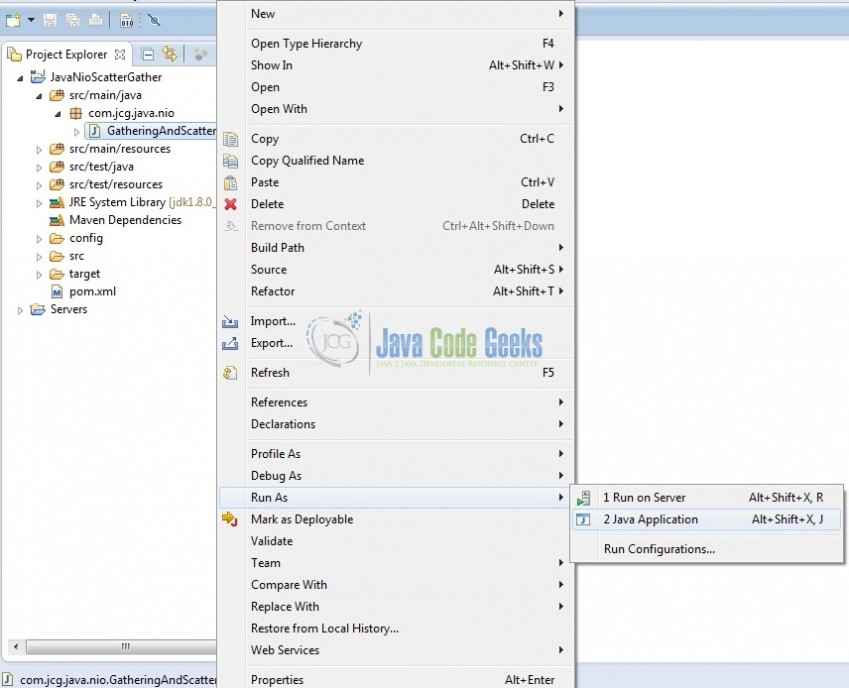
To run the Java Nio application, Right-click on the GatheringAndScattering class -> Run As -> Java Application. Developers can debug the example and see what happens after every step!
5. Project Demo
When developers run the above program, the code shows the following status as output.
That’s all for this post. Happy Learning!!
6. Conclusion
Scatter and Gather are powerful tools when they are used properly and they allow developers to delegate the grunt work to an operating system. The operating system separates out the data into multiple buckets or assembles the disparate data chunks into a whole. This can be a huge win because the operating system is highly optimized for this sort of thing and saves the work of moving things around; thus avoiding buffer copies and reducing the number of code that developers need to write and debug. Since developers are basically assembling the data by providing references to the data containers, the various chunks can be assembled in different ways by building the multiple arrays of the buffers referenced in different combinations.
That’s all for this tutorial and I hope this article served you whatever you were looking for.
7. Download the Eclipse Project
This was an example of Java Nio for the beginners.
You can download the full source code of this example here: JavaNioScatterGather




This is great and all but you did not provide an actual practical example of the one use case you mentioned “header and body in separate buffers”. This tutorial is pretty useless without an actual practical example. It is just more noise on the internet to take up your time and not learn anything new.
Jarrod,
Hope you are doing well. Thanks for pointing out the use case but due to the unavailability of the FTP resource at that moment I wasn’t able to write down an actual practical code (i.e. clearing showing the header & body separation) and hence had to redirect the code approach from FTP to File. I will follow up with the support team and would request them for one more article on this topic!
Have a great day!