How to install Maven on Windows
In this tutorial, we will show you an easy way to install Apache Maven on Windows. Actually, we just need to download the Apache Maven’s zip release file, extract it on a folder and create a new Windows environment path variable that points to the extracted folder.
In this example, we use the following tools on a Windows 7 platform:
- JDK 1.7
- Apache Maven 2.2.1
Finally, we must note that this tutorial can be applied for both Maven 3.0.5 and Maven 3.1.1 versions.
1. Create the appropriate environment variables for Java
First of all, we must be sure that Java JDK is properly installed on the computer. The default installation folder is C:\Program Files\Java . Next, we must add a new environment variable, called “JAVA_HOME” and set its value to point to the Java JDK installation folder.
In order to add a new environment variable on Windows 7, we must complete the following steps:
- Right click on the Computer icon on your Desktop and choose the “Properties” option.
- In the System window, in the left panel, click on “Advanced system settings”.
- In the System Properties window, select the “Advanced” tab and click on the “Environment Variables…” button, located at the bottom right of the window.
- In the Environment Variables window, in the System variables section, click on the “New” button and fill the appropriate fields.
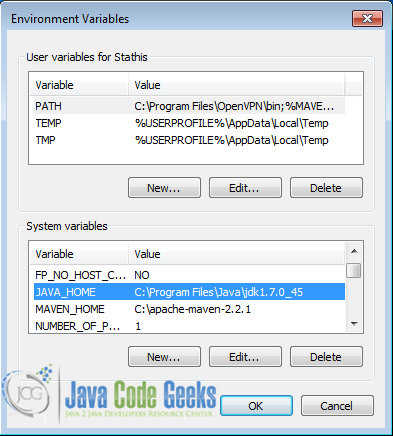
If the procedure has been completed successfully, a new environment variable will have been added, as highlighted:
2. Download and Extract Apache Maven
Choose your preferred version from the Apache Maven official website and download it. In this example, we will use the Apache Maven 2.2.1 version.
Once the download is complete, we extract the downloaded zip file inside the C: drive. That’s it, all Apache Maven files and folders should be inside the folder C:\ apache-maven-2.2.1.
3. Create a new environment variable for Maven home
After we have finished downloading and extracting our Apache Maven software, we must add a new environment variable. The name of the variable will be “MAVEN_HOME” and its value shall be “C:\ apache-maven-2.2.1”.
As we have mentioned in Step 1:
- Right click on the Computer icon on your Desktop and choose the “Properties” option.
- In the System window, in the left panel, click on “Advanced system settings”.
- In the System Properties window, select the “Advanced” tab and click on the “Environment Variables…” button, located at the bottom right of the window.
- In the Environment Variables window, in the System variables section, click on the “New” button and fill the appropriate fields.
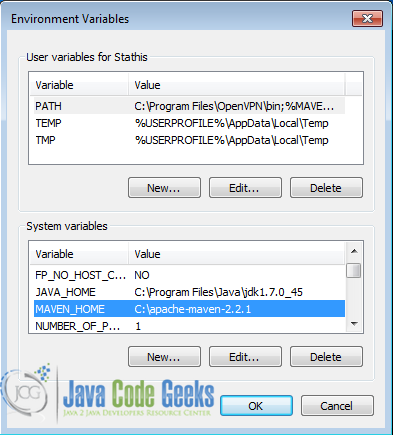
If the procedure has been completed successfully, a new environment variable under the name “MAVEN_HOME” will have been added, as highlighted:
4. Create a new environment variable for Maven path
The last thing to do is update the “PATH” environment variable, in order for Maven’s command to be executed everywhere.
The “PATH” environment variable is updated as follows:
- Right click on the Computer icon on your Desktop and choose the “Properties” option.
- In the System window, in the left panel, click on “Advanced system settings”.
- In the System Properties window, select the “Advanced” tab and click on the “Environment Variables…” button, located at the bottom right of the window.
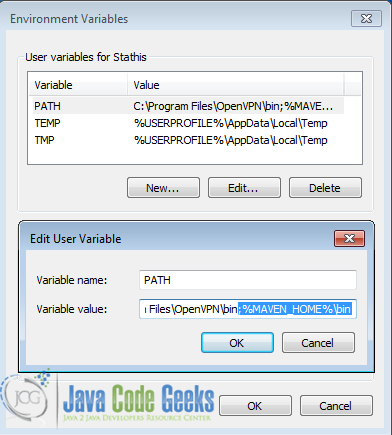
- In the Environment Variables window, in the User Variables section, select the “PATH” variable, click on the “Edit” button and fill the appropriate fields, as highlighted:
5. Verify the Installation
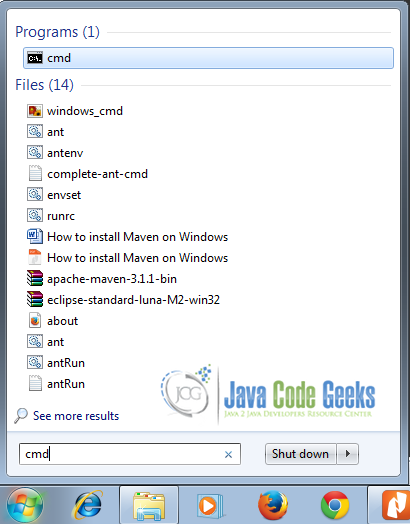
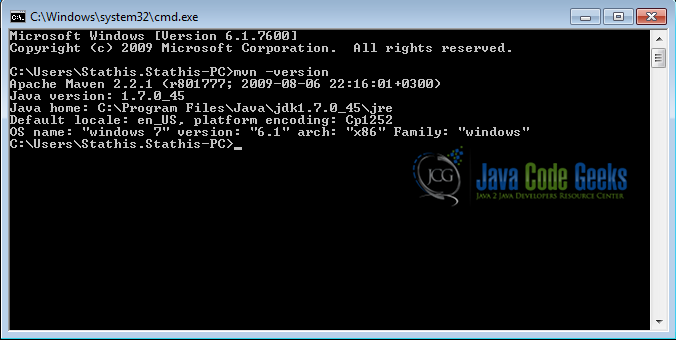
To verify your installation, open the cmd and execute the command:
$ mvn -version
If the installation has been completed successfully, you shall see a similar output, depending on the installed version of Java:
This was an example on how to install Apache Maven on Windows.

