Apache Maven Enforcer Plugin Example
1. Apache Maven Enforcer Plugin – Introduction
Maven is a software project management and comprehension tool. Based on the concept of a project object model (POM), Maven can manage a project’s build, reporting and documentation from a central piece of information.
1.1 Maven installation guide
You just need to download the Maven’s zip file, unzip it to a folder, and configure the Windows environment variables.
1.2 JDK and JAVA_HOME
Make sure JDK is installed, and JAVA_HOME environment variable is configured. Follow the steps below to see Environment Variables:
- Right click the Computer icon.
- Choose Properties from the context menu.
- Click the Advanced system settings link.
- Click Environment Variables.
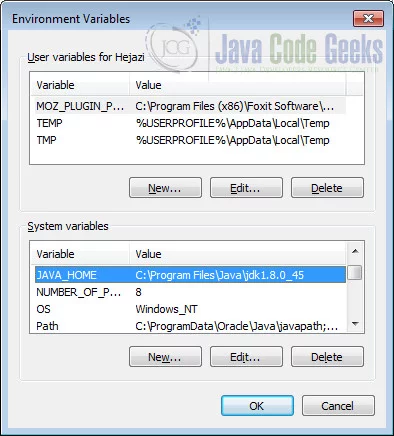
1.3 Download Apache Maven
Visit Maven official website, download the Maven zip file, for example apache-maven-3.6.1-bin.zip. Unzip it to a folder: C:\Program Files\apache-maven-3.6.1
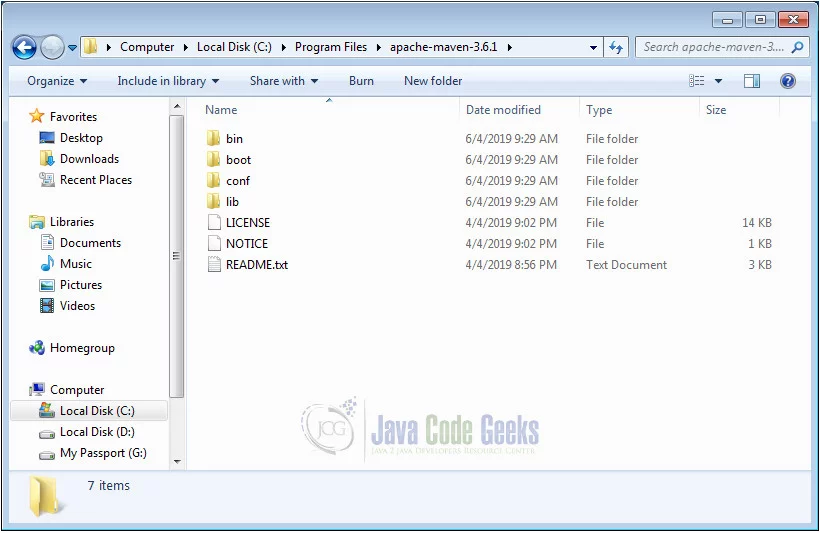
That’s all, just download and unzip, installation is NOT required.
1.4 Add MAVEN_HOME system variable
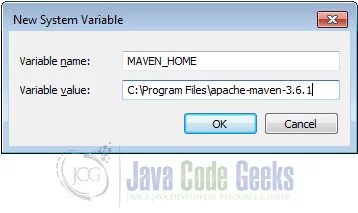
Add a MAVEN_HOME system variables, and point it to the Maven folder.
Here are the steps to add a new variable:
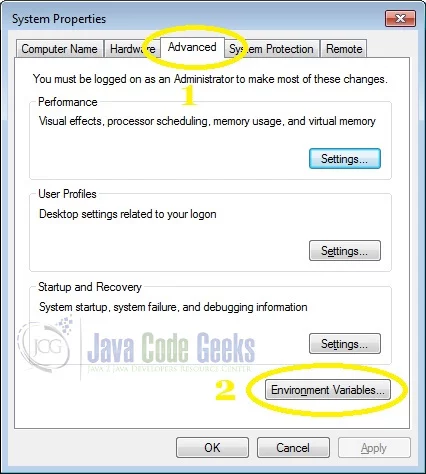
Click New to add a new variable:
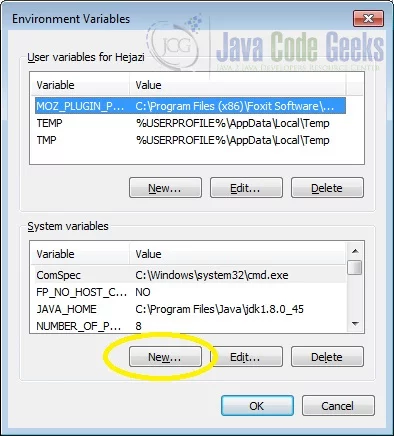
Pay attention to the capital letters of the variable name, as it is case sensitive.
Variable value points to the location we extracted the Maven zip file.
1.5 Add %MAVEN_HOME%\bin To PATH
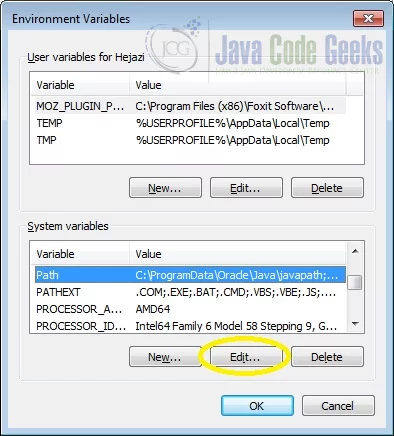
In system variables, find PATH variable and follow the steps below:
Click Edit:
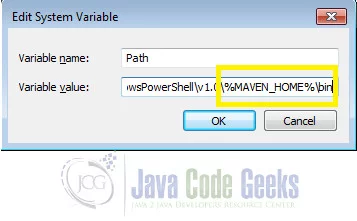
Add %MAVEN_HOME%\bin to the end of the Variable value:
1.6 Verification
Done, start a new command prompt, type mvn –version : Holddown the Windows Key and Press R on your keyboard.
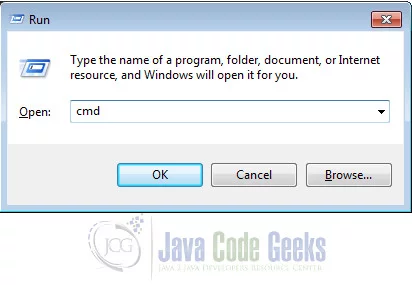
By clicking OK, cmd.exe runs. Now type the command below:
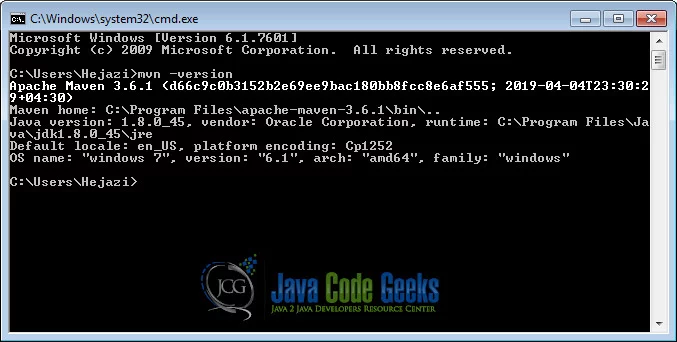
2. What is Maven Enforcer Plugin?
The Enforcer plugin helps maintain project standards and provides goals to control certain environmental constraints such as Maven version, JDK version and OS family along with many more standard(built-in) rules and user created rules.
General instructions on how to use the Enforcer Plugin can be found on the usage page.
3. What can the Enforcer plugin do for the project?
Generally we can use it to guarantee the level of compliance in our project, it is especially handy when we have distributed teams:
- Enforce banned dependencies:
- Dependencies that are undesirable by your organization can be banned and reported during the build so that other developers can not add them to the pom.
- Some third party dependencies include transitive dependencies that may conflict with your project’s dependencies. For example: If your project uses Logback and SFL4j, it is a best practice to ensure no other logging frameworks are included in the build.
- Reduce package size when packaging the application in a war or jar, by excluding banned dependencies.
- Enforce a specific version of Java, OS, and Maven.
Now lets see how to use this plugin using an example:
4. Plugin Configuration and Goals
Maven Enforcer has two goals:
- enforcer:enforce goal: runs during a project build to execute rules specified in the configuration
- enforcer:display-info goal: shows current information about the built-in rules that are present in the project’s pom.xml
5. Create a Maven project
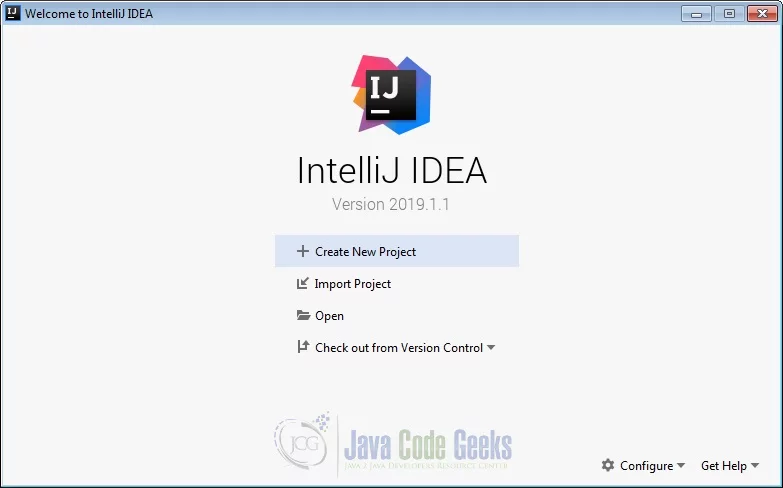
Open IntelliJ Idea, choose Create New Project:
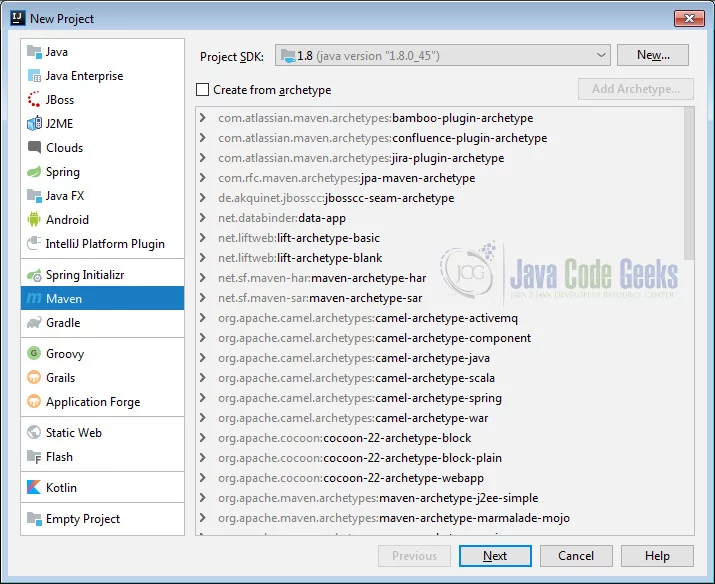
From the right sidebar select Maven:
In the next window enter GroupId and ArtifactId as you wish:
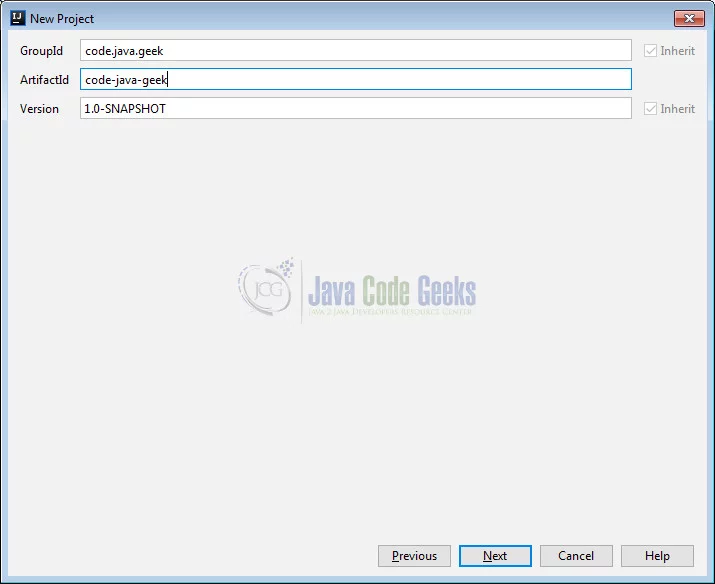
By clicking Next the Project name and location is displayed. You can change the values as you wish.
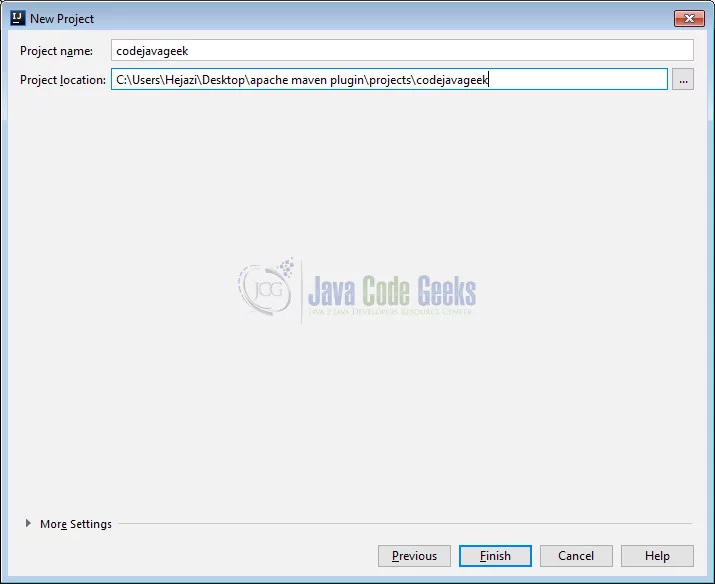
After clicking the “Finish” button this window appears in the IDE:

Let’s define the enforce goal in the executions tag. Furthermore, we’ll add the configuration tag that holds the rules definitions for the project:
executions tag:
...
<executions>
    <execution>
        <id>enforce</id>
        <goals>
            <goal>enforce</goal>
        </goals>
        <configuration>
            <rules>
                <requireMavenVersion>
                    <version>4.0</version>
                    <message>Invalid Maven version. It should, at
                    least, be 4.0</message>
                </requireMavenVersion>
                <requireJavaVersion>
                    <version>1.9</version>
                    <message>Invalid Java version. It should, at
                    least, be 1.9</message>
                </requireJavaVersion>
            </rules>
        </configuration>
    </execution>
</executions>
...
The keyword enforce shows there are rules to follow. In fact the rules are enforced during the build phase of the project.
The available built-in rules are described here. Each rule to be executed should be added to the rules element along with the specific configuration for that rule.
- requireMavenVersion rule enforces certain Maven versions.
- requireJavaVersion rule enforces certain Java JDK versions.
- requireOs rule can enforce certain values about the Operating System and processor architecture.
All rules also accept a message parameter for specifying a custom message:
rules:
...
<requireMavenVersion>
    <version>4.0</version>
    <message>Invalid Maven version. It should, at least, be 4.0</message>
</requireMavenVersion>
...
To check the rule’s behavior, we run mvn clean compile in the Terminal window:
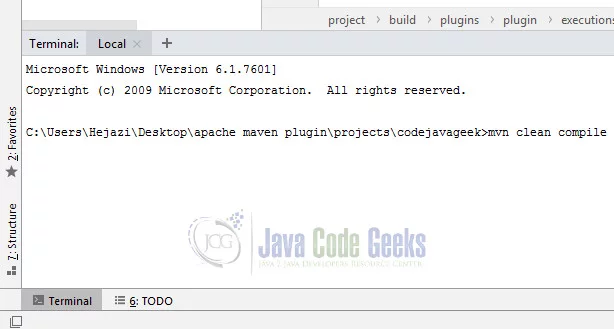
It’ll produce the following error lines on the console:
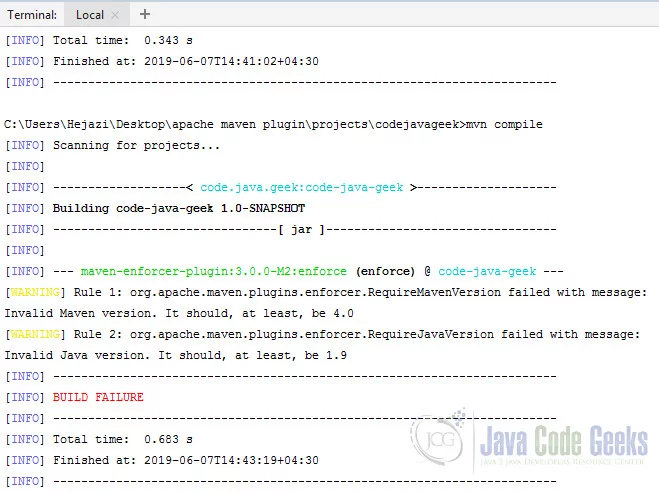
As you see we have warnings on Rule 1 and Rule 2 with our defined messages.
Now we add another rule related to OS version:
Require OS Version: This rule can enforce certain values about the Operating System and processor architecture. The values and code used to determine if an OS is allowed are exactly the same as the OS Profile activation in Maven.
rules:
...
<requireOS>
   <family>unix</family>
</requireOS>
To check the rule’s behavior, we run again mvn clean compile in the Terminal window. We can run first mvn clean then mvn compile
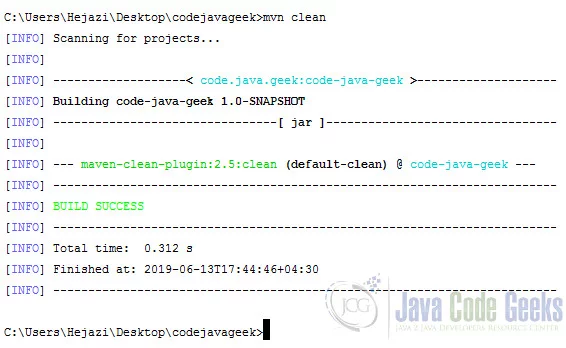
Now we run the install command:
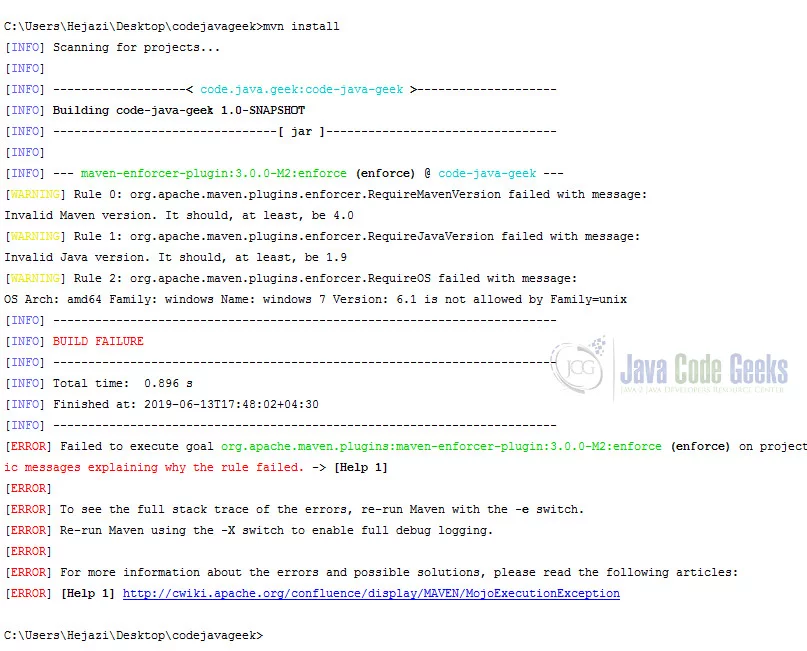
As you see there is one rule added to WARNINGs saying that windows 7 is not allowed.
6. Download the Complete Source Code
This was a tutorial of Apache Maven Enforcer Plugin Example.
You can download the full source code of this example here: Apache Maven Enforcer Plugin Example

