Apache Maven Eclipse Integration aims to ease developers to update pom.xml in the Eclipse IDE. In this tutorial, I will demonstrate how to create, build, and modify a Maven project in the Eclipse IDE.
Table Of Contents
1. Introduction
Apache Maven is a software project management tool. Maven can manage a project’s build, report, and documentation from a central piece of information based on a Project Object Model (POM). Eclipse is an integrated development environment (IDE) used in computer programming, and is the most widely used Java IDE. M2Eclipse (M2E) is the official Eclipse project for Maven integration for the Eclipse IDE.
The goal of M2E is to support Maven in the Eclipse IDE, making it easier to edit Maven’s pom.xml and run a build from the IDE. In this tutorial, I will show you how to create, build, and manage a Maven project inside Eclipse.
2. Install Eclipse
First, click here to install JDK 8, then click here to install Eclipse. If you already have JDK and Eclipse installed, you can skip this step.
3. Install Maven
Eclipse IDE comes with Maven already embedded, but it’s not suitable to execute Maven commands outside of Eclipse. Please click here to install Maven.
We need to set up Maven environment variable. Click here for instruction on windows OS.
Note: M2_HOME is the environment variable name for Maven 2.x and 3.x. MAVEN_HOME is the environment variable name for Maven 1.x.
3.1 Settings.xml
A Maven settings.xml file defines configurable property values. For example, it defines a local repository location, alternate remote repository servers, and authentication information for private repositories.
- Global setting –
${M2_HOME}/conf/settings.xml - User setting –
${user.home}/.m2/settings.xml. The user setting is optional.
Note: The user setting takes precedence over the global setting for the same configuration elements.
4. Install M2Eclipse
M2E is bundled in Eclipse since version Luna which was released on June 25, 2014. Click here for Eclipse with a version older than Luna.
4.1 Check If M2E is Installed or Not
Launch Eclipse, then click Help->About Eclipse IDE, then click the Installation Details button.
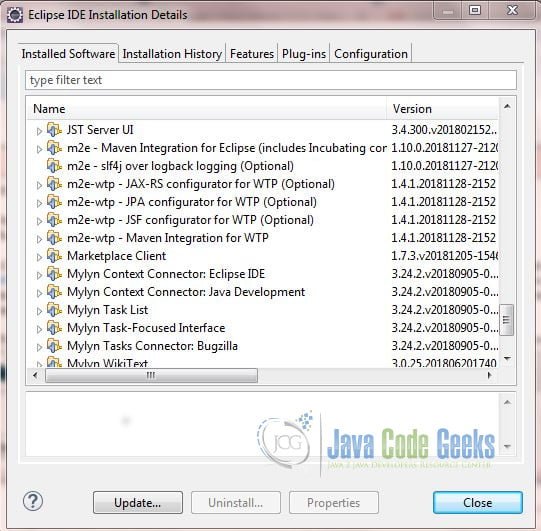
M2E is installed if m2e is displayed like shown.
4.2 Configure Maven in Eclipse
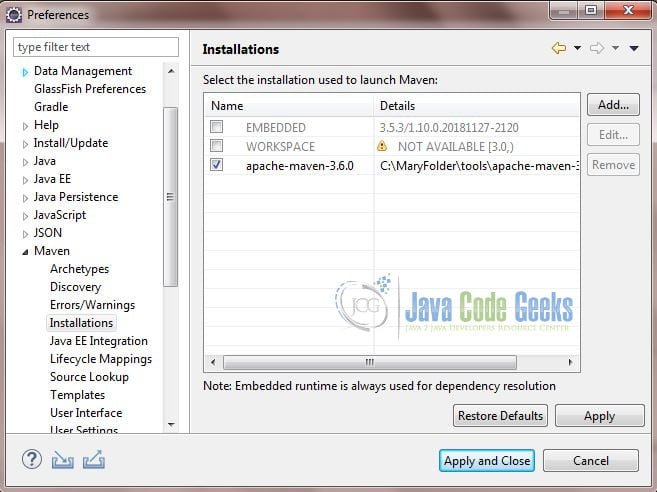
Launch Eclipse, and click Windows->Preferences->Maven. We will update two maven settings: installation and user setting.
4.2.1 Installation
Click add, and enter the Maven home directory as shown.
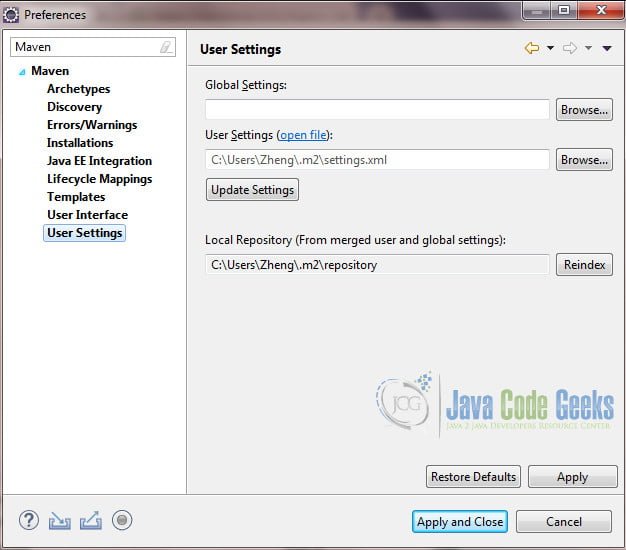
4.2.2 User Setting
Enter the user setting location and the local repository as shown.
5. Create a New Maven Project
M2E enables developers to create a new Maven project in the Eclipse IDE.
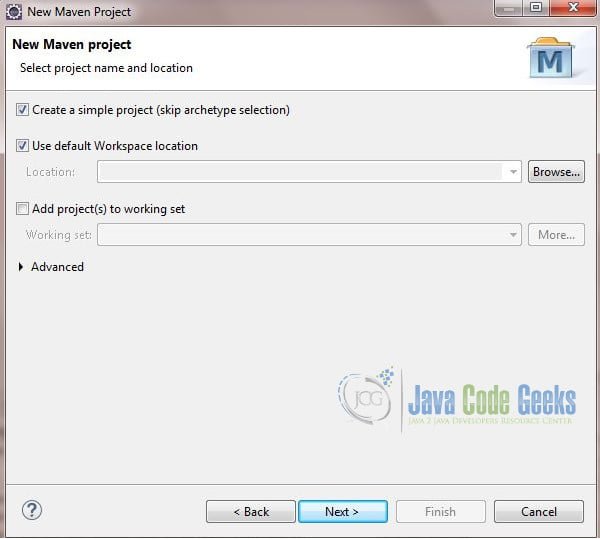
First, launch Eclipse, then click File->New->Other…->Maven->Maven Project.
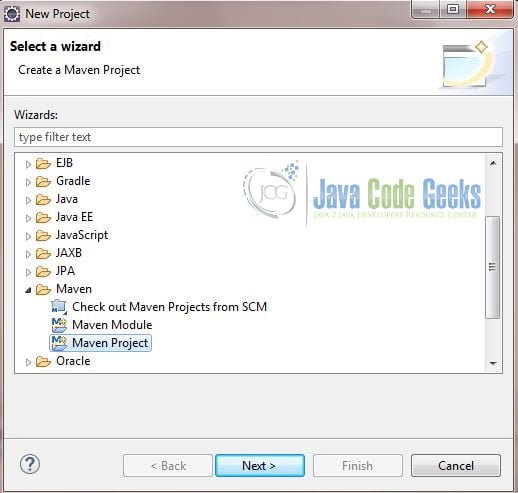
It will open a new window after Next is clicked. Check the “create a simple project” option.
Click Next, then enter the group id, artifact id, and version of your project .
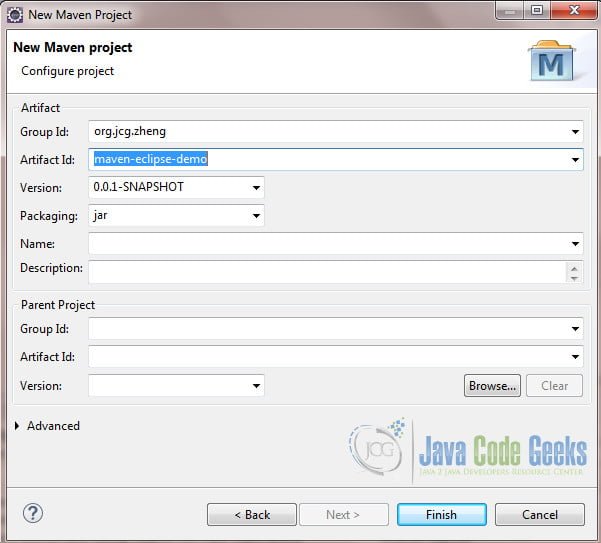
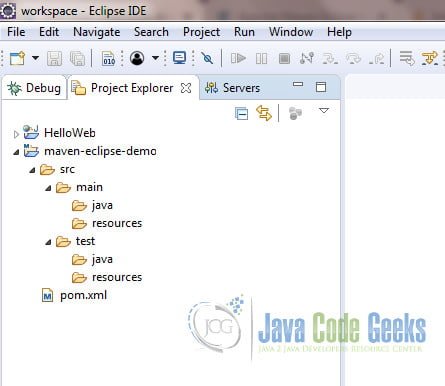
Click Finish. It will generate a new project with a standard Maven folder structure.
Click here to create a new maven project based on a maven archetype.
6. Build Project
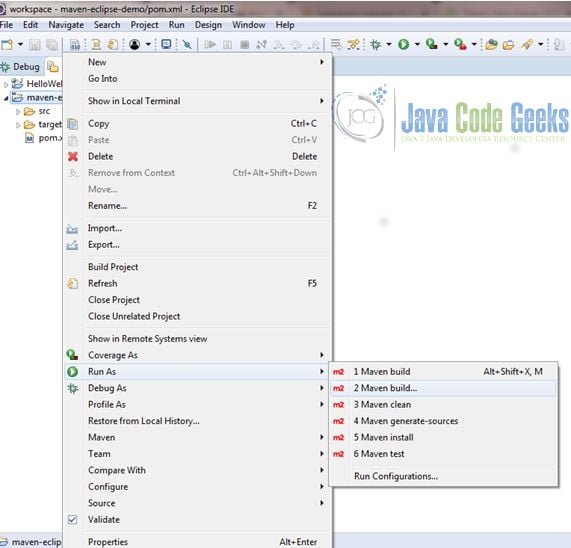
Now, you have a generated Maven project. Right-click it to open a pop-up window. Select Run As->Maven Install to build it.

You should monitor the console view in Eclipse IDE which outputs the Maven build result. You should receive a “BUILD SUCCESS” message when it finishes.
You can execute other maven commands: clean, test, build, etc in Eclipse IDE.
6.1 Build with a Customized Command
You can build a project with a customized configuration in Eclipse IDE.
Right-click the project and select Run As->Maven Build.... It will open up a window.
Enter the customized Maven goal and profile if there is any.
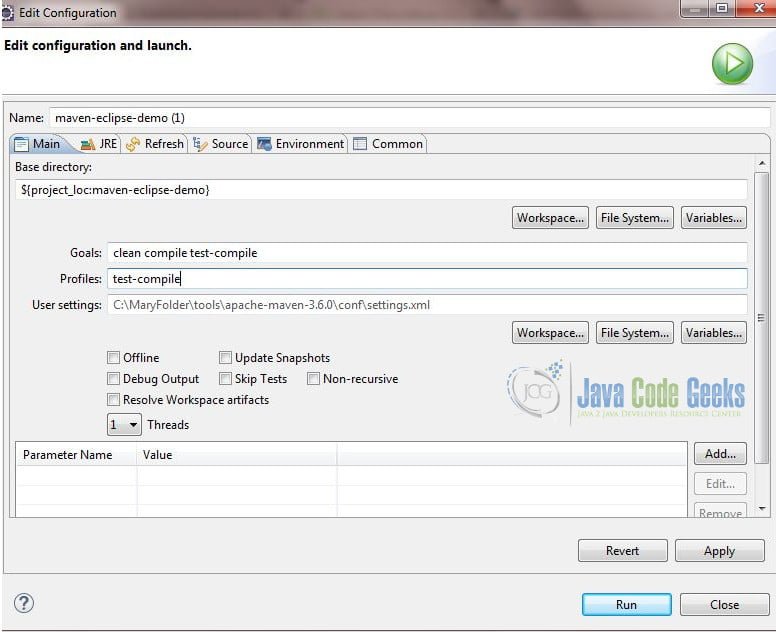
Click Apply and Run to execute it.
7. Manage Project
You can add dependencies and plug-ins by updating pom.xml. The M2E plug-in makes these tasks easily done in the Eclipse IDE.
7.1 Add Dependencies
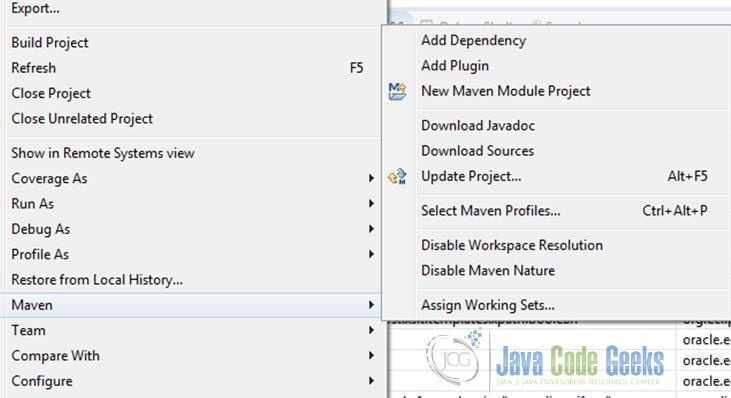
Right-click the project, select Maven->Add dependency.
It will open a window to fill the dependency details. I will use Junit as an example here.
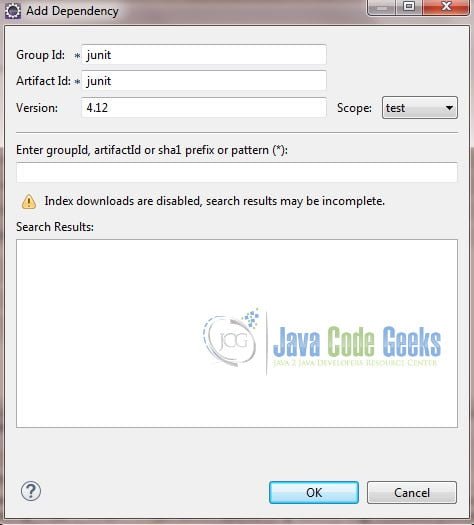
After clicking OK, you should see that pom.xml is updated with Junit.
pom.xml
<project xmlns="http://maven.apache.org/POM/4.0.0" xmlns:xsi="http://www.w3.org/2001/XMLSchema-instance" xsi:schemaLocation="http://maven.apache.org/POM/4.0.0 http://maven.apache.org/xsd/maven-4.0.0.xsd">
  <modelVersion>4.0.0</modelVersion>
  <groupId>org.jcg.zheng</groupId>
  <artifactId>maven-eclipse-demo</artifactId>
  <version>0.0.1-SNAPSHOT</version>
  <dependencies>
  	<dependency>
  		<groupId>junit</groupId>
  		<artifactId>junit</artifactId>
  		<version>4.12</version>
  		<scope>test</scope>
  	</dependency>
  </dependencies>
</project>
7.2 Create a New Maven Module
If you want to add a new maven module to the current project, you can do so by right-clicking it and select Maven->New Module Project and follow the steps in the pop-up windows.
Please click here for detailed instructions.
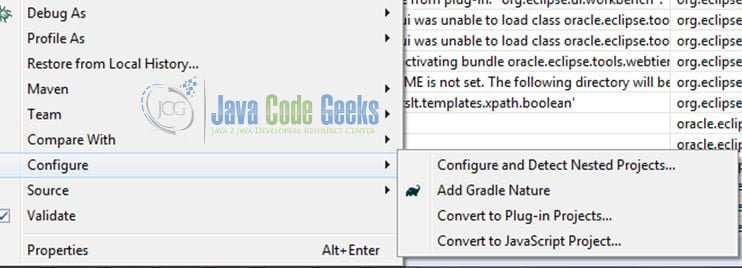
7.3 Convert to a Maven Project
If you have a non-maven project and want to convert it to a Maven project. You can do so by right-clicking it and select Configure->Convert to Maven Project.
8. Troubleshooting Tips
Here are some useful tips when troubleshooting a Maven project in the Eclipse IDE.
8.1 Class Path File
Eclipse Java development tools (JDT) relies on the .classpath file to compile a project. It defines a project’s source folders, output folders, and class path entries. Maven super pom defaults the source folder and output folders.
If Eclipse IDE does not load the Maven dependencies for a Maven project, then you can fix it by correcting its .classpath file. Here is an example of a .classpath file which you can use in your project.
.classpath
<?xml version="1.0" encoding="UTF-8"?>
<classpath>
	<classpathentry kind="src" path="src/main/java"/>
	<classpathentry kind="src" output="target/test-classes" path="src/test/java">
		<attributes>
            		<attribute name="test" value="true"/>
        	</attributes>
	</classpathentry>
	<classpathentry kind="con" path="org.eclipse.jdt.launching.JRE_CONTAINER/org.eclipse.jdt.internal.debug.ui.launcher.StandardVMType/JavaSE-1.8">
		<attributes>
			<attribute name="owner.project.facets" value="java"/>
		</attributes>
	</classpathentry>
	<classpathentry kind="con" path="org.eclipse.m2e.MAVEN2_CLASSPATH_CONTAINER">
		<attributes>
			<attribute name="maven.pomderived" value="true"/>
		</attributes>
	</classpathentry>
	<classpathentry kind="output" path="target/classes"/>
</classpath>
8.2 Clean Project
Clicking Project->Clean... usually clears Eclipse IDE errors.
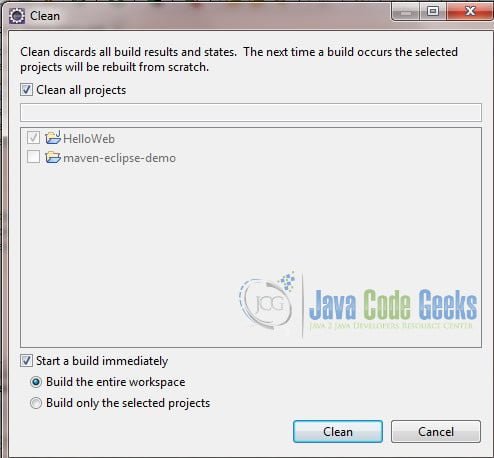
As you see here, it has two options: one to build the entire workspace and one to build only the selected projects.
8.3 Update Project
Right-click the project and select Maven->update project....
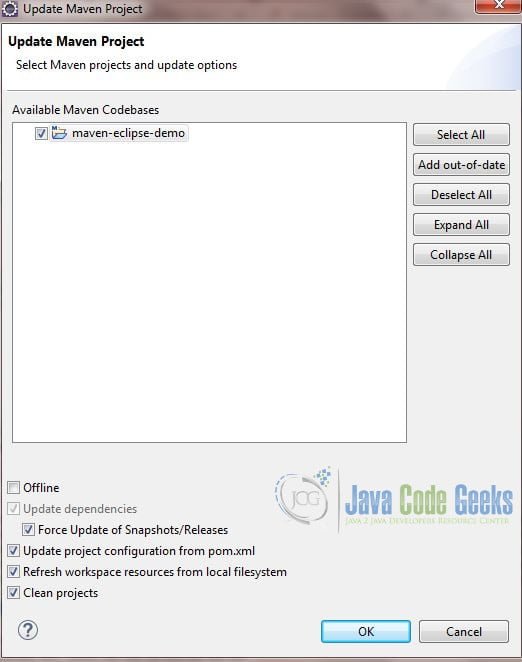
Click OK to update the project.
9. Apache Maven Eclipse Integration – Summary
Apache provides maven-eclipse-plugin to integrate Maven in Eclipse, but it is retired in 2015. M2Eclipse is the official Eclipse project for Maven integration for the Eclipse IDE.
In this tutorial, I demonstrated how to create a new Maven project, how to build a project, how to add a dependency, and some useful troubleshooting tips in Eclipse IDE.
