1. Introduction
One common mistake that developers make in creating JUnit is the version mismatch. Projects seems to be now keen on creating Junit test cases using the more advance annotation based (JUnit 4) rather than the older way (Extending TestCase class) of doing it.
A common error or issue is when a developer loads/imports a JUnit 4 on the project but creates a Junit source using the JUnit 3 approach (extends test case with TestCase class). This will clearly result in a configuration issue such as missing dependency/library or incompatible library versions. JUnit libraries were made to be backward compatible but it’s always safe to stick with a specific one to avoid further issues.
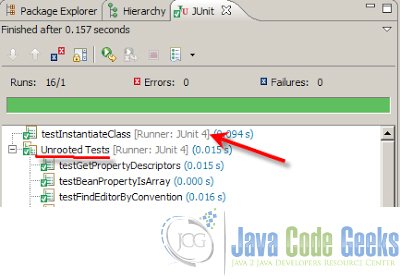
In our example below, we will be tackling one of the few issues that a developer may encounter during this unwanted crisis. It shows a typical junit scenario configured to comply with the JUnit4 standards.
JUnitSampleUnRootedTest.java
package com.junit.unrooted.test.sample;

import static org.junit.Assert.assertTrue;

import org.junit.Before;
import org.junit.Test;
import org.junit.runner.RunWith;
import org.junit.runners.BlockJUnit4ClassRunner;

import junit.framework.TestCase;

@RunWith(BlockJUnit4ClassRunner.class)
public class JUnitSampleUnRootedTest {

	int totalNumberOfApplicants = 0;
	int totalNumberOfAcceptableApplicants = 10;

	@Test
	public void testAssertions() {
		assertTrue((this.totalNumberOfApplicants != this.totalNumberOfAcceptableApplicants));
	}


	@Test
	public void testAssertTrueWithMessage(){
		assertTrue("Is total number of applicants acceptable?",(this.totalNumberOfApplicants != this.totalNumberOfAcceptableApplicants));
	}
}
The issue is, that the developer is using JUnit 3 library as oppose to Junit4. This resulted to the following error after trying to run the unit test case.
2. Solution
The solution is basically just to use the correct library. This will let JUnit get the correct implementation and thus avoid having a JUnit Test that’s unrooted. To load the library in eclipse, simple either use the implicit features (by adding libraries to the project) or via maven.

Project Libraries
Make sure to import the JUnit library on your eclipse properly. Do a few refresh of the workspace and build projects to ensure that it picks up.

Maven
Make sure to update the project settings after putting the dependency on your pom.xml. This will ensure that eclipse will pick it up and import it on your project.
<dependency>
    <groupId>junit</groupId>
    <artifactId>junit</artifactId>
    <version>4.12</version>
</dependency>
Here are useful links/reference to forums that would give in depth information about this:
- http://stackoverflow.com/questions/23229538/junit-test-unrooted-tests-initializationerror
- http://stackoverflow.com/questions/120889/unrooted-tests
3. Download the Eclipse project
You can download the full source code of this example here: junit-unrooted-example
