JUnit Report Generation Example
In this example we shall show users how we can generate reports using the Maven and JUnit. JUnit Report Generation example demonstrates the basic usage of the reporting functionality of JUnit tests.
As you already know, JUnit is the basic unit test framework for the Java programmers. This example focuses more on generating the report. Let’s start by analyzing the ways through which we can generate the HTML reports of our test cases.
1. Introduction
JUnit helps us in validation our methods for functionality. But in some cases we have to see the report also for the test cases. In the process of developing reports, Maven plays an important role as it will make a text, XML and also HTML reports. All JUnit test cases with the details are printed in the reports. We will see in this example how this can be achieved.
However, reports can be generated in many different ways like with Ant, TestNG and other independent libraries. But we will focus on very simple case i.e. with the help of Maven.
We will be using the surefire plugin of maven to generate the reports for our example.
2. Technologies Used
We will be using following technologies to work n this example
- Java – primary language for coding
- Eclipse – IDE for coding
- Maven – dependency management tool and also to generate reports for our test cases.
- JUnit 4.12 – testing framework
3. Project Setup
You may skip project creation and jump directly to the beginning of the example below.
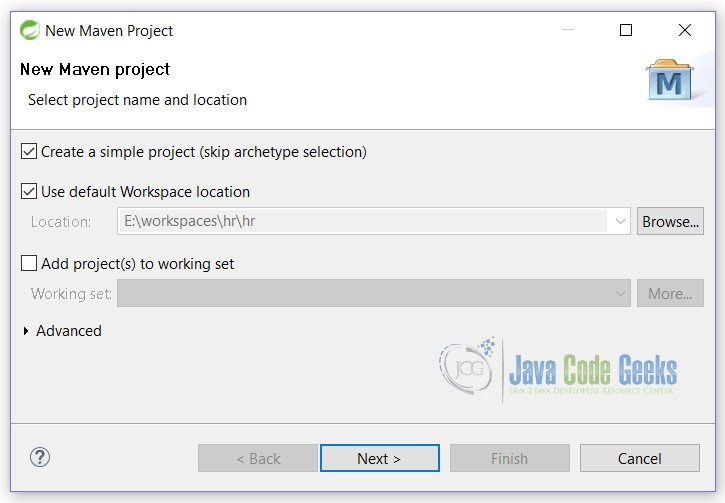
Open Eclipse. Select File -> New -> Maven Project. Following screen will appear. Fill in the values displayed below and then click on Next.
Fill in all the details as shown and click on Finish button.
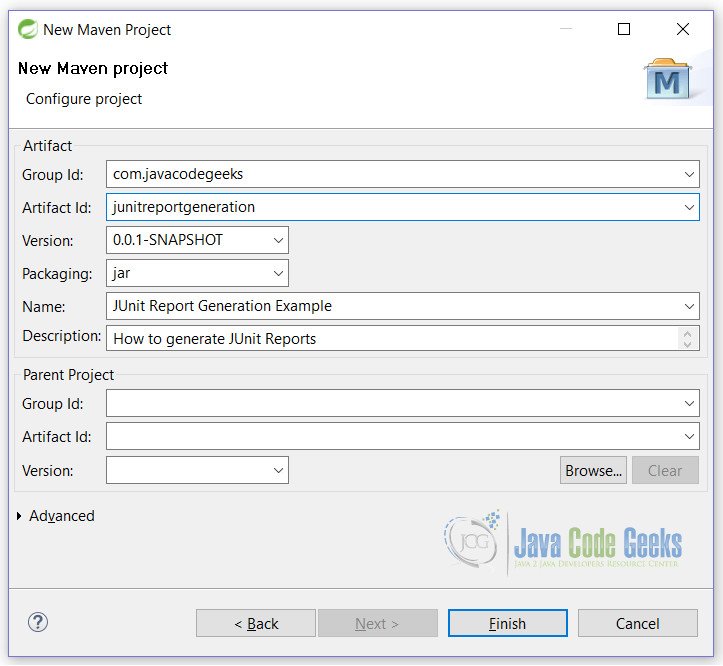
Clicking on Finish button will create a blank Maven project that will be a starting point of our example.
4. JUnit Report Generation Example
First of all we need to put the dependencies for our project. Simply put the following line in the pom.xml file.
pom.xml
<dependencies>
        <dependency>
            <groupId>junit</groupId>
            <artifactId>junit</artifactId>
            <version>4.12</version>
        </dependency>
    </dependencies>

    <properties>
        <maven.compiler.source>1.8</maven.compiler.source>
        <maven.compiler.target>1.8</maven.compiler.target>
    </properties>

    <reporting>
        <plugins>
            <plugin>
                <groupId>org.apache.maven.plugins</groupId>
                <artifactId>maven-surefire-report-plugin</artifactId>
                <version>2.19.1</version>
            </plugin>
        </plugins>
    </reporting>
Lines 1-7 will download JUnit jar file.
Lines 9-12 will ask Maven to use Java 1.8 for this example.
Lines 14-22 are used to fetch the surefire plugin that helps us to generate the report for our test cases.
This will ready our project. Let’s start creating a unit test case.
4.1 JUnit Report Generation Test Class
We will be creating a small test class with only 4 test cases to be tested. By default all test cases will be passed so that our report will be generated.
JUnitReportGenerationTest.java
package junitreportgeneration;

import static org.hamcrest.CoreMatchers.instanceOf;
import static org.hamcrest.CoreMatchers.is;
import static org.junit.Assert.assertThat;
import static org.junit.Assert.assertTrue;

import java.util.ArrayList;
import java.util.List;

import org.junit.Test;

public class JUnitReportGenerationTest {

	private String developer = "Vinod";

	@Test
	public void instanceOfTest() {
		assertThat(new ArrayList(), instanceOf(List.class));
	}

	@Test
	public void assertTrueTest() {
		assertTrue(true);
	}

	@Test
	public void equalToTest() {
		assertThat(developer, is("Vinod"));
	}

	@Test
	public void failTest() {
		assertThat(developer, is("Any"));
	}
}
This is a simple test class.
5. Generate Reports
To generate a report you need to simple run the Maven command:
mvn clean install test surefire-report:report
To run from eclipse you need to follow some steps.
- Right click on project
- Run As -> Run Configurations…
- You will be prompted with the screen
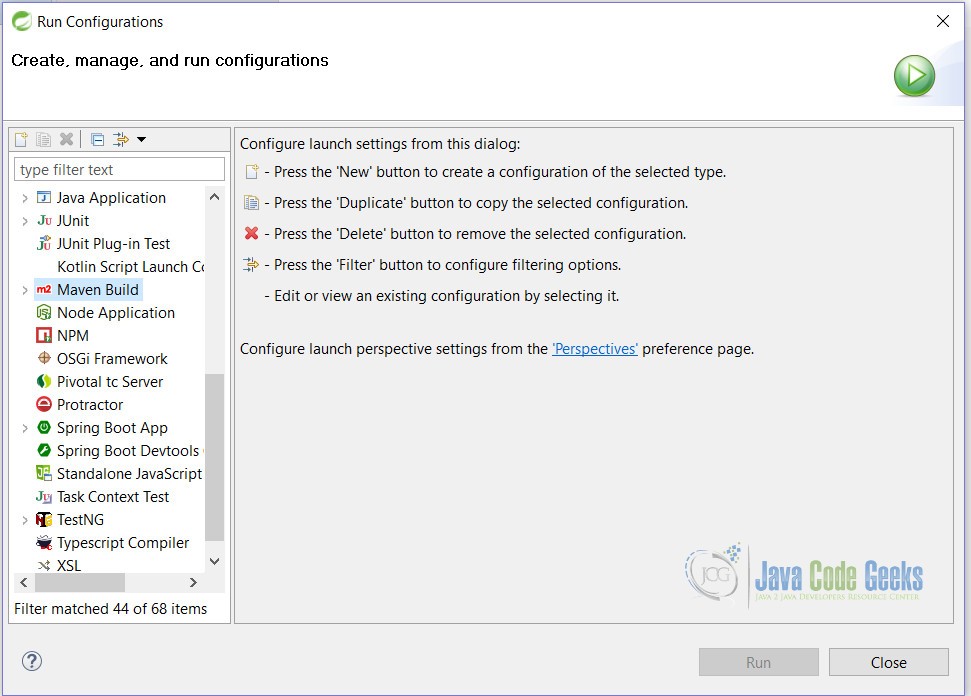
- Double Click on Maven Build
- You will be prompted with following screen
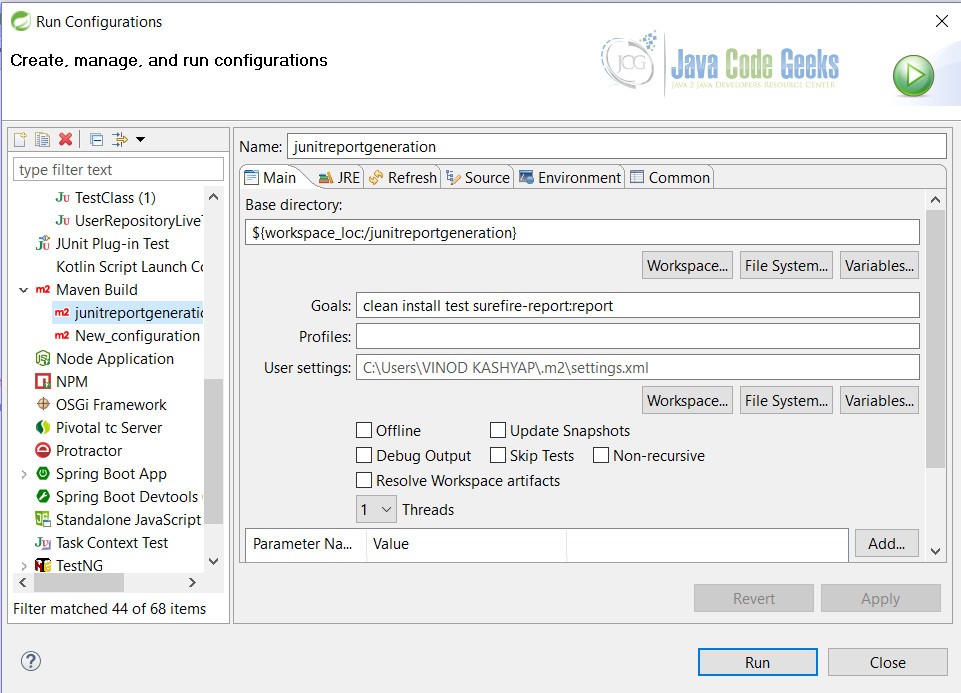
- For Base Directory field, Select Workspace… button and select your project
- Fill in the details as shown above and click on Apply button.
- Now click on Run button on same window
You will see the output generated in the target folder.
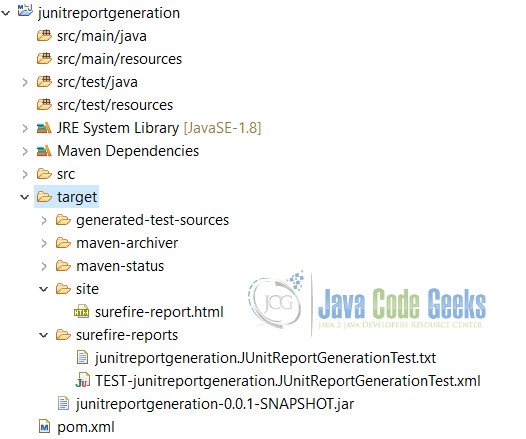
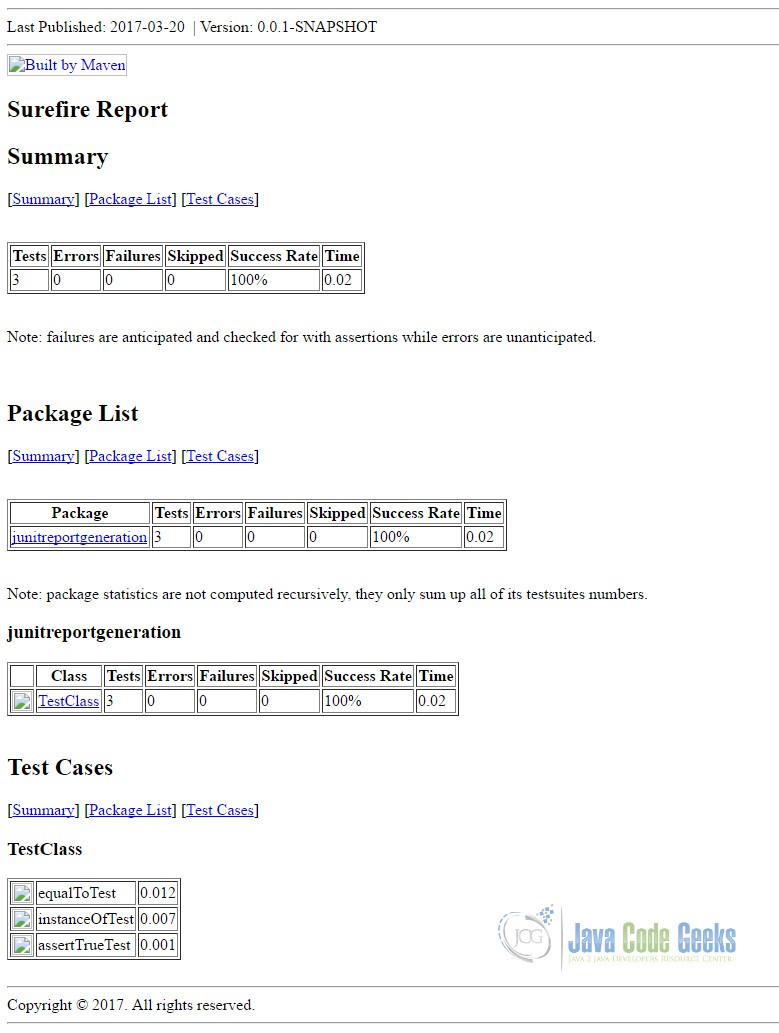
Open sure-fire.html file from target -> site folder in any browser. You will see the following output.
6. Conclusion
Through this example we have learnt that generation of a simple HTML report of JUnit test cases is very simple. We have generated reports with the help of the Maven plugin surefire.
7. Download the Eclipse Project
This is a JUnit Report Generation Example.
You can download the full source code of this example here: JUnitReportGeneration.zip


After Complete of 4 step
5 step Reporting
Maven Build as per screenshot is displaying filename of java or project name
and make run