In this example we shall show you how to start with JUnit hello world. JUnit is an open-source testing framework used by Java programmers. It contains various methods to include in class to make your test cases run smoothly.
Currently latest stable version is 4.x and 5.x is coming most probably in Q1 of 2017. JUnit contains many annotations that are used while creating test cases.
- @BeforeClass: It is used to write code that we want to run before all test cases.
- @Before: It will run before every test case.
- @Test: This is actual test case.
- @After: It will run after every test case.
- @AfterClass: It is used to write code that we want to run after all test cases.
For the sake of simplicity of the example we are using the Maven so that you don’t need to include the jar yourself. Maven is dependency management tool for Java. The jar and its dependencies would be automatically pulled by Maven.
Tools/technologies needed:
Eclipse
Maven
Java
JUnit 4.12 (pulled by Maven automatically)
With this example we will try to show the basic usage of the JUnit. Let’s start with the creation of project in Eclipse.
1. Setup JUnit Hello World Project
You may skip project creation and jump directly to the beginning of the example below.
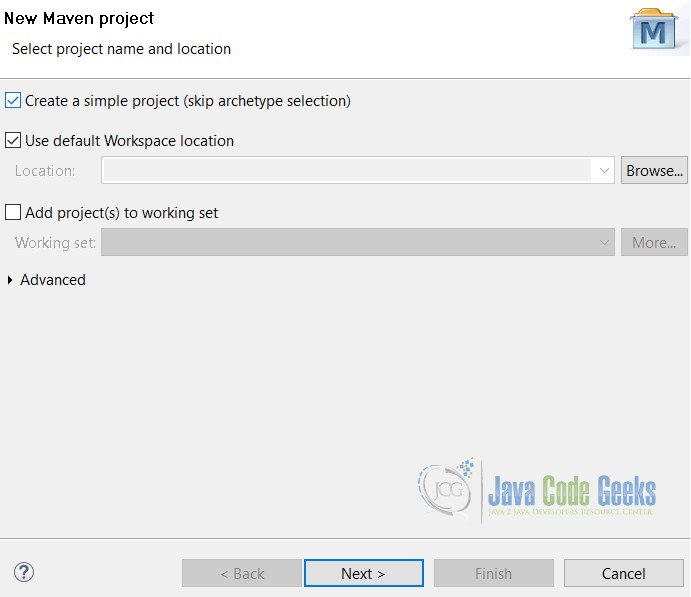
First you need to Select File -> New -> Maven Project
You will see the below screen. Select the top most checkbox as we need simple maven project.
Click on Next button which will take you to second screen. Fill the required details as described in below:
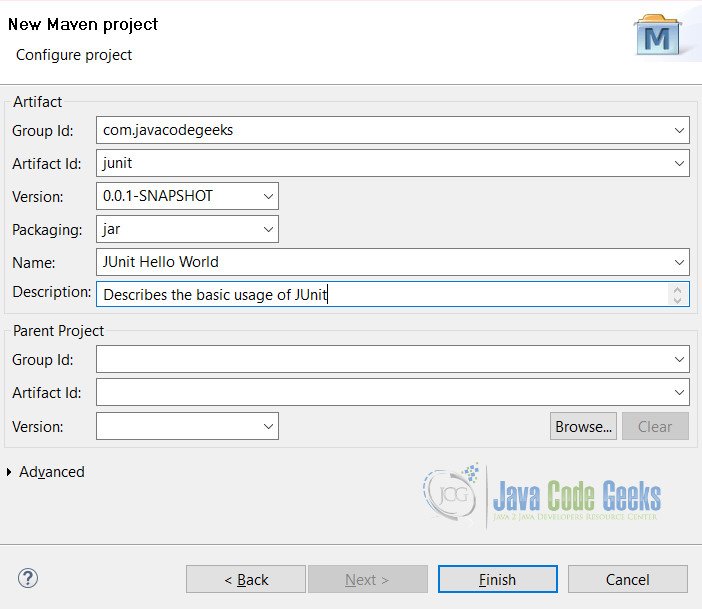
Click on finish. Now you are ready for your project. Open pom.xml and copy dependencies to it.
pom.xml
<dependencies>
 <dependency>
  <groupId>junit</groupId>
  <artifactId>junit</artifactId>
  <version>4.12</version>
 </dependency>
</dependencies>
2. Java Classes
Let’s create class which contains one method.
JUnitHelloWorld.java
package junit;

public class JUnitHelloWorld {

	public boolean isGreater(int num1, int num2){
		return num1 > num2;
	}
}
In this class we have a method named isGreater() which tells us that if first number is greater than second number or not. It will return true or false depending on the parameters passed.
JUnitHelloWorldTest.java
package junit;

import static org.junit.Assert.assertTrue;

import org.junit.After;
import org.junit.AfterClass;
import org.junit.Before;
import org.junit.BeforeClass;
import org.junit.Test;

public class JUnitHelloWorldTest {

	@BeforeClass
	public static void beforeClass() {
		System.out.println("Before Class");
	}

	@Before
	public void before() {
		System.out.println("Before Test Case");
	}

	@Test
	public void isGreaterTest() {
		System.out.println("Test");
		JUnitHelloWorld helloWorld = new JUnitHelloWorld();
		assertTrue("Num 1 is greater than Num 2", helloWorld.isGreater(4, 3));
	}

	@After
	public void after() {
		System.out.println("After Test Case");
	}

	@AfterClass
	public static void afterClass() {
		System.out.println("After Class");
	}
}
In this class we can see there are five methods. Most important is the @Test method, which is our main test case. Other methods are optional and may or may not be used.

3. Run JUnit Project
Right click on JUnitHelloWorldTest and Run As -> JUnit Test. We will see the following output:
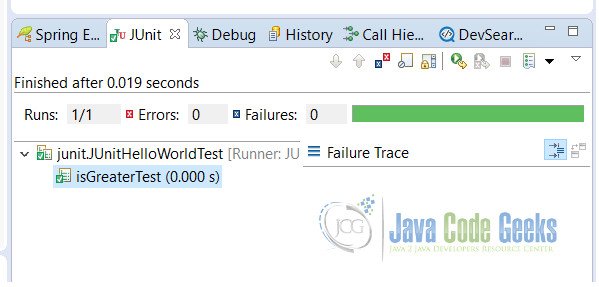
And also in the output window here’s what we should see
The result shown in image JUnit Test Case Passed is due to the test case passed. We can see the line number 27 from JUnitHelloWorldTest class that 4 is greater than 3.
assertTrue("Num 1 is greater than Num 2", helloWorld.isGreater(4, 3));
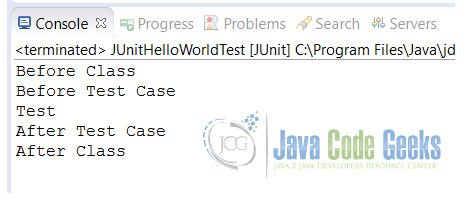
We can also notice the output in console which shows us the method calls. We can see how all annotations work and how the priority of methods is called.
Now change the parameters to 2 and 3.
assertTrue("Num 1 is greater than Num 2", helloWorld.isGreater(2, 3));
When you run the above code it will generate the below error

From above it shows that our test case fails because we are expecting the result to evaluate to true but we are getting false
4. Download the Eclipse Project
This was an example of JUnit Hello World.
You can download the full source code of this example here: JUnitHelloWorld

How can we set value of @value in above project.project is not spring or spring boot.