In this tutorial, we shall show users the usage of the DbUnit framework. JUnit DbUnit example will lead you to the details of testing with the DbUnit. There are other tutorials on JUnit if you want to learn more about the JUnit.
Click here to view the tutorials related to JUnit on Java Code Geeks.
1. Introduction
DbUnit is a JUnit extension that helps to test the applications that are heavily dependent on the database.
There are scenarios in which you have to test run all your test cases multiple times and the data comes from the database. In these scenarios, there are higher chances of corrupting the database. To handle this situation DbUnit comes into the picture. It helps us to generate the data from the database and then test those data. Thus avoiding the corrupting of the database.
2. Technology Stack
In this example, we will be using the following technologies:
- Java 1.8– Language to write our application
- JUnit 4.12 – Testing framework
- Maven – Build and dependency management tool
- Eclipse – IDE for writing programs
- DbUnit – Tool to test the database centric applications
3. Project Setup
You may skip project creation and jump directly to the beginning of the example below.
Let’s start by creating a Maven project. Open Eclipse. Click on File -> New -> Maven Project.
Firstly, click on the first check box and then click Next.

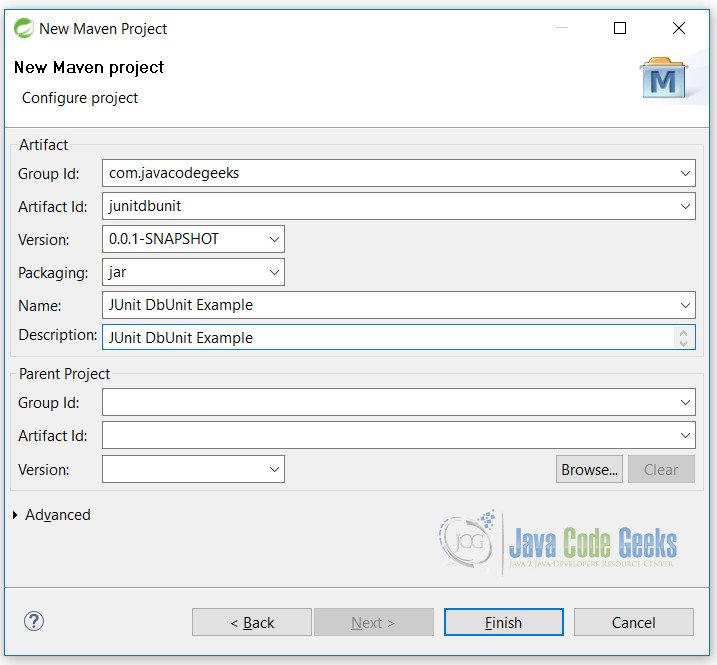
Secondly, fill in the details as shown and click Finish.
With this we are ready for the project. But this will only create a blank Maven project.
4. JUnit DbUnit Example
Let’s start coding our example. But before that, we need to do some initial steps for working of our example. We need to add the following lines to the pom.xml file.
pom.xml
<dependencies>
<dependency>
<groupId>junit</groupId>
<artifactId>junit</artifactId>
<version>4.12</version>
<scope>test</scope>
</dependency>

<dependency>
<groupId>org.dbunit</groupId>
<artifactId>dbunit</artifactId>
<version>2.5.3</version>
</dependency>

<dependency>
<groupId>mysql</groupId>
<artifactId>mysql-connector-java</artifactId>
<version>5.1.30</version>
</dependency>
</dependencies>
<build>
<finalName>junitbasematcher</finalName>
<plugins>
<plugin>
<groupId>org.apache.maven.plugins</groupId>
<artifactId>maven-compiler-plugin</artifactId>
<version>2.5.1</version>
<inherited>true</inherited>
<configuration>
<source>1.8</source>
<target>1.8</target>
</configuration>
</plugin>
</plugins>
</build>
Check lines 3, 10 and 16. We are initializing our applications with JUnit, DbUnit and MySql jar files.
At line 30 and 31 we are telling Maven to use Java 8 for this example. As such no exclusive feature of Java 8 is used in this example, we are targeting the latest version for more stability.
4.1 Java Classes
DbUnit provides the DBTestCase class that extends JUnit TestCase class. We can use this class and extend it to create out test class.
First of all, we need to create an XML file that will represent the database table.
user.xml
<?xml version="1.0" encoding="UTF-8"?>
<dataset>
    <USER userid='1' first_name='Vinod' last_name='Kashyap' />

    <USER userid='2' first_name='Dhwani' last_name='Kashyap' />

    <USER userid='3' first_name='Asmi' last_name='Kashyap' />
</dataset>
Here, USER is the name of the table. userid, first_name and last_name are column names. Make sure to put this file under the root so that it can be accessed from this class.
Let’s start creating our test class.
DbUnit.java
package junitdbunit;

import static org.hamcrest.CoreMatchers.is;
import static org.junit.Assert.assertThat;

import java.io.FileInputStream;

import org.dbunit.DBTestCase;
import org.dbunit.PropertiesBasedJdbcDatabaseTester;
import org.dbunit.dataset.IDataSet;
import org.dbunit.dataset.xml.FlatXmlDataSetBuilder;
import org.dbunit.operation.DatabaseOperation;
import org.junit.Test;

public class DbUnit extends DBTestCase {

    public DbUnit(String name) {
        super(name);
        System.setProperty(PropertiesBasedJdbcDatabaseTester.DBUNIT_DRIVER_CLASS, "com.mysql.jdbc.Driver");
        System.setProperty(PropertiesBasedJdbcDatabaseTester.DBUNIT_CONNECTION_URL, "jdbc:mysql://localhost:3306/user");
        System.setProperty(PropertiesBasedJdbcDatabaseTester.DBUNIT_USERNAME, "root");
        System.setProperty(PropertiesBasedJdbcDatabaseTester.DBUNIT_PASSWORD, "");
    }

    protected IDataSet getDataSet() throws Exception {
        return new FlatXmlDataSetBuilder().build(new FileInputStream("user.xml"));
    }

    protected DatabaseOperation getSetUpOperation() throws Exception {
        return DatabaseOperation.REFRESH;
    }

    protected DatabaseOperation getTearDownOperation() throws Exception {
        return DatabaseOperation.NONE;
    }

    @Test
    public void testById() {

        int userId = 5;// get user id from database
        assertThat(1, is(userId));
    }
}
Let’s analyze this class by identifying the main lines.
Line 15: As you can see, we have extended the DBTestCase class of the DbUnit. It will help us to take the help of some of the methods of the class.

Line 17: We have defined a class constructor that will initialize the required database connections. We have defined, a driver for the database to connect with the username and password to connect to it. We are also assigning the connection URL for the database.
Line 25: This method will read the XML file and create the required entries in the database. Here we are using the FlatXmlDataSet of IDataSet. Similarly there are many other structures that we can use. Some of them are:
- FlatXmlDataSet
- XmlDataSet
- StreamingDataSet
- DatabaseDataSet
- QueryDataSet
- DefaultDataSet
- CompositeDataSet
- FilteredDataSet
- XlsDataSet
- ReplacementDataSet
You can visit this page for more details about the above datasets.
Line 29: This method will setup database to initial position before testing any method.
Line 33: This will clear all the entries after test case run.
Line 40: At this line you have to fetch the record from the database and then test it with the assertThat() method.
5. Best Practices
As per the DbUnit there are some best practices to be followed while using the DbUnit. Here we include the DbUnit website for your reference.
- Use one database instance per developer : Multiple developers working on the same project should have their own database instance to prevent data corruption
- Good setup don’t need cleanup : You should always avoid creating tests that depends on results of preceding tests
- Use multiple small datasets : instead of putting your entire database data in one large dataset, try to break it into many smaller chunks.
- Perform setup of stale data once for entire test class or test suite : If several tests are using the same read-only data, this data could be initialized once for an entire test class or test suite
6. Conclusion
In this JUnit DbUnit example, you have learned the importance and usage of the DbUnit framework in the field of testing where the application is most of the time database centric.
These applications are heavily dependent on the Database for work. DbUnit is an ideal framework for testing.
7. Download the Eclipse Project
This is a JUnit DbUnit Example
You can download the full source code of this example here: junitdbunit.zip

Interesting. thank you!