In this example we shall show users the usage of Cucumber with JUnit. JUnit Cucumber example will follow a brief introduction about the relation they share and how we can use both with each other. This is a very basic example and users are recommended to test their own scenarios after reading this example.
After going through example you will be familiar with the uses of Cucumber. We shall show you the basic steps for creating and building an small example which which test your cases with JUnit and Cucumber.
If you are regular reader of my blogs you are already familiar with the JUnit. If not please go through some JUnit examples.
1. Introduction
Cucumber is a testing framework which supports Behaviour Driven Development (BDD). It lets us define application behaviour in plain meaningful English text using a simple grammar defined by a language called Gherkin. Cucumber itself is written inRuby, but it can be used to test code written in Ruby or other languages including but not limited to Java, C# and Python.
Cucumber is providing a way for non-technical person to define test cases for a product, and on the other hand, our expectation is for smooth and timely execution of such test cases.
Gherkin is the language that Cucumber understands. It is a Business Readable, Domain Specific Language that lets you describe software’s behaviour without detailing how that behaviour is implemented. See below how we can do this.
- Given: The purpose of givens is to put the system in a known state before the user (or external system) starts interacting with the system (in the When steps).
- When: The purpose of When steps is to describe the key action the user performs (or, using Robert C. Martin’s metaphor, the state transition).
- Then: The purpose of Then steps is to observe outcomes. The observations should be related to the business value/benefit in your feature description.
Here, we have mentioned 3 statements which are self defined.
2. Technologies Used
Some of the technologies used in this example are:
- Java: language for this example
- Eclipse: IDE for code
- JUnit 4.12: testing framework
- Cucumber: testing framework
- Maven: dependency management tool
3. Project Setup
You may skip project creation and jump directly to the beginning of the example below.
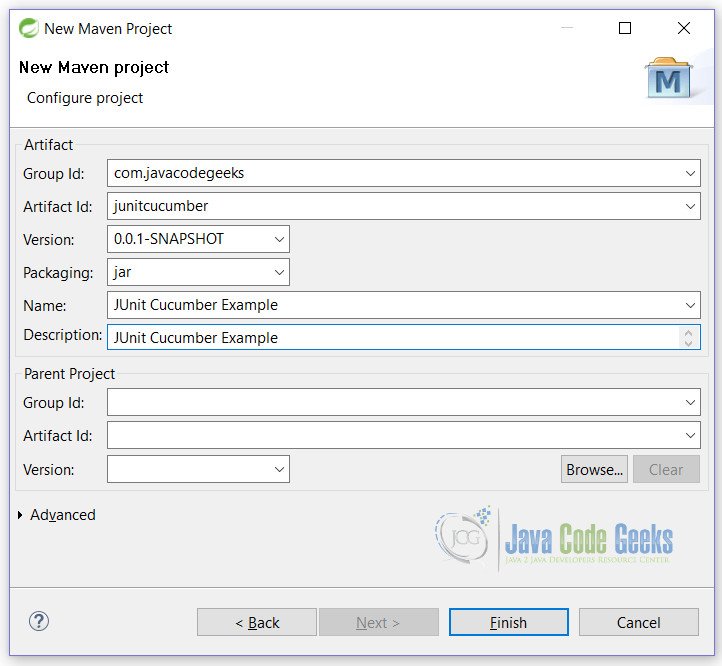
Open Eclipse. Click on File -> New -> Maven Project You will see the following screen. Fill in the details as shown.

On next screen, fill all the necessary details.
Clicking on Finish will create a blank Maven project. Now we will start coding our example.
4. JUnit Cucumber Example
First of all, paste the below lines in your pom.xml of your project.
pom.xml
 <dependencies>

        <dependency>
            <groupId>info.cukes</groupId>
            <artifactId>cucumber-junit</artifactId>
            <version>1.2.5</version>
        </dependency>

        <dependency>
            <groupId>junit</groupId>
            <artifactId>junit</artifactId>
            <version>4.12</version>
            <scope>test</scope>
        </dependency>

        <dependency>
            <groupId>info.cukes</groupId>
            <artifactId>cucumber-java</artifactId>
            <version>1.2.5</version>
            <scope>test</scope>
        </dependency>

    </dependencies>
    <properties>
        <maven.compiler.source>1.8</maven.compiler.source>
        <maven.compiler.target>1.8</maven.compiler.target>
    </properties>
Here we are asking Maven to fetch all jars related to the example. We have defined 3 jars and if there are any dependencies of these jars then they will be automatically pulled by Maven.
First at line no 5, is cucumber-junit jar, which is used with JUnit to test our example.
Second at line no 11, is junit jar, which is our main jar for testing.
Third at line no 18, is cucumber-java jar, that is used by our application and helps cucumber to recognize our Java syntax.
In line no 25,26 we have defined that maven should use 1.8 version of Java.
4.1 Model Class
Let’s start with a small model class. It is a simple class with 3 variables assigned to it and all will be used for testing. We will see the usage further in example.
User.java
package junitcucumber;

public class User {

	private String name;
	private String certification;
	private int marks;

	public String getName() {
		return name;
	}

	public void setName(String name) {
		this.name = name;
	}

	public String getCertification() {
		return certification;
	}

	public void setCertification(String certification) {
		this.certification = certification;
	}

	public int getMarks() {
		return marks;
	}

	public void setMarks(int marks) {
		this.marks = marks;
	}

	public boolean getResult() {
		if (this.marks < 60) {
			return false;
		} else {
			return true;
		}
	}

}
4.2 Testing Classes
We will create 2 classes that are used by Cucumber for testing. First is feature file. This is a simple file which defines our cases i.e. Given, When and Then scenarios.
The extension for this file is .feature

user.feature
Feature: User Certification
    Scenario: User is Passed
        Given that the user Vinod is given a task to clear Java certification exam
        When Vinod got 60 marks in exam
        Then Vinod is known as Java certified
In this file we have defined some of the test scenarios. Let’s examine them.
Line no 1 specifies the name of our feature i.e. a name that can be used to identified the feature.
Line no 2 defines the Scenario. Here we are writing the name of the scenario that we want to test. In our case we are testing that User is certified.
Next 3 lines are self defined and explained above.
After writing the features that we want to test, we need to create the steps file that tell cucumber what exactly to be tested.
UserSteps.java
package junitcucumber;

import static org.hamcrest.CoreMatchers.is;
import static org.hamcrest.MatcherAssert.assertThat;
import static org.hamcrest.core.IsEqual.equalTo;

import cucumber.api.java.en.Given;
import cucumber.api.java.en.Then;
import cucumber.api.java.en.When;
import junitcucumber.User;

public class UserSteps {

	private User user = new User();

	@Given("^that the user (.*) is given a task to clear (.*) certification exam$")
	public void certificationName(String name, String certication) throws Throwable {
		user.setName(name);
		user.setCertification(certication);
	}

	@When("^(.*) got (\\d+) marks in exam$")
	public void gotMarks(String name, int marks) throws Throwable {
		user.setName(name);
		user.setMarks(marks);
	}

	@Then("^(.*) is known as (.*) certified$")
	public void certifiedYes(String name, String certification) throws Throwable {
		assertThat(name, is(user.getName()));
		assertThat(user.getCertification(), equalTo("Java"));
		assertThat(user.getResult(), is(true));
	}
}
As you can see we have used @Given(), @When() and @Then() annotations for the Given, When and Then of cucumber. We can write the regular expression inside our annotations to test the scenarios.
4.3 Main Entry class
Last but not the least is the main class that runs our test cases.
UserTest.java
package junitcucumber;

import org.junit.runner.RunWith;
import cucumber.api.junit.Cucumber;

@RunWith(Cucumber.class)
public class UserTest {
}
As you see that the class is annotated with the @RunWith(Cucumber.class) class. And one more thing that needs to be noted is that the class has nothing inside it. It is bare minimum class that helps in running our tests with the Cucumber.
When you run your test case by right clicking the above class and Run As -> JUnit test, then you will see the following output in the console and the JUnit window.
Output at console
1 Scenarios ( [32m1 passed [0m)
3 Steps ( [32m3 passed [0m)
0m0.129s
Output at JUnit window

5. Conclusion
In conclusion, we have seen how cucumber helps us to run the test cases with the natural language with plain english. We have also learned how we can test the cucumber with JUnit. Individually they are very good but when used together they will create a blast that helps the Java programmer to test his scenarios.
6. Download The Source Code
This is JUnit Cucumber Example
You can download the full source code of this example here: JunitCucumber.zip

thanks for the article, very interesting.. However, i think we have to put the user.feature file in resources/junitcucumber, otherwise, it will return cucumber jvm CucumberException: No features found at []
Thanks.
Thank you it helped me