In this post, we feature a comprehensive tutorial on Java Data Structures.
1. What is a Data Structure in Java?
A data structure in java is a particular way of organizing data in a computer so that it can be used effectively. The idea is to reduce the space and time complexities of different tasks.
You can also check this tutorial in the following video:

Table Of Contents
1.1 Overview of Data Structures
Data Structure in Java can be defined as the group of data elements which provides an efficient way of storing and organizing data in the computer so that it can be used efficiently. Some examples of Data Structures are arrays, Linked List, Stack, Queue, etc.
Java Data Structures are the main part of many computer science algorithms. It plays a crucial role in enhancing the performance of a software or a program as the main function of the software is to store and retrieve the user’s data as fast as possible.
2. Arrays
Arrays in Java, are data structures, which are defined as the collection of similar types of data items stored at contiguous memory locations.
Arrays are the derived data type in C programming language which can store the primitive type of data such as int, char, double, float, etc. Array is the simplest data structure where each data element can be randomly accessed by using its index number.
2.1 Array
In this section we will discuss the One Dimension Array, also known as simple array or list. Each element in the array is of same data type and carries a same size.
Elements of the array are stored at contiguous memory locations where the first element is stored at the smallest memory location, hence they can be randomly accessed since we can calculate the address of each element of the array with the given base address and the size of data element.
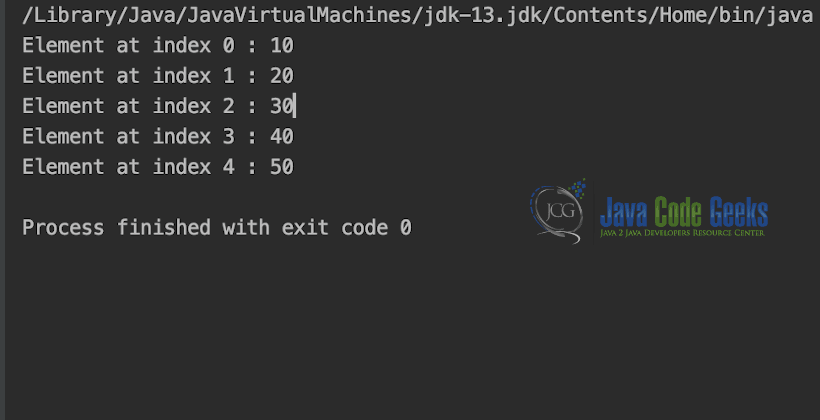
We will show the example of an array in the code snippet below.
Arrays.java
package Arrays;


class Arrays {
    public static void main(String[] args) {
        int[] arr;

        arr = new int[5];

        arr[0] = 10;

        arr[1] = 20;

        arr[2] = 30;
        arr[3] = 40;
        arr[4] = 50;

        for (int i = 0; i < arr.length; i++)
            System.out.println("Element at index " + i +
                    " : " + arr[i]);
    }
}
Output is shown in snapshot below.
2.2 2D Array
2D array can be defined as an array of arrays also known as Matrix. The 2D array is organised as the collection of rows and columns.
Element in 2D array are also stored in contiguous memory locations but require 2 indices for navigation, one row index and one column index.
We will show the example of a Matrix in the code snippet below.
Matrix.java
package Arrays;
class Matrix {
public static void main(String[] args) {
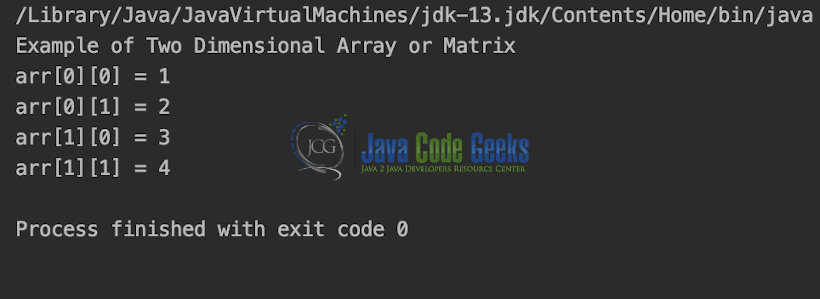
System.out.println("Example of Two Dimensional Array or Matrix");
int[][] arr = {{1, 2}, {3, 4}};
for (int i = 0; i < 2; i++)
for (int j = 0; j < 2; j++)
System.out.println("arr[" + i + "][" + j + "] = "
+ arr[i][j]);
}
}
Output is shown in the snapshot below.
3. LinkedLists
Linked List Java Data structure can be defined as a collection of objects called nodes that are randomly stored in the memory. A node contains two fields i.e. data stored at that particular address and the pointer which contains the address of the next node in the memory.
The First node of the LinkedList is usually called the Head. The last node of the list contains pointer to the null.
LinkedList overcome some of the limitations of arrays, which are listed below.
- The size of array must be known in advance before using it in the program.
- Increasing size of the array is a time taking process. It is almost impossible to expand the size of the array at run time.
- All the elements in the array need to be contiguously stored in the memory. Inserting any element in the array needs shifting of all its predecessors.
3.1 LinkedList Data Structure
Linked list is the data structure which can overcome all the limitations of an array. Using linked list is useful because,It allocates the memory dynamically. All the nodes of linked list are non-contiguously stored in the memory and linked together with the help of pointers. Sizing is no longer a problem since we do not need to define its size at the time of declaration. List grows as per the program’s demand and limited to the available memory space.
The code snippet below shows the basic implementation on LinkedList in Java with name LinkedList.java.
In the following sections we will discuss the common operations supported by LinkedList Data Structure.
3.1.1 Insertion At Beginning
In this section we will discuss how to add a node in beginning of the LinkedList.
Inserting a new element into a singly linked list at beginning is quite simple. We just need to make a few adjustments in the Head link.
Code sample along with output for this operation is given at the end of LinkedList Section with name LinkedList.java.
3.1.2 Insertion At End
In this section we will discuss how to add a node at the end of the LinkedList.
In order to insert a node at the last, there are two following scenarios which need to be mentioned.
- The node is being added to an empty list
- The node is being added to the end of the linked list
Code sample along with output for this operation is given at the end of LinkedList Section with name LinkedList.java.
3.1.3 Insertion After Specific Node
In this section we will discuss about how to add a node in LinkedList after a specific number or node with certain data.
In order to insert an element after the specified number of nodes into the linked list, we need to skip the desired number of elements in the list to move the pointer at the position after which the node will be inserted.
3.1.4 Deletion At Beginning
In this section we will discuss about how to remove a node from beginning of the LinkedList.
Deleting a node from the beginning of the list is the simplest operation of all. It just need a few adjustments in the node pointers. Since the first node of the list is to be deleted, therefore, we just need to make the head, point to the next of the head.
Code sample along with output for this operation is given at the end of LinkedList Section with name LinkedList.java.
3.1.5 Deletion At End
In this section we will discuss about how to remove a node from end of the LinkedList.
There are two scenarios in which, a node is deleted from the end of the linked list.
- There is only one node in the list and that needs to be deleted.
- There are more than one node in the list and the last node of the list will be deleted.
Code sample along with output for this operation is given at the end of LinkedList Section with name LinkedList.java.
3.1.6 Deletion After Specific Node
In this section we will discuss about how to remove a node in LinkedList after a specific number or node with certain data.
In order to delete the node, which is present after the specified node, we need to skip the desired number of nodes to reach the node after which the node will be deleted. We need to keep track of the two nodes. The one which is to be deleted the other one if the node which is present before that node.
Code sample along with output for this operation is given at the end of LinkedList Section with name LinkedList.java.
3.1.7 Traversing a LinkedList
In this section we will discuss the Traversal Operation on LinkedList.
Traversing is the most common operation that is performed in almost every scenario of singly linked list. Traversing means visiting each node of the list once in order to perform some operation on that particular node.
3.1.8 Searching Within a LinkedList
In this section we will discuss the search operation in LinkedList.
Searching is performed in order to find the location of a particular element in the list. Searching any element in the list needs traversing through the list and make the comparison of every element of the list with the specified element. If the element is matched with any of the list element then the location of the element is returned from the function.
LinkedList.java
package LinkedList;
class Node {
protected int data;
protected Node link;
public Node() {
link = null;
data = 0;
}
public Node(int d, Node n) {
data = d;
link = n;
}
public void setLink(Node n) {
link = n;
}
public void setData(int d) {
data = d;
}
public Node getLink() {
return link;
}
public int getData() {
return data;
}
}
class LinkedList {
protected Node start;
protected Node end;
public int size;
public LinkedList() {
start = null;
end = null;
size = 0;
}
public boolean isEmpty() {
return start == null;
}
public int getSize() {
return size;
}
public void insertAtStart(int val) {
Node nptr = new Node(val, null);
size++;
if (start == null) {
start = nptr;
end = start;
} else {
nptr.setLink(start);
start = nptr;
}
}
public void insertAtEnd(int val) {
Node nptr = new Node(val, null);
size++;
if (start == null) {
start = nptr;
end = start;
} else {
end.setLink(nptr);
end = nptr;
}
}
public void insertAtPos(int val, int pos) {
Node nptr = new Node(val, null);
Node ptr = start;
pos = pos - 1;
for (int i = 1; i < size; i++) {
if (i == pos) {
Node tmp = ptr.getLink();
ptr.setLink(nptr);
nptr.setLink(tmp);
break;
}
ptr = ptr.getLink();
}
size++;
}
public void deleteAtPos(int pos) {
if (pos == 1) // case covering the delete at beginning
{
start = start.getLink();
size--;
return;
}
if (pos == size) // case covering delete at end
{
Node s = start;
Node t = start;
while (s != end) {
t = s;
s = s.getLink();
}
end = t;
end.setLink(null);
size--;
return;
}
Node ptr = start;
pos = pos - 1;
for (int i = 1; i < size - 1; i++) {
if (i == pos) {
Node tmp = ptr.getLink();
tmp = tmp.getLink();
ptr.setLink(tmp);
break;
}
ptr = ptr.getLink();
}
size--;
}
public void display() {
System.out.print("\n Linked List = ");
if (size == 0) {
System.out.print("empty\n");
return;
}
if (start.getLink() == null) {
System.out.println(start.getData());
return;
}
Node ptr = start;
System.out.print(start.getData() + "->");
ptr = start.getLink();
while (ptr.getLink() != null) {
System.out.print(ptr.getData() + "->");
ptr = ptr.getLink();
}
System.out.print(ptr.getData() + "\n");
}
public static void main(String[] args) {
LinkedList list = new LinkedList();
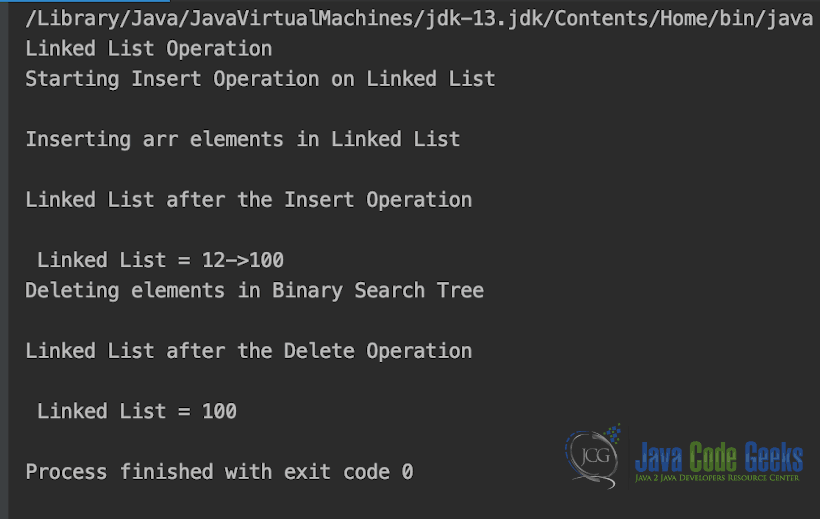
System.out.println("Linked List Operation");
int[] arr = {12, 9, 100};
System.out.println("Starting Insert Operation on Linked List\n");
System.out.println("Inserting arr elements in Linked List\n");
list.insertAtStart(arr[0]);
list.insertAtEnd(arr[2]);
System.out.println("Linked List after the Insert Operation");
list.display();
System.out.println("Deleting elements in Binary Search Tree\n");
for (int i = 0; i < arr.length; i++) {
list.deleteAtPos(i);
}
System.out.println("Linked List after the Delete Operation");
list.display();
}
}
Output is shown in the snapshot below.
3.2 Doubly LinkedList Data Structure
Doubly linked list data structure in java is a complex type of linked list in which a node contains a pointer to the previous as well as the next node in the sequence. Therefore, in a doubly-linked list, a node consists of three parts: node data, pointer to the next node in sequence (next pointer) , pointer to the previous node (previous pointer).
Code sample along with output is given at the end of Doubly LinkedList Section with name DoublyLinkedList.java.
3.2.1 Insertion At Beginning
In this section we will discuss how to add a node in beginning of the Doubly LinkedList.
As in doubly linked list, each node of the list contain double pointers therefore we have to maintain more number of pointers in doubly linked list as compare to singly linked list.
There are two scenarios of inserting any element into doubly linked list. Either the list is empty or it contains at least one element.
Code sample along with output for this operation is given at the end of Doubly LinkedList Section with name DoublyLinkedList.java.
3.2.2 Insertion At End
In this section we will discuss how to add a node in end of the Doubly LinkedList.
In order to insert a node in doubly linked list at the end, we must make sure whether the list is empty or it contains any element.
Code sample along with output for this operation is given at the end of Doubly LinkedList Section with name DoublyLinkedList.java.
3.2.3 Insertion After Specific Node
In this section we will discuss how to add a node after specific node of the Doubly LinkedList.
In order to insert a node after the specified node in the list, we need to skip the required number of nodes in order to reach the mentioned node and then make the pointer adjustments as required.
3.2.4 Deletion At Beginning
In this section we will discuss about how to remove a node from beginning of the Doubly LinkedList.
Deletion in doubly linked list at the beginning is the simplest operation. We just need to copy the head pointer to pointer ptr and shift the head pointer to its next.
Code sample along with output for this operation is given at the end of Doubly LinkedList Section with name DoublyLinkedList.java.
3.2.5 Deletion At End
In this section we will discuss about how to remove a node from end of the Doubly LinkedList.
Deletion in doubly linked list at the beginning is the simplest operation. We just need to copy the head pointer to pointer ptr and shift the head pointer to its next.
Code sample along with output for this operation is given at the end of Doubly LinkedList Section with name DoublyLinkedList.java.
3.2.6 Deletion After Specific Node
In this section we will discuss about how to remove a node after specific node of the Doubly LinkedList.
In order to delete a node after the specified node in the list, we need to skip the required number of nodes in order to reach the mentioned node and then make the pointer adjustments as required.
3.2.7 Traversing a LinkedList
In this section we will discuss the Traversal Operation on Doubly LinkedList.
Traversing is the most common operation that is performed in almost every scenario of Doubly linked list. Traversing means visiting each node of the list once in order to perform some operation on that particular node.
Code sample along with output for this operation is given at the end of Doubly LinkedList Section with name DoublyLinkedList.java.
3.2.8 Searching Within a LinkedList
In this section we will discuss the search operation in Doubly LinkedList.
Searching is performed in order to find the location of a particular element in the list. Searching any element in the list needs traversing through the list and make the comparison of every element of the list with the specified element. If the element is matched with any of the list element then the location of the element is returned from the function.
DoublyLinkedList.java
package LinkedList;
import java.util.NoSuchElementException;
public class DoublyLinkedList {
private Node head;
private Node tail;
private int size;
public DoublyLinkedList() {
size = 0;
}
private class Node {
int element;
Node next;
Node prev;
public Node(int element, Node next, Node prev) {
this.element = element;
this.next = next;
this.prev = prev;
}
}
public int size() {
return size;
}
public boolean isEmpty() {
return size == 0;
}
public void addFirst(int element) {
Node tmp = new Node(element, head, null);
if (head != null) {
head.prev = tmp;
}
head = tmp;
if (tail == null) {
tail = tmp;
}
size++;
System.out.println("adding: " + element);
}
public void addLast(int element) {
Node tmp = new Node(element, null, tail);
if (tail != null) {
tail.next = tmp;
}
tail = tmp;
if (head == null) {
head = tmp;
}
size++;
System.out.println("adding: " + element);
}
public void traverseForward() {
System.out.println("Traversing forward..");
Node tmp = head;
while (tmp != null) {
System.out.println(tmp.element);
tmp = tmp.next;
}
}
public void traverseBackward() {
System.out.println("Traversing backward..");
Node tmp = tail;
while (tmp != null) {
System.out.println(tmp.element);
tmp = tmp.prev;
}
}
public int removeFirst() {
if (size == 0) throw new NoSuchElementException();
Node tmp = head;
head = head.next;
head.prev = null;
size--;
System.out.println("deleted: " + tmp.element);
return tmp.element;
}
public int removeLast() {
if (size == 0) throw new NoSuchElementException();
Node tmp = tail;
tail = tail.prev;
tail.next = null;
size--;
System.out.println("deleted: " + tmp.element);
return tmp.element;
}
public static void main(String a[]) {
DoublyLinkedList dll = new DoublyLinkedList();
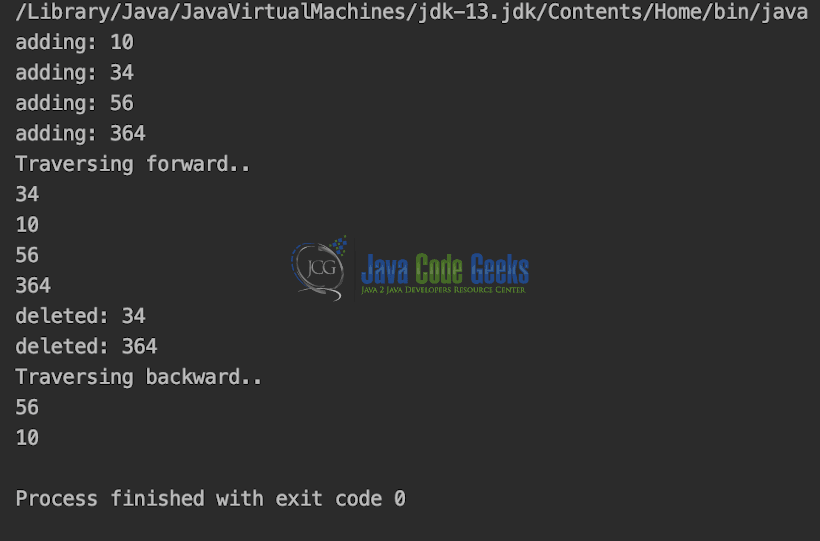
dll.addFirst(10);
dll.addFirst(34);
dll.addLast(56);
dll.addLast(364);
dll.traverseForward();
dll.removeFirst();
dll.removeLast();
dll.traverseBackward();
}
}
Output is shown in the Snapshot below.
4. Stacks
The stack data structure in java is an ordered list in which, insertion and deletion can be performed only at one end that is called top.
Stack is a recursive data structure having pointer to its top element. Stacks are sometimes called as Last-In-First-Out (LIFO) lists i.e. the element which is inserted first in the stack, will be deleted last from the stack.
Stack can be implemented using 2 Data Structures at its base. It can be implemented either using an Array or a LinkedList.
Stack usually Supports 3 Operations.
- Push: Insert an element on top of Stack.
- Pop: Delete the element from the top of the stack.
- Peek: Visit the element on top of the stack without removing it.
We will cover all these operations in both implementation of stack.
4.1 Array Implementation
In this section we will implement the stack all the above mentioned operations using Array as the underlying data structure.
Code sample of the above implementation is given in code snippet below.
StackUsingArray.java
package Stacks;
import java.util.EmptyStackException;
public class StackUsingArray {
private int arr[];
private int size;
private int index = 0;
public StackUsingArray(int size) {
this.size = size;
arr = new int[size];
}
public void push(int element) {
if (isFull()) {
throw new StackOverflowError("Stack is full");
}
arr[index] = element;
index++;
}
public int pop() {
if (isEmpty()) {
throw new EmptyStackException();
}
return arr[--index];
}
public int peek() {
if (isEmpty()) {
throw new EmptyStackException();
}
int peekIndex = index - 1;
return arr[peekIndex];
}
public boolean isEmpty() {
if (index == 0) {
return true;
}
return false;
}
public boolean isFull() {
if (index == size) {
return true;
}
return false;
}
public int size() {
return index;
}
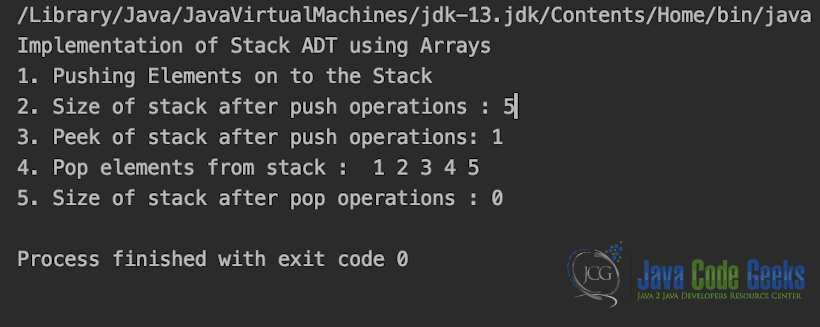
public static void main(String[] args) {
System.out.println("Implementation of Stack ADT using Arrays");
StackUsingArray stack = new StackUsingArray(5);
System.out.println("1. Pushing Elements on to the Stack");
stack.push(5);
stack.push(4);
stack.push(3);
stack.push(2);
stack.push(1);
System.out.println("2. Size of stack after push operations : " + stack.size());
System.out.println("3. Peek of stack after push operations: " + stack.peek());
System.out.printf("4. Pop elements from stack : ");
while (!stack.isEmpty()) {
System.out.printf(" %d", stack.pop());
}
System.out.println("\n5. Size of stack after pop operations : " + stack.size());
}
}
Output is shown in snapshot below.
4.2 LinkedList Implementation
In this section we will implement the stack all the above mentioned operations using LinkedList as the underlying data structure.
Code sample of the above implementation is given in code snippet below.
StackUsingLinkedlist.java
package Stacks;
import static java.lang.System.exit;
class StackUsingLinkedlist {
private class Node {
int data;
Node link;
}
Node top;
StackUsingLinkedlist() {
this.top = null;
}
public void push(int x) {
Node temp = new Node();
if (temp == null) {
System.out.print("\nHeap Overflow");
return;
}
temp.data = x;
temp.link = top;
top = temp;
}
public boolean isEmpty() {
return top == null;
}
public int peek() {
if (!isEmpty()) {
return top.data;
} else {
System.out.println("Stack is empty");
return -1;
}
}
public void pop() {
if (top == null) {
System.out.print("\nStack Underflow");
return;
}
top = (top).link;
}
public void display() {
if (top == null) {
System.out.printf("\nStack Underflow");
exit(1);
} else {
Node temp = top;
while (temp != null) {
System.out.printf("%d->", temp.data);
temp = temp.link;
}
}
}
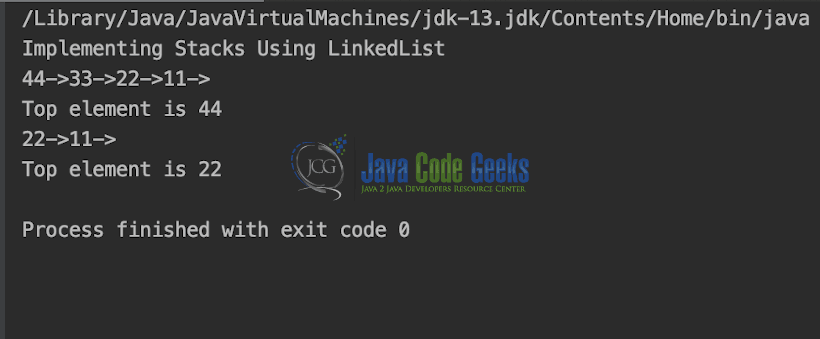
public static void main(String[] args) {
System.out.println("Implementing Stacks Using LinkedList");
StackUsingLinkedlist obj = new StackUsingLinkedlist();
obj.push(11);
obj.push(22);
obj.push(33);
obj.push(44);
obj.display();
System.out.printf("\nTop element is %d\n", obj.peek());
obj.pop();
obj.pop();
obj.display();
System.out.printf("\nTop element is %d\n", obj.peek());
}
}
Output is shown in the snapshot below.
5. Queues
A queue data structure in java can be defined as an ordered list that enables insert operations to be performed at one end called REAR and delete operations to be performed at another end called FRONT.
Queue is referred to be as First In First Out list.
Queue usually Supports 2 Major Operations.
- enqueue: Insert an element on from the REAR of the Queue.
- dequeue: Delete the element from the FRONT of the Queue.
5.1 Array Implementation
In this section we will implement the queue all the above mentioned operations using Array as the underlying data structure.
Code sample of the above implementation is given in code snippet below.
QueueUsingArrays.java
package Queues;
class QueueUsingArrays {
private static int front, rear, capacity;
private static int queue[];
QueueUsingArrays(int c) {
front = rear = 0;
capacity = c;
queue = new int[capacity];
}
static void enqueue(int data) {
if (capacity == rear) {
System.out.printf("\nQueue is full\n");
return;
} else {
queue[rear] = data;
rear++;
}
return;
}
static void dequeue() {
if (front == rear) {
System.out.printf("\nQueue is empty\n");
return;
} else {
for (int i = 0; i < rear - 1; i++) {
queue[i] = queue[i + 1];
}
if (rear < capacity)
queue[rear] = 0;
rear--;
}
return;
}
static void display() {
int i;
if (front == rear) {
System.out.printf("\nQueue is Empty\n");
return;
}
for (i = front; i < rear; i++) {
System.out.printf(" %d <-- ", queue[i]);
}
return;
}
static void startOfQueue() {
if (front == rear) {
System.out.printf("\nQueue is Empty\n");
return;
}
System.out.printf("\nFront Element is: %d", queue[front]);
return;
}
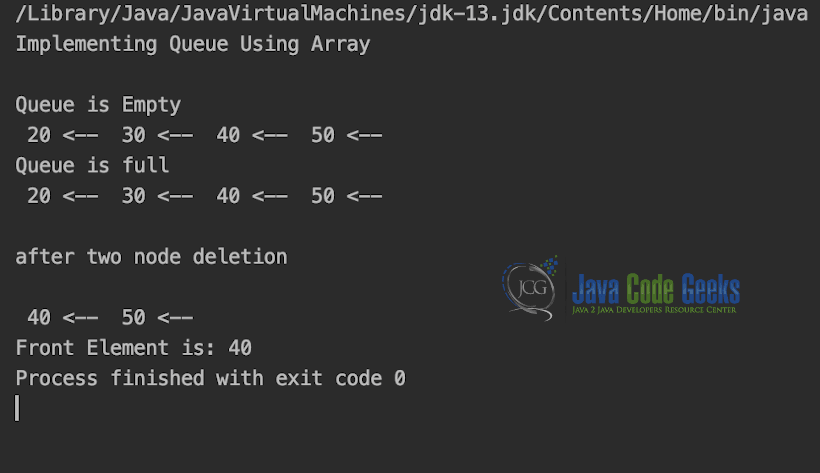
public static void main(String[] args) {
System.out.println("Implementing Queue Using Array");
QueueUsingArrays q = new QueueUsingArrays(4);
q.display();
q.enqueue(20);
q.enqueue(30);
q.enqueue(40);
q.enqueue(50);
q.display();
q.enqueue(60);
q.display();
q.dequeue();
q.dequeue();
System.out.printf("\n\nafter two node deletion\n\n");
q.display();
q.startOfQueue();
}
}
Output is shown in Snapshot below.
5.2 LinkedList Implementation
In this section we will implement the queue all the above mentioned operations using LinkedList as the underlying data structure.
Code sample of the above implementation is given in code snippet below.
QueueUsingLinkedList.java
package Queues;
class QueueNode {
int key;
QueueNode next;
public QueueNode(int key) {
this.key = key;
this.next = null;
}
}
class QueueUsingLinkedList {
QueueNode front, rear;
public QueueUsingLinkedList() {
this.front = this.rear = null;
}
void enqueue(int key) {
QueueNode temp = new QueueNode(key);
if (this.rear == null) {
this.front = this.rear = temp;
return;
}
this.rear.next = temp;
this.rear = temp;
}
QueueNode dequeue() {
if (this.front == null)
return null;
QueueNode temp = this.front;
this.front = this.front.next;
if (this.front == null)
this.rear = null;
return temp;
}
void display(){
if (this.front == null)
System.out.println("");
QueueNode temp = this.front;
while(temp != null){
System.out.print(temp.key + " -> ");
temp = temp.next;
}
}
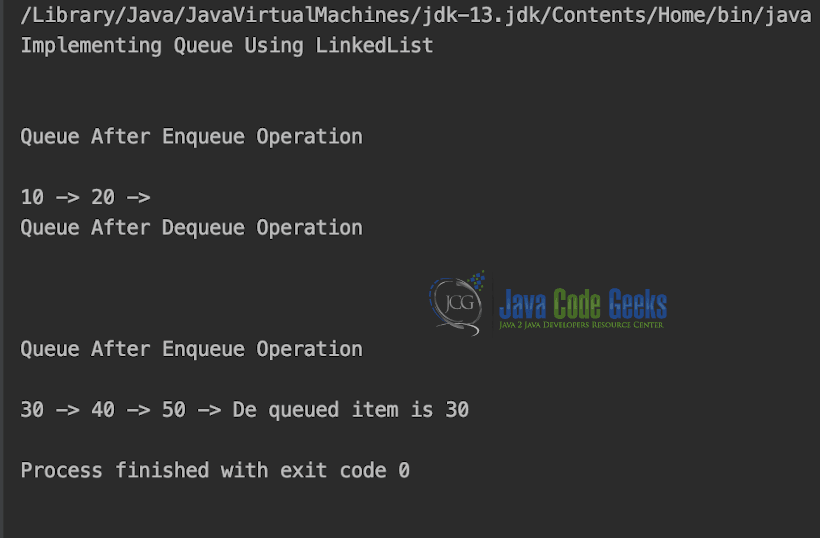
public static void main(String[] args) {
System.out.println("Implementing Queue Using LinkedList\n");
QueueUsingLinkedList qUsingLinkedList = new QueueUsingLinkedList();
qUsingLinkedList.enqueue(10);
qUsingLinkedList.enqueue(20);
System.out.println("\nQueue After Enqueue Operation\n");
qUsingLinkedList.display();
qUsingLinkedList.dequeue();
qUsingLinkedList.dequeue();
System.out.println("\nQueue After Dequeue Operation\n");
qUsingLinkedList.display();
qUsingLinkedList.enqueue(30);
qUsingLinkedList.enqueue(40);
qUsingLinkedList.enqueue(50);
System.out.println("\nQueue After Enqueue Operation\n");
qUsingLinkedList.display();
System.out.println("De queued item is " + qUsingLinkedList.dequeue().key);
}
}
Output is shown in Snapshot below.
5.3 Circular Queue
In this section we will discuss the Circular Queue.
In Circular Queue, deletions and insertions can only be performed at front and rear end respectively.
Circular Queue usually Supports 2 Major Operations.
- enqueue: Insert an element on from the REAR of the Queue.
- dequeue: Delete the element from the FRONT of the Queue.
Code sample of the above implementation is given in code snippet below.
CircularQueue.java
package Queues;

import java.util.Arrays;

class CircularQueue {

    private int currentSize;
    private int[] circularQueueElements;
    private int maxSize;

    private int rear;
    private int front;

    public CircularQueue(int maxSize) {
        this.maxSize = maxSize;
        circularQueueElements = new int[this.maxSize];
        currentSize = 0;
        front = -1;
        rear = -1;
    }


    public void enqueue(int item) throws Exception {
        if (isFull()) {
            throw new Exception("Circular Queue is full. Element cannot be added");
        } else {
            rear = (rear + 1) % circularQueueElements.length;
            circularQueueElements[rear] = item;
            currentSize++;

            if (front == -1) {
                front = rear;
            }
        }
    }


    public int dequeue() throws Exception {
        int deQueuedElement;
        if (isEmpty()) {
            throw new Exception("Circular Queue is empty. Element cannot be retrieved");
        } else {
            deQueuedElement = circularQueueElements[front];
            circularQueueElements[front] = Integer.MIN_VALUE;
            front = (front + 1) % circularQueueElements.length;
            currentSize--;
        }
        return deQueuedElement;
    }


    public boolean isFull() {
        return (currentSize == circularQueueElements.length);
    }


    public boolean isEmpty() {
        return (currentSize == 0);
    }

    @Override
    public String toString() {
        return "CircularQueue [" + Arrays.toString(circularQueueElements) + "]";
    }

    public static void main(String[] args) throws Exception {
        System.out.println("Implementing Circular Queue");
        CircularQueue circularQueue = new CircularQueue(8);

        circularQueue.enqueue(15);
        circularQueue.enqueue(16);
        circularQueue.enqueue(17);
        circularQueue.enqueue(18);
        circularQueue.enqueue(19);
        circularQueue.enqueue(20);
        circularQueue.enqueue(21);
        circularQueue.enqueue(22);

        System.out.println("Full Circular Queue" + circularQueue);

        System.out.print("Dequeued following element from circular Queue ");
        System.out.println(circularQueue.dequeue() + " ");
        circularQueue.enqueue(23);
        System.out.println("After enqueueing circular queue with element having value 23");
        System.out.println(circularQueue);
    }

}
Output is shown in the snapshot below.

6. Trees
A Tree is a recursive data structure containing the set of one or more data nodes where one node is designated as the root of the tree while the remaining nodes are called as the children of the root.
The nodes other than the root node are partitioned into the non empty sets where each one of them is to be called sub-tree.
Nodes of a tree either maintain a parent-child relationship between them or they are sister nodes.
In a general tree, A node can have any number of children nodes but it can have only a single parent.
Basic terminology
- Root Node :- The root node is the topmost node in the tree hierarchy.
- Sub Tree :- If the root node is not null, then any tree rooted at root node children is called a Sub Tree.
- Leaf Node :- The node of tree, which doesn’t have any child node, is called leaf node. Leaf node is the bottom most node of the tree.
- Path :- The sequence of consecutive edges is called path.
- Ancestor node :- An ancestor of a node is any predecessor node on a path from root to that node.
- Degree :- Degree of a node is equal to number of children, a node have.
- Level Number :- Each node of the tree is assigned a level number in such a way that each node is present at one level higher than its parent. Root node of the tree is always present at level 0.
Code Example of Tree is given in the code snippet below.
6.1 Binary Tree
Binary Tree is a special type of generic tree in which, each node can have at most two children. Binary tree is generally partitioned into three disjoint subsets.
- Root of the node
- left sub-tree which is also a binary tree.
- Right binary sub-tree
Code Example of Binary Tree is given in the code snippet below.
Node.java
package Trees;

class Node
{
    int key;
    Node left, right;

    public Node(int item)
    {
        key = item;
        left = right = null;
    }
}
BinaryTree.java
package Trees;

class BinaryTree {
    Node root;

    BinaryTree(int key) {
        root = new Node(key);
    }

    BinaryTree() {
        root = null;
    }

    public static void main(String[] args) {
        BinaryTree tree = new BinaryTree();
        tree.root = new Node(1);
        tree.root.left = new Node(2);
        tree.root.right = new Node(3);
        tree.root.left.left = new Node(4);

    }
}
6.2 Binary Tree Traversal
In this section we will discuss the methods of Traversing Binary Trees.
There are 3 major ones.
- Pre Order Traversal
- Post Order Traversal
- In Order Traversal
6.2.1 Pre Order Traversal
In Pre Order Traversal, we follow the steps shown below.
- Visit the root node
- traverse the left sub-tree in pre-order
- traverse the right sub-tree in pre-order
Code Example of Pre Order Traversal of Binary Tree is end of Binary Tree Traversal Section
6.2.2 Post Order Traversal
In Post Order Traversal, we follow the steps shown below.
- Traverse the left sub-tree in post-order
- Traverse the right sub-tree in post-order
- visit the root
Code Example of Pre Order Traversal of Binary Tree is end of Binary Tree Traversal Section
6.2.3 In Order Traversal
In In Order Traversal, we follow the steps shown below.
- Traverse the left sub-tree in in-order
- Visit the root
- Traverse the right sub-tree in in-order
Code Example of Pre Order Traversal of Binary Tree is end of Binary Tree Traversal Section
BinaryTreeTraversal.java
package Trees;
class BinaryTreeTraversal {
Node root;
BinaryTreeTraversal() {
root = null;
}
void printPostorder(Node node) {
if (node == null)
return;
printPostorder(node.left);
printPostorder(node.right);
System.out.print(node.key + " ");
}
void printInorder(Node node) {
if (node == null)
return;
printInorder(node.left);
System.out.print(node.key + " ");
printInorder(node.right);
}
void printPreorder(Node node) {
if (node == null)
return;
System.out.print(node.key + " ");
printPreorder(node.left);
printPreorder(node.right);
}
void printPostorder() {
printPostorder(root);
}
void printInorder() {
printInorder(root);
}
void printPreorder() {
printPreorder(root);
}
public static void main(String[] args) {
BinaryTreeTraversal tree = new BinaryTreeTraversal();
tree.root = new Node(1);
tree.root.left = new Node(2);
tree.root.right = new Node(3);
tree.root.left.left = new Node(4);
tree.root.left.right = new Node(5);
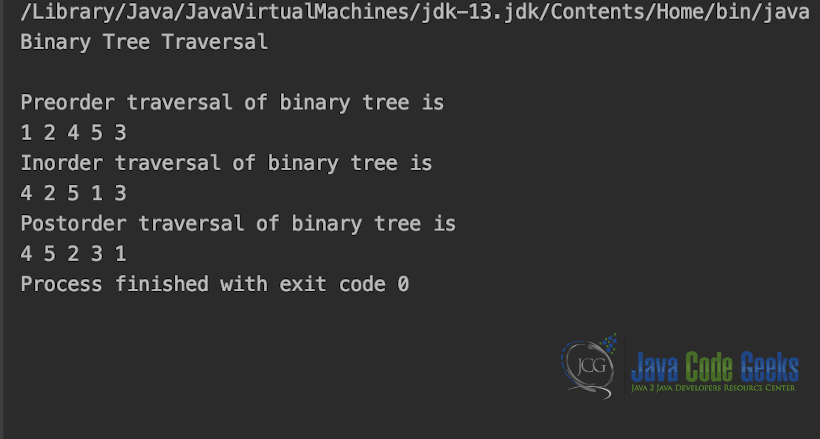
System.out.println("Binary Tree Traversal\n");
System.out.println("Preorder traversal of binary tree is ");
tree.printPreorder();
System.out.println("\nInorder traversal of binary tree is ");
tree.printInorder();
System.out.println("\nPostorder traversal of binary tree is ");
tree.printPostorder();
}
}
Output is shown in the snapshot below.
6.3 Binary Search Tree
Binary Search tree data structure in java can be defined as a class of binary trees, in which the nodes are arranged in a specific order. This is also called ordered binary tree.
In a binary search tree, the value of all the nodes in the left sub-tree is less than the value of the root.
Similarly, value of all the nodes in the right sub-tree is greater than or equal to the value of the root.
This rule will be recursively applied to all the left and right sub-trees of the root.
6.3.1 Insertion in Binary Search Tree
Insert function is used to add a new element in a binary search tree at appropriate location.
Insert function is to be designed in such a way that, it must node violate the property of binary search tree at each value, which is,
The value of all the nodes in the left sub-tree is less than the value of the root and value of all the nodes in the right sub-tree is greater than or equal to the value of the root.
6.3.2 Deletion in Binary Search Tree
Delete function is used to delete the specified node from a binary search tree. However, we must delete a node from a binary search tree in such a way, that the property of binary search tree doesn’t violate.
There are three situations of deleting a node from binary search tree.
- The node to be deleted is a leaf node.
- The node to be deleted has only one child.
- The node to be deleted has two children.
6.3.3 Searching in Binary Search Tree
Searching means finding or locating some specific element or node within a data structure.
However, searching for some specific node in binary search tree is pretty easy due to the fact that, element in BST are stored in a particular order. We just follow the steps shown below.
- Compare the element with the root of the tree.
- If the item is matched then return the location of the node.
- Otherwise check if item is less than the element present on root, if so then move to the left sub-tree.
- If not, then move to the right sub-tree.
- Repeat this procedure recursively until match found.
- If element is not found then return NULL.
Code example showing the Binary Search Tree Implementation with the Insertion, Deletion and Search operation is shown in the code snippet below.
A Node in Binary Search Tree is defined in the code snippet below.
BinarySearchTreeNode.java
package Trees;


class BinarySearchTreeNode {
    BinarySearchTreeNode left, right;
    int data;

    public BinarySearchTreeNode() {
        left = null;
        right = null;
        data = 0;
    }

    public BinarySearchTreeNode(int n) {
        left = null;
        right = null;
        data = n;
    }

    public void setLeft(BinarySearchTreeNode n) {
        left = n;
    }

    public void setRight(BinarySearchTreeNode n) {
        right = n;
    }

    public BinarySearchTreeNode getLeft() {
        return left;
    }

    public BinarySearchTreeNode getRight() {
        return right;
    }

    public void setData(int d) {
        data = d;
    }

    public int getData() {
        return data;
    }
}
And the Utility helper functions are defined in Code snippet below.
BinarySearchTreeUtil.java
package Trees;


class BinarySearchTreeUtil {
    private BinarySearchTreeNode root;

    public BinarySearchTreeUtil() {
        root = null;
    }

    public boolean isEmpty() {
        return root == null;
    }

    public void insert(int data) {
        root = insert(root, data);
    }

    private BinarySearchTreeNode insert(BinarySearchTreeNode node, int data) {
        if (node == null)
            node = new BinarySearchTreeNode(data);
        else {
            if (data <= node.getData())
                node.left = insert(node.left, data);
            else
                node.right = insert(node.right, data);
        }
        return node;
    }

    public void delete(int k) {
        if (isEmpty())
            System.out.println("Tree Empty");
        else if (search(k) == false)
            System.out.println("Sorry " + k + " is not present");
        else {
            root = delete(root, k);
            System.out.println(k + " deleted from the tree");
        }
    }

    private BinarySearchTreeNode delete(BinarySearchTreeNode root, int k) {
        BinarySearchTreeNode p, p2, n;
        if (root.getData() == k) {
            BinarySearchTreeNode lt, rt;
            lt = root.getLeft();
            rt = root.getRight();
            if (lt == null && rt == null)
                return null;
            else if (lt == null) {
                p = rt;
                return p;
            } else if (rt == null) {
                p = lt;
                return p;
            } else {
                p2 = rt;
                p = rt;
                while (p.getLeft() != null)
                    p = p.getLeft();
                p.setLeft(lt);
                return p2;
            }
        }
        if (k < root.getData()) {
            n = delete(root.getLeft(), k);
            root.setLeft(n);
        } else {
            n = delete(root.getRight(), k);
            root.setRight(n);
        }
        return root;
    }


    public boolean search(int val) {
        return search(root, val);
    }

    private boolean search(BinarySearchTreeNode r, int val) {
        boolean found = false;
        while ((r != null) && !found) {
            int rval = r.getData();
            if (val < rval)
                r = r.getLeft();
            else if (val > rval)
                r = r.getRight();
            else {
                found = true;
                break;
            }
            found = search(r, val);
        }
        return found;
    }
    public void printTree()
    {
        printTree(root);
    }
    private void printTree(BinarySearchTreeNode r)
    {
        if (r != null)
        {
            printTree(r.getLeft());
            System.out.print(r.getData() +" ");
            printTree(r.getRight());
        }
    }

}
And the Driver program for the Binary Search Tree operations are defined in code snippet below.
BinarySearchTree.java
package Trees;


public class BinarySearchTree {
    public static void main(String[] args) {
        BinarySearchTreeUtil BinarySearchTreeUtil = new BinarySearchTreeUtil();
        System.out.println("\nBinary Search Tree Operations\n");
        int[] arr = {12, 9, 100, 0, 76, 54, 5, 7, 0};
        System.out.println("Starting Insert Operation on Binary Search Tree\n");
        System.out.println("Inserting arr elements in Binary Search Tree\n");
        for (int i = 0; i < arr.length; i++) {
            System.out.println("Element To be inserted now is " + arr[i] + "\n");
            BinarySearchTreeUtil.insert(arr[i]);
        }
        System.out.println("Binary Search Tree After all insert operation\n");
        BinarySearchTreeUtil.printTree();
        System.out.println();
        System.out.println("\nStarting Search Operation in Binary Search Tree\n");
        System.out.println("\nSearch result : " + BinarySearchTreeUtil.search(100));

        System.out.println("\nStarting Delete Operation in Binary Search Tree\n");
        System.out.println("\nElement to be deleted is "+ 100 + " \n");
        BinarySearchTreeUtil.delete(100);
        System.out.println();
        System.out.println("\nBinary Search Tree After Delete operation\n");
        BinarySearchTreeUtil.printTree();
        System.out.println();
    }
}
Output of BinarySearchTree.java is shown in the snapshot below.

7. Graphs
A graph data structure in java can be defined as a group of vertices and edges that are used to connect these vertices.
A graph can be seen as a cyclic tree, where the vertices (Nodes) maintain any complex relationship among them instead of having parent child relationship.
7.1 Graph Implementation
There are two ways to Implement Graph
- Adjacency Matrix: In adjacency matrix, the rows and columns are represented by the graph vertices.
- Adjacency List: An adjacency list is maintained for each node present in the graph which stores the node value and a pointer to the next adjacent node to the respective node.
7.2 Graph Traversal
In this section we will discuss the Graph Traversal, which basically means the ways using which each and every vertices and edge of the Graph can be visited.
There are 2 common Graph Traversal Methods.
- Breadth First Search
- Depth First Search
7.2.1 Breadth First Search
Breadth first search is a graph traversal algorithm that starts traversing the graph from root node and explores all the neighbouring nodes.
Then, it selects the nearest node and explore all the unexplored nodes. The algorithm follows the same process for each of the nearest node until it finds the goal.
Code example showing the Breadth First Search in Graph is shown in the code snippet below.
BFSTraversal.java
package Graph;
import java.util.*;
class BFSTraversal {
private int V;
private LinkedList<Integer> adj[];
BFSTraversal(int v) {
V = v;
adj = new LinkedList[v];
for (int i = 0; i < v; ++i)
adj[i] = new LinkedList();
}
void addEdge(int v, int w) {
adj[v].add(w);
}
void printBFSTraversal(int s) {
boolean visited[] = new boolean[V];
LinkedList<Integer> queue = new LinkedList<Integer>();
visited[s] = true;
queue.add(s);
while (queue.size() != 0) {
s = queue.poll();
System.out.print(s + " ");
Iterator<Integer> i = adj[s].listIterator();
while (i.hasNext()) {
int n = i.next();
if (!visited[n]) {
visited[n] = true;
queue.add(n);
}
}
}
}
public static void main(String args[]) {
BFSTraversal graphBFSTraversal = new BFSTraversal(4);
graphBFSTraversal.addEdge(0, 1);
graphBFSTraversal.addEdge(0, 2);
graphBFSTraversal.addEdge(1, 2);
graphBFSTraversal.addEdge(2, 0);
graphBFSTraversal.addEdge(2, 3);
graphBFSTraversal.addEdge(3, 3);
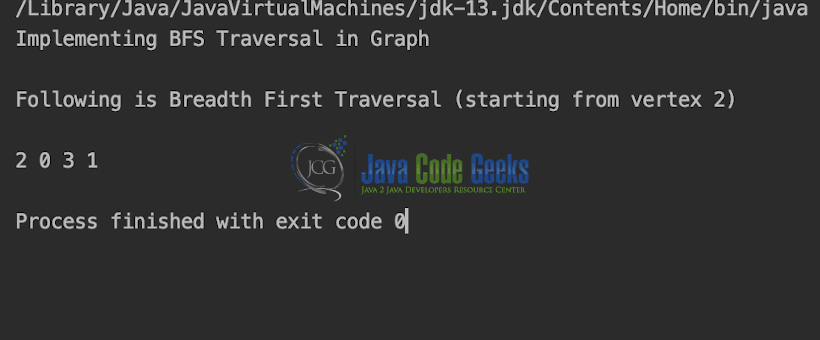
System.out.println("Implementing BFS Traversal in Graph\n");
System.out.println("Following is Breadth First Traversal " +
"(starting from vertex 2)\n");
graphBFSTraversal.printBFSTraversal(2);
System.out.println();
}
}
Output is shown in the snapshot below.
7.2.2. Depth First Search
Depth first search (DFS) algorithm starts with the initial node of the graph G, and then goes to deeper and deeper until we find the goal node or the node which has no children.
The algorithm, then backtracks from the dead end towards the most recent node that is yet to be completely unexplored.
Code example showing the Depth First Search in Graph is shown in the code snippet below.
DFSTraversal.java
package Graph;
import java.util.*;
class DFSTraversal {
private int V;
private LinkedList<Integer> adj[];
DFSTraversal(int v) {
V = v;
adj = new LinkedList[v];
for (int i = 0; i < v; ++i)
adj[i] = new LinkedList();
}
void addEdge(int v, int w) {
adj[v].add(w); }
void DFSUtil(int v, boolean visited[]) {
visited[v] = true;
System.out.print(v + " ");
Iterator<Integer> i = adj[v].listIterator();
while (i.hasNext()) {
int n = i.next();
if (!visited[n])
DFSUtil(n, visited);
}
}
void DFS(int v) {
boolean visited[] = new boolean[V];
DFSUtil(v, visited);
}
public static void main(String args[]) {
DFSTraversal graphDFSTraversal = new DFSTraversal(4);
graphDFSTraversal.addEdge(0, 1);
graphDFSTraversal.addEdge(0, 2);
graphDFSTraversal.addEdge(1, 2);
graphDFSTraversal.addEdge(2, 0);
graphDFSTraversal.addEdge(2, 3);
graphDFSTraversal.addEdge(3, 3);
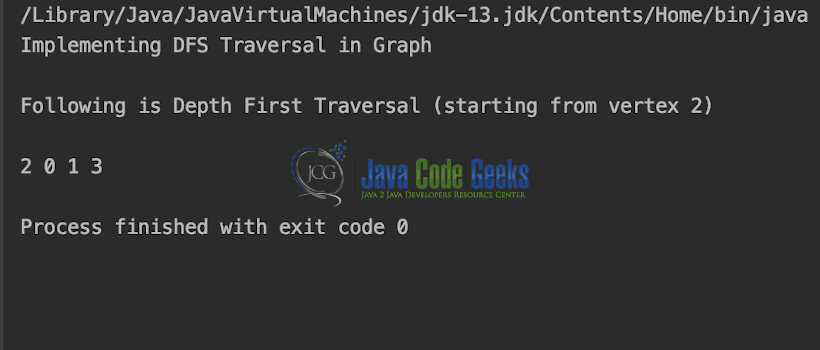
System.out.println("Implementing DFS Traversal in Graph\n");
System.out.println("Following is Depth First Traversal " +
"(starting from vertex 2)\n");
graphDFSTraversal.DFS(2);
System.out.println();
}
}
Output is shown in the snapshot below.
7.3 Spanning Tree
Spanning tree can be defined as a sub-graph of connected, undirected graph G that is a tree produced by removing the desired number of edges from a graph.
In other words, Spanning tree is a non-cyclic sub-graph of a connected and undirected graph G that connects all the vertices together.
A graph G can have multiple spanning trees.
7.4 Minimum Spanning Tree
A minimum spanning tree is a spanning tree which has minimal total weight. In other words, minimum spanning tree is the one which contains the least weight among all other spanning tree of some particular weighted graph (every edge has some weight in a weighted graph).
7.4.1 Prim’s Algorithm
Prim’s Algorithm is used to find the minimum spanning tree from a graph. Prim’s algorithm finds the subset of edges that includes every vertex of the graph such that the sum of the weights of the edges can be minimized.
Prim’s algorithm starts with the single node and explore all the adjacent nodes with all the connecting edges at every step. The edges with the minimal weights causing no cycles in the graph got selected.
Code example showing the Prims Algorithm in Graph is shown in the code snippet below.
PrimsMST.java
package MinimumSpanningTree;
import java.lang.*;
class PrimsMST {
private static final int V = 5;
int minKey(int key[], Boolean mstSet[]) {
int min = Integer.MAX_VALUE, min_index = -1;
for (int v = 0; v < V; v++)
if (mstSet[v] == false && key[v] < min) {
min = key[v];
min_index = v;
}
return min_index;
}
void displayMST(int parent[], int graph[][]) {
System.out.println("Edge \tWeight");
for (int i = 1; i < V; i++)
System.out.println(parent[i] + " - " + i + "\t" + graph[i][parent[i]]);
}
void primMST(int graph[][]) {
int parent[] = new int[V];
int key[] = new int[V];
Boolean mstSet[] = new Boolean[V];
for (int i = 0; i < V; i++) {
key[i] = Integer.MAX_VALUE;
mstSet[i] = false;
}
key[0] = 0;
parent[0] = -1;
for (int count = 0; count < V - 1; count++) {
int u = minKey(key, mstSet);
mstSet[u] = true;
for (int v = 0; v < V; v++)
if (graph[u][v] != 0 && mstSet[v] == false && graph[u][v] < key[v]) {
parent[v] = u;
key[v] = graph[u][v];
}
}
displayMST(parent, graph);
}
public static void main(String[] args) {
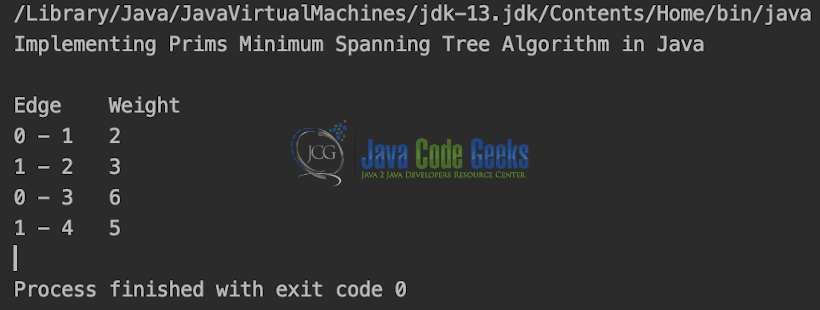
System.out.println("Implementing Prims Minimum Spanning Tree Algorithm in Java\n");
PrimsMST t = new PrimsMST();
int graph[][] = new int[][]{{0, 2, 0, 6, 0},
{2, 0, 3, 8, 5},
{0, 3, 0, 0, 7},
{6, 8, 0, 0, 9},
{0, 5, 7, 9, 0}};
t.primMST(graph);
}
}
Output is shown in the snapshot below.
7.4.2 Kruskal’s Algorithm
Kruskal’s Algorithm is used to find the minimum spanning tree for a connected weighted graph.
The main target of the algorithm is to find the subset of edges by using which, we can traverse every vertex of the graph.
Kruskal’s algorithm follows greedy approach which finds an optimum solution at every stage instead of focusing on a global optimum.
Code example showing the Kruskal’s Algorithm in Graph is shown in the code snippet below.
KruskalMST.java
package MinimumSpanningTree;


import java.util.Arrays;

class KruskalMST {
    class Edge implements Comparable<Edge> {
        int src, dest, weight;

        public int compareTo(Edge compareEdge) {
            return this.weight - compareEdge.weight;
        }
    }

    ;

    class subset {
        int parent, rank;
    }

    ;

    int V, E;
    Edge edge[];

    KruskalMST(int v, int e) {
        V = v;
        E = e;
        edge = new Edge[E];
        for (int i = 0; i < e; ++i)
            edge[i] = new Edge();
    }

    int find(subset subsets[], int i) {
        if (subsets[i].parent != i)
            subsets[i].parent = find(subsets, subsets[i].parent);

        return subsets[i].parent;
    }

    void Union(subset subsets[], int x, int y) {
        int xroot = find(subsets, x);
        int yroot = find(subsets, y);

        if (subsets[xroot].rank < subsets[yroot].rank)
            subsets[xroot].parent = yroot;
        else if (subsets[xroot].rank > subsets[yroot].rank)
            subsets[yroot].parent = xroot;

        else {
            subsets[yroot].parent = xroot;
            subsets[xroot].rank++;
        }
    }

    void KruskalMST() {
        Edge result[] = new Edge[V];
        int e = 0;
        int i = 0;
        for (i = 0; i < V; ++i)
            result[i] = new Edge();

        Arrays.sort(edge);

        subset subsets[] = new subset[V];
        for (i = 0; i < V; ++i)
            subsets[i] = new subset();

        for (int v = 0; v < V; ++v) {
            subsets[v].parent = v;
            subsets[v].rank = 0;
        }

        i = 0;
        while (e < V - 1) {
            Edge next_edge = new Edge();
            next_edge = edge[i++];

            int x = find(subsets, next_edge.src);
            int y = find(subsets, next_edge.dest);

            if (x != y) {
                result[e++] = next_edge;
                Union(subsets, x, y);
            }
        }

        System.out.println("Following are the edges in " +
                "the constructed MST\n");
        for (i = 0; i < e; ++i) {
            System.out.println("(Source) " + result[i].src + " -- " + "(Destination) " +
                    result[i].dest + " == " + "(Weight) " + result[i].weight);
        }
    }

    public static void main(String[] args) {

        int V = 4;
        int E = 5;
        KruskalMST kruskalMST = new KruskalMST(V, E);

        kruskalMST.edge[0].src = 0;
        kruskalMST.edge[0].dest = 1;
        kruskalMST.edge[0].weight = 10;

        kruskalMST.edge[1].src = 0;
        kruskalMST.edge[1].dest = 2;
        kruskalMST.edge[1].weight = 6;

        kruskalMST.edge[2].src = 0;
        kruskalMST.edge[2].dest = 3;
        kruskalMST.edge[2].weight = 5;

        kruskalMST.edge[3].src = 1;
        kruskalMST.edge[3].dest = 3;
        kruskalMST.edge[3].weight = 15;

        kruskalMST.edge[4].src = 2;
        kruskalMST.edge[4].dest = 3;
        kruskalMST.edge[4].weight = 4;
        System.out.println("Implementing the Kruskal MST\n");

        kruskalMST.KruskalMST();
    }
}
Output is shown in snapshot below.

8. Searching
In this section we will discuss the search operation, where we traverse a set of data and look for a particular element in it.
Searching is the process of finding some particular element in the list. If the element is present in the list, then the process is called successful and the process returns the location of that element, otherwise the search is called unsuccessful.
There are two popular search methods that are widely used in order to search some item into the list. However, choice of the algorithm depends upon the arrangement of the list.
- Linear Search
- Binary Search
8.1 Linear Search
Linear search is the simplest search algorithm and often called sequential search.
In this type of searching, we simply traverse the list completely and match each element of the list with the item whose location is to be found.
If the match found then location of the item is returned otherwise the algorithm return NULL.
Code sample of the Linear Search is given in code snippet below.
LinearSearch.java
package Searching;
public class LinearSearch {
public static void main(String args[]) {
int array[] = {10, 20, 25, 63, 96, 57};
int size = array.length;
int value = 63;
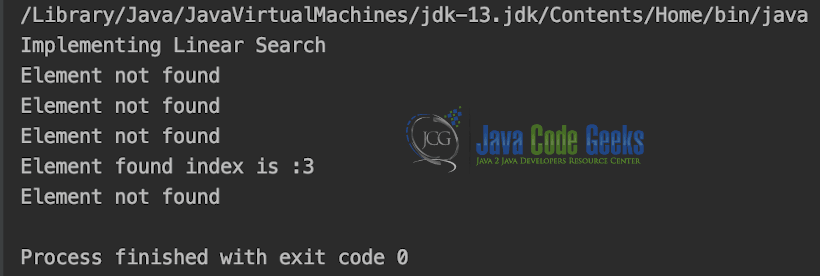
System.out.println("Implementing Linear Search");
for (int i = 0; i < size - 1; i++) {
if (array[i] == value) {
System.out.println("Element found index is :" + i);
} else {
System.out.println("Element not found");
}
}
}
}
Output is shown in the Snapshot below.
8.2 Binary Search
Binary search is the search technique which works efficiently on the sorted lists. Hence, in order to search an element into some list by using binary search technique, we must ensure that the list is sorted.
Binary search follows divide and conquer approach in which, the list is divided into two halves and the item is compared with the middle element of the list. If the match is found then, the location of middle element is returned otherwise, we search into either of the halves depending upon the result produced through the match.
Code sample of the Binary Search is given in code snippet below.
BinarySearch.java
package Searching;
class BinarySearch {
int binarySearch(int arr[], int l, int r, int x) {
if (r >= l) {
int mid = l + (r - l) / 2;
if (arr[mid] == x)
return mid;
if (arr[mid] > x)
return binarySearch(arr, l, mid - 1, x);
return binarySearch(arr, mid + 1, r, x);
}
return -1;
}
public static void main(String args[]) {
BinarySearch ob = new BinarySearch();
int arr[] = {2, 3, 4, 10, 40};
int n = arr.length;
int x = 10;
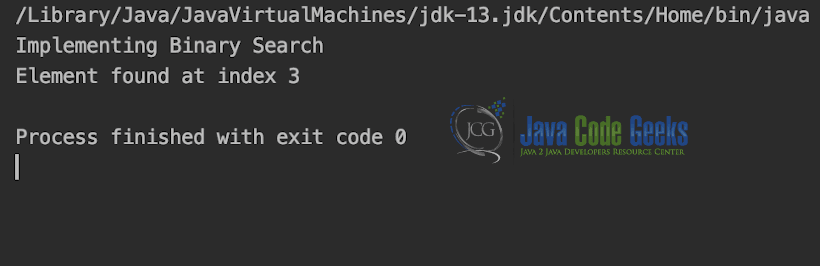
System.out.println("Implementing Binary Search");
int result = ob.binarySearch(arr, 0, n - 1, x);
if (result == -1)
System.out.println("Element not present");
else
System.out.println("Element found at index " + result);
}
}
Output is shown in Snippet below.
9. Sorting
In this section we will discuss the sort operation. We perform sorting when we want to arrange the set of items in any particular order.
There are many sorting algorithms, but we have cover the most common once, which are
- Bubble Sort
- Selection Sort
- Insertion Sort
- Quick Sort
- Merge Sort
9.1 Bubble Sort
In Bubble sort, Each element of the array is compared with its adjacent element. The algorithm processes the list in passes. A list with n elements requires n-1 passes for sorting.
Code sample of the Bubble Sort is given in code snippet below.
BubbleSort.java
package Sorting;
class BubbleSort
{
void bubbleSort(int arr[])
{
int n = arr.length;
for (int i = 0; i < n-1; i++)
for (int j = 0; j < n-i-1; j++)
if (arr[j] > arr[j+1])
{
int temp = arr[j];
arr[j] = arr[j+1];
arr[j+1] = temp;
}
}
void display(int arr[])
{
int n = arr.length;
for (int i=0; i<n; ++i)
System.out.print(arr[i] + " ");
System.out.println();
}
public static void main(String args[])
{
BubbleSort ob = new BubbleSort();
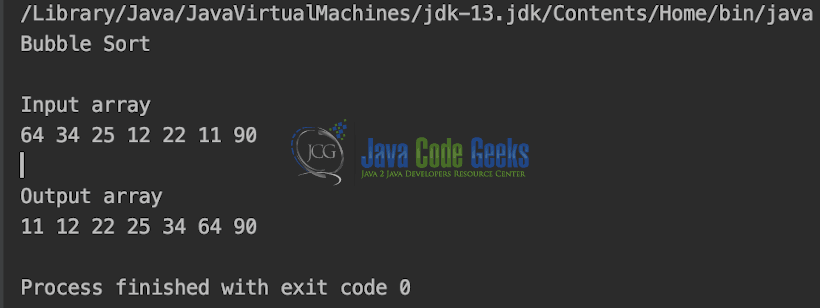
int arr[] = {64, 34, 25, 12, 22, 11, 90};
System.out.println("Bubble Sort");
System.out.println("\nInput array");
ob.display(arr);
ob.bubbleSort(arr);
System.out.println("\nOutput array");
ob.display(arr);
}
}
Output is shown in the Snapshot below.
9.2 Selection Sort
In selection sort, the smallest value among the unsorted elements of the array is selected in every pass and inserted to its appropriate position into the array.
First, find the smallest element of the array and place it on the first position. Then, find the second smallest element of the array and place it on the second position. The process continues until we get the sorted array.
Code sample of the Selection Sort is given in code snippet below.
SelectionSort.java
package Sorting;
public class SelectionSort {
static void display(int arr[]) {
int n = arr.length;
for (int i = 0; i < n; ++i)
System.out.print(arr[i] + " ");
System.out.println();
}
public static void main(String args[]) {
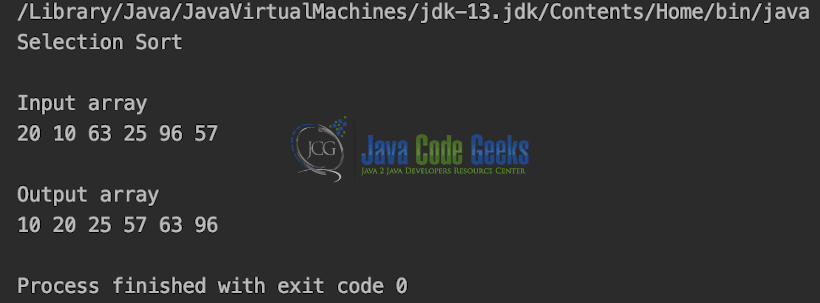
int array[] = {20, 10, 63, 25, 96, 57};
int size = array.length;
System.out.println("Selection Sort");
System.out.println("\nInput array");
display(array);
selectionSort(array, size);
System.out.println("\nOutput array");
display(array);
}
private static void selectionSort(int[] array, int size) {
for (int i = 0; i < size - 1; i++) {
int min = i;
for (int j = i + 1; j < size; j++) {
if (array[j] < array[min]) {
min = j;
}
}
int temp = array[min];
array[min] = array[i];
array[i] = temp;
}
}
}
Output is shown in the Snapshot below.
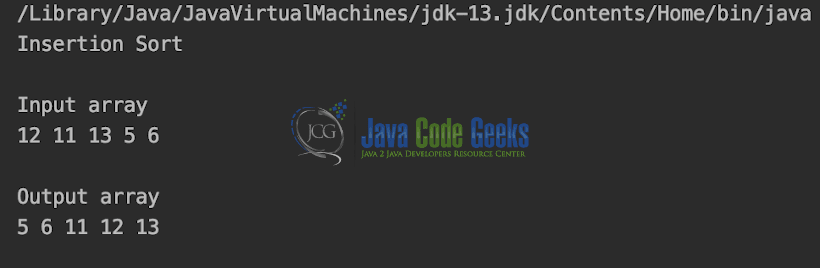
9.3 Insertion Sort
Insertion sort is the simple sorting algorithm which is commonly used in the daily lives while ordering a deck of cards.
In this algorithm, we insert each element onto its proper place in the sorted array.
Code sample of the Insertion Sort is given in code snippet below.
InsertionSort.java
package Sorting;

class InsertionSort {
    void insertionSort(int arr[])
    {
        int n = arr.length;
        for (int i = 1; i < n; ++i) {
            int key = arr[i];
            int j = i - 1;

            while (j >= 0 && arr[j] > key) {
                arr[j + 1] = arr[j];
                j = j - 1;
            }
            arr[j + 1] = key;
        }
    }


    static void display(int arr[])
    {
        int n = arr.length;
        for (int i = 0; i < n; ++i)
            System.out.print(arr[i] + " ");

        System.out.println();
    }


    public static void main(String args[])
    {
        int arr[] = { 12, 11, 13, 5, 6 };
        System.out.println("Insertion Sort");
        System.out.println("\nInput array");
        display(arr);
        InsertionSort ob = new InsertionSort();
        ob.insertionSort(arr);
        System.out.println("\nOutput array");
        display(arr);
    }
}
Output is shown in the Snapshot below.
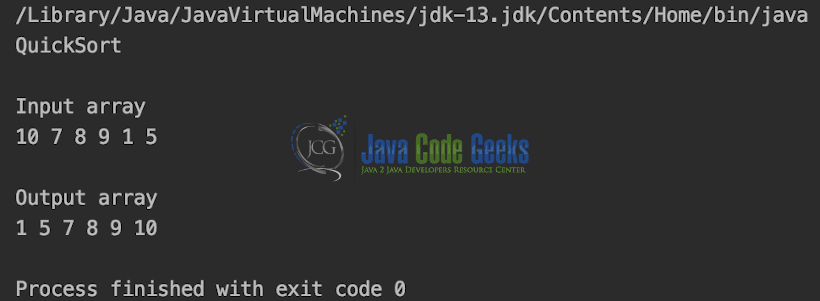
9.4 Quick Sort
Quick sort is the widely used sorting algorithm that makes n log n comparisons in average case for sorting of an array of n elements.
This algorithm follows divide and conquer approach. It picks an element as pivot and partitions the given array around the picked pivot.
The key process in quickSort is partition(). Target of partitions is, given an array and an element x of array as pivot, put x at its correct position in sorted array and put all smaller elements (smaller than x) before x, and put all greater elements (greater than x) after x. All this should be done in linear time.
Code sample of the Quick Sort is given in code snippet below.
QuickSort.java
package Sorting;

class QuickSort {

    int partition(int arr[], int low, int high) {
        int pivot = arr[high];
        int i = (low - 1);
        for (int j = low; j < high; j++) {

            if (arr[j] < pivot) {
                i++;


                int temp = arr[i];
                arr[i] = arr[j];
                arr[j] = temp;
            }
        }


        int temp = arr[i + 1];
        arr[i + 1] = arr[high];
        arr[high] = temp;

        return i + 1;
    }


    void quickSort(int arr[], int low, int high) {
        if (low < high) {

            int pi = partition(arr, low, high);


            quickSort(arr, low, pi - 1);
            quickSort(arr, pi + 1, high);
        }
    }


    static void display(int arr[]) {
        int n = arr.length;
        for (int i = 0; i < n; ++i)
            System.out.print(arr[i] + " ");
        System.out.println();
    }


    public static void main(String args[]) {
        int arr[] = {10, 7, 8, 9, 1, 5};
        int n = arr.length;
        System.out.println("QuickSort");
        System.out.println("\nInput array");
        display(arr);
        QuickSort ob = new QuickSort();
        ob.quickSort(arr, 0, n - 1);

        System.out.println("\nOutput array");
        display(arr);
    }
}
Output is shown in the Snapshot below.
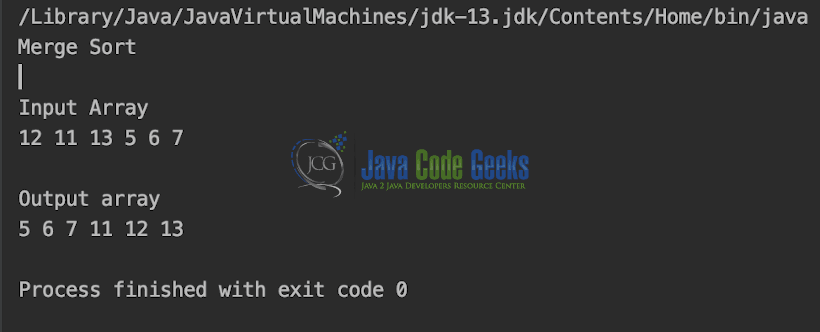
9.5 Merge Sort
Merge sort is the algorithm which follows divide and conquer approach. Consider an array A of n number of elements.
The algorithm processes the elements in 3 steps.
- If A Contains 0 or 1 elements then it is already sorted, otherwise, Divide A into two sub-array of equal number of elements.
- Conquer means sort the two sub-arrays recursively using the merge sort.
- Combine the sub-arrays to form a single final sorted array maintaining the ordering of the array.
Code sample of the Merge Sort is given in code snippet below.
MergeSort.java
package Sorting;

class MergeSort {
    void merge(int arr[], int l, int m, int r) {

        int n1 = m - l + 1;
        int n2 = r - m;


        int L[] = new int[n1];
        int R[] = new int[n2];


        for (int i = 0; i < n1; ++i)
            L[i] = arr[l + i];
        for (int j = 0; j < n2; ++j)
            R[j] = arr[m + 1 + j];


        int i = 0, j = 0;


        int k = l;
        while (i < n1 && j < n2) {
            if (L[i] <= R[j]) {
                arr[k] = L[i];
                i++;
            } else {
                arr[k] = R[j];
                j++;
            }
            k++;
        }


        while (i < n1) {
            arr[k] = L[i];
            i++;
            k++;
        }

        while (j < n2) {
            arr[k] = R[j];
            j++;
            k++;
        }
    }


    void mergeSort(int arr[], int l, int r) {
        if (l < r) {

            int m = (l + r) / 2;


            mergeSort(arr, l, m);
            mergeSort(arr, m + 1, r);


            merge(arr, l, m, r);
        }
    }


    static void display(int arr[]) {
        int n = arr.length;
        for (int i = 0; i < n; ++i)
            System.out.print(arr[i] + " ");
        System.out.println();
    }


    public static void main(String args[]) {
        int arr[] = {12, 11, 13, 5, 6, 7};
        System.out.println("Merge Sort");
        System.out.println("\nInput Array");
        display(arr);

        MergeSort ob = new MergeSort();
        ob.mergeSort(arr, 0, arr.length - 1);

        System.out.println("\nOutput array");
        display(arr);
    }
}
Output of MergeSort.java is shown in the snapshot below.
10. Summary
To Summarise, we have covered all the basic data structure used, with there implementation from scratch in Java, in this Article. In Java, we have libraries which contains the optimized implementation of these data structures and more, most famous of those is Java Collection Framework, which covers all the aforementioned Data structures.
11. Download the Source Code
You can download the full source code of this example here: Java Data Structures Tutorial
