In this article, we will learn about Java API and working with Java API. We will discuss different types of API requests and what does REST API mean. We will also see an example of a REST API.
You can also check this tutorial in the following video:

1. Java API
An API stands for Application Programming Interface, and it is an interface that allows communication between different applications using the packages it comprises. Java API comprises a collection of interfaces, classes, and packages. It helps us to use the packaged classes and interfaces to build our applications and supports reusability. Whenever we write any program in java, we use the Java API to do so. For example, we use JDBC API in java to connect to any database server to perform several transactions using java.
2. How to use an API with Java
In Java, we use API to access other software applications and build java API’s to allow other systems to access our resources. In other words, we can either create a client for an existing API or an API service to be used by others.
2.1 As a Client(as an API consumer)
If we want to access an API, we build a java API client for accessing the API based on the rules and controls provided by the API developer. We can access resources that we want from another system using the API exposed/provided by the other system.
2.2 As an API provider
We create an API so that the other system can access our resources via the API exposed/provided by us. To access our API, they have to follow the standards and rules set up and build an API client.
3. Types of API Requests
There are various kinds of API request based on the operation need to be performed. The most commonly used APIs requests are
3.1 GET
GET is the most commonly used request and is used to get any resource from the server using an API. When a user requests an API using GET, the server returns the user’s data if it is available on the server.
3.2 POST
This request type adds or posts any new data to the server. When a user requests an API using POST, the server adds the data into its resource and returns the status of whether the posting was a success or a failure.
3.3 PUT
This request type updates/modifies the data on the server. When a user requests an API using PUT, then the server updates the data into its resource and returns the status whether the update was a success or a failure.
3.4 DELETE
This request type deletes the data from the server. When a user requests an API using DELETE, then the server removes the data from the resource and returns the status of whether the delete was successful or a failure.
4. What does REST mean
REST stands for Representational State Transfer, and it’s an architectural pattern that defines a set of rules for developing web-services. And the web services built using these constraints are called Restful web service.
Rest APIs deal with client-server architecture and are stateless, meaning the server doesn’t store states, and each request is separate and independent.
5. Simple API in java
We can create a REST API in java using several ways. And one of the most common way to create the java REST API is using Jersey. Follow the steps below to create the simple REST API
5.1 Creating the web project with maven
The first step for creating any application is to have a project. You can do that using any IDE(Integrated Development Tool). I will show the sample using the IntelliJ Idea IDE. You can choose any other as well like one of the alternatives is Eclipse IDE. After creating the maven project, please add the below code into your pom.xml file to get the required dependencies.
Maven dependencies in pom.xml file
<project xmlns="http://maven.apache.org/POM/4.0.0" xmlns:xsi="http://www.w3.org/2001/XMLSchema-instance"
  xsi:schemaLocation="http://maven.apache.org/POM/4.0.0 http://maven.apache.org/maven-v4_0_0.xsd">
  <modelVersion>4.0.0</modelVersion>

  <groupId>demo.jcg.restapi</groupId>
  <artifactId>demoRestAPI</artifactId>
  <packaging>war</packaging>
  <version>1.0-SNAPSHOT</version>
  <name>demoRestAPI</name>

  <url>http://maven.apache.org</url>
  <repositories>
		<repository>
			<id>maven2-repository.java.net</id>
			<name>Java.net Repository for Maven</name>
			<url>http://download.java.net/maven/2/</url>
			<layout>default</layout>
		</repository>
	</repositories>
  <dependencies>
    <dependency>
		<groupId>com.sun.jersey</groupId>
		<artifactId>jersey-server</artifactId>
		<version>1.19.4</version>
	</dependency>
	<dependency>
		<groupId>com.sun.jersey</groupId>
		<artifactId>jersey-core</artifactId>
		<version>1.19.4</version>
	</dependency>
	<dependency>
		<groupId>com.sun.jersey</groupId>
		<artifactId>jersey-servlet</artifactId>
		<version>1.19.4</version>
	</dependency>
  </dependencies>

  <build>
    <finalName>demoRestAPI</finalName>
	    <plugins>
		    <plugin>
		      <artifactId>maven-compiler-plugin</artifactId>
		        <configuration>
		          <source>1.8</source>
		          <target>1.8</target>
		        </configuration>
		    </plugin>
	  </plugins>
  </build>
</project>
With the above configuration, your project will have all the dependencies to create a REST API.
5.2 Creating the java rest service class
After having all the dependencies setup, we need to create the rest service class where we will write our API. Have a look into the code below
Rest service class
package demo.jcg.restapi;

import javax.ws.rs.GET;
import javax.ws.rs.Path;
import javax.ws.rs.PathParam;

@Path("/demo")
public class RestAPIDemo
{
	@GET
	@Path("/{name}")
	public String greetings(@PathParam("name") String name)
	{
		return  name.toUpperCase()+ ", from Java Code Geeks";
	}
}
Now let’s understand the class above, here the class RestAPIDemo is has used certain annotations which are
@Path: This annotation makes your API’s path into the server resource, i.e. specifies the URI using which this API can be accessed.
@GET: This annotation specifies the type of request that can be made to this method. As discussed above GET is used to get some resource from the REST API
@PathParam: This annotation tells that the URI path contains a parameter that needs to be passed when accessing this API resource.
In the above program, we are exposing a GET method through our REST API, where the user will access the API by passing the name in the path param. They get the name appended with the greeting. For example “Shankar, from Java Code Geeks”. All the annotations are coming from the Jersey API library used.
5.3 Configuring the web.xml
Now the final step before we can deploy our REST API, we need to do the configuration for our web.xml as shown below
Configuration for web.xml
<!DOCTYPE web-app PUBLIC
 "-//Sun Microsystems, Inc.//DTD Web Application 2.3//EN"
 "http://java.sun.com/dtd/web-app_2_3.dtd" >

<web-app>

  <display-name>Archetype Created Web Application</display-name>

  <servlet>
		<servlet-name>jersey-serlvet</servlet-name>
		<servlet-class>com.sun.jersey.spi.container.servlet.ServletContainer</servlet-class>
		<init-param>
		     <param-name>com.sun.jersey.config.property.packages</param-name>
		     <param-value>demo.jcg.restapi</param-value>
		</init-param>
		<load-on-startup>1</load-on-startup>
	</servlet>

	<servlet-mapping>
		<servlet-name>jersey-serlvet</servlet-name>
		<url-pattern>/*</url-pattern>
	</servlet-mapping>

</web-app>
In the above web.xml file, we have to make sure that our servlet is added as Jersey’s servlet container within the servlet-class tags.
com.sun.jersey.spi.container.servlet.ServletContainer
5.4 Deploying our application
The final step to make our REST API running is to deploy the application into a server to serve the request made to this API.
Adding a server in an IDE is very simple. For the above example, we use Apache Tomcat and then deploy the rest API into the server.
Note: If you cannot add the server into the IDE due to some issues. We can directly place our war(Web-Archive) file inside the web apps folder of your tomcat server home directory. The war file is inside the target directory of our project.
You can download the tomcat server here
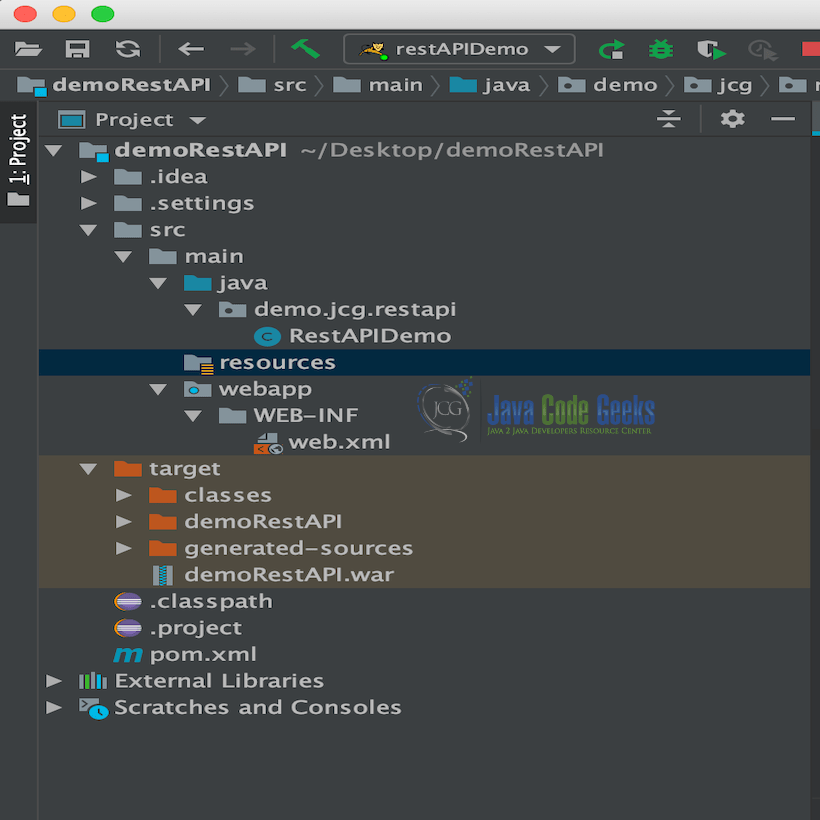
Check the final project structure of the project structure below
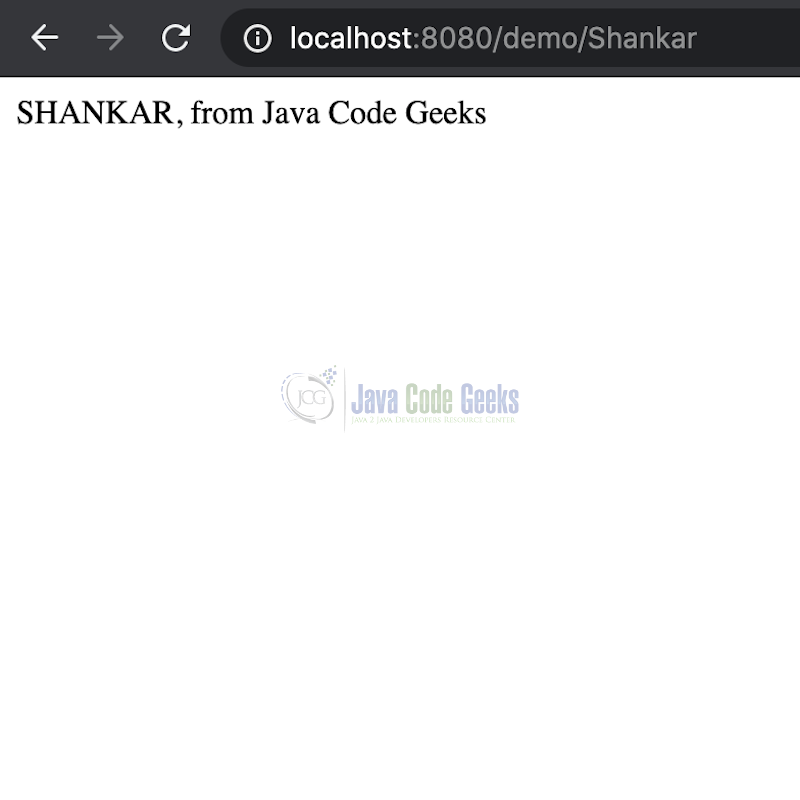
5.5 Testing your application
Once deployed, we can test our REST API in any browser using the URL http://localhost:8080/demo/Shankar. As we saw in the rest service class, the path “demo” is part of the REST API URL. The output is
6. Summary
In this article, we saw what Java API is, how we can use APIs with Java. We looked at the different types of API requests and discussed the REST API. We also created a sample REST API and tested it.
7. More articles
- Java Tutorial for Beginners
- 150 Java Interview Questions and Answers
- Best Way to Learn Java Programming Online
- Download and Install Java Development Kit (JDK) 13
8. Download the source code
This was the REST API example using java.
You can download the full source code of this example here: Java API Tutorial
Last updated on Apr. 28th, 2021
