Code coverage is a crucial aspect of software development, helping us ensure that our code is thoroughly tested. JaCoCo (Java Code Coverage) is a popular tool for measuring code coverage in Java applications. This article will explore how to set up maven multi module code coverage using JaCoCo in a Spring Boot project.
1. Understanding Maven Multi-Module Projects
A Maven multi-module project is like a big project made up of smaller projects. The main project collects and organizes these smaller projects, making it easier to handle and keep things neat. It’s a way of building software in a structured and organized way, where each small part has its role in the overall project. This structure is beneficial for large-scale applications, promoting code reuse, maintainability, and efficient project management.
1.1 Setting Up a Maven Multi-Module Project
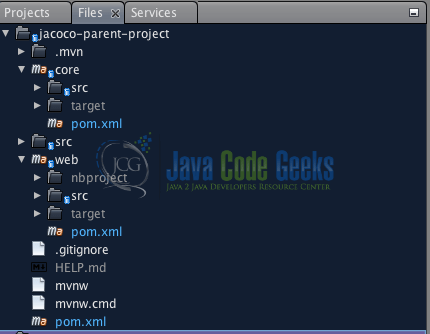
In this article, we will assume a modular project structure with two modules: core and web. We can use the Spring Initializr or create it manually. Let’s go through the steps to set up a Maven multi-module project in Spring Boot.
1.1.1 Step 1: Create the Parent Project with Spring Initializer
Start by visiting the Spring Initializer web interface. We can configure the parent project and its basic settings by following these steps:
- Set the
ProjecttoMaven Project. - Choose the appropriate
Language(Java for this project). - Set the
Spring Bootversion. - In the
Project Metadatasection, provide theGroup,Artifact, andNamefor your parent project. - Check the
PackagingasJar. Later we will change the packaging type to POM. - Add dependencies as per your project requirements (
Spring Webfor this project).
Click on the Generate button to download the generated project ZIP file.
1.1.2 Step 2: Extract and Navigate
Once downloaded, extract the ZIP file to a directory of your choice. Open a terminal and navigate into the project directory:
cd jacoco-parent-project
Note: We need to modify the pom.xml file to change the packaging type to POM. Open the pom.xml file in the root directory of the project and locate the <packaging>. Change the value from jar or war to pom.
Now, we have a Spring Boot project with the packaging type as pom. This project can be used as the parent project in a multi-module setup.
1.1.3 Step 3: Create Submodules
Using the terminal, let’s create submodules for different parts of our Spring Boot application. For example, let’s create two submodules, core and web:
mvn archetype:generate -DgroupId=com.jcg.core -DartifactId=core -DarchetypeArtifactId=maven-archetype-quickstart -DinteractiveMode=false

mvn archetype:generate -DgroupId=com.jcg.web -DartifactId=web -DarchetypeArtifactId=maven-archetype-quickstart -DinteractiveMode=false
1.1.4 Step 4: Verify or Modify Parent POM
Open the pom.xml file in the parent project directory and add the following <modules> section if not present. The parent pom.xml file should be like this:
<project xmlns="http://maven.apache.org/POM/4.0.0" xmlns:xsi="http://www.w3.org/2001/XMLSchema-instance" xsi:schemaLocation="http://maven.apache.org/POM/4.0.0 https://maven.apache.org/xsd/maven-4.0.0.xsd">
    <modelVersion>4.0.0</modelVersion>

    <groupId>com.jcg</groupId>
    <artifactId>jacoco-parent-project</artifactId>
    <version>0.0.1-SNAPSHOT</version>
    <name>jacoco-parent-project</name>
    <packaging>pom</packaging>
    <description>Demo project for Maven Multi-Module Project</description>

    <modules>
        <module>core</module>
        <module>web</module>
    </modules>

    <properties>
        <java.version>17</java.version>
        <spring.boot.version>3.2.0</spring.boot.version>
    </properties>

    <build>

        <plugins>

            <plugin>
                <groupId>org.apache.maven.plugins</groupId>
                <artifactId>maven-compiler-plugin</artifactId>
                <version>3.10.1</version>
                <configuration>
                    <source>${java.version}</source>
                    <target>${java.version}</target>
                </configuration>
            </plugin>

            <!-- Maven Surefire plugin for running tests -->
            <plugin>
                <groupId>org.apache.maven.plugins</groupId>
                <artifactId>maven-surefire-plugin</artifactId>
                <version>3.0.0-M5</version>
            </plugin>

        </plugins>
    </build>

</project>
2. Project Example
2.1 Core Module Layer
First, Let’s create the core module, which contains the business logic.
package com.jcg.core;

public class Calculator {

    public int add(int a, int b) {
        return a + b;
    }
}
In this example, The Calculator class provides a simple method, add which takes two integers as parameters and returns their sum. This class will be used in CalculatorController within the web module, demonstrating the separation of concerns in a multi-module Spring Boot project.
2.1.1 Unit Test – Core Module Test
Now, we will create a test class for the Calculator class in the core module.
public class CalculatorTest {

    @Test
    public void testAdd() {
         Calculator calculator = new Calculator();
        int result = calculator.add(2, 3);
        assertEquals(5, result);
    }

}
2.1.2 Ensure Core Module is Covered – Surefire Plugin Configuration
Make sure the core module is covered by adding the maven-surefire-plugin to its pom.xml. This will employ the Maven Surefire plugin to execute the unit tests.
<!-- core/pom.xml -->
<build>
<!-- Maven Surefire plugin for running unit test -->
            <plugin>
                <groupId>org.apache.maven.plugins</groupId>
                <artifactId>maven-surefire-plugin</artifactId>
                <version>3.1.2</version>
            </plugin>

        </plugins>
</build>
2.2 Web Module Layer
Create the web module, which contains the Spring Boot application.
@RestController
@RequestMapping("/calculator")
public class CalculatorController {

    private final Calculator calculator;

    @Autowired
    public CalculatorController(Calculator calculator) {
        this.calculator = calculator;
    }

    @GetMapping("/add")
    public int add(@RequestParam int a, @RequestParam int b) {
        return calculator.add(a, b);
    }

}
This controller provides a simple RESTful endpoint for adding two numbers. In this example:
@RestControlleris used to indicate that this class is a controller that handles HTTP requests and returns JSON responses.@RequestMapping("/calculator")specifies the base path for all endpoints in this controller.- The constructor is annotated with
@Autowiredto inject an instance of theCalculatorinto the controller. - The
addmethod is mapped to the/addendpoint and takes two parameters (aandb) from the request parameters. It delegates the addition operation to the injectedCalculatorinstance and returns the result.
2.2.1 Integration Test – Web Module Test
Let’s create a test class for the CalculatorController class in the web module.
@WebMvcTest(CalculatorController.class)
public class CalculatorControllerTest {

    @Autowired
    private MockMvc mockMvc;

    @Mock
    private Calculator calculator;

    @Test
    public void testAdd() throws Exception {

        when(calculator.add(anyInt(), anyInt())).thenReturn(5);

        int a = 2;
        int b = 3;

        mockMvc.perform(get("/calculator/add")
                .param("a", String.valueOf(a))
                .param("b", String.valueOf(b)))
                .andExpect(status().isOk())
                .andExpect(content().string("5"));
    }

}
In this example, we used @WebMvcTest to focus on testing the CalculatorController class. In this test:
@WebMvcTest(CalculatorController.class)is used to focus the test on theCalculatorControllerclass.- We injected a
MockMvcinstance to perform HTTP requests and assert the responses. @Mockis used to mock theCalculatordependency.- The
testAddmethod performs a GET request to the/calculator/addendpoint with parametersa=2andb=3. - The behavior of the
calculator.addmethod is mocked to return5. - Assertions are made to ensure that the response status is OK and the response content is “5”.
This test ensures that the CalculatorController correctly interacts with the Calculator and produces the expected response.
2.2.2 Maven Failsafe Plugin for Integration Test
Update the web module pom.xml to manage the execution of integration tests during the build.
    <build>
        <plugins>
            <plugin>
                <groupId>org.apache.maven.plugins</groupId>
                <artifactId>maven-failsafe-plugin</artifactId>
                <version>3.1.2</version>
                <executions>
                    <execution>
                        <goals>
                            <goal>integration-test</goal>
                            <goal>verify</goal>
                        </goals>
                    </execution>
                </executions>
            </plugin>
        </plugins>
    </build>
3. Configuring JaCoCo for Multi-Module Coverage
To configure the JaCoCo plugin for multi-module coverage in our Maven project, we need to include the JaCoCo plugin configuration in the pom.xml of the parent project. This allows us to aggregate code coverage reports from multiple modules. Below is an example of how to set up JaCoCo to measure code coverage in a multi-module project.
3.1 Add JaCoCo Plugin to Parent POM
Include the JaCoCo plugin in the build/plugins section of the parent pom.xml:
<!-- JaCoCo Plugin for code coverage -->
            <plugin>
                <groupId>org.jacoco</groupId>
                <artifactId>jacoco-maven-plugin</artifactId>
                <version>0.8.7</version> <!-- Adjust version as needed -->
                <executions>
                    <execution>
                        <id>prepare-agent</id>
                        <goals>
                            <goal>prepare-agent</goal>
                        </goals>
                    </execution>
                    <execution>
                        <id>report</id>
                        <phase>prepare-package</phase>
                        <goals>
                            <goal>report</goal>
                        </goals>
                    </execution>
                </executions>
            </plugin>
The prepare-agent goal is executed during the initialize phase, and the report goal is executed during the prepare-package phase. This configuration ensures that JaCoCo is set up to collect code coverage data during the build.
3.2 Configure JaCoCo in Each Module
In each module’s pom.xml, include the following in the build/plugins section:
            <!-- JaCoCo Plugin for code coverage -->
            <plugin>
                <groupId>org.jacoco</groupId>
                <artifactId>jacoco-maven-plugin</artifactId>
                <version>0.8.7</version>
            <executions>
                    <execution>
                        <goals>
                            <goal>prepare-agent</goal>
                        </goals>
                    </execution>
                    <execution>
                        <id>report</id>
                        <phase>prepare-package</phase>
                        <goals>
                            <goal>report</goal>
                        </goals>
                    </execution>
                </executions>
            </plugin>
This ensures that JaCoCo is configured for each submodule, and coverage reports are generated individually.
3.3 Running Tests and Generating Reports
Execute the following Maven command to build and generate code coverage reports:
mvn clean install
This command will compile the code, run tests, and generate JaCoCo reports.
3.4 Viewing JaCoCo Reports
After running the Maven command above, you can find the reports by navigating to the web/target/site/jacoco/index.html and core/target/site/jacoco/index.html file to view the code coverage report. The images below show the report generated for the core and web modules respectively.


3.5 Analyzing JaCoCo Reports
JaCoCo generates reports that include line coverage, branch coverage, and more. Let’s take a look at some essential metrics:
- Line Coverage: Indicates the percentage of lines covered by tests.
- Branch Coverage: Measures the coverage of decision points, such as if statements and switch statements.
- Instruction Coverage: Represents the percentage of Java bytecode instructions covered by tests.
4. Conclusion
In conclusion, integrating JaCoCo into Maven multi-module projects provides a powerful solution for ensuring code coverage across the entire codebase. The modular structure of Maven multi-module projects, combined with JaCoCo’s detailed reports, enables developers to identify and address areas of the application that lack proper test coverage. By following the steps outlined in this article and exploring the various JaCoCo configurations, we can enhance the quality and reliability of our Java projects.
5. Download the Source Code
This was an article on Jacoco Coverage for Maven Multi-Module Project.
You can download the full source code of this example here: Jacoco Coverage for Maven Multi-Module Project
