In this article, we will discuss how to use the spring framework in the Eclipse IDE. We will go step by step to set up all the prerequisites to run a spring application in eclipse with an example.
1. Setup Java Development Kit
The first and the important step is to set up the java development kit locally in your system. Please follow the link here from steps 1 through 2.2 for installing and setting up JDK in your local.
2. Install Apache Common Logging API
To use the spring framework, we need to have apache common logging dependencies installed. Spring framework uses common loggings APIs for several internal usages. To download the logging file, please follow the link here. Unzip the folder and we will be using it later.
3. Setup Eclipse IDE
To setup the eclipse IDE, use the link here to download the eclipse IDE based on your operating system. Once you have downloaded, install it by clicking into the installer.
4. Setup Spring Framework Libraries
To setup the libraries related to spring framework, go to the link here and download the zip file with the latest version. Extract the zip file and have it ready for the next steps.
5. Example using Spring framework with Eclipse
Launch the eclipse IDE downloaded in the above step by double clicking into the eclipse icon.
5.1 Create a java project
First step is to create the project, since here we are talking about the spring, so we will be creating the java project from the eclipse dashboard
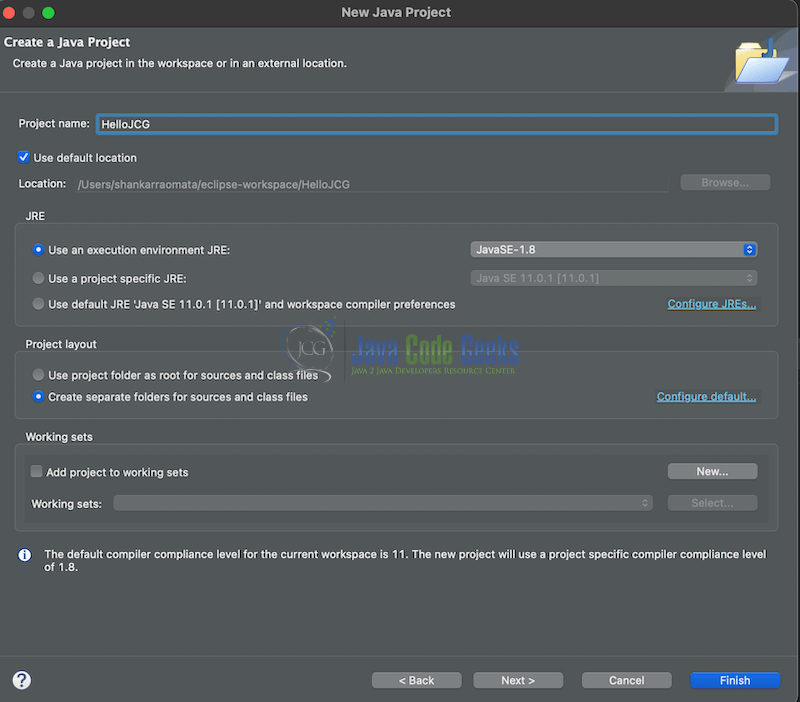
Make sure to choose the JDK version as per the setup you did in the above step 1. For example in my case i am using JDK 8, hence chosen the JDK 1.8 in the above picture.
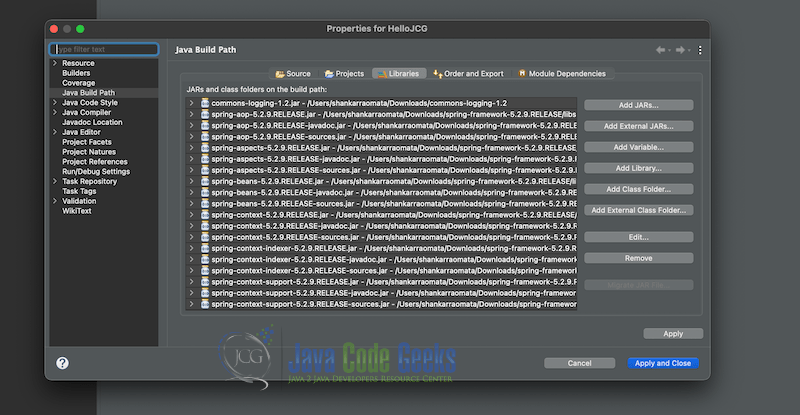
5.2 Adding the libraries
Now we have to configure the build path for the project and add all the dependencies we downloaded. For the common-logging API, we can directly go to the folder where we have extracted our common logging and select the jar inside the extracted folder with the name similar to commons-logging-X(here X is the version of the common logging API). And for the spring dependencies we have to go to the libs folder into the extracted folder.

Adding the jars by clicking the add external jars button
5.3 Running the code
Now once we have setup the project in the eclipse, lets create a package inside the src folder.
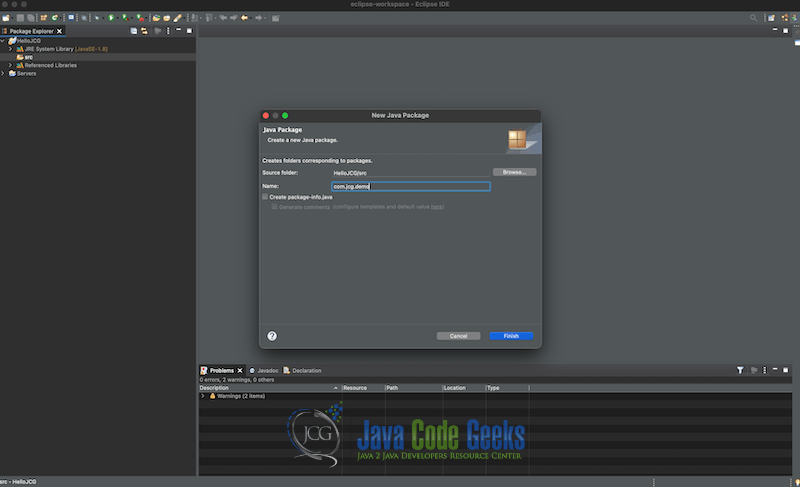
Create two classes, one will be the model class Message.java and the other would be the main class JCGDemo.java. We will also create a application-context.xml file which will have all the dependencies as beans for the application
The content are shown below
Message.java
package com.jcg.demo;

public class Message {

	 private String greeting;

	   public void setGreeting(String greeting){
	      this.greeting  = greeting;
	   }
	   public void getGreeting(){
	      System.out.println(greeting);
	   }

}
In the class above we are creating a greeting string variable with the getter and setter to access and update its value. It will be used in the next step
JCGDemo.java
package com.jcg.demo;

import org.springframework.context.ApplicationContext;
import org.springframework.context.support.ClassPathXmlApplicationContext;

public class JCGDemo {

	public static void main(String[] args) {
		  ApplicationContext context = new ClassPathXmlApplicationContext("application-context.xml");
	      Message obj = (Message) context.getBean("message");
	      obj.getGreeting();

	}

}
This class has all the important code, lets discuss step by step. The class contains the java main method as the starting point of the program.
Next line is the very important step, as it using the ClassPathXmlApplicationContext to parse and read the application-context.xml file which is called as bean definition file. It contains all the beans which we define and want spring to initialise and manage it life cycle.
The next line calls the getBean() method from the context we got in the above line and get the instance of the class which we want to use. In our case we want the instance of the Message class which is defined with the id “message” as shown in the below application-context file.
application-context.xml
<?xml version = "1.0" encoding = "UTF-8"?>
<beans xmlns = "http://www.springframework.org/schema/beans"
   xmlns:xsi = "http://www.w3.org/2001/XMLSchema-instance"
   xsi:schemaLocation = "http://www.springframework.org/schema/beans
   http://www.springframework.org/schema/beans/spring-beans-3.0.xsd">

   <bean id = "message" class = "com.jcg.demo.Message">
      <property name = "greeting" value = "Hello from JCG"/>
   </bean>
</beans>
Here from the above file we can see that we are injecting the message “Hello from JCG” in the variable greeting defined in the Message class. When we call the method getGreeting() from the Message class we see that it displays the message with spring automatically injecting it.
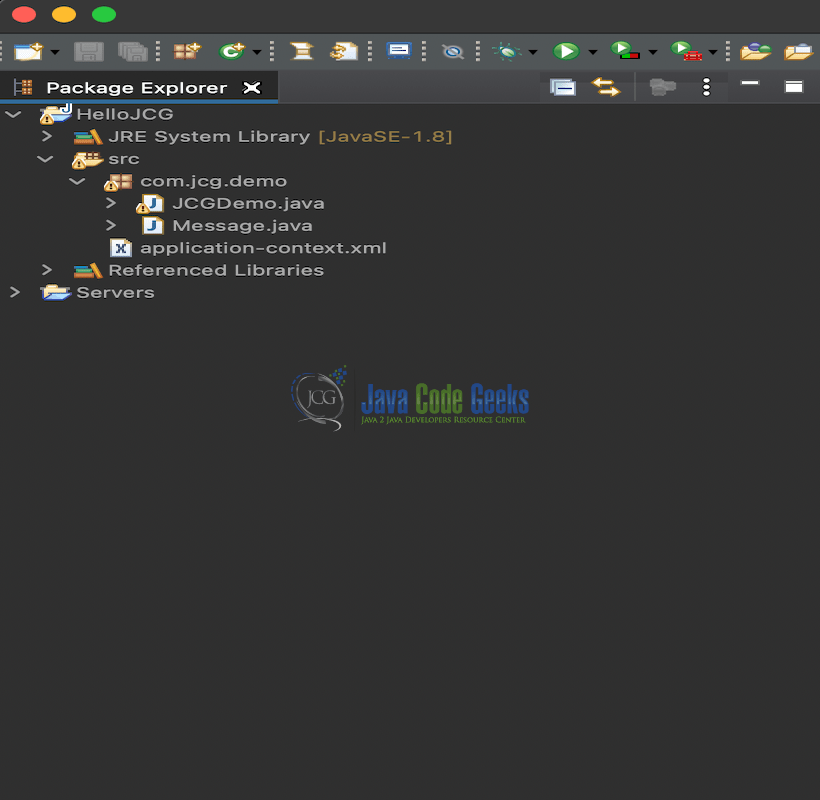
Please find the screenshot below for the final look of the project explorer in the eclipse.
To execute the program you have to run the JCGDemo file as a java application and you will see the output as shown below
Hello from JCG
6. Summary
In this article, we discussed step by step for setting up the spring project using the Eclipse IDE. We also discussed the prerequisites for the spring framework and executed a small example using the spring framework in eclipse.
