1. Introduction
This is an in-depth article related to downloading of Spring framework. Spring Framework helps in creating stand-alone and production-ready applications. Spring Framework features are Spring MVC, JPA, Spring Boot, Micro Containers, and Messaging. It is an open-source software framework used by developers for creating web applications and services. Developers use Java technology stack for creating web apps.
2. Spring Framework
2.1 Prerequisites
Java 7 or 8 is required on the linux, windows or mac operating system. Maven 3.6.1 is required for building the spring application.
2.2 Download
You can download Java 8 can be downloaded from the Oracle web site . Apache Maven 3.6.1 can be downloaded from Apache site. Spring framework latest releases are available from the spring website. Eclipse Oxygen can be downloaded from the eclipse web site.
2.3 Setup
2.3.1 Setup Java Development Kit
You can set the environment variables for JAVA_HOME and PATH. They can be set as shown below:
Setup
JAVA_HOME="/desktop/jdk1.8.0_73"
export JAVA_HOME
PATH=$JAVA_HOME/bin:$PATH
export PATH
2.3.2 Setup Maven
The environment variables for maven are set as below:
Maven Environment
JAVA_HOME=”/jboss/jdk1.8.0_73″
export M2_HOME=/users/bhagvan.kommadi/Desktop/apache-maven-3.6.1
export M2=$M2_HOME/bin
export PATH=$M2:$PATH
2.3.3 Setup Eclipse IDE
2.3.3.1 Eclipse Oxygen Setup
The ‘eclipse-java-oxygen-2-macosx-cocoa-x86_64.tar’ can be downloaded from the eclipse website. The tar file is opened by double click. The tar file is unzipped by using the archive utility. After unzipping, you will find the eclipse icon in the folder. You can move the eclipse icon from the folder to applications by dragging the icon.
2.3.3.2 Launching IDE
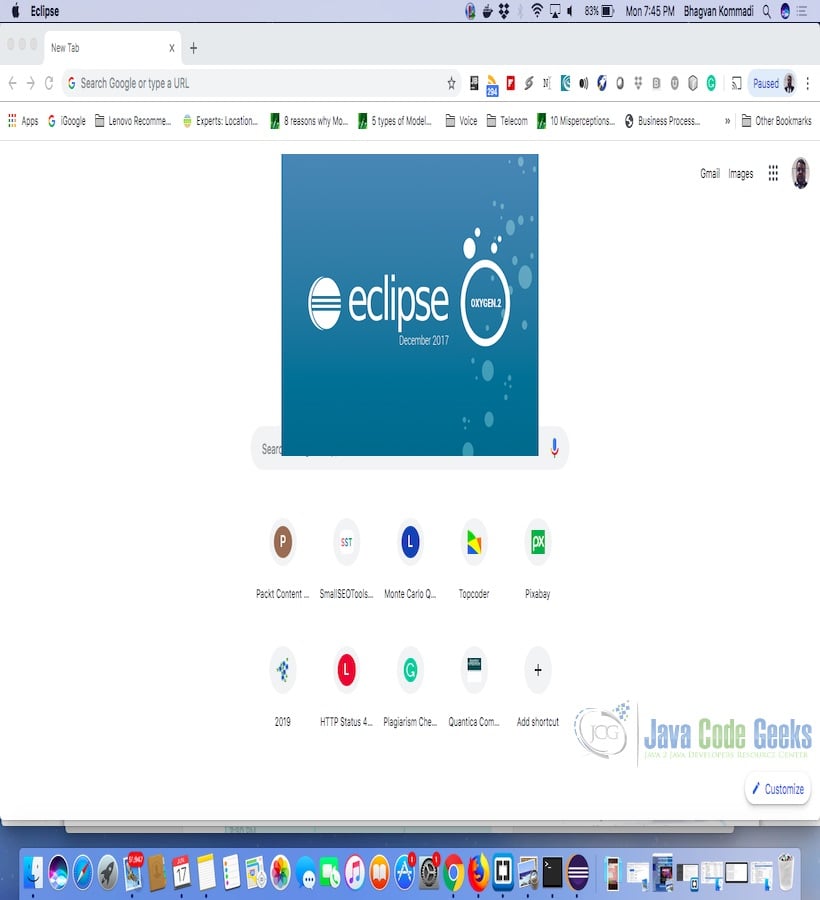
Eclipse has features related to language support, customization, and extension. You can click on the eclipse icon to launch eclipse. The eclipse screen pops up as shown in the screenshot below:
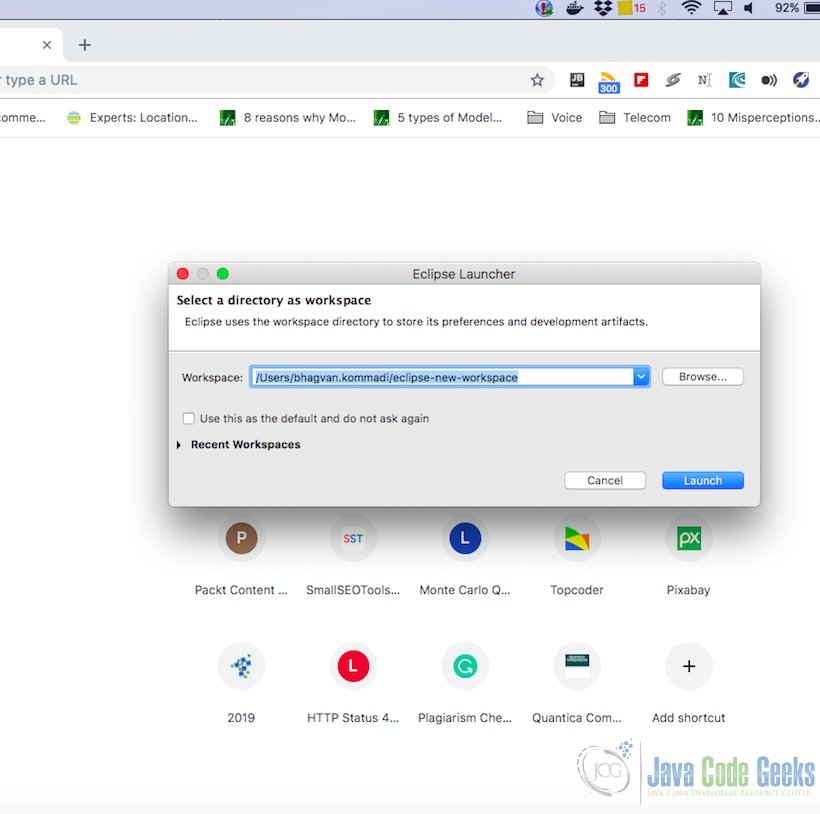
You can select the workspace from the screen which pops up. The attached image shows how it can be selected.
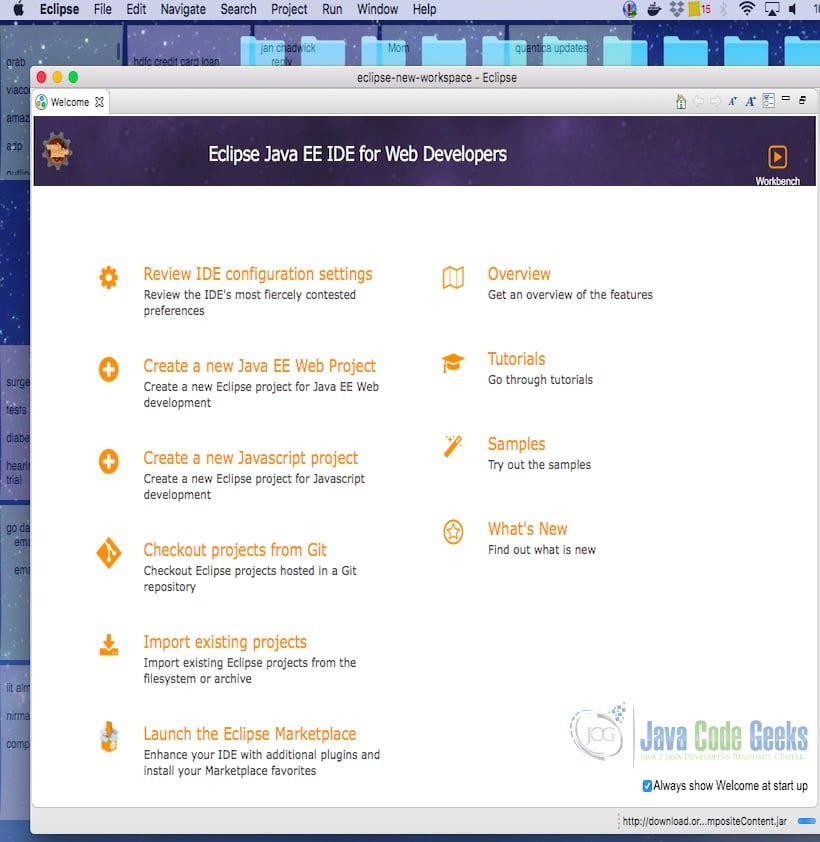
You can see the eclipse workbench on the screen. The attached screenshot shows the Eclipse project screen.
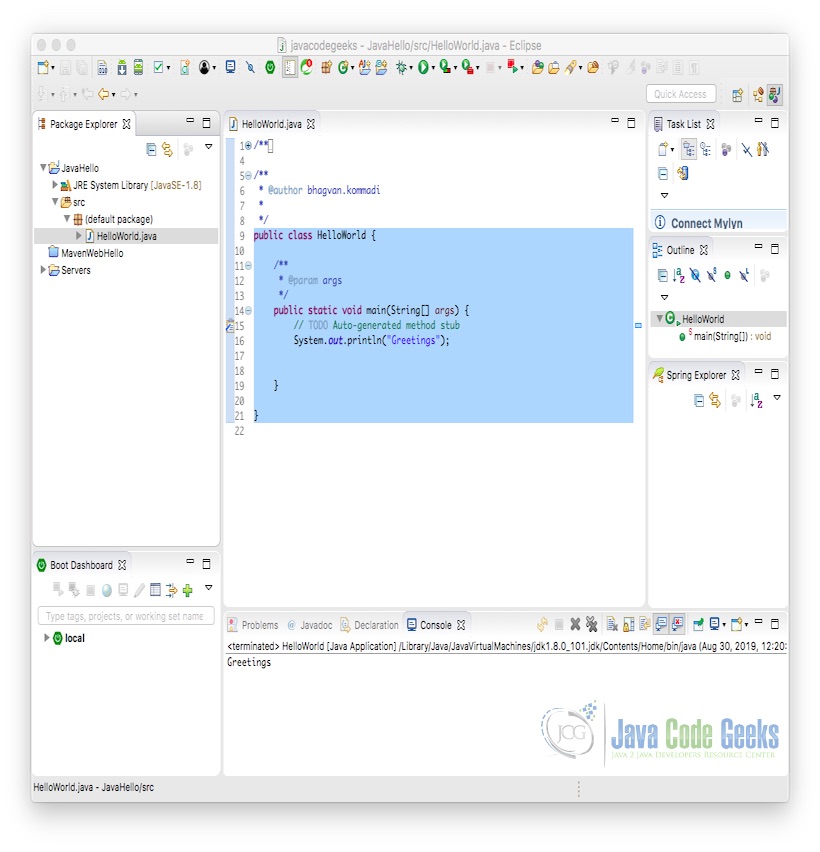
Java Hello World class prints the greetings. The screenshot below is added to show the class and execution on the eclipse.
2.3.4 Install Apache Common Logging API
Commons Logging is used in Spring for logging. Commons logging is set up after spring framework libraries are setup. It is a Java-based logging package and a programming model for logging and for other toolkits. spring-boot-starter-logging artifact is configured for enabling logging in Spring. Logging providers supported in spring-boot-starter-logging are Log4j2, Logback, and Java util Logging. Default logs are written to console and supported by Logback. Spring boot internally uses Apache commons-logging.
2.3.5 Setup Spring Framework Libraries
Spring Boot framework is downloaded as part of project pom.xml. If you are using a spring boot starter, we use spring-boot-starter-logging. spring-boot-starter-logging is a dependency for spring-boot-starter-web.
spring-boot-starter-logging is added as a dependency in pom.xml. Sample pom.xml is shown below.
Spring Configuration
<?xml version="1.0" encoding="UTF-8"?>
<project xmlns="http://maven.apache.org/POM/4.0.0" xmlns:xsi="http://www.w3.org/2001/XMLSchema-instance"
	xsi:schemaLocation="http://maven.apache.org/POM/4.0.0 https://maven.apache.org/xsd/maven-4.0.0.xsd">
	<modelVersion>4.0.0</modelVersion>
	<parent>
		<groupId>org.springframework.boot</groupId>
		<artifactId>spring-boot-starter-parent</artifactId>
		<version>2.4.4</version>
		<relativePath/> <!-- lookup parent from repository -->
	</parent>
	<groupId>com.example</groupId>
	<artifactId>spring-boot</artifactId>
	<version>0.0.1-SNAPSHOT</version>
	<name>spring-boot</name>
	<description>Demo project for Spring Boot</description>
	<properties>
		<java.version>1.8</java.version>
	</properties>
	<dependencies>
		<dependency>
			<groupId>org.springframework.boot</groupId>
			<artifactId>spring-boot-starter-web</artifactId>
		</dependency>

		<dependency>
			<groupId>org.springframework.boot</groupId>
			<artifactId>spring-boot-starter-test</artifactId>
			<scope>test</scope>
		</dependency>
		<dependency>
    <groupId>org.springframework.boot</groupId>
    <artifactId>spring-boot-starter-web</artifactId>
    <exclusions>
        <exclusion>
            <groupId>org.springframework.boot</groupId>
            <artifactId>spring-boot-starter-logging</artifactId>
        </exclusion>
    </exclusions>
</dependency>
<dependency>
    <groupId>org.springframework.boot</groupId>
    <artifactId>spring-boot-starter-log4j2</artifactId>
</dependency>

	</dependencies>

	<build>
		<plugins>
			<plugin>
				<groupId>org.springframework.boot</groupId>
				<artifactId>spring-boot-maven-plugin</artifactId>
			</plugin>
		</plugins>
	</build>

</project>
2.4 How to download and install Spring framework
Spring framework’s latest releases are available from the spring website. You can select the framework based on your operating system. After downloading the zip file can be extracted to a folder. The libraries in the libs folder are set in the CLASSPATH variable.
2.5 Building the Application
2.5.1 Spring
You can start building Spring applications using Spring Boot. Spring Boot has minimal configuration of Spring. Spring Boot has simplified security, tracing, application health management and runtime support for webservers. Spring configuration is done through maven pom.xml. The xml configuration is shown as below:
Spring Configuration
<?xml version="1.0" encoding="UTF-8"?>
<project xmlns="http://maven.apache.org/POM/4.0.0" xmlns:xsi="http://www.w3.org/2001/XMLSchema-instance"
    xsi:schemaLocation="http://maven.apache.org/POM/4.0.0 https://maven.apache.org/xsd/maven-4.0.0.xsd">
    <modelVersion>4.0.0</modelVersion>

    <groupId>org.springframework</groupId>
    <artifactId>spring-helloworld</artifactId>
    <version>0.1.0</version>

    <parent>
        <groupId>org.springframework.boot</groupId>
        <artifactId>spring-boot-starter-parent</artifactId>
        <version>2.1.4.RELEASE</version>
    </parent>

    <dependencies>
        <dependency>
            <groupId>org.springframework.boot</groupId>
            <artifactId>spring-boot-starter-web</artifactId>
        </dependency>
        <dependency>
            <groupId>org.springframework.boot</groupId>
            <artifactId>spring-boot-starter-test</artifactId>
            <scope>test</scope>
        </dependency>
    </dependencies>

    <properties>
        <java.version>1.8</java.version>
    </properties>


    <build>
        <plugins>
            <plugin>
                <groupId>org.springframework.boot</groupId>
                <artifactId>spring-boot-maven-plugin</artifactId>
            </plugin>
        </plugins>
    </build>

</project>
You can create a HelloWorldController class as the web controller. The class is annotated using @RestController. Rest Controller is used to handle requests in Spring Model View Controller framework. Annotation @RequestMapping is used to annotate the index() method. The code for the HelloWorldController class is shown below:
HelloWorldController
package helloworld;
import org.springframework.web.bind.annotation.RestController;
import org.springframework.web.bind.annotation.RequestMapping;

@RestController
public class HelloWorldController {

    @RequestMapping("/")
    public String index() {
        return "Hello World\n";
    }

}
HelloWorldApp is created as the Spring Boot web application. When the application starts, beans, and settings are wired up dynamically. They are applied to the application context. The code for HelloWorldApp class is shown below:
HelloWorldApp
package helloworld;
import java.util.Arrays;

import org.springframework.boot.SpringApplication;
import org.springframework.boot.autoconfigure.SpringBootApplication;
import org.springframework.context.ApplicationContext;

@SpringBootApplication
public class HelloWorldApp {

    public static void main(String[] args) {
        ApplicationContext ctx = SpringApplication.run(HelloWorldApp.class, args);

        System.out.println("Inspecting the beans");

        String[] beans = ctx.getBeanDefinitionNames();
        Arrays.sort(beans);
        for (String name : beans) {
            System.out.println("Bean Name" +name);
        }
    }

}
Maven is used for building the application. The command below builds the application.
Maven Build Command
mvn package
The output of the executed command is shown below.
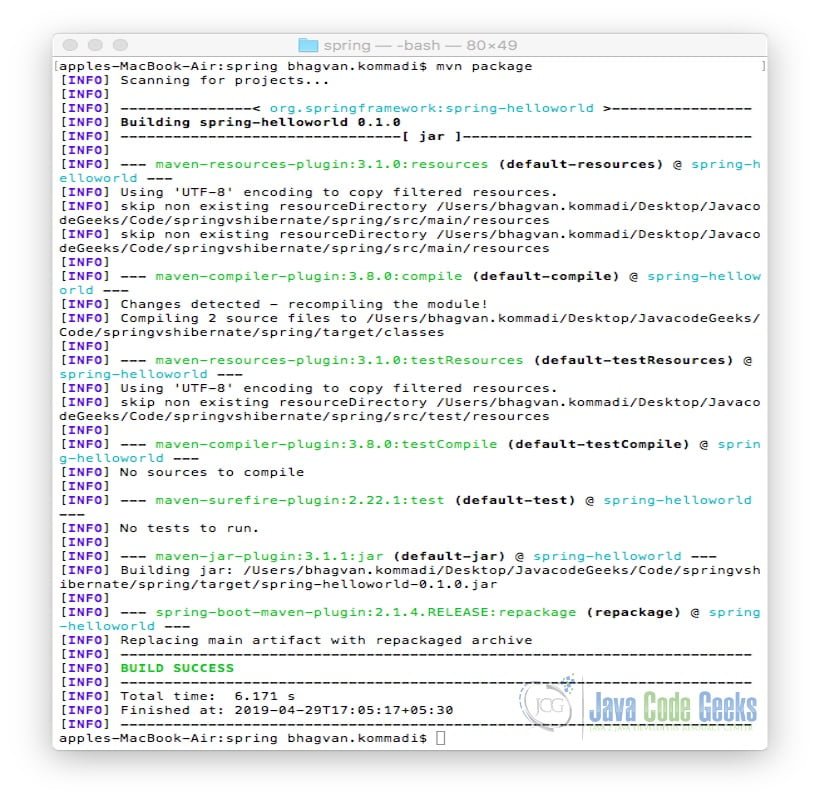
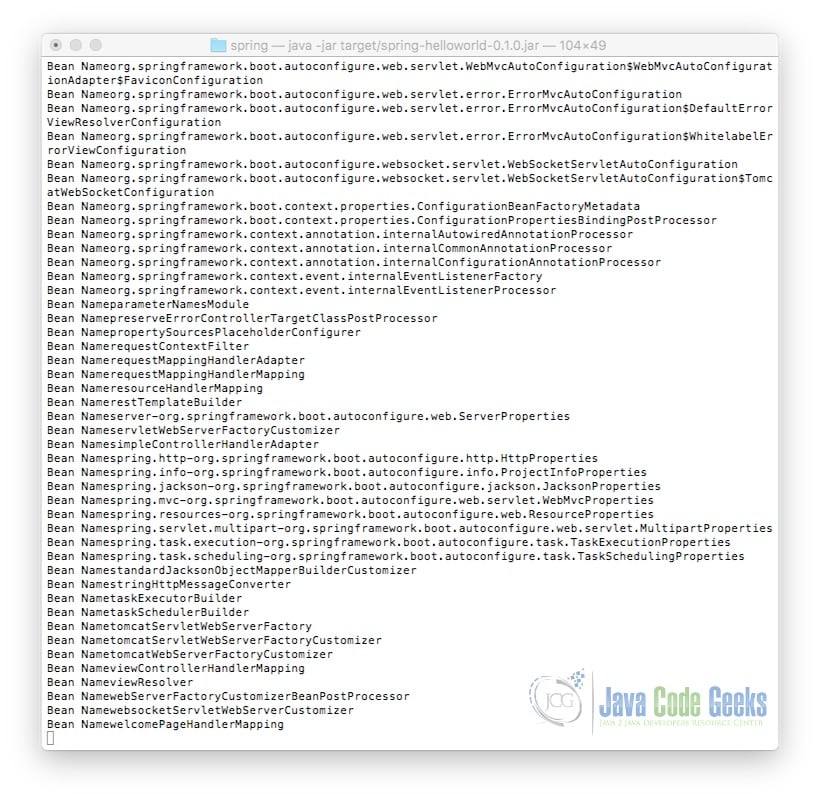
The jar file spring-helloworld-0.1.0.jar is created. The following command is used for executing the jar file.
Java Command
java -jar target/spring-helloworld-0.1.0.jar
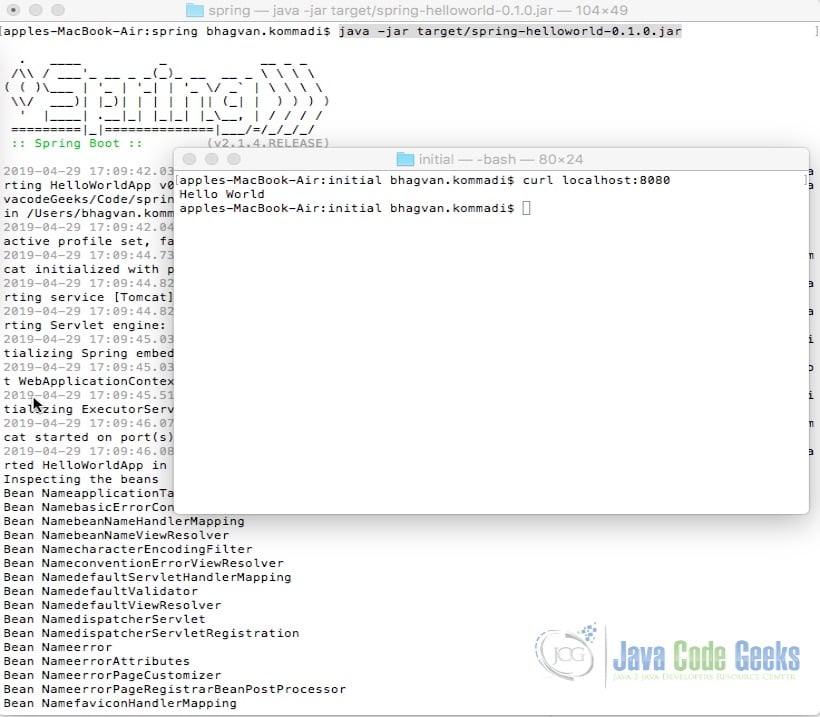
The output of the Java command is shown as below:
Curl command is invoked on the command line for the execution of index method. The method returns a String “Hello World” text. @RestController aggregates the two annotations @Controller and @ResponseBody. This results in returning data. The ouput is shown as below.
2.6 Unit Tests
2.6.1 Spring
In Spring, MockMvc is used to send HTTP requests to the DispatcherServlet. The assertions are made based on the result obtained from the servlet. @AutoConfigureMockMvc annotation is used with @SpringBootTest to inject a MockMvc instance. The implementation of the Spring Unit Test is shown as below:
HelloWorldControllerTest
package helloworld;

import static org.hamcrest.Matchers.equalTo;
import static org.springframework.test.web.servlet.result.MockMvcResultMatchers.content;
import static org.springframework.test.web.servlet.result.MockMvcResultMatchers.status;

import org.junit.Test;
import org.junit.runner.RunWith;
import org.springframework.beans.factory.annotation.Autowired;
import org.springframework.boot.test.autoconfigure.web.servlet.AutoConfigureMockMvc;
import org.springframework.boot.test.context.SpringBootTest;
import org.springframework.http.MediaType;
import org.springframework.test.context.junit4.SpringRunner;
import org.springframework.test.web.servlet.MockMvc;
import org.springframework.test.web.servlet.request.MockMvcRequestBuilders;

@RunWith(SpringRunner.class)
@SpringBootTest
@AutoConfigureMockMvc
public class HelloWorldControllerTest {

    @Autowired
    private MockMvc mvc;

    @Test
    public void getMessage() throws Exception {
        mvc.perform(MockMvcRequestBuilders.get("/").accept(MediaType.APPLICATION_JSON))
                .andExpect(status().isOk())
                .andExpect(content().string(equalTo("Hello World\n")));
    }
}
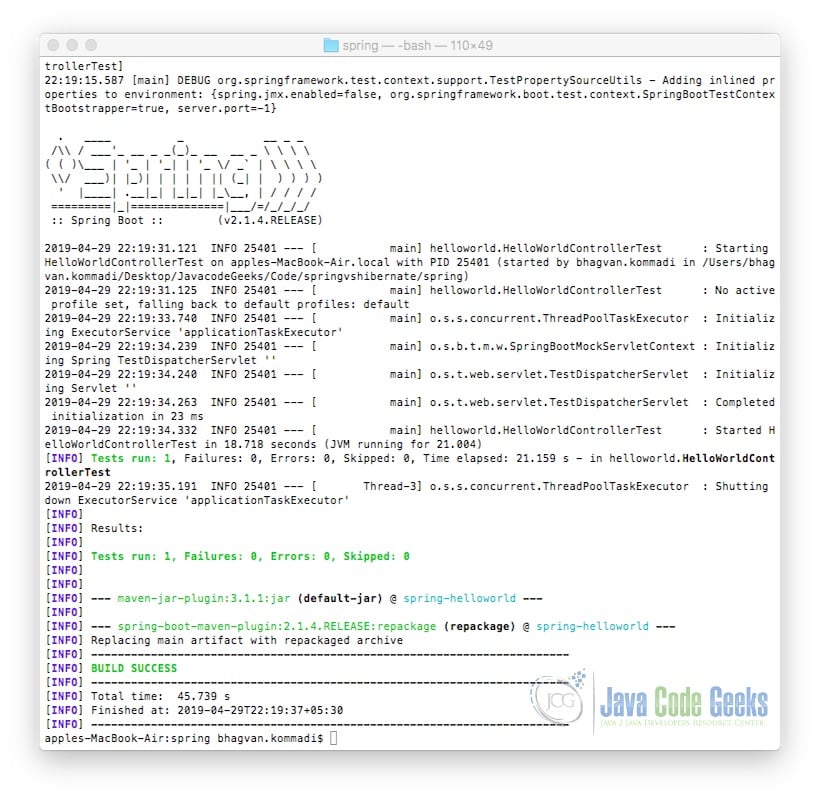
Maven command is used to run the unit test. The command is as below :Maven Build Command
Maven Build Command
mvn package
The output of the executed command is shown below.
2.7 Developing Spring app on Eclipse
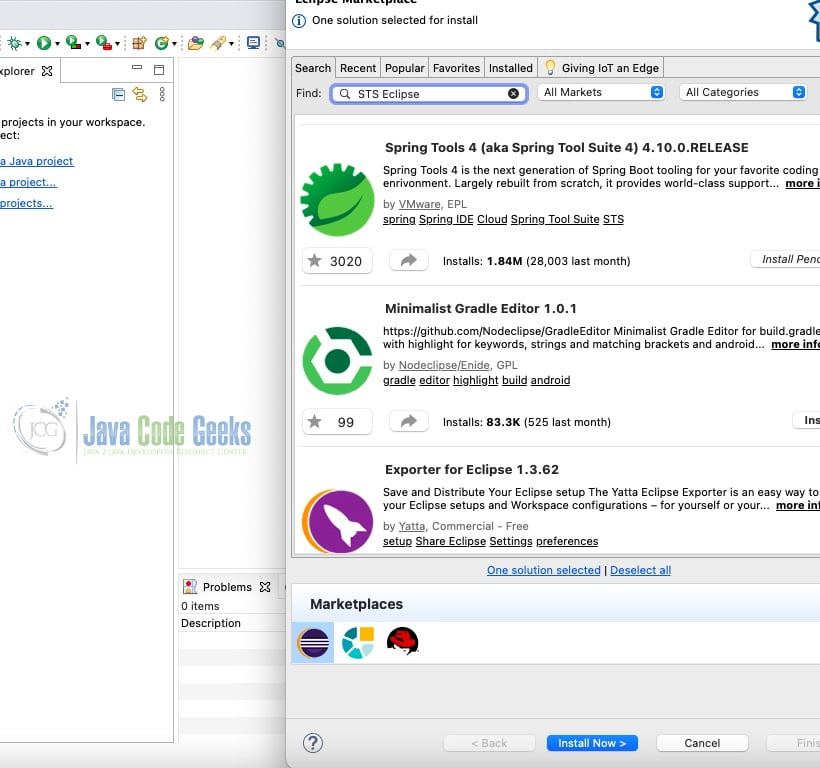
You can select STS (spring tools suite ) from the marketplace. You can go to Help > Install New Software. Below is the screenshot which shows how to search for Eclipse plugins.
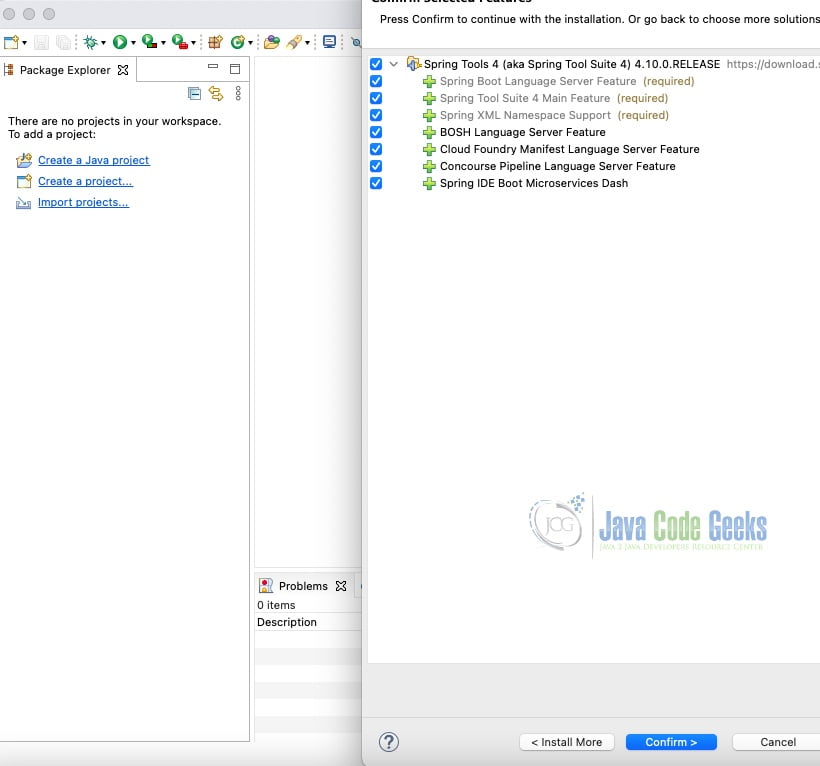
You can select the features from the ui as shown in the figure below:
You can finish the installation as shown in the screen shot below:

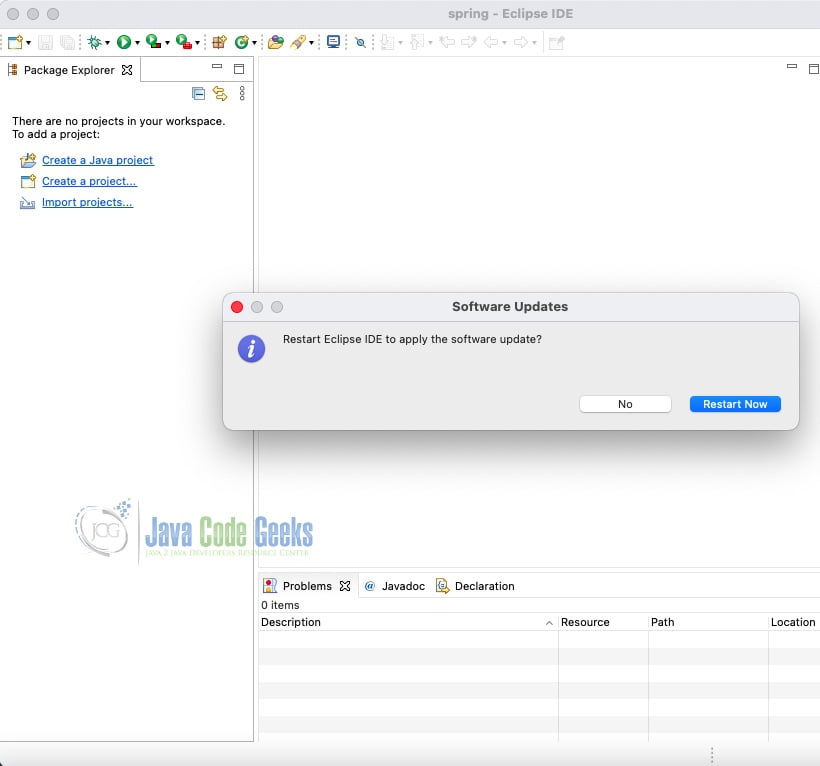
You can restart the eclipse as suggested and shown in the screenshot below:
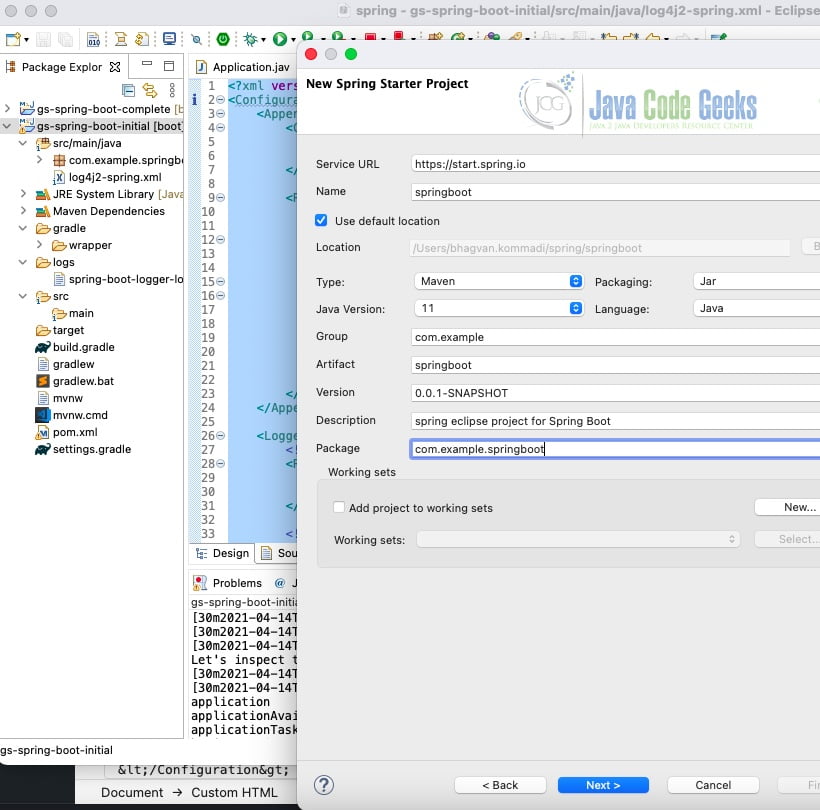
You can create Spring boot project from the menu as shown in the screen shot below:

You can fill the project information as shown in the screen shot below:
After creating a spring boot project, logging can be configured in any of these files:
- logback-spring.xml
- logback.xml
- logback-spring.groovy
- logback.groovy
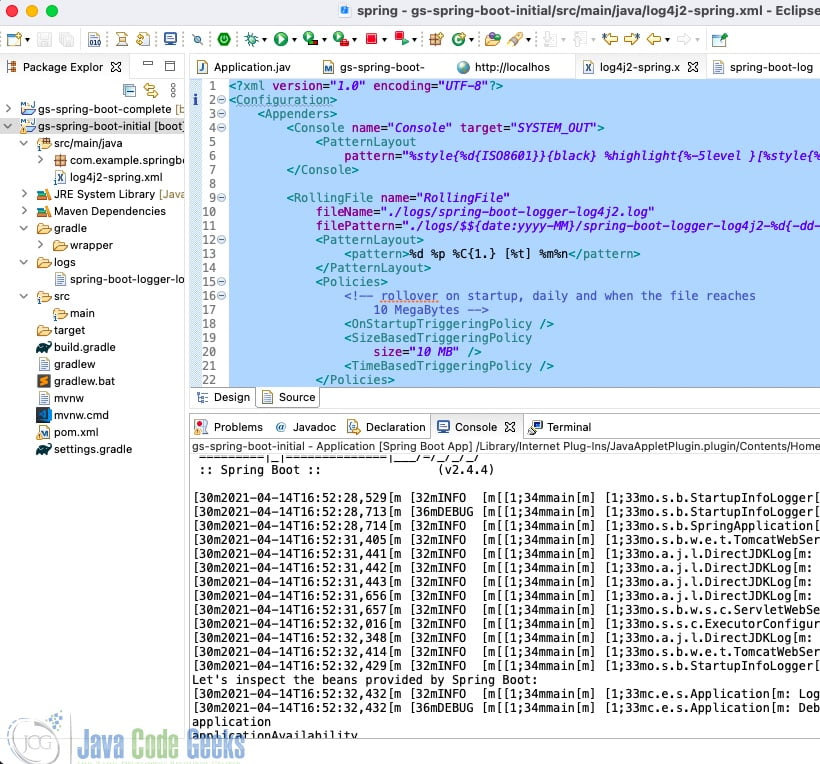
Below is shown the implementation of logback-spring.xml:
logback spring configuration
<?xml version="1.0" encoding="UTF-8"?>
<Configuration>
    <Appenders>
        <Console name="Console" target="SYSTEM_OUT">
            <PatternLayout
                pattern="%style{%d{ISO8601}}{black} %highlight{%-5level }[%style{%t}{bright,blue}] %style{%C{1.}}{bright,yellow}: %msg%n%throwable" />
        </Console>

        <RollingFile name="RollingFile"
            fileName="./logs/spring-boot-logger-log4j2.log"
            filePattern="./logs/$${date:yyyy-MM}/spring-boot-logger-log4j2-%d{-dd-MMMM-yyyy}-%i.log.gz">
            <PatternLayout>
                <pattern>%d %p %C{1.} [%t] %m%n</pattern>
            </PatternLayout>
            <Policies>
                <!-- rollover on startup, daily and when the file reaches
                    10 MegaBytes -->
                <OnStartupTriggeringPolicy />
                <SizeBasedTriggeringPolicy
                    size="10 MB" />
                <TimeBasedTriggeringPolicy />
            </Policies>
        </RollingFile>
    </Appenders>

    <Loggers>
        <!-- LOG everything at INFO level -->
        <Root level="info">
            <AppenderRef ref="Console" />
            <AppenderRef ref="RollingFile" />
        </Root>

        <!-- LOG "com.example*" at TRACE level -->
        <Logger name="com.example" level="trace"></Logger>
    </Loggers>

</Configuration>
You can create the controller and application in the project. The source code of the HelloController is shown below:
Hello Controller
package com.example.springboot;

import org.springframework.web.bind.annotation.RestController;
import org.springframework.web.bind.annotation.RequestMapping;

@RestController
public class HelloController {

	@RequestMapping("/")
	public String index() {
		return "Hello World!";
	}

}
The source code of the spring Application class is shown below. Apache commons logging is implemented in the class main method
Spring Application
package com.example.springboot;

import java.util.Arrays;

import org.springframework.boot.SpringApplication;
import org.springframework.boot.autoconfigure.SpringBootApplication;
import org.springframework.context.ApplicationContext;
import org.apache.commons.logging.Log;
import org.apache.commons.logging.LogFactory;

@SpringBootApplication
public class Application {

	private static Log logger = LogFactory.getLog(Application.class);

	public static void main(String[] args) {
		ApplicationContext ctx = SpringApplication.run(Application.class, args);

		System.out.println("Let's inspect the beans provided by Spring Boot:");


		logger.info("Logging info");
        logger.debug("Debug info");

		String[] beanNames = ctx.getBeanDefinitionNames();
		Arrays.sort(beanNames);
		for (String beanName : beanNames) {
			System.out.println(beanName);
		}
	}

}
You can execute the Spring application by running it as Spring boot application. Logs are created in /logs folder.
3. Download the Source Code
You can download the full source code of this example here: How to Download Spring Framework
