In this article, we’re going to see how to download and install MySQL using the default installer. Also, we’ll set up the server using the auto start package and do some examples.
1. Download MySQL Installer
As Linux/macOS-based system user, I commonly use a package manager like Home Brew and APT in the terminal to install software that I need. However, we can use installers distributed by the companies or developers that work as well.
We’re going to download the MySQL Community version, a free version distributed by Oracle. The site to download this version is here.
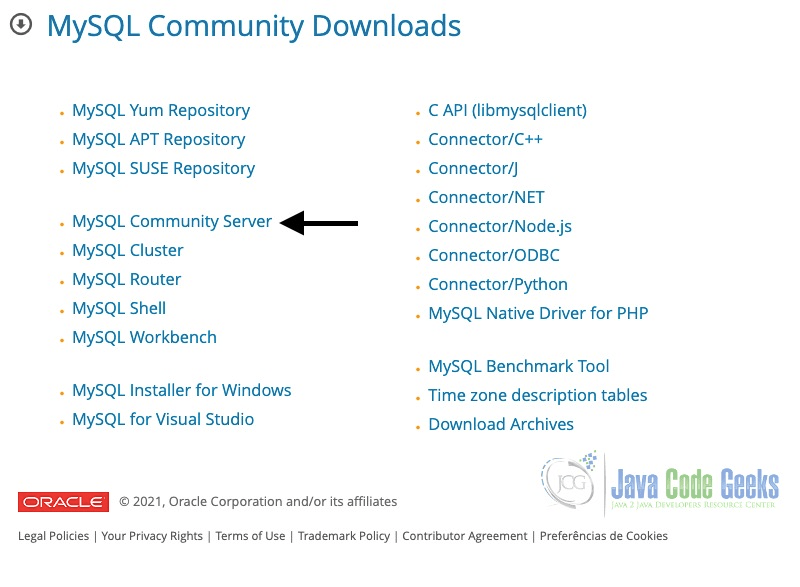
Note that on the introduction page there is a set of options. We’re going to choose MySQL Community Server.
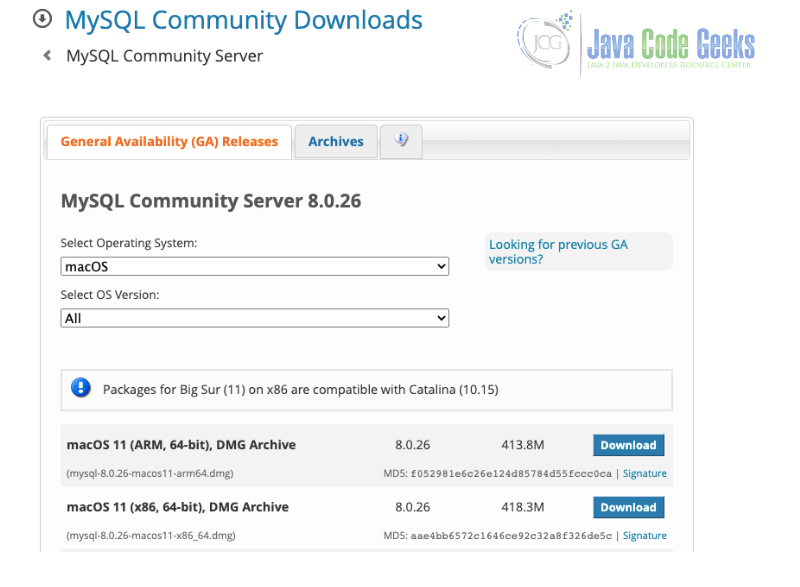
On the next page, we’ll select our current operating system in the menu. We’ll find the current version of MySQL on this page, however, you can find older versions on the Archives tab.
For this article, I’m using version 8.0.26 with macOS. I’m going to download and DMG file to install.
For Linux users, there are some installers available. For Ubuntu/Debian users, we can get the .deb package. SUSE and RedHat-based systems can get the .rpm package. Also, Linux distributions have the .tar file available too, which is more generic.
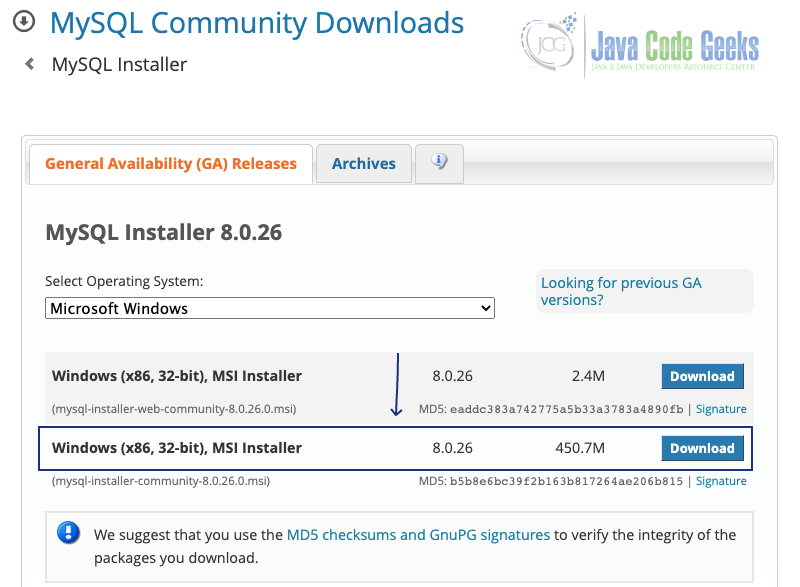
Windows users find the MSI installer in this link. Choose the complete installer instead of the web installer.
Maybe an Oracle account is required to download the installer. Follow the steps to create the account (if you haven’t) or log in with a proper account.
2. Install using MySQL Installer
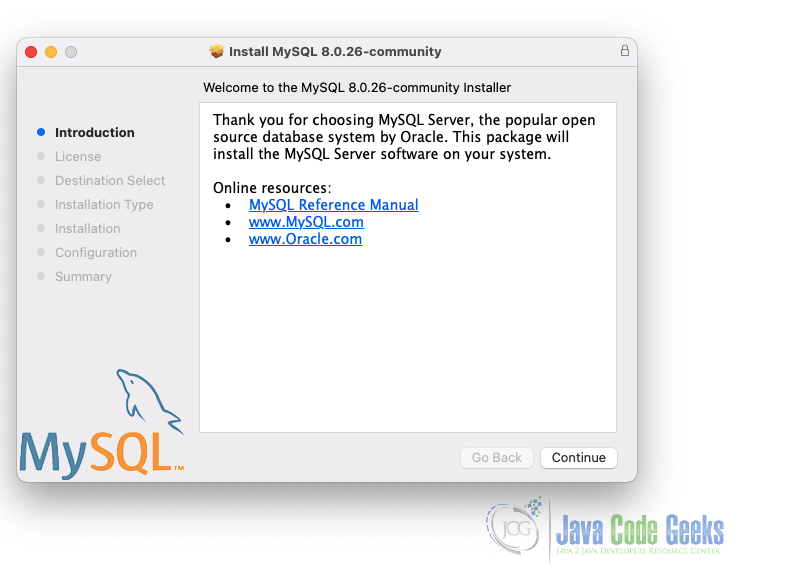
After downloading the installer, we’re going to follow the steps to install MySQL Server in our machine. The first one and easier is to open the downloaded installer in the folder.
We should see the first screen to start the installing process. Press the continue (or next) button.
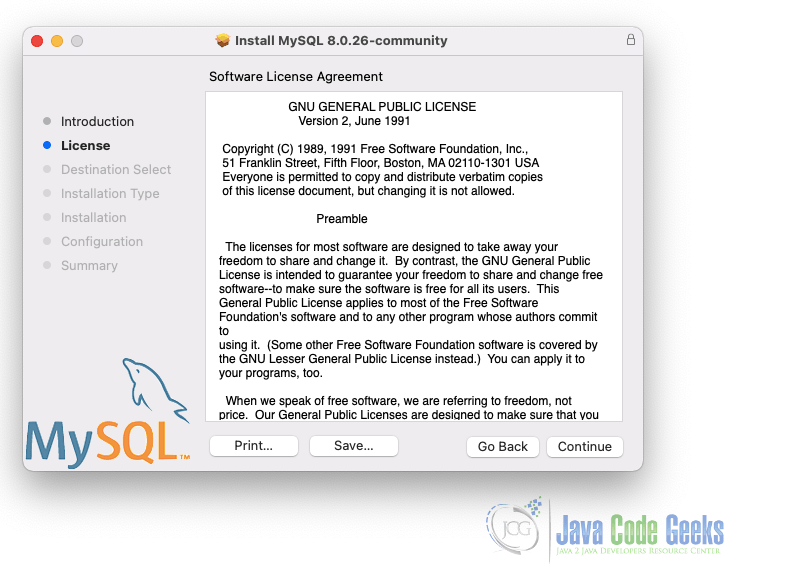
Next, we’ll see a disclaimer about GNU General Public License. Important here is to know that we’re using a free version, which means, this version is not intended for commercial purposes, just for study and testing cases.
We must “Agree” with the terms to continue the installation. Hit the continue button to go to the next step.
The following step will be required the install location. I recommend choosing the default location that the installer shows because is easier to know where the configuration stuff is when we set up the server later.
Also, in the Customize button, we can see what the installer will really install. For this article, I’m keeping the standard install, but feel free to do your own customization.
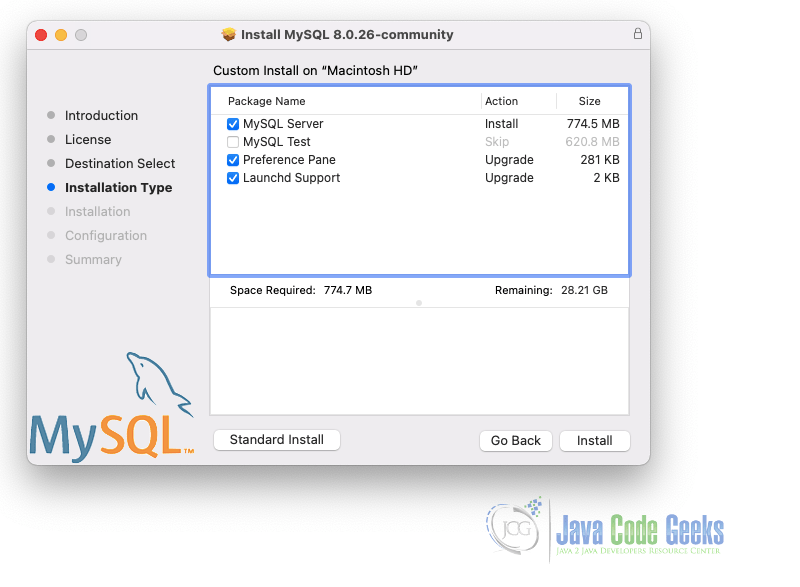
Important note: Launchd Support is an option to autostart MySQL when the computer starts. In the next sections, I’ll show how to set up this option in our machine.
After choosing your type of installation, hit the Install button to proceed with the installation. When the installation is finished, it’s time to do some configurations.
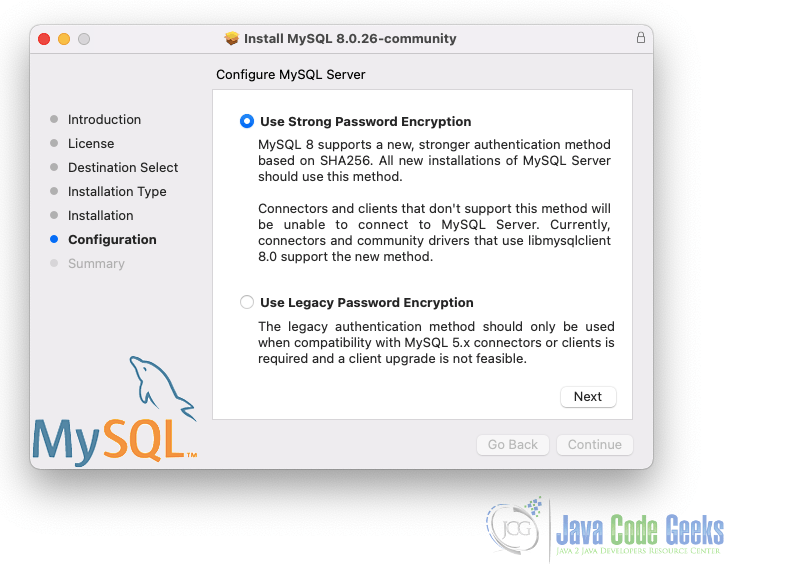
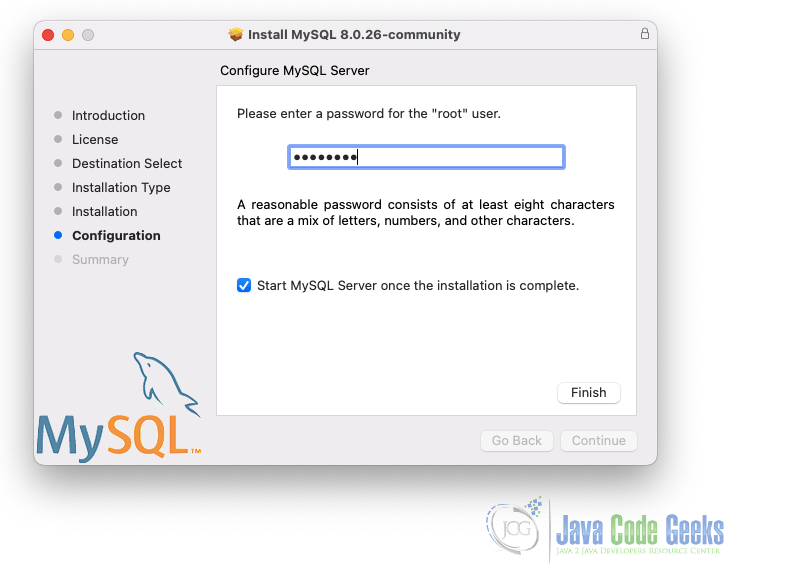
The first step is to set up the admin password. It’s highly recommended to use strong password encryption. When decided the password to insert, click on the finish button.
3. Install and set up Auto-start package
3.1 MacOS
Once installed, we can access the MySQL configuration in macOS at System Preferences > MySQL.
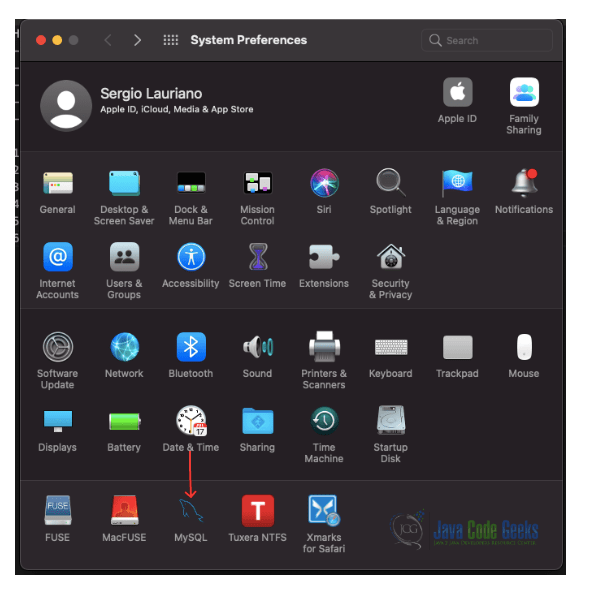
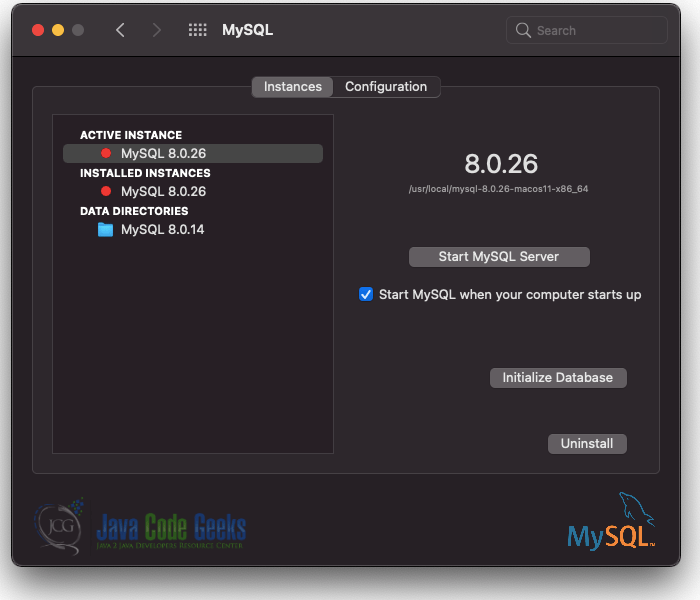
With the configuration window opened, we can see the option “Start MySQL when your computer starts up” on the Instances tab. Just keep checked and will always start when your machine has started.
3.2 Windows
For Windows, we have the option to put MySQL server as a service. To install the service, use the following command.
MySQL service install on Windows
C:\> "C:\Program Files\MySQL\MySQL Server 8.0\bin\mysqld" --install
After the command had been executed, access the Windows Service Control Manager in the Controle Panel. An Admin user is needed to do it.
More details can be found here.
4. Connect to installed MySQL server
After installing the MySQL server, it’s time to check if the installing process was OK. For this, we can use MySQL command CLI (mysql) and MySQL Workbench.
4.1 Using mysql command CLI
When using mysql command-line client, the simplest way is using the command below to access the server using the user and password previously created. In my case, I’m using the user root, which is the server admin.
MySQL command-line connect
$ mysql -u root -p
Enter password:
Welcome to the MySQL monitor.  Commands end with ; or \g.
Your MySQL connection id is 17
Server version: 8.0.26 MySQL Community Server - GPL

Copyright (c) 2000, 2021, Oracle and/or its affiliates.

Oracle is a registered trademark of Oracle Corporation and/or its
affiliates. Other names may be trademarks of their respective
owners.

Type 'help;' or '\h' for help. Type '\c' to clear the current input statement.

mysql>
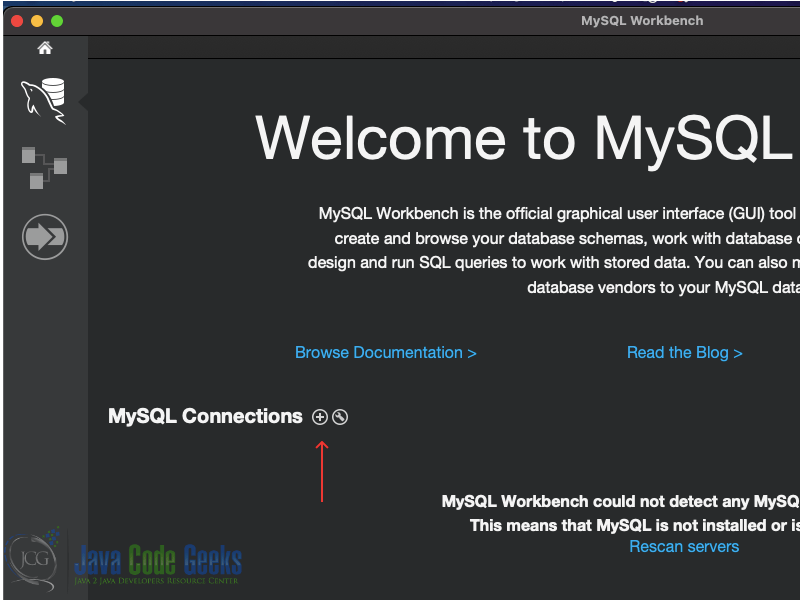
4.2 Using MySQL Workbench (or other SQL client)
You can download and install MySQL Workbench here. To connect, just click on the plus button on MySQL Connections at the home screen of MySQL Workbench to add a new connection.
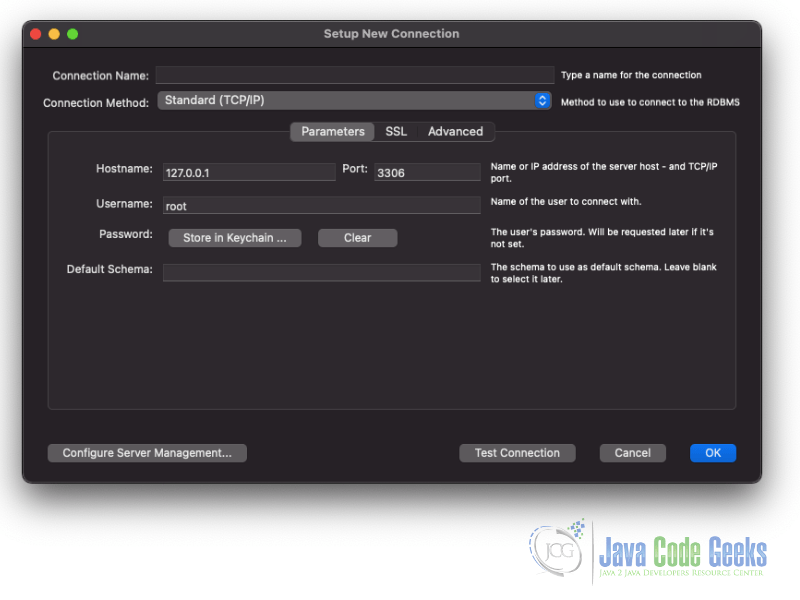
In the connection window, we must put the Hostname, Port, and Username. By default, Hostname came with the local IP (127.0.0.1), which we can maintain our replace by localhost.
Next, the Port is set with MySQL default port (3306). If you don’t change on installation, keep it. Finally, we put our user to connect, which in this case is the root user.
5. Try some example
Once connected, you can try the script below to create a new database and a table. Also, there is an insert to put some data into to confirm that’s everything is working fine.
MySQL query example
DROP DATABASE IF EXISTS mysql_test;

CREATE DATABASE mysql_test;

DROP TABLE IF EXISTS mysql_test.Customers;

CREATE TABLE mysql_test.Customers (
       CustomerID INT AUTO_INCREMENT PRIMARY KEY,
       CustomerName VARCHAR(255),
       ContactName VARCHAR(255),
       ContactMail VARCHAR(255)
);

INSERT INTO mysql_test.Customers(CustomerName,ContactName,ContactMail) VALUES ('Tampa Bay Buccaneers','Tom Brady', 'tom.brady@buccaneers.com'),
('New England Patriots', null, 'contact@patriots.com'),
('Dallas Cowboys','Dak Prescott', 'dak.prescott@cowboys.net'),
('Kansas City Chiefs','Patrick Mahomes', 'pmahomes@kcchiefs.com'),
('New Orleans Saints', null, 'contact@saints.com');

SELECT * FROM mysql_test.Customers;
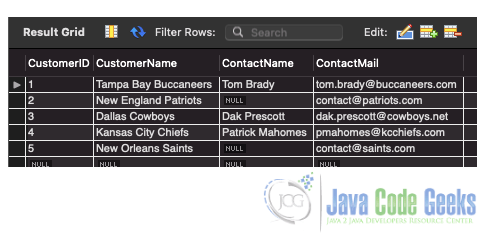
The result on Workbench should look like the following:
6. Conclusion
And that’s it! We saw how to download install MySQL using MySQL installer. Also, we view some details about the installation and understand how to set up the auto-start package.
In conclusion, we check the connection using MySQL Workbench and create some data to insert into the server storage.
This article was based on the official MySQL Installation Guide that can be read in detail here.
7. Download the source code
You can download the full source code of this example here: How to Download and Install MySQL
Last updated on Feb. 24th, 2022
