Spring JdbcTemplate is a powerful mechanism to connect to the database and execute SQL queries. In this tutorial, we will discuss the Spring JdbcTemplate and we will cover all the CRUD operations.
Table Of Contents
1. Introduction
1.1 Spring Framework
- Spring is an open-source framework created to address the complexity of an enterprise application development
- One of the chief advantages of the Spring framework is its layered architecture, which allows developer to be selective about which of its components they can use while providing a cohesive framework for
J2EEapplication development - Spring framework provides support and integration to various technologies for e.g.:
- Support for Transaction Management
- Support for interaction with the different databases
- Integration with the Object Relationship frameworks for e.g. Hibernate, iBatis etc
- Support for Dependency Injection which means all the required dependencies will be resolved with the help of containers
- Support for
RESTstyle web-services
1.2 Why to use Spring Jdbc Template?
Before we start coding let’s take a brief introduction to why do we need to adopt Spring Jdbc Template instead of the traditional Jdbc Programming or ORM like Hibernate.
The answer to this question, traditional JDBC programming is a pain for developers as they need to code more and manage a number of a headache regarding the connection management and writing the same code again and again. On the other hand, ORM tools are good but developers need to deal with a heavy part of the configuration and also need to add a number of external jars to code.
Jdbc Template, on the other hand, provides a new and efficient mechanism to deal with the database and developers don’t need to bother about any heavy XML configurations like ORM’s do or adding same connection code again and again as in a traditional JDBC programming.
In Jdbc template developers put the connection string in one place and don’t even need to add external jar files. It cleans up the resources automatically by releasing the database connections and provides a better error detection mechanism by splitting the Jdbc SQLExceptions into RuntimeExceptions.
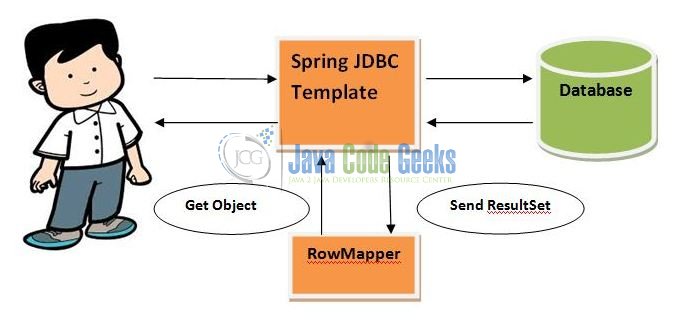
1.3 Spring Jdbc
Spring provides a simplification in handling database access with the Spring Jdbc Template. The Jdbc template internally uses the Jdbc code but provides an API, so developers don’t have to write the Boiler Plate code. The Spring Jdbc Template has the following advantages compared with the standard Jdbc.
- Jdbc Template allows to clean-up the resources automatically i.e. releasing the database connections
- Jdbc Template converts the standard Jdbc
SQLExceptionsintoRuntimeExceptionswhich allows the programmer to react more flexible to the errors - Jdbc Template also converts the vendor specific error messages into better understandable error messages
- Jdbc Template provides methods to write the
SQLqueries directly, thereby saving lot of work and time
1.3.1 Spring Jdbc Approaches
Spring framework provides the following approaches for Jdbc database access:
- JdbcTemplate
- NamedParameterJdbcTemplate
- SimpleJdbcTemplate
- SimpleJdbcInsert
- SimpleJdbcCall
1.3.2 Spring JdbcTemplate Class
It is the central class in Spring Jdbc support classes and takes care of the creation and release of the resources such as Creating and Closing of Connection, Statement, ResultSet objects etc. So it will not lead to any problem if developers forget to close the database connection.
This class handles the exception and provides the informative exception messages by the help of exception classes defined in the org.springframework.dao package. Developers can perform all the database operations with the help of JdbcTemplate class such as Insertion, Updation, Deletion, and Retrieval of the data from the database.
Let’s see the methods of Spring JdbcTemplate class.
| No. | Method | Description |
|---|---|---|
| 1. | public int update(String query) | It is used to INSERT, UPDATE and DELETE records. |
| 2. | public int update(String query, Object... args) | It is used to INSERT, UPDATE and DELETE records by using the PreparedStatement. |
| 3. | public void execute(String query) | It is used to execute the DDL (i.e. Data Definition Language) query. |
| 4. | public T execute(String sql, PreparedStatementCallbackaction) | It executes the query by using the PreparedStatement callback method. |
| 5. | public T query(String sql, ResultSetExtractor resultSetExtratObj) | It is used to fetch the records using the ResultSetExtractor interface. |
| 6. | public List query(String sql, RowMapper rowMapperObj) | It is used to fetch the records using RowMapper. |
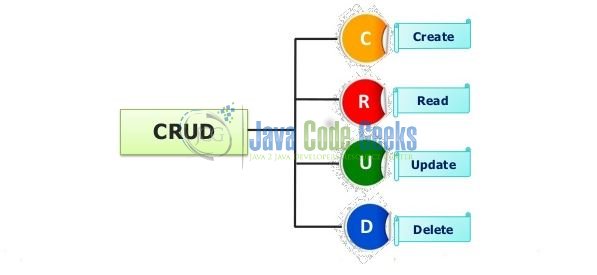
1.4 CRUD Operations
CRUD means the basic operations to be done in a data repository. We directly handle records or data objects; apart from these operations, the records are passive entities. CRUD stands for Create, Read, Update, and Delete. The CRUD functions are the user interfaces to databases, as they permit users to create, view, modify and alter data. CRUD works on entities in databases and manipulates these entities.
For instance, a simple student database table adds (creates) new student details, accesses (reads) existing student details, modifies (updates) existing student data such as subjects, and deletes student details when students leave the school.
The commands corresponding to these operations in SQL are INSERT, SELECT, UPDATE, and DELETE. INSERT adds new records, SELECT retrieves or selects existing records based on selection conditions, UPDATE modifies existing records and DELETE removes tables or records in a table.
1.5 Download and Install MySQL
You can watch this video in order to download and install the MySQL database on your Windows operating system.
Now, open up the Eclipse IDE and let’s see how to implement the Jdbc Template in the Spring framework!
2. Spring JdbcTemplate CRUD Operations Tutorial
2.1 Tools Used
We are using Eclipse Kepler SR2, JDK 8, MySQL and Maven. Having said that, we have tested the code against JDK 1.7 and it works well.
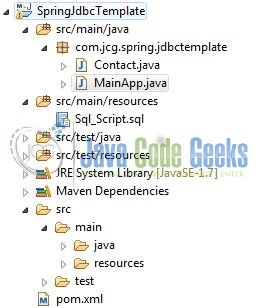
2.2 Project Structure
Firstly, let’s review the final project structure, in case you are confused about where you should create the corresponding files or folder later!
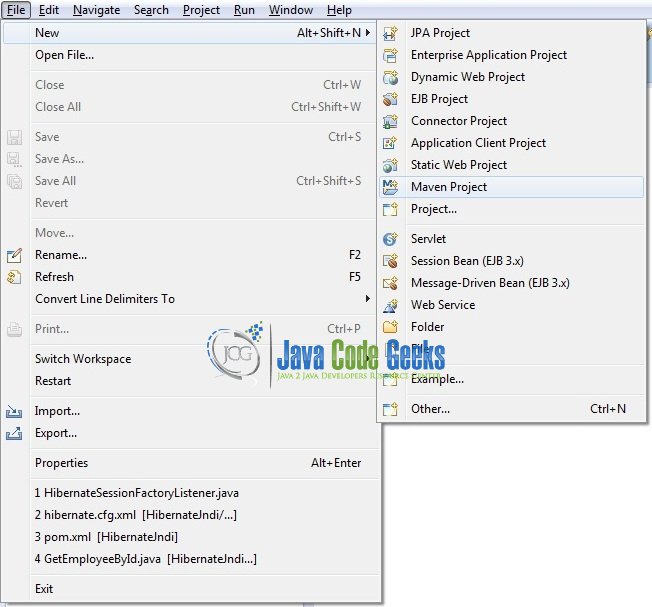
2.3 Project Creation
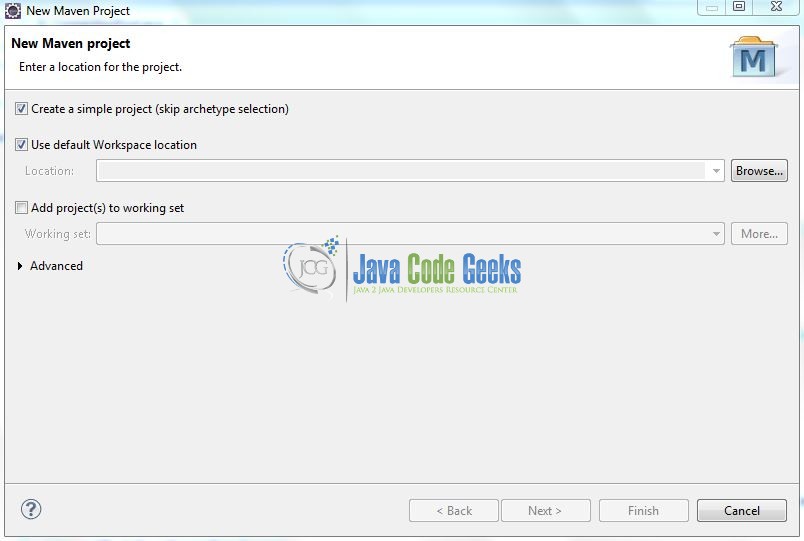
This section will demonstrate on how to create a Java based Maven project with Eclipse. In Eclipse IDE, go to File -> New -> Maven Project.
In the New Maven Project window, it will ask you to select project location. By default, ‘Use default workspace location’ will be selected. Select the ‘Create a simple project (skip archetype selection)’ checkbox and just click on next button to proceed.
It will ask you to ‘Enter the group and the artifact id for the project’. We will input the details as shown in the below image. The version number will be by default: 0.0.1-SNAPSHOT.
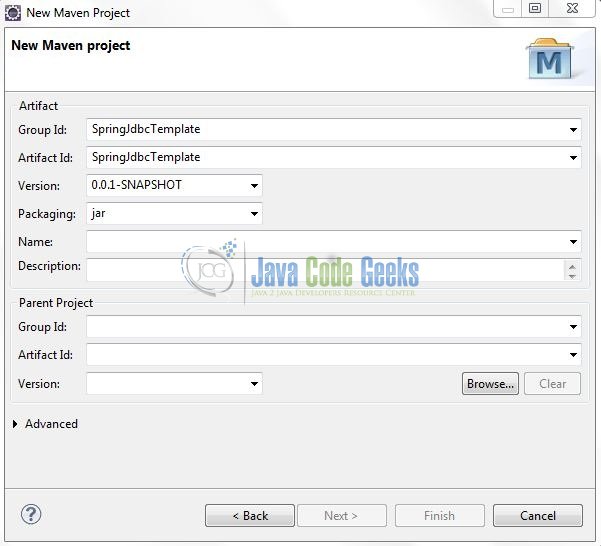
Click on Finish and the creation of a maven project is completed. If you observe, it has downloaded the maven dependencies and a pom.xml file will be created. It will have the following code:
pom.xml
<project xmlns="http://maven.apache.org/POM/4.0.0" xmlns:xsi="http://www.w3.org/2001/XMLSchema-instance" xsi:schemaLocation="http://maven.apache.org/POM/4.0.0 http://maven.apache.org/xsd/maven-4.0.0.xsd">
	<modelVersion>4.0.0</modelVersion>
	<groupId>SpringJdbcTemplate</groupId>
	<artifactId>SpringJdbcTemplate</artifactId>
	<version>0.0.1-SNAPSHOT</version>
	<packaging>jar</packaging>
</project>
We can start adding the dependencies that developers want like Spring Jdbc, MySQL etc. Let’s start building the application!
3. Application Building
Below are the steps involved in developing this application.
3.1 Database & Table Creation
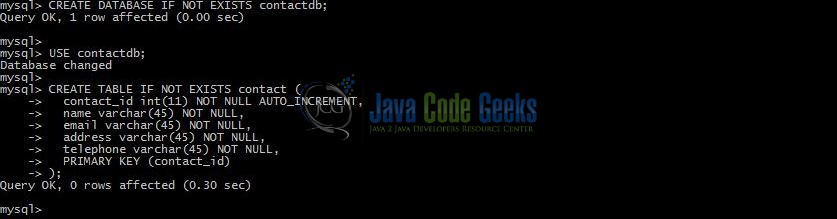
The following MySQL script is used to create a database called contactdb with table: contact. Open MySQL terminal or workbench terminal and execute the script:
CREATE DATABASE IF NOT EXISTS contactdb;

USE contactdb;

CREATE TABLE IF NOT EXISTS contact (
  contact_id int(11) NOT NULL AUTO_INCREMENT,
  name varchar(45) NOT NULL,
  email varchar(45) NOT NULL,
  address varchar(45) NOT NULL,
  telephone varchar(45) NOT NULL,
  PRIMARY KEY (contact_id)
);
If everything goes well, the database and the table will be shown in the MySQL workbench.
3.2 Maven Dependencies
Here, we specify the dependency for the Spring Jdbc and MySQL Connector. The rest dependencies will be automatically resolved by Maven. The updated file will have the following code:
pom.xml
<project xmlns="http://maven.apache.org/POM/4.0.0" xmlns:xsi="http://www.w3.org/2001/XMLSchema-instance"
	xsi:schemaLocation="http://maven.apache.org/POM/4.0.0 http://maven.apache.org/xsd/maven-4.0.0.xsd">
	<modelVersion>4.0.0</modelVersion>
	<groupId>SpringJdbcTemplate</groupId>
	<artifactId>SpringJdbcTemplate</artifactId>
	<version>0.0.1-SNAPSHOT</version>
	<name>SpringJdbcTemplateExample</name>
	<dependencies>
		<!-- Spring Framework Dependencies -->
		<dependency>
			<groupId>org.springframework</groupId>
			<artifactId>spring-core</artifactId>
			<version>4.2.4.RELEASE</version>
		</dependency>
		<dependency>
			<groupId>org.springframework</groupId>
			<artifactId>spring-jdbc</artifactId>
			<version>4.0.3.RELEASE</version>
		</dependency>
		<!-- MySQL Connector Java Dependency -->
		<dependency>
			<groupId>mysql</groupId>
			<artifactId>mysql-connector-java</artifactId>
			<version>5.1.30</version>
		</dependency>
	</dependencies>
	<build>
		<finalName>${project.artifactId}</finalName>
	</build>
</project>
3.3 Java Class Creation
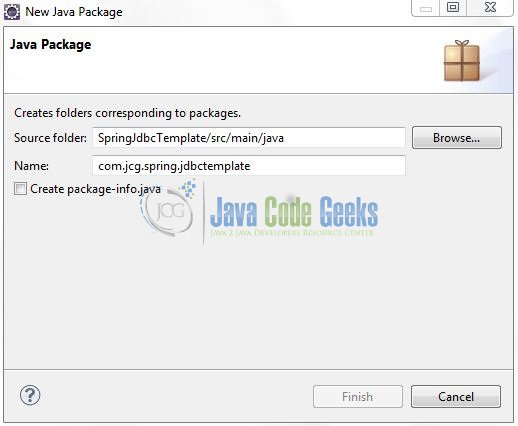
Let’s create the required Java files. Right-click on src/main/java folder, New -> Package.

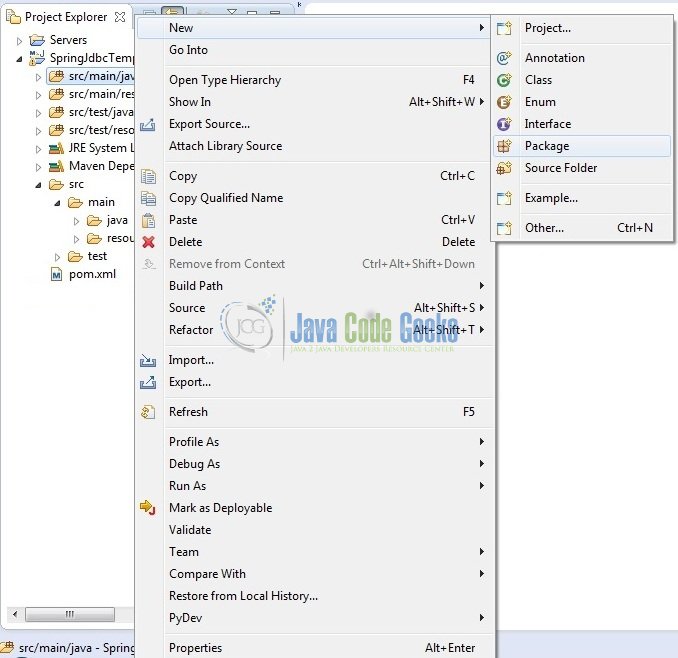
A new pop window will open where we will enter the package name as: com.jcg.spring.jdbctemplate.
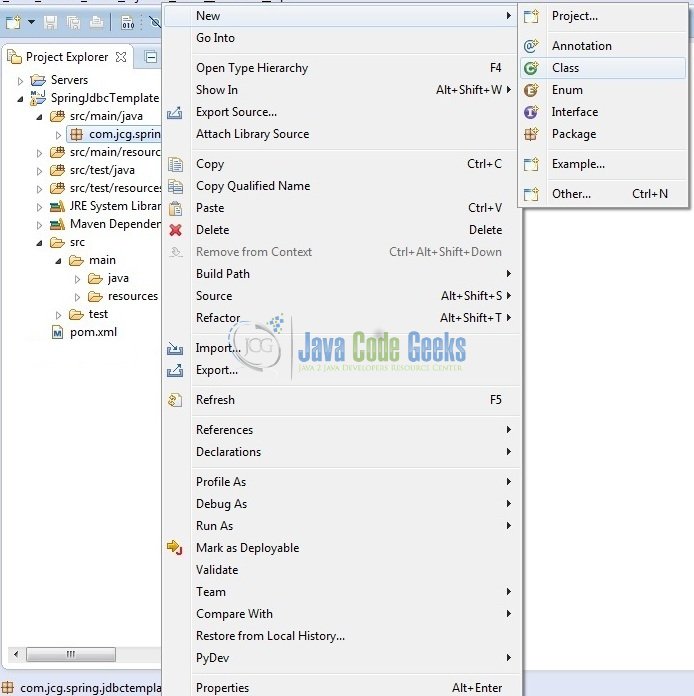
Once the package is created in the application, we will need to create the Model and the Implementation classes. Right-click on the newly created package: New -> Class.
A new pop window will open and enter the file name as: Contact. The POJO model class will be created inside the package: com.jcg.spring.jdbctemplate.
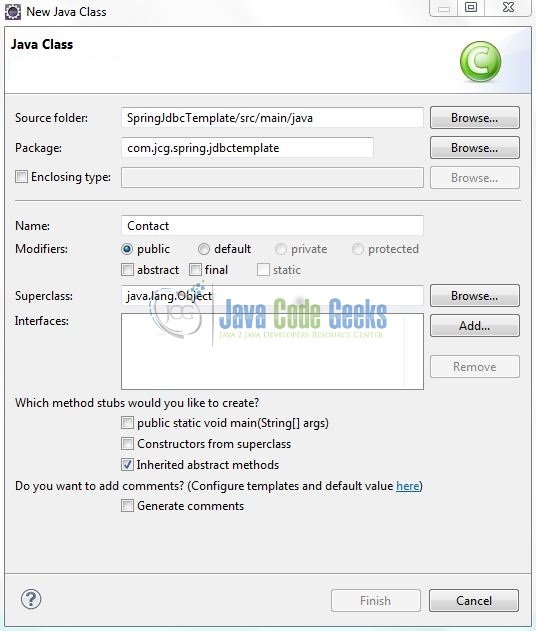
Repeat the step (i.e. Fig. 10) and enter the filename as: MainApp. This implementation class will be used to perform the database operations and is created inside the package: com.jcg.spring.jdbctemplate.

3.3.1 Implementation of Model Class
This class simply maps a row in the contact table to a Java object. Add the following code to it:
Contact.java
package com.jcg.spring.jdbctemplate;

public class Contact {

	private String email;
	private String name;
	private String phone;
	private String address;

	public String getEmail() {
		return email;
	}
	public void setEmail(String email) {
		this.email = email;
	}
	public String getName() {
		return name;
	}
	public void setName(String name) {
		this.name = name;
	}
	public String getPhone() {
		return phone;
	}
	public void setPhone(String phone) {
		this.phone = phone;
	}
	public String getAddress() {
		return address;
	}
	public void setAddress(String address) {
		this.address = address;
	}
	public String toString() {
		return String.format("[%s - %s - %s - %s]", name, email, address, phone);
	}
}
3.3.2 Implementation of Utility Class
This is the main implementation class that demonstrates performing the CRUD SQL operations using Jdbc with Spring Jdbc Template. Add the following code to it:
MainApp.java
package com.jcg.spring.jdbctemplate;

import java.sql.ResultSet;
import java.sql.SQLException;
import java.util.List;

import org.springframework.jdbc.core.JdbcTemplate;
import org.springframework.jdbc.core.RowMapper;
import org.springframework.jdbc.datasource.SimpleDriverDataSource;

public class MainApp {

	static JdbcTemplate jdbcTemplateObj;
	static SimpleDriverDataSource dataSourceObj;

	// Database Configuration Parameters
	static String DB_USERNAME = "root";
	static String DB_PASSWORD = "";
	static String DB_URL = "jdbc:mysql://localhost:3306/contactdb";

	public static SimpleDriverDataSource getDatabaseConnection()  {
		dataSourceObj = new SimpleDriverDataSource();
		try {
			dataSourceObj.setDriver(new com.mysql.jdbc.Driver());
			dataSourceObj.setUrl(DB_URL);
			dataSourceObj.setUsername(DB_USERNAME);
			dataSourceObj.setPassword(DB_PASSWORD);
		} catch(SQLException sqlException) {
			sqlException.printStackTrace();
		}
		return dataSourceObj;
	}

	public static void main(String[] args) throws SQLException {
		// Code To Set Driver Class Name, Database URL, Username & Password
		jdbcTemplateObj = new JdbcTemplate(getDatabaseConnection());

		if(null != jdbcTemplateObj) {

			// SQL Operation #1 - SQL INSERT Operation
			String sqlInsertQuery = "INSERT INTO contact (name, email, address, telephone) VALUES (?, ?, ?, ?)";
			for(int j=101; j<106; j++) {
				jdbcTemplateObj.update(sqlInsertQuery, "Editor " + j, "editor" + j +"@javacodegeek.com", "Greece", "0123456789");
			}

			// SQL Operation #2 - SQL UPDATE Operation
			String sqlUpdateQuery = "UPDATE contact set email=? where name=?";
			jdbcTemplateObj.update(sqlUpdateQuery, "administrator101@javacodegeek.com", "Editor 101");

			// SQL Operation #3 - SQL READ Operation
			String sqlSelectQuery = "SELECT name, email, address, telephone FROM contact";
			List listContacts = jdbcTemplateObj.query(sqlSelectQuery, new RowMapper() {
				public Contact mapRow(ResultSet result, int rowNum) throws SQLException {
					Contact contactObj = new Contact();
					contactObj.setName(result.getString("name"));
					contactObj.setEmail(result.getString("email"));
					contactObj.setAddress(result.getString("address"));
					contactObj.setPhone(result.getString("telephone"));
					return contactObj;
				}
			});

			// Displaying The SQL Records
			for (Contact contactDetail : listContacts) {
				System.out.println(contactDetail.toString());
			}

			// SQL Operation #4 - SQL DELETE Operation
			String sqlDeleteQuery = "DELETE FROM contact where name=?";
			jdbcTemplateObj.update(sqlDeleteQuery, "Editor 104");
		} else {
			System.out.print("Application Is Not Able To Bind With The Database! Please Check!");
		}
	}
}
Notes:
- Developers should change the Database URL, Username and Password according to the settings on the environment
- The Jdbc Template methods throw runtime
DataAccessException, so here is an example if developers want to catch this exception explicitly:try { String sqlDeleteQuery = "DELETE FROM contact where name=?"; jdbcTemplateObj.update(sqlDeleteQuery, "Editor 104"); } catch (DataAccessException exObj) { exObj.printStackTrace(); }
4. Run the Application
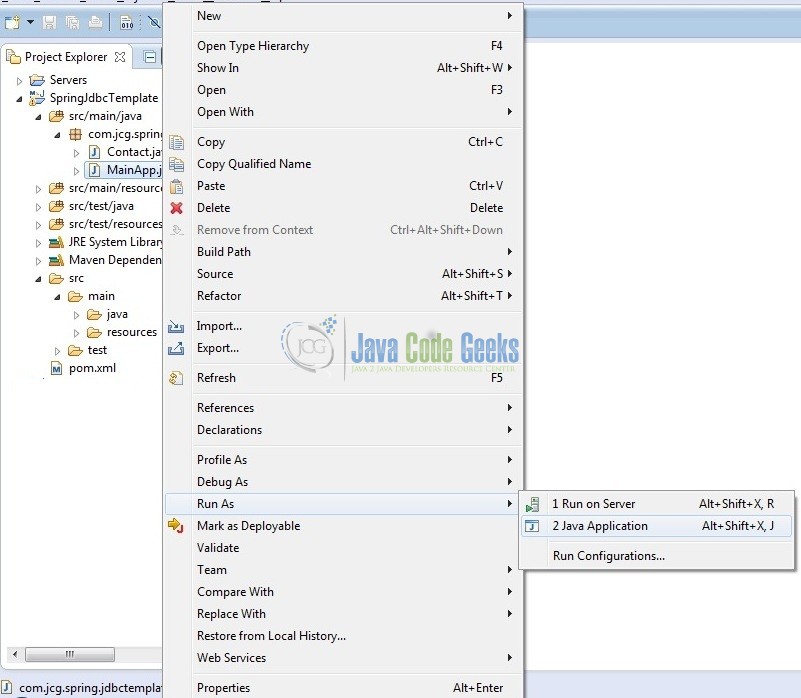
To run the application, Right click on the MainApp class, Run As -> Java Application. Developers can debug the example and see what happens after every step. Enjoy!
5. Project Demo
The code shows the following status as output.
SQL Insert Operation
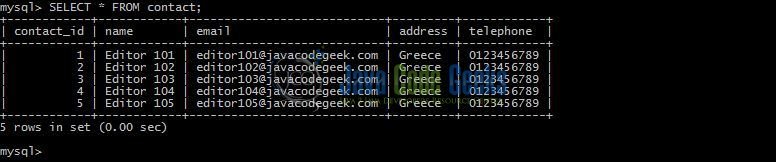
SQL Update Operation

SQL Read Operation

SQL Delete Operation

That’s all for this post. Happy Learning!
6. Conclusion
In this tutorial, developers learned how to use the Spring Jdbc Template for performing the basic SQL operation. That’s all for the Spring tutorial and I hope this article served you whatever you were looking for. For your convenience, we have created a downloadable Maven-Eclipse project in the Downloads section.
7. Download the Eclipse Project
This was an example of Spring Jdbc Template for beginners.
You can download the full source code of this example here: Spring JdbcTemplate
