1. Introduction
Spring Cloud Stream is a structure for structure exceptionally adaptable occasion driven microservices associated with shared informing frameworks. The structure gives adaptable programming model based on effectively settled and well-known Spring figures of speech and best works on, including support for tenacious bar/sub semantics, purchaser gatherings, and stateful segments.
Message lines are significant and helpful instruments that you can use for your Microservices arranged engineering. Numerous designers are reluctant utilizing them with the dread that they may include an excess of multifaceted nature and expectation to absorb information to the comprehension of their framework. I will tell you the best way to utilize RabbitMQ and Spring Cloud Stream to get some essential informing courses set-up with a next to no exertion!
RabbitMQ is a gigantically well known message dealer. Indeed, the official site asserts this is the most prevalent open source message merchant out there! This makes it an incredible contender to be the message specialist for your framework. Prevalence isn’t sufficient purpose behind utilizing something (yet it for the most part brings a lot of advantages, for example, network and backing), so rest guaranteed RabbitMQ has substantially more to offer than its notoriety. It is anything but difficult to utilize (you will see) and it can dependably deal with 25500 messages for each second with the biggest recorded organization – the Instagram, accomplishing in excess of 1,000,000 messages for every second!
Why I didn’t pick Kafka for this blog entry? Kafka is an astonishing innovation. It can deal with genuinely enormous information. On the off chance that you are accomplishing in excess of 120500 messages for each second-go for Kafka! At that point, your utilization case is most likely so propelled that you may not require this blog entry. On the off chance that you don’t require such an extensive amount crude power and you manage progressively standard microservices arrangement I trust you will like what RabbitMQ brings to the table and the straightforwardness of setup. Don’t hesitate to check Kafka a while later nothing amiss with knowing your alternatives!
2. Installing RabbitMQ
Installing RabbitMQ is the first step towards this tutorial. You require to setup RabbitMQ to utilise the same for the communication with the Spring Cloud Stream Application. The installation of RabbitMQ is pretty simple. You can follow this link to install RabbitMQ onto your system.
Once you have installed RabbitMQ, you can hit the URL http://localhost:15672 to verify the installation and open up the RabbitMQ console and login with the user name and password as guest. You should be able to see the dashboard.
3. Getting Started with Spring Cloud Stream
The center structure squares of Spring Cloud Stream are:
Destination Binders: Components capable to give joining the outside informing frameworks.
Destination Bindings: Bridge between the outer informing frameworks and application gave Producers and Consumers of messages (made by the Destination Binders).
Message: The sanctioned information structure utilized by makers and shoppers to speak with Destination Binders (and in this way different applications by means of outer informing frameworks).
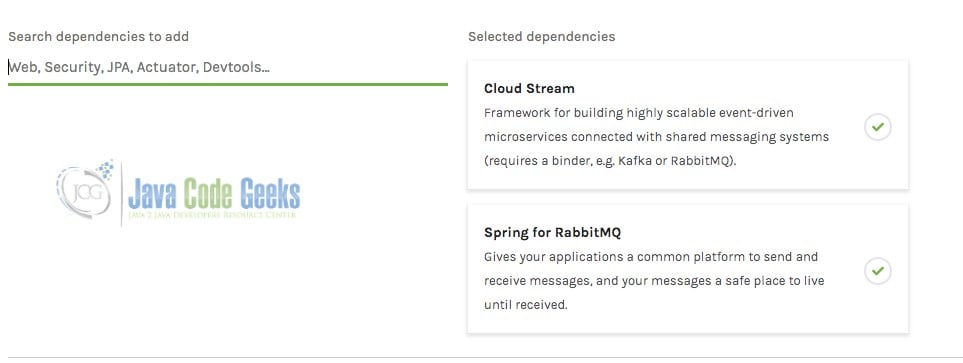
To start with, let us create a starter project with the required Spring Dependencies. To create the starter project, head over to this Spring Starter Project creation link. In the list of dependencies, enter Spring Cloud Stream as a dependency as shown in figure below. Hit Generate project to download the starter project with all the relevant dependencies in it. Ensure that you download a Maven project to follow this tutorial. The code level steps are pretty much similar for Gradle project as well. However, there might be differences in the project structures. Hence, it is advisable to use Maven.
Unarchive the downloaded project and import it into your favourite IDE. I will be using Spring Tool Suite 4.1 here which is potentially the best for the Spring Boot projects. You should be able to see the project structure as shown in the image below.
We will build a Cab Booking use case here. In a cab booking scenario, normally there is a central server to which the user communicates. Once the cab is booked, the server emits a message to all the cab owners in the surrounding region and the cab owners see a notification on their screen. Thus, Cab owners are Cab Booking Consumers and our server will be Cab Booking Emitter. This is the use case we will try to depict in our sample code here. Let us start by first creating the Consumer Application.
4. Creating Spring Cloud Stream Consumer
It might be a little unacceptable that we are creating a consumer before creating an emitter of the message. However, this is logical as we would require to ensure that when a message is emitted by the emitter, there is an active Rabbit MQ channel to consume that and pass it further to the message consumer. Thus, we are creating the consumer first to allow the RabbitMQ channel to exist from the beginning itself.
Before we proceed, we need to add one more dependency to the project to ensure that the project supports RabbitMQ as the messaging queue engine. Below code snippet shows that dependency. Add that dependency to the pom.xml file of the imported project.
<dependency>
    <groupId>org.springframework.cloud</groupId>
    <artifactId>spring-cloud-starter-stream-rabbit</artifactId>
    <version>1.3.0.RELEASE</version>
</dependency>
Now, let us begin creating the consumer for the Cab Owners. For the same, create the file as shown below.
DemoConsumerApplication.java
package com.example.demo;
import org.springframework.boot.SpringApplication;
import org.springframework.boot.autoconfigure.SpringBootApplication;
import org.springframework.cloud.stream.annotation.EnableBinding;
import org.springframework.cloud.stream.annotation.StreamListener;
import org.springframework.cloud.stream.messaging.Sink;

@EnableBinding(Sink.class)
@SpringBootApplication
public class DemoConsumerApplication {

    public static void main(String[] args) {
        SpringApplication.run(DemoConsumerApplication.class, args);
    }

    @StreamListener(target = Sink.INPUT)
    public void processCabBooking(String booking){
        System.out.println("This was a confirmed booking!: "+booking);
    }
}
There are multiple items to note in the above code. The first is an annotation @EnableBinding. This annotation registers the channel to read data from. The next annotation placed above the processCabBooking function is @StreamListener. This annotation marks the function as a listener to the connected stream. The next step is to configure the project for connecting to Rabbit MQ. For this, we need to update the application.properties file in the sample project. Modify the code in the file as shown below
application.properties
server.port=8090
spring.rabbitmq.host=localhost
spring.rabbitmq.port=15672
spring.rabbitmq.username=guest
spring.rabbitmq.password=guest

spring.cloud.stream.bindings.input.destination=employeeRegistrations
spring.cloud.stream.bindings.input.group=employeeRegistrationQueue
In the above code, server.port points to the port on which you wish to run the Spring Application. The rest of the parameters indicate the rabbit mq configuration. In case you have changed the Rabbit MQ configuration and chose different port or credentials, you might need to configure accordingly. Now let us run the code and check how the channels are created in RabbitMQ. The Rabbit MQ port can be checked in its home screen in the Ports and Contexts section as shown in the image below.
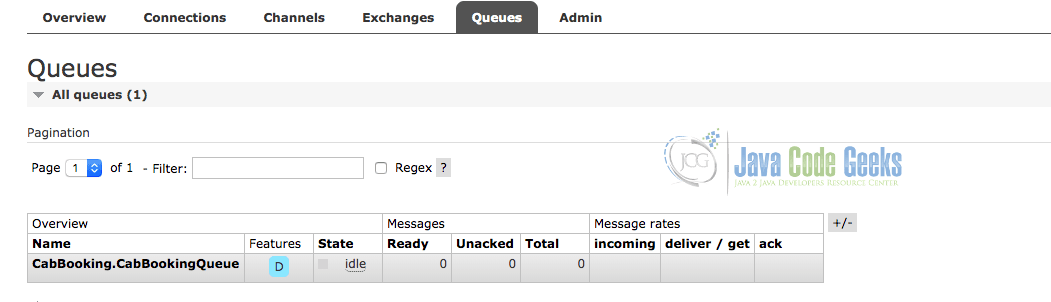
As soon as you run the project, you will find the Queue registered in the Queues tab of Rabbit MQ as shown in the image below. Notice that the queue is currently Idle as there is no publisher. To create a publisher, we will create a separate project containing almost similar code and dependencies but registering a publisher. Let us progress on that.
5. Creating Spring Cloud Stream Publishers
A Publisher is a function that sends the messages to the subscribers in the Rabbit MQ messaging queue. Rabbit MQ is the intermediate transactor for the system. It maintains the queues and messages in the queue to be sent to the subscribers. This ensures that the messages between the servers is never lost. To create a publishers, let us take up another fresher project from the Spring Starter site. Once you have the starter project downloaded and imported into your IDE, we can start coding for the publishers.
Just like we did for the Subscribers, Publishers will be simple Java functions that will be registered as the publisher. Any messages sent from the publishers will be published to the queue. Let us start coding our first Publisher. To begin with, create the application class as shown below:
DemoPublisherApplication.java
package com.example.demo;
import org.springframework.boot.SpringApplication;
import org.springframework.boot.autoconfigure.SpringBootApplication;
import org.springframework.cloud.stream.annotation.EnableBinding;
import org.springframework.cloud.stream.annotation.StreamListener;
import org.springframework.cloud.stream.messaging.Sink;

@EnableBinding(Sink.class)
@SpringBootApplication
public class DemoPublisherApplication {

    public static void main(String[] args) {
        SpringApplication.run(DemoPublisherApplication.class, args);
    }
}
Next step is to define a cab booking object to carry the data around. The Cab booking object will contain details like origin location, destination location, cab type. Create the object as shown below.
CabBooking.java
package com.example.demo;

import com.fasterxml.jackson.annotation.JsonIgnoreProperties;

@JsonIgnoreProperties(ignoreUnknown=true)
public class CabBooking {

	private String origin;
	private String destination;
	private String type;
	public String getOrigin() {
		return origin;
	}
	public void setOrigin(String origin) {
		this.origin = origin;
	}
	public String getDestination() {
		return destination;
	}
	public void setDestination(String destination) {
		this.destination = destination;
	}
}
This object will be our transport carrier for the messages. Now let us create the source of message generation to send the messages via this object. This code would just create the interface to specify how to transact the message. Create the interface as shown below:
CabBookingSource.java
package com.example.demo;

import org.springframework.cloud.stream.annotation.Output;
import org.springframework.messaging.MessageChannel;

public interface CabBookingSource {

	@Output("cabBookingChannel")
	MessageChannel cabBooked();
}
The above interface defines the Message channel that will be used for transacting message. The final coding step is to create a controller. The controller will be a REST web service to hit the application and practically send an object using the message queue. Let us create the controller as shown in the code below.
CabBookingController.java
package com.example.demo;
import org.springframework.beans.factory.annotation.Autowired;
import org.springframework.cloud.stream.annotation.EnableBinding;
import org.springframework.integration.support.MessageBuilder;
import org.springframework.web.bind.annotation.RequestBody;
import org.springframework.web.bind.annotation.RequestMapping;
import org.springframework.web.bind.annotation.ResponseBody;
import org.springframework.web.bind.annotation.RestController;
@RestController
@EnableBinding(CabBookingSource.class)
public class CabBookingController {

	@Autowired
	CabBookingSource cabBookingSource;

	@RequestMapping("/book")
	@ResponseBody
	public String orderFood(@RequestBody CabBooking booking) {
		cabBookingSource.cabBooked().send(MessageBuilder.withPayload(booking).build());
		System.out.println(booking.toString());
		return "Cab Booked";
	}
}
This controller can be hit from an external API tester like the Postman application. We will be using the same here in. Lets do the final configuration step for the project before we begin our testing. We need to configure the RabbitMQ connection parameters just like we did for the consumer application. Use the below properties to ensure that we can start both the servers together.
application.properties
server.port=8090
spring.rabbitmq.host=localhost
spring.rabbitmq.port=5672
spring.rabbitmq.username=guest
spring.rabbitmq.password=guest

spring.cloud.stream.bindings.input.destination=CabBooking
spring.cloud.stream.bindings.input.group=CabBookingQueue
Now execute both the codes together. You should be able to see the exchange that is happening in Rabbit MQ now. To hit the API, go to Postman application and send a POST request to the url localhost:8080/book. The body of the request should match the object attributes. Thus, you will be able to test the message exchange in action.
This controller can be hit from an external API tester like the Postman application. We will be using the same here in. Lets do the final configuration step for the project before we begin our testing. We need to configure the RabbitMQ connection parameters just like we did for the consumer application. Use the below properties to ensure that we can start both the servers together.
You can notice that the object is being serialised and sent to RabbitMQ. This object will be received at the consumer end for further operations. Thus, an asynchronous messaging channel between two servers has been established. The data exchange here is asynchronous which means that the servers are free to consume the data when they need. The data is automatically destroyed as it gets consumed.
6. Conclusion
The above discussion helped you understand what is Rabbit MQ. It takes you through the process of using Java Spring Boot for the purpose of establishing communication channels between two servers using Spring Cloud Stream capabilities. Rabbit MQ is the choice of channel here because it is comparatively simple to get started with and has a simplistic UI to support faster development and debugging. Spring has a readily available RabbitMQ dependency which helps in speeding up the development process.
Spring Cloud Stream is essentially a library that is able to setup asynchronous communication channels between multiple servers for the purpose of data exchange. Spring Cloud stream is configurable to use any intermediate channel like Rabbit MQ or Kafka for instance. This configuration has to be done by just specifying the parameters in the properties file. This ensures easy transition between different medium of communication. Thus, we can establish a reliable asynchronous communication between servers using Spring Cloud Stream library.
7. Download the Source Code
The application was split into two different project. The complete code could be downloaded using the link below.
You can download the full source code of this example here: Spring Cloud Stream Example
