In this example, we shall demonstrate how we can use Spring Session to improve user experience and maintain continuity of user sessions even in case of server failures.
Table Of Contents
1. Introduction
Spring Session is another very important Spring project that eases our task of HttpSession Management. It offers out of the box support for various Session related services like Multiple Browser Logins, maintaining user session state through server crashes i.e. Sticky Session etc.
Spring Session uses a filter, org.springframework.web.filter.DelegatingFilterProxy, which accepts the HttpRequest and constructs and injects its own Request object down the hierarchy. This way it gains control to the way new sessions are created, since the session object is attached to the HttpRequest Object.
The session information is stored in a database, Redis NoSQL database, in our case. As a result, even when the server crashes, the session data is maintained on the server. Redis is a key-value based NoSQL Database which can be easily associated with Spring Data as demonstrated here. The key for storing session is the sessionId and the value is the data associated with the user which is present in the session.
Let’s take an example and see how it works:
2. Project Set-Up
Let’s start by first setting up the project in Eclipse or any other you have in mind. We shall use Maven to setup our project. Open Eclipse and create a simple Maven project and check the skip archetype selection checkbox on the dialogue box that appears. Replace the content of the existing pom.xml with the one provided below:
pom.xml
<project xmlns="http://maven.apache.org/POM/4.0.0" xmlns:xsi="http://www.w3.org/2001/XMLSchema-instance"
	xsi:schemaLocation="http://maven.apache.org/POM/4.0.0 http://maven.apache.org/xsd/maven-4.0.0.xsd">
	<modelVersion>4.0.0</modelVersion>
	<groupId>com.jcg.examples.springSessionExample</groupId>
	<artifactId>SpringSessionExample</artifactId>
	<version>0.0.1-SNAPSHOT</version>
	<packaging>war</packaging>

	<dependencies>
		<dependency>
			<groupId>org.springframework.session</groupId>
			<artifactId>spring-session</artifactId>
			<version>1.2.0.RC3</version>
		</dependency>
		<dependency>
			<groupId>org.springframework.data</groupId>
			<artifactId>spring-data-redis</artifactId>
			<version>1.7.1.RELEASE</version>
		</dependency>
		<dependency>
			<groupId>org.springframework.security</groupId>
			<artifactId>spring-security-web</artifactId>
			<version>4.0.3.RELEASE</version>
		</dependency>
		<dependency>
			<groupId>org.apache.commons</groupId>
			<artifactId>commons-pool2</artifactId>
			<version>2.4.1</version>
		</dependency>
		<dependency>
			<groupId>redis.clients</groupId>
			<artifactId>jedis</artifactId>
			<version>2.7.3</version>
		</dependency>


	</dependencies>
	<repositories>
		<repository>
			<id>spring-milestones</id>
			<name>Spring Milestones</name>
			<url>https://repo.spring.io/libs-milestone</url>
			<snapshots>
				<enabled>false</enabled>
			</snapshots>
		</repository>
	</repositories>

	<build>
		<sourceDirectory>src</sourceDirectory>
		<plugins>
			<plugin>
				<artifactId>maven-compiler-plugin</artifactId>
				<version>3.3</version>
				<configuration>
					<source>1.8</source>
					<target>1.8</target>
				</configuration>
			</plugin>
			<plugin>
				<artifactId>maven-war-plugin</artifactId>
				<version>2.6</version>
				<configuration>
					<warSourceDirectory>WebContent</warSourceDirectory>
					<failOnMissingWebXml>false</failOnMissingWebXml>
				</configuration>
			</plugin>
		</plugins>
	</build>
</project>
This will import the required JAR dependencies in the project. We can now start with the actual implementation of the Spring Session in our project.
3. Implementation
3.1 Sticky Session
We start the implementation by first configuring the springSessionRepositoryFilter filter which will inject the Spring Request object in stead of the original HttpRequest object. The web.xml looks like :
web.xml
<?xml version="1.0" encoding="UTF-8"?>
<web-app xmlns:xsi="http://www.w3.org/2001/XMLSchema-instance"
	xmlns="http://java.sun.com/xml/ns/javaee"
	xsi:schemaLocation="http://java.sun.com/xml/ns/javaee http://java.sun.com/xml/ns/javaee/web-app_2_5.xsd"
	id="WebApp_ID" version="2.5">
	<display-name>SpringMVCloginExample</display-name>
	<filter>
		<filter-name>springSessionRepositoryFilter</filter-name>
		<filter-class>org.springframework.web.filter.DelegatingFilterProxy</filter-class>
	</filter>
	<filter-mapping>
		<filter-name>springSessionRepositoryFilter</filter-name>
		<url-pattern>/*</url-pattern>
	</filter-mapping>
	<context-param>
		<param-name>contextConfigLocation</param-name>
		<param-value>classpath://spring-config.xml</param-value>
	</context-param>

	<listener>
		<listener-class>org.springframework.web.context.ContextLoaderListener</listener-class>
	</listener>
	<session-config>
		<session-timeout>1</session-timeout>
	</session-config>
</web-app>
Next, we need to configure the spring container so that it can inject the DAOs for the Redis Repositories.
spring-config.xml
<?xml version="1.0" encoding="UTF-8"?>
<beans xmlns="http://www.springframework.org/schema/beans"
	xmlns:context="http://www.springframework.org/schema/context"
	xmlns:xsi="http://www.w3.org/2001/XMLSchema-instance"
	xsi:schemaLocation="
   http://www.springframework.org/schema/beans
   http://www.springframework.org/schema/beans/spring-beans-3.0.xsd
   http://www.springframework.org/schema/context
   http://www.springframework.org/schema/context/spring-context-3.0.xsd">

	<context:component-scan base-package="com.jcg.examples" />
	<bean
class="org.springframework.session.data.redis.config.annotation.web.http.RedisHttpSessionConfiguration" />


	<bean
		class="org.springframework.data.redis.connection.jedis.JedisConnectionFactory" />

</beans>
Now all the configuration is in place for the Spring Container. For ease of understanding, I have used plain J2EE with Servlets and JSP’s. The requests from the browser are directed to the Servlet : CustomServlet class below. The servlet simply adds the username if present in the request to the HttpSession.
CustomServlet.java
package com.jcg.examples.servlet;


import java.io.IOException;

import javax.servlet.RequestDispatcher;
import javax.servlet.ServletException;
import javax.servlet.annotation.WebServlet;
import javax.servlet.http.HttpServlet;
import javax.servlet.http.HttpServletRequest;
import javax.servlet.http.HttpServletResponse;
import javax.servlet.http.HttpSession;

import com.jcg.examples.service.MultiLoginService;


@WebServlet("/customServlet")
public class CustomServlet extends HttpServlet
{
	private static final long serialVersionUID = 1L;

	protected void doGet(HttpServletRequest request, HttpServletResponse response) throws ServletException, IOException
	{
		doPost(request, response);
	}

	protected void doPost(HttpServletRequest request, HttpServletResponse response) throws ServletException, IOException
	{
		HttpSession session = request.getSession();

		String userName = request.getParameter("userName");

		if(userName != null)
		{
			session.setAttribute("Username", request.getParameter("userName"));
		}

		RequestDispatcher rd = request.getRequestDispatcher("welcome.jsp");

		rd.forward(request, response);
	}
}
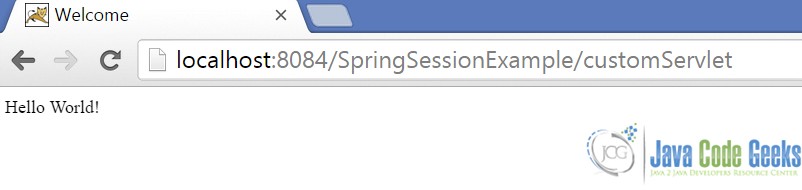
Here’s the simple welcome.jsp just to display the username passed via the browser. If no username is passed, it simply prints Hello World!
welcome.jsp
<%@ page language="java" contentType="text/html; charset=ISO-8859-1"
	pageEncoding="ISO-8859-1"%>
<!DOCTYPE html PUBLIC "-//W3C//DTD HTML 4.01 Transitional//EN" "http://www.w3.org/TR/html4/loose.dtd">
<html>
<head>
<meta http-equiv="Content-Type" content="text/html; charset=ISO-8859-1">
<title>Welcome</title>
</head>
<body>
	<%
			String userName = (String) session.getAttribute("Username");
			String additionalURL = (String) request.getAttribute("alias");
			if (userName != null)
			{
					out.write("Hello" + userName);
			}
			else
			{
					out.write("Hello World!");
			}
			if (additionalURL == null)
			{
					additionalURL = "";
			}
	%>

</body>
</html>
How it Works : When a new request comes from the browser, the springSessionRepositoryFilterintercepts it. It substitutes the HttpRequest object with its own implementation which is created using the original Request. This new Request object also holds reference to the substituted HttpSession Wrapper instead of the plain javax.servlet.http.HttpSession object.
The changes made to this new session object like addition or removal of attributes is persisted into the Redis Database Server without the developer writing any code for this. Since the session is data is persisted in the database instead of the Application server memory, the session data is available to other Application servers as well.
As a result, even when any of the node fails another server from the node group can take-up without any interruption noticed by the end-user(sticky-session).
For the Spring session to be able to persist the data, it is essential that the Redis Server should be running.
Let’s have a look at demonstrating what we have learned so far in this example:
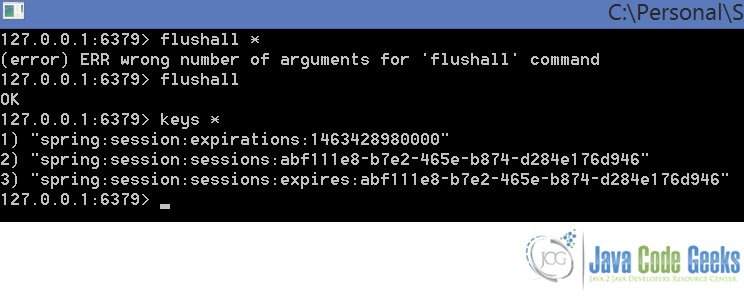
To test our Spring Session demo, we have two Tomcat servers with our application deployed at both the servers. Both the applications are pointing to the same Redis server which stores the user session information. The thing the readers should note here is that, Redis server stores data in the form of key-value pairs. The key being the Jsession-Id and the values being whatever we want to store in the user session.
When we first hit one of the server running on port 8084:
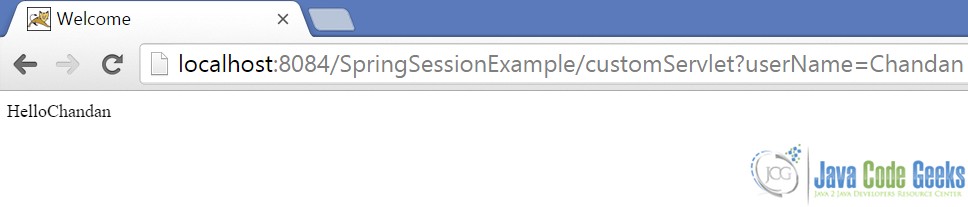
Passing the userName parameter via the URL :
Now we hit the other server which also has our application deployed on port 8088:
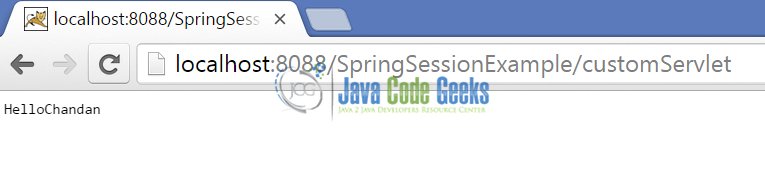

As you can see in the image above even though we have not passed the username in the url, the server is able to display the username associated with that session.
Here’s the session information stored in the Redis Server:
This is all about maintaining the session when the application server fails.
3.2 Single Sign On
Another feature about Spring Session is that it can be used for multiple logins from the same browser. This is particularly useful when we are building multiple applications that permit the same credentials set. This functionality is called Single Sign-On.
Let’s modify our code so that we can implement this single sign on functionality we just discussed:
In the Servlet, we need to add a call to the MultiLoginService class, so that appropriate session aliases are assigned to them.
CustomServlet.java
package com.jcg.examples.servlet;


import java.io.IOException;

import javax.servlet.RequestDispatcher;
import javax.servlet.ServletException;
import javax.servlet.annotation.WebServlet;
import javax.servlet.http.HttpServlet;
import javax.servlet.http.HttpServletRequest;
import javax.servlet.http.HttpServletResponse;
import javax.servlet.http.HttpSession;

import com.jcg.examples.service.MultiLoginService;


@WebServlet("/customServlet")
public class CustomServlet extends HttpServlet
{
		private static final long serialVersionUID = 1L;

		protected void doGet(HttpServletRequest request, HttpServletResponse response) throws ServletException, IOException
		{
				doPost(request, response);
		}

		protected void doPost(HttpServletRequest request, HttpServletResponse response) throws ServletException, IOException
		{
				HttpSession session = request.getSession();

				String userName = request.getParameter("userName");

				if(userName != null && !"".equals(userName))
				{
						session.setAttribute("Username", request.getParameter("userName"));
				}

				MultiLoginService.createMultiLogin(request);

				RequestDispatcher rd = request.getRequestDispatcher("welcome.jsp");

				rd.forward(request, response);
		}

}
Session alias is nothing but a random string that we use to keep a mapping of associated session Ids. We can get this alias by calling the sessionManager.getNewSessionAlias method as shown in line 40 of the MultiLoginService class below.
MultiLoginService.java
package com.jcg.examples.service;

import java.util.Map;

import javax.servlet.http.HttpServletRequest;
import javax.servlet.http.HttpSession;

import org.springframework.session.Session;
import org.springframework.session.SessionRepository;
import org.springframework.session.web.http.HttpSessionManager;

public class MultiLoginService
{
		public static void createMultiLogin(HttpServletRequest httpRequest)
		{
				HttpSessionManager sessionManager =(HttpSessionManager) httpRequest.getAttribute(HttpSessionManager.class.getName());
				String alias = httpRequest.getParameter("_s");
				@SuppressWarnings("unchecked")
				SessionRepository<Session> sessionRepository =
                (SessionRepository<Session>) httpRequest.getAttribute(SessionRepository.class.getName());


				for(Map.Entry<String, String> entry : sessionManager.getSessionIds(httpRequest).entrySet()) {
            String aliasId = entry.getKey();
            String sessionId = entry.getValue();

            Session storedSession = sessionRepository.getSession(sessionId);
            HttpSession httpSession = httpRequest.getSession();
            if(storedSession != null && storedSession.getAttribute("Username") != null && httpSession.getAttribute("Username") == null )
            {
            		httpSession.setAttribute("Username", storedSession.getAttribute("Username"));
            }


            System.out.println(aliasId +" : "+sessionId);
				}

				if(alias == null || "".equals(alias.trim()))
				{
						alias = sessionManager.getNewSessionAlias(httpRequest);
				}
				httpRequest.setAttribute("alias",alias);
		}
}
The alias is named _s by default. This alias needs to be present in every request for the application to decide the correct session mapping. In the absence of this alias, the application maps the incoming request session to alias with value as _s=0.
Below is the jsp that holds the _s variable in a hidden field and the value is submitted alongwith every request.
welcome.jsp
<%@ page language="java" contentType="text/html; charset=ISO-8859-1"
	pageEncoding="ISO-8859-1"%>
<!DOCTYPE html PUBLIC "-//W3C//DTD HTML 4.01 Transitional//EN" "http://www.w3.org/TR/html4/loose.dtd">
<html>
<head>
<meta http-equiv="Content-Type" content="text/html; charset=ISO-8859-1">
<title>Welcome</title>
</head>
<body>
	<%
			String userName = (String) session.getAttribute("Username");
			String additionalURL = (String) request.getAttribute("alias");
			if (userName != null)
			{
					out.write("Hello " + userName+ "!");
			}
			else
			{
					out.write("Hello World!");
			}
			if (additionalURL == null)
			{
					additionalURL = "";
			}
	%>
	<form method="post" action="<%=request.getContextPath()%>/customServlet">
		<input type="text" name = "userName" >
		<br/>
		<input type="submit" value="View My Name"/>
		<input type="hidden" name="_s" value="<%=additionalURL%>"/>

	</form>


</body>
</html>
Let’s test out this functionality:
Initial Page:

Upon entering the text : Chandan and clicking on the View My Name Button.
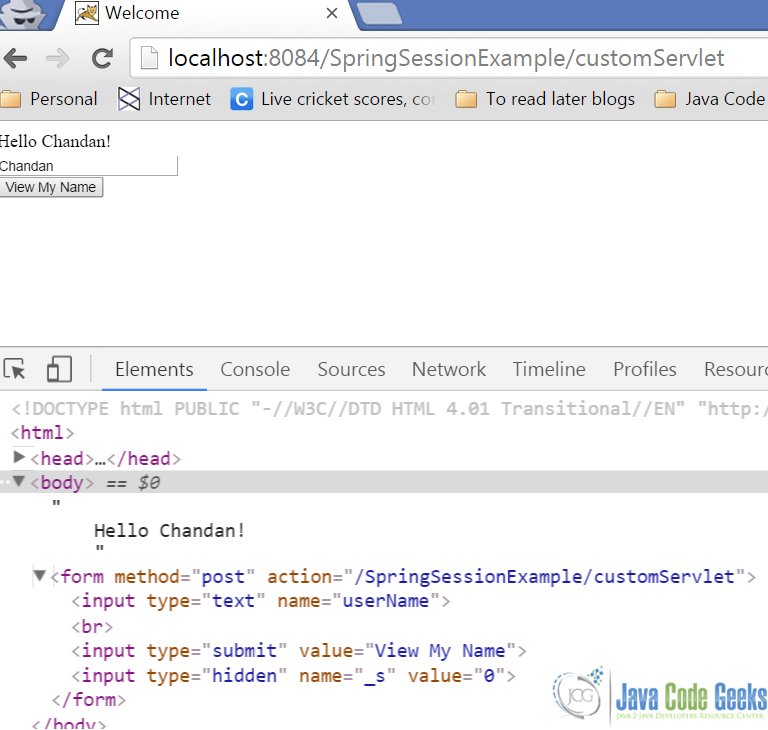
Same session in another browser tab but with different parameter :

The sessions are differentiated by their aliases. Here’s how the browser stores them:
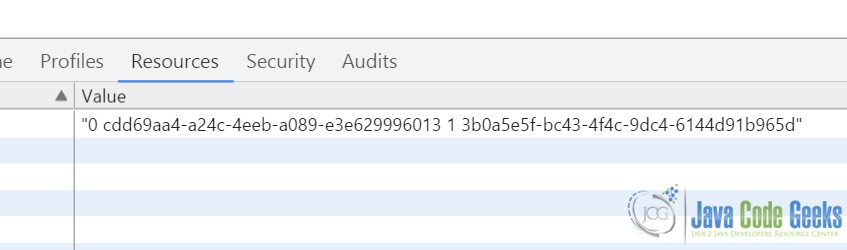
Here’s the how the output looks in the console, displaying the sessionIds map, with alias being the key and the session id being the value.
0 : cdd69aa4-a24c-4eeb-a089-e3e629996013
1 : 3b0a5e5f-bc43-4f4c-9dc4-6144d91b965d
4. Download The Source Code
Here, we demonstrated how we can use spring session to manage HttpSession for an uninterrupted user experience.
You can download the source code of this example here: SpringSessionExample.zip

i am unable to run your code.
When running the program I see the following
Estado HTTP 404 – Not Found
Tipo Informe de estado
mensaje /SpringSessionExample/
descripción El recurso requerido no está disponible.
Apache Tomcat/8.5.28
Good morning Chandan, here’s Tom. Nice to meet you. I just see this blog from you about Java and Redis. I tested it and modify a few thing for debugging, make it compile and config to test against AWS ElastiCache Redis. I create a Github repo to describe this end to end setup for AWS infra and Java program at here https://github.com/cheungtom/SpringSessionExample. The README already state the source code is from your tutorial site and software IP right if any belongs to you. To see if this is fine to you or not. I use your material, so want to… Read more »