Hello, in this tutorial, we will go over the fundamentals of setting up a Spring project integrated with Hibernate. Next we will perform CRUD operations against an Oracle database.
Table Of Contents
1. Introduction
In this tutorial, we will create a simple Spring boot project using maven. The Spring framework will integrate with Hibernate to show the ORM capabilities of Hibernate framework in performing CRUD operations. We will create a separate to demonstrate these capabilities. Spring Boot has been used to illustrate how it helps in quickly setting up Spring projects, and reduce headaches related to library dependencies.
2. Setting up Project
2.1. Create Maven project in Eclipse
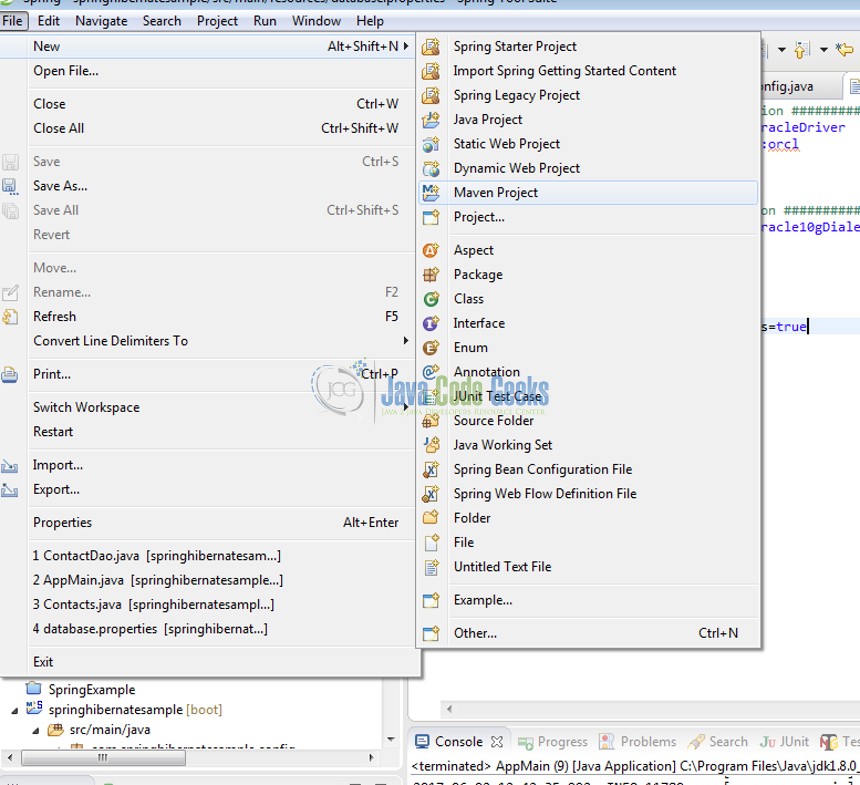
Create a New Maven Project
- Navigate to File menu in Eclipse or Spring Tool Suite IDE.
- Click ‘File’ -> ‘New’ -> ‘Maven Project’.
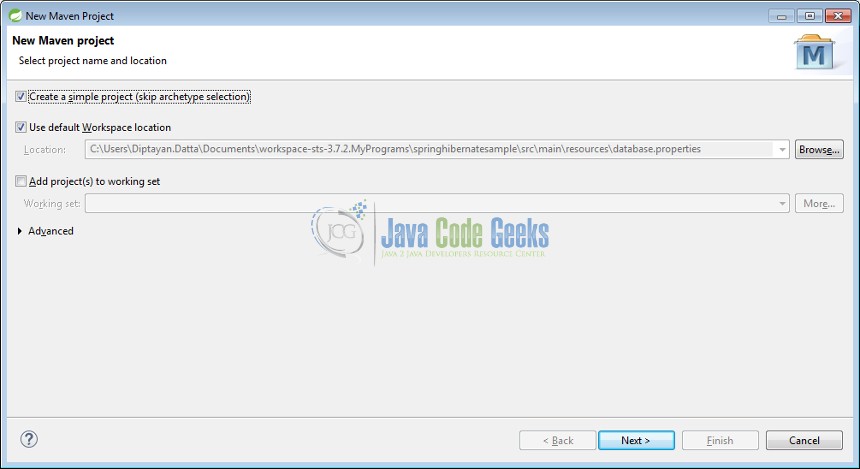
Under the “New Maven Project” window:
- Select ‘Create a simple project….’ check box.
- The remaining options can be kept as it is and simply click on ‘Next’.
In the next window enter the following options:
- For
Group IDenter com.springhibernateexample. - For
Artifact IDenter springhibernatexample. - The remaining options can be kept as is (We will be working with a jar file here).
- Click on ‘Finish’.

A new maven project is created and is visible under Package Explorer in Eclipse
2.2. Adding POM dependencies
The POM file is most integral unit of building projects with Maven. The XML file contains information about the project and configuration details used by Maven to build the project. The library files which are necessary to run the application are entered as dependencies in the POM file. (For details, you can refer to https://maven.apache.org/pom.html)
The following dependencies are added to the pom.xml file.
pom.xml
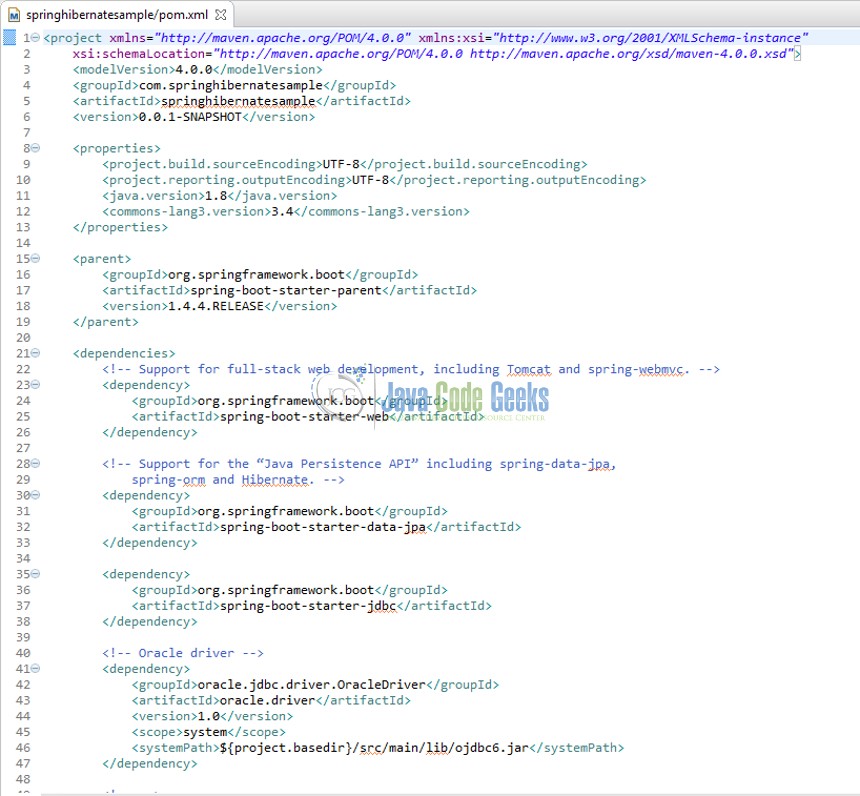
Here the first entry to note is the spring-boot-starter element. spring-boot-starter contains the necessary auto-configuration for Spring JPA, and the spring-boot-starter-jpa project references all the necessary dependencies such as hibernate-entitymanager. Spring boot resolves dependency management issues and creates auto-configured Spring apps. This resolves a lot of issues from the development side.
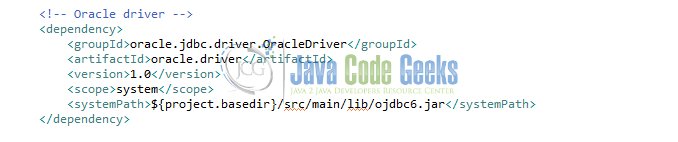
Since we are using Oracle in our example, this jar file is available to maven.
To view all the libraries added to your Spring project, navigate to the location of the POM file and run the below command from the CMD.
mvn dependency:tree
Resolved POM dependencies.
[INFO]
[INFO] ------------------------------------------------------------------------
[INFO] Building springhibernatesample 0.0.1-SNAPSHOT
[INFO] ------------------------------------------------------------------------
[INFO]
[INFO] --- maven-dependency-plugin:2.10:tree (default-cli) @ springhibernatesample ---
[INFO] com.springhibernatesample:springhibernatesample:jar:0.0.1-SNAPSHOT
[INFO] +- org.springframework.boot:spring-boot-starter-web:jar:1.4.4.RELEASE:compile
[INFO] |  +- org.springframework.boot:spring-boot-starter:jar:1.4.4.RELEASE:compile
[INFO] |  |  +- org.springframework.boot:spring-boot:jar:1.4.4.RELEASE:compile
[INFO] |  |  +- org.springframework.boot:spring-boot-autoconfigure:jar:1.4.4.RELEASE:compile
[INFO] |  |  +- org.springframework.boot:spring-boot-starter-logging:jar:1.4.4.RELEASE:compile
[INFO] |  |  |  +- ch.qos.logback:logback-classic:jar:1.1.9:compile
[INFO] |  |  |  |  \- ch.qos.logback:logback-core:jar:1.1.9:compile
[INFO] |  |  |  +- org.slf4j:jul-to-slf4j:jar:1.7.22:compile
[INFO] |  |  |  \- org.slf4j:log4j-over-slf4j:jar:1.7.22:compile
[INFO] |  |  +- org.springframework:spring-core:jar:4.3.6.RELEASE:compile
[INFO] |  |  \- org.yaml:snakeyaml:jar:1.17:runtime
[INFO] |  +- org.springframework.boot:spring-boot-starter-tomcat:jar:1.4.4.RELEASE:compile
[INFO] |  |  +- org.apache.tomcat.embed:tomcat-embed-core:jar:8.5.11:compile
[INFO] |  |  +- org.apache.tomcat.embed:tomcat-embed-el:jar:8.5.11:compile
[INFO] |  |  \- org.apache.tomcat.embed:tomcat-embed-websocket:jar:8.5.11:compile
[INFO] |  +- org.hibernate:hibernate-validator:jar:5.2.4.Final:compile
[INFO] |  |  +- javax.validation:validation-api:jar:1.1.0.Final:compile
[INFO] |  |  +- org.jboss.logging:jboss-logging:jar:3.3.0.Final:compile
[INFO] |  |  \- com.fasterxml:classmate:jar:1.3.3:compile
[INFO] |  +- com.fasterxml.jackson.core:jackson-databind:jar:2.8.6:compile
[INFO] |  |  +- com.fasterxml.jackson.core:jackson-annotations:jar:2.8.6:compile
[INFO] |  |  \- com.fasterxml.jackson.core:jackson-core:jar:2.8.6:compile
[INFO] |  +- org.springframework:spring-web:jar:4.3.6.RELEASE:compile
[INFO] |  |  +- org.springframework:spring-aop:jar:4.3.6.RELEASE:compile
[INFO] |  |  +- org.springframework:spring-beans:jar:4.3.6.RELEASE:compile
[INFO] |  |  \- org.springframework:spring-context:jar:4.3.6.RELEASE:compile
[INFO] |  \- org.springframework:spring-webmvc:jar:4.3.6.RELEASE:compile
[INFO] |     \- org.springframework:spring-expression:jar:4.3.6.RELEASE:compile
[INFO] +- org.springframework.boot:spring-boot-starter-data-jpa:jar:1.4.4.RELEASE:compile
[INFO] |  +- org.springframework.boot:spring-boot-starter-aop:jar:1.4.4.RELEASE:compile
[INFO] |  |  \- org.aspectj:aspectjweaver:jar:1.8.9:compile
[INFO] |  +- org.hibernate:hibernate-core:jar:5.0.11.Final:compile
[INFO] |  |  +- org.hibernate.javax.persistence:hibernate-jpa-2.1-api:jar:1.0.0.Final:compile
[INFO] |  |  +- org.javassist:javassist:jar:3.20.0-GA:compile
[INFO] |  |  +- antlr:antlr:jar:2.7.7:compile
[INFO] |  |  +- org.jboss:jandex:jar:2.0.0.Final:compile
[INFO] |  |  +- dom4j:dom4j:jar:1.6.1:compile
[INFO] |  |  |  \- xml-apis:xml-apis:jar:1.4.01:compile
[INFO] |  |  \- org.hibernate.common:hibernate-commons-annotations:jar:5.0.1.Final:compile
[INFO] |  +- org.hibernate:hibernate-entitymanager:jar:5.0.11.Final:compile
[INFO] |  +- javax.transaction:javax.transaction-api:jar:1.2:compile
[INFO] |  +- org.springframework.data:spring-data-jpa:jar:1.10.7.RELEASE:compile
[INFO] |  |  +- org.springframework.data:spring-data-commons:jar:1.12.7.RELEASE:compile
[INFO] |  |  +- org.springframework:spring-orm:jar:4.3.6.RELEASE:compile
[INFO] |  |  +- org.springframework:spring-tx:jar:4.3.6.RELEASE:compile
[INFO] |  |  +- org.slf4j:slf4j-api:jar:1.7.22:compile
[INFO] |  |  \- org.slf4j:jcl-over-slf4j:jar:1.7.22:compile
[INFO] |  \- org.springframework:spring-aspects:jar:4.3.6.RELEASE:compile
[INFO] +- org.springframework.boot:spring-boot-starter-jdbc:jar:1.4.4.RELEASE:compile
[INFO] |  +- org.apache.tomcat:tomcat-jdbc:jar:8.5.11:compile
[INFO] |  \- org.springframework:spring-jdbc:jar:4.3.6.RELEASE:compile
[INFO] +- oracle.jdbc.driver.OracleDriver:oracle.driver:jar:1.0:system
[INFO] \- org.apache.tomcat:tomcat-dbcp:jar:8.0.27:compile
[INFO]    \- org.apache.tomcat:tomcat-juli:jar:8.0.27:compile
[INFO] ------------------------------------------------------------------------
[INFO] BUILD SUCCESS
[INFO] ------------------------------------------------------------------------
3. Building Project
3.1. Create Application Configurations
Step 1. Create the main application class – Application. This class is marked with the following annotations:
@ComponentScan : We will include the packages which contain other configuration classes in this element. These classes are necessary for setting up the over all configuration of the project.
@SpringBootApplication : Is a convenience annotation that adds all of the following:
@Configuration: tags the class as a source of bean definitions for the application context.@EnableAutoConfiguration: tells Spring Boot to start adding beans based on classpath settings, other beans, and various property settings.
Normally you would add @EnableWebMvc for a Spring MVC app, but Spring Boot adds it automatically when it sees spring-webmvc on the classpath. This flags the application as a web application and activates key behaviors such as setting up a DispatcherServlet.
Application.java
@ComponentScan({ "com.springhibernatesample.config" })
@SpringBootApplication
public class Application {

	public static void main(String[] args) {
		SpringApplication.run(AppMain.class, args);
	}
}
Step 2. Create Hibernate configuration class. This is the main part of the configuration – and it is done via a Spring factory bean – either the simpler LocalEntityManagerFactoryBean or the more flexible LocalContainerEntityManagerFactoryBean. The latter option is used here.
A connection to a database is represented by an EntityManager instance, which also provides functionality for performing operations on a database. The main role of an EntityManagerFactory instance is to support instantiation of EntityManager instances. An EntityManagerFactory is constructed for a specific database, and by managing resources efficiently (e.g. a pool of sockets), provides an efficient way to construct multiple EntityManager instances for that database. The instantiation of the EntityManagerFactory itself might be less efficient, but it is a one time operation. Once constructed, it can serve the entire application.
DataAccessConfig .java
@Configuration
@EnableTransactionManagement
@ComponentScan(basePackages = { "com.springhibernatesample.dao" })
@PropertySource({ "classpath:database.properties" })
public class DataAccessConfig {

	@Autowired
	private Environment env;

	@Bean
	public DataSource dataSource() {
		BasicDataSource dataSource = new BasicDataSource();
		dataSource.setDriverClassName(env.getProperty("jdbc.driverClassName"));
		dataSource.setUrl(env.getProperty("jdbc.url"));
		dataSource.setUsername(env.getProperty("jdbc.username"));
		dataSource.setPassword(env.getProperty("jdbc.password"));
		return dataSource;
	}

	@Bean
	public LocalContainerEntityManagerFactoryBean entityManagerFactoryBean() {
		HibernateJpaVendorAdapter vendorAdapter = new HibernateJpaVendorAdapter();
		vendorAdapter.setDatabase(Database.ORACLE);
		vendorAdapter.setGenerateDdl(false);
		vendorAdapter.setShowSql(Boolean.TRUE);

		LocalContainerEntityManagerFactoryBean factory = new LocalContainerEntityManagerFactoryBean();
		factory.setPackagesToScan("com.springhibernatesample.model");
		factory.setJpaVendorAdapter(vendorAdapter);
		factory.setDataSource(dataSource());

		Properties jpaProperties = new Properties();
		jpaProperties.put("hibernate.dialect", env.getProperty("hibernate.dialect"));
		jpaProperties.put("hibernate.show_sql", env.getProperty("hibernate.show_sql"));
		jpaProperties.put("hibernate.format_sql", env.getProperty("hibernate.format_sql"));
		jpaProperties.put("hibernate.use_sql_comments", env.getProperty("hibernate.use_sql_comments"));
		jpaProperties.put("hibernate.connection.isolation", env.getProperty("hibernate.connection.isolation"));
		jpaProperties.put("hibernate.connection.autoReconnect", env.getProperty("hibernate.connection.autoReconnect"));
		jpaProperties.put("hibernate.connection.autoReconnectForPools",
				env.getProperty("hibernate.connection.autoReconnectForPools"));

		factory.setJpaProperties(jpaProperties);
		return factory;
	}

	@Bean(name = "entityManager")
	public EntityManager entityManager() {
		return entityManagerFactoryBean().getObject().createEntityManager();
	}

	@Bean
	public PlatformTransactionManager transactionManager() {
		return new JpaTransactionManager(entityManagerFactoryBean().getObject());
	}

	@Bean
	public static PropertySourcesPlaceholderConfigurer propertySourcesPlaceHolderConfigurer() {
		return new PropertySourcesPlaceholderConfigurer();
	}
}
The DataSource properties have been configured using a properties file. The properties file is used to parameterize the following:

- Data source configuratons like connection strings.
- The various attributes of hibernate configs. The connection pool elements can be modified here. Thus having a clean maintainable code.
database.properties
################### DataSource Configuration ##########################
jdbc.driverClassName=oracle.jdbc.driver.OracleDriver
jdbc.url=jdbc:oracle:thin:@localhost:1521:orcl
jdbc.username=system
jdbc.password=Oracle_3

################### Hibernate Configuration ##########################
hibernate.dialect=org.hibernate.dialect.Oracle10gDialect
hibernate.show_sql=false
hibernate.format_sql=true
hibernate.use_sql_comments=true
hibernate.connection.isolation=2
hibernate.connection.autoReconnect=true
hibernate.connection.autoReconnectForPools=true
##########################
3.2. Create Entity
We will be working with a simple entity called Contacts for the purpose of this tutorial. We will create a table in DB for this entity with a few attributes like first name, last name, phone number etc.
CREATE TABLE "SYSTEM"."CONTACTS"
   (	"ID" NUMBER GENERATED BY DEFAULT ON NULL AS IDENTITY MINVALUE 1 MAXVALUE 9999999999999999999999999999 INCREMENT BY 1 START WITH 1 CACHE 20 NOORDER  NOCYCLE  NOT NULL ENABLE,
	"FIRSTNAME" VARCHAR2(30 BYTE),
	"LASTNAME" VARCHAR2(30 BYTE),
	"TELEPHONE" VARCHAR2(15 BYTE),
	"EMAIL" VARCHAR2(30 BYTE),
	"CREATED" TIMESTAMP (6) DEFAULT sysdate,
	 CONSTRAINT "CONTACTS_PK" PRIMARY KEY ("ID")
   ) ;
Next we will create a class in our spring app which maps to this table in DB. This is critical piece of setting up the mapping between DB and java POJOs – the foundation of ORM. (ORM Defn: Object-relational mapping (ORM, O/RM, and O/R mapping tool) in computer science is a programming technique for converting data between incompatible type systems in object-oriented programming languages. This creates, in effect, a “virtual object database” that can be used from within the programming language.)
Hibernate provides a Java based configuration and a XML based one to accomplish this. Here we will be using the Java base annotation configuration. These features are made available by the Hibernate API. Advantages of Hibernate:
- Entities can be designed based on domain driven design principles and not an DB models.
- Details of SQL logic are hidden from OO logic and business code.
- JDBC implementations are handled by hibernate.
- Business code interacts with objects instead of DB tables.
- The developer does not need to worry about transaction management details.
Create Contacts java class.
Contacts.java
@Entity
@Table(name = "contacts")
public class Contacts {

	@Id
	@Column(name = "ID")
	private String id;

	@Column(name = "FIRSTNAME")
	private String firstName;

	@Column(name = "LASTNAME")
	private String lastName;

	@Column(name = "TELEPHONE")
	private String phone;

	@Column(name = "EMAIL")
	private String email;

	@JsonFormat(shape = JsonFormat.Shape.STRING, pattern = "dd-MM-yyyy hh:mm:ss")
	@Column(name = "CREATED")
	private Date createDate;

	@Override
	public String toString() {
		StringBuilder s = new StringBuilder();
		s.append("Contact details: ")
			.append("First Name: ").append(firstName).append(", Last Name: ").append(lastName)
			.append(", Phone Num: ").append(phone).append(", Email: ").append(email);
		return s.toString();
	}

	// getters and setters
}
3.3. Create DAO
Create DAO class. This class is responsible for performing the CRUD operations. Any client which needs to perform any operations on the contacts entity will work with this class. In real-world example, the class should implement a DAO interface which stipulates the allowed operations. So this basic example, we will be using a simple and direct DAO.
ContactDao.java
@Repository
public class ContactDao {

	@Autowired
	private EntityManager entityManager;

	@SuppressWarnings("unchecked")
	public List getAll() {
		return entityManager.createQuery("from Contacts").getResultList();
	}

	/**
	 * Fetch Contacts entity by primary key
	 * @param id
	 * @return
	 */
	public Contacts get(String id) {
		return entityManager.find(Contacts.class, id);
	}

	/**
	 * Create new contact entity
	 * @param c
	 */
	public void create(Contacts c) {
		c.setCreateDate(new Date());
		entityManager.persist(c);
	}

	/**
	 * Update existing contact entity
	 * @param c
	 */
	public void update(Contacts c) {
		entityManager.merge(c);
	}

	/**
	 * Update existing contact entity
	 * @param c
	 */
	public void delete(Contacts c) {
		entityManager.remove(c);
	}
}
The @Repository annotation is a key element here. This annotation marks this class for Spring as a DAO class which encapsulates storage, retrieval, and search behavior over entities (Java POJOs).
The entityManager bean has been autowired in the DataAccessConfig class.
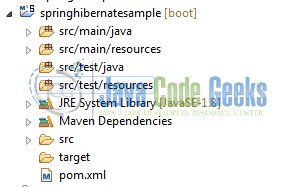
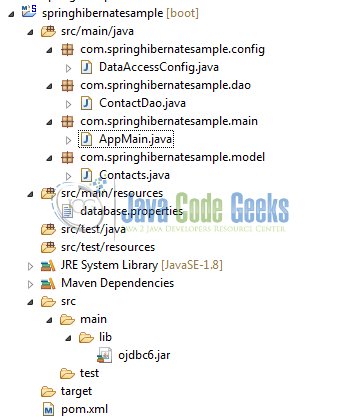
Final project structure
4. Project Demo
The next step is to perform read, insert, delete etc operations on the entity. The hibernate mappings annotated at the entity level will handle the necessary the object relational mappings.
Just for the sake of this exercise, we are printing the results of some of the exercises to the console (refer to java class AppMain).
READ : Fetch all contact entities from DB
[Contact details: First Name: sD, Last Name: Sdsd, Phone Num: asasaa, Email: dDSd, Contact details: First Name: test1, Last Name: test1Last, Phone Num: 7738778899, Email: test1@email.com,
READ : Find entity by primary key ID
Contact details: First Name: John, Last Name: Doe, Phone Num: 6305678899, Email: jDoe@email.com
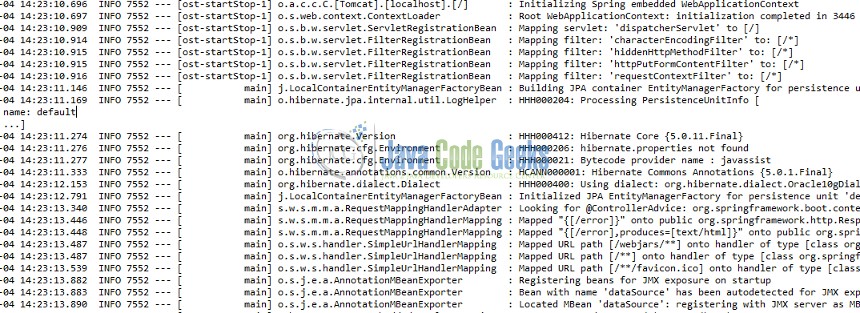
Console Output Screenshot
5. Conclusions
In this example, we covered the basics of the following:
- Setting up a new Maven project in Eclipse
- Configuring the project to add spring and hibernate depencies in POM.xml
- Setting up the configuration for a spring-hibernate project.
- Creating entities with proper Hibernate annotations to handle the object relational mapping.
- Perform CRUD operations with that entity.
6. Download Source Code
This was a Java Spring Hibernate example with Maven and Eclipse.
You can download the full source code of this example here: SpringHibernateExample
