In this example we are going to see how you can integrate Jersey with JAXB (Java Architecture for XML Binding) to create RESTful services that consume and produce XML streams. As you probably know JAXB is used to marshal a Java Object to XML, and ummarshal an XML file (or stream in general) to Java Object. You don’t have to download any additional libraries to use JAXB, as long as you use Jersey on your project.
In this example we are not going to focus on how to create JAX-RS application from top to bottom. So make sure you read carefully Jersey Hello World Example and pay attention to the sections concerning the creation of the project with Eclipse IDE as well as the deployment of the project in Tomcat.
You can create your own project following the instructions on Jersey Hello World Example. But you can also download the Eclipse project of this tutorial here : JAXRS-HelloWorld.zip, and build your code on top of that.
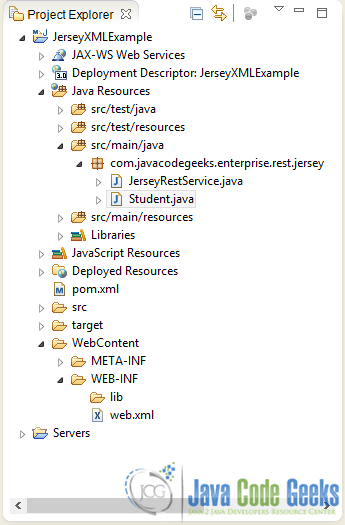
1. Project structure
For this example, I’ve created a new Project called “JerseyXMLExample“. You can see the final structure of the project in the image below:
At this point you can also take a look at the web.xml file to see how the project is configured:
web.xml:
<?xml version="1.0" encoding="UTF-8"?>
<web-app xmlns:xsi="http://www.w3.org/2001/XMLSchema-instance" xmlns="http://java.sun.com/xml/ns/javaee" xsi:schemaLocation="http://java.sun.com/xml/ns/javaee http://java.sun.com/xml/ns/javaee/web-app_3_0.xsd" id="WebApp_ID" version="3.0">
  <display-name>Restful Web Application</display-name>

	<servlet>
		<servlet-name>jersey-helloworld-serlvet</servlet-name>
		<servlet-class>
                     com.sun.jersey.spi.container.servlet.ServletContainer
                </servlet-class>
		<init-param>
		     <param-name>com.sun.jersey.config.property.packages</param-name>
		     <param-value>com.javacodegeeks.enterprise.rest.jersey</param-value>
		</init-param>
		<load-on-startup>1</load-on-startup>
	</servlet>

	<servlet-mapping>
		<servlet-name>jersey-helloworld-serlvet</servlet-name>
		<url-pattern>/rest/*</url-pattern>
	</servlet-mapping>
</web-app>
As you can see our servlet is mapped to /rest/ URI pattern. So the basic structure of the URIs to reach the REST Services used in this example will have the form :
http://localhost:8080/JerseyXMLExample/rest/...
2. Java Object with JAXB Annotations
This is the Object that is going to be represented in XML.
Student.java:
package com.javacodegeeks.enterprise.rest.jersey;

import javax.xml.bind.annotation.XmlAttribute;
import javax.xml.bind.annotation.XmlElement;
import javax.xml.bind.annotation.XmlRootElement;

@XmlRootElement(name = "student")
public class Student {

	private int id;
	private String firstName;
	private String lastName;
	private int age;

	// Must have no-argument constructor
	public Student() {

	}

	public Student(String fname, String lname, int age, int id) {
		this.firstName = fname;
		this.lastName = lname;
		this.age = age;
		this.id = id;
	}

	@XmlElement
	public void setFirstName(String fname) {
		this.firstName = fname;
	}

	public String getFirstName() {
		return this.firstName;
	}

	@XmlElement
	public void setLastName(String lname) {
		this.lastName = lname;
	}

	public String getLastName() {
		return this.lastName;
	}

	@XmlElement
	public void setAge(int age) {
		this.age = age;
	}

	public int getAge() {
		return this.age;
	}

	@XmlAttribute
	public void setId(int id) {
		this.id = id;
	}

	public int getId() {
		return this.id;
	}

	@Override
	public String toString() {
		return new StringBuffer(" First Name : ").append(this.firstName)
				.append(" Last Name : ").append(this.lastName)
				.append(" Age : ").append(this.age).append(" ID : ")
				.append(this.id).toString();
	}

}
In the above code:
@XmlRootElement: defines the root element of XML.@XmlElement: is used to define element in XML file.@XmlAttribute: is used to define an attribute of the root element.
3. REST Service to produce XML output
Let’s see how easy it is with Jersey to produce XML output using a simple Student instance.
JerseyRestService.java:
package com.javacodegeeks.enterprise.rest.jersey;

import javax.ws.rs.GET;
import javax.ws.rs.Path;
import javax.ws.rs.PathParam;
import javax.ws.rs.Produces;
import javax.ws.rs.core.MediaType;

@Path("/xmlServices")
public class JerseyRestService {

	@GET
	@Path("/print/{name}")
	@Produces(MediaType.APPLICATION_XML)
	public Student responseMsg( @PathParam("name") String name ) {

		Student st = new Student(name, "Diaz",22,1);

		return st;

	}
}
After deploying the application, open your browser and go to:
http://localhost:8080/JerseyXMLExample/rest/xmlServices/print/James
Here is the response:

Here is the raw HTTP Response:
HTTP Response:
HTTP/1.1 200 OK
Server: Apache-Coyote/1.1
Content-Type: application/xml
Content-Length: 147
Date: Mon, 25 Nov 2013 14:51:40 GMT

<?xml version="1.0" encoding="UTF-8" standalone="yes"?>
<student id="1">
	<age>22</age>
	<firstName>James</firstName>
	<lastName>Diaz</lastName>
</student>
3. REST Service to consume XML
Here is a REST Service that consumes a simple Student XML element.
JerseyRestService.java:
package com.javacodegeeks.enterprise.rest.jersey;

import javax.ws.rs.GET;
import javax.ws.rs.Path;
import javax.ws.rs.PathParam;
import javax.ws.rs.Produces;
import javax.ws.rs.core.MediaType;

@Path("/xmlServices")
public class JerseyRestService {

	@POST
	@Path("/send")
	@Consumes(MediaType.APPLICATION_XML)
	public Response consumeXML( Student student ) {

		String output = student.toString();

		return Response.status(200).entity(output).build();
	}
}
Now in order to consume that service we have to create a post request and append an XML file to it. For that we are going to use Jersey Client API. To use Jersery Client API you have to add the following dependency in your pom.xml.
Jesey Client API dependency:
<dependency>
	<groupId>com.sun.jersey</groupId>
	<artifactId>jersey-client</artifactId>
	<version>1.9</version>
</dependency>
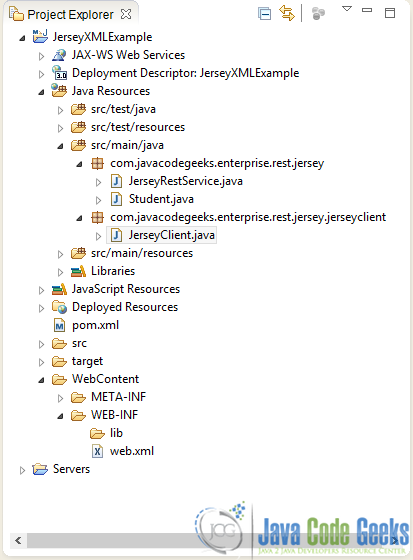
For this, I’ve created a new class, called JerseyClient.java in a new Package called com.javacodegeeks.enterprise.rest.jersey.jerseyclient. So the final Project Structure would be like so:
Here is the client:
JerseyClient.java:
package com.javacodegeeks.enterprise.rest.jersey.jerseyclient;

import com.javacodegeeks.enterprise.rest.jersey.Student;
import com.sun.jersey.api.client.Client;
import com.sun.jersey.api.client.ClientResponse;
import com.sun.jersey.api.client.WebResource;

public class JerseyClient {

	public static void main(String[] args) {
		try {

			Student st = new Student("Adriana", "Barrer", 12, 9);

			Client client = Client.create();

			WebResource webResource = client
					.resource("http://localhost:8080/JerseyXMLExample/rest/xmlServices/send");

			ClientResponse response = webResource.accept("application/xml")
					.post(ClientResponse.class, st);

			if (response.getStatus() != 200) {
				throw new RuntimeException("Failed : HTTP error code : "
						+ response.getStatus());
			}

			String output = response.getEntity(String.class);

			System.out.println("Server response : \n");
			System.out.println(output);

		} catch (Exception e) {

			e.printStackTrace();

		}

	}

}
As you can see, we create a simple Student instance and send it to the service via a POST Request. This is the output of the above client:
Outptut:
Server response :

First Name : Adriana Last Name : Barrer Age : 12 ID : 9
Here is the raw POST request:
POST Request:
POST /JerseyXMLExample/rest/xmlServices/send HTTP/1.1
Accept: application/xml
Content-Type: application/xml
User-Agent: Java/1.7.0_45
Host: localhost:8080
Connection: keep-alive
Content-Length: 151

<?xml version="1.0" encoding="UTF-8" standalone="yes"?>
<student id="9">
	<age>12</age>
	<firstName>Adriana</firstName>
	<lastName>Barrer</lastName>
</student>
Note: Of course you can produce your POST request using any other tool that does the job. The example will work as long as you append the appropriate code in the POST Request body, like you see in the above request. For instance, you could simply read an XML file as a String and append it to the request.
Download Eclipse Project
This was an XML Example With Jersey + JAXB. Download the Eclipse Project of this example: JerseyXMLExample.zip

500 error is coming even after using @XmlRootElement